Category: Survival

  • Beyond the Bunker: How to Integrate Preparedness into Family Life (Without Scaring Anyone)

    Beyond the Bunker: How to Integrate Preparedness into Family Life (Without Scaring Anyone)

    Beyond the Bunker: How to Integrate Preparedness into Family Life (Without Scaring Anyone)

    In a world increasingly prone to unexpected disruptions – from natural disasters to economic shifts – the concept of preparedness has moved from the fringe to the mainstream. Yet, for many, the idea of “prepping” conjures images of isolated bunkers and doomsday scenarios, a narrative that can alienate rather than engage. At TacticalProof.com, we believe true resilience is built not in isolation, but within the strength of a united family. This article explores effective strategies for family preparedness integration, transforming it from a daunting chore into an empowering, even adventurous, aspect of daily life, ensuring everyone is on board without instilling fear.

    Related TacticalProof reading: Is Waterfall Water Safe to Drink?

    Introduction: The Family Advantage – Why Everyone Needs to Be On Board

    The strength of a family unit in an emergency cannot be overstated. When every member understands their role, possesses essential skills, and knows the family’s plan, the collective ability to navigate crises skyrockets. Preparedness isn’t just about stockpiling supplies; it’s about cultivating a mindset of self-reliance, problem-solving, and mutual support. When preparedness becomes a shared family value, it fosters confidence, reduces anxiety, and builds an unbreakable bond that extends far beyond the immediate threat of an emergency. It’s about creating a proactive, resilient household ready for anything life throws its way, together.

    Shifting the Narrative: From Doom & Gloom to Resilience & Adventure

    The biggest hurdle in involving family in prepping is often the perception. Many associate preparedness with fear-mongering and worst-case scenarios, which can be particularly unsettling for children and even reluctant adults. Our goal is to shift this narrative entirely. Instead of focusing on what might go wrong, emphasize the positive outcomes: increased safety, self-sufficiency, new skills, and even exciting adventures.

    • Focus on Empowerment: Frame preparedness as gaining superpowers – the ability to fix things, find solutions, and help others.
    • Highlight Skill-Building: Learning first aid isn’t just for emergencies; it’s a valuable life skill. Navigation isn’t just for survival; it’s for hiking and exploring.
    • Embrace the “What If” as a Challenge: Instead of “What if the power goes out?” try “How resourceful can we be if the power goes out? Let’s see who can come up with the best candle holder!” This is key to non-scary prepping.
    • Celebrate Small Victories: Did you successfully rotate your food storage? Did a child remember the emergency contact number? Acknowledge and praise these efforts to make prepping fun.

    By reframing preparedness as a journey of growth, skill acquisition, and family bonding, you transform it from a source of anxiety into a source of strength and excitement.

    Age-Appropriate Roles: Engaging Kids and Teens in Preparedness

    One of the most effective ways of involving family in prepping is to assign roles and responsibilities tailored to each member’s age and capabilities. This not only lightens the load for parents but also gives children and teens a sense of ownership and importance in the family’s safety plan.

    For Young Children (Ages 3-7):

    • “Spot the Exit” Game: When entering new places (stores, restaurants), ask them to point out the exits. Makes them observant.
    • “Fire Drill Practice”: Make it a game to crawl low under smoke, meet at a designated safe spot outside. Use a timer for fun.
    • “Buddy System”: Teach them to always stay with a designated adult or older sibling in a crowd.
    • Basic First Aid Helpers: They can fetch the band-aids, hold a flashlight, or comfort a sibling during minor injuries.
    • Emergency Contact Practice: Help them memorize their full name, address, and a parent’s phone number through songs or repetition.

    For Elementary Schoolers (Ages 8-12):

    • Emergency Kit Inventory: Let them help check expiration dates on food, rotate water, and organize supplies.
    • “Go-Bag” Personalization: Allow them to pack a few comfort items (small toy, book) in their individual emergency bag.
    • Basic First Aid Training: Teach them how to apply pressure to a wound, identify allergic reactions, and call 911 (when appropriate).
    • Water Purification Basics: Show them how a simple filter works or how to boil water (under supervision).
    • Map Reading: Introduce basic map symbols and how to find your home on a local map.
    • Fire Safety: Teach them how to use a fire extinguisher (practice with a dummy one or a small, controlled fire with adult supervision).

    For Teens (Ages 13+):

    • Advanced First Aid/CPR: Encourage them to take a certified course. These are invaluable skills.
    • Navigation & Communication: Teach them how to use a compass, read topographical maps, and operate a two-way radio (FRS/GMRS).
    • Vehicle Preparedness: Involve them in checking tire pressure, fluid levels, and packing a vehicle emergency kit.
    • Shelter Building: Practice setting up a tent or creating a makeshift shelter in the backyard.
    • Food Preparation: Teach them how to cook simple meals using non-perishable ingredients or a camp stove.
    • Security & Awareness: Discuss situational awareness, home security measures, and how to respond to various threats.
    • Family Emergency Plan Lead: Empower them to help lead drills and update the family emergency planning document.

    Practical Steps: Making Preparedness a Natural Part of Daily Life

    The key to successful family preparedness integration is to weave it seamlessly into your everyday routines, making it feel less like a chore and more like a natural extension of responsible living. Here are some concrete examples:

    “Game Night” for Skills:

    • First Aid Charades: Act out different injuries and treatments.
    • Knot Tying Challenge: See who can tie the most useful knots (bowline, square knot, sheet bend) the fastest.
    • “Survival Scavenger Hunt”: Hide items around the house/yard that would be useful in an emergency (flashlight, water bottle, whistle) and have kids find them, explaining their use.
    • Map & Compass Quest: Create a simple treasure hunt using a map and compass in your local park or backyard.

    “Pantry Challenges”:

    • “Eat Your Preps” Week: Once a month, commit to eating meals primarily from your stored food supplies. This helps with food rotation, identifies what your family actually likes, and teaches creative cooking with limited ingredients.
    • “No-Cook Meal” Night: Practice preparing a meal without electricity, using only shelf-stable items.

    Regular Drills & Discussions:

    • Fire Drills: Practice escape routes and meeting points at least twice a year.
    • “What If” Scenarios: During dinner, pose a hypothetical emergency (e.g., “What if the power went out for three days right now?”) and discuss as a family how you would handle it. This builds critical thinking and problem-solving skills.
    • Communication Practice: Regularly review emergency contact information and practice using alternative communication methods (e.g., two-way radios, pre-arranged signals).

    Everyday Habits:

    • “Always Full Tank” Rule: Encourage drivers to keep their gas tanks at least half full.
    • Water Bottle Carry: Make carrying a reusable water bottle a habit for everyone.
    • Small EDC (Everyday Carry) for Adults/Teens: Encourage carrying a small flashlight, multi-tool, and basic first aid items.
    Everyday Habits:
    Everyday Habits:: Everyday Habits:.

    By integrating these activities, preparedness becomes less of a separate task and more of a lifestyle, fostering a sense of readiness and competence within the family.

    Addressing Skepticism: How to Talk to Reluctant Spouses or Relatives

    It’s common to encounter skepticism or even outright resistance from family members who don’t share your level of enthusiasm for preparedness. Approaching these conversations with empathy, logic, and a focus on shared values is crucial.

    • Start Small and Focus on Common Ground: Instead of discussing societal collapse, talk about practical, relatable concerns. “Wouldn’t it be nice to have extra water if the pipes burst?” or “Having a stocked pantry means fewer last-minute grocery runs and saves money.”
    • Highlight Benefits, Not Fears: Emphasize convenience, cost savings, peace of mind, and the ability to help others. “If we have extra food, we can help Grandma if she runs out.”
    • Lead by Example: Quietly organize your own emergency supplies, rotate food, and learn skills. Your actions might speak louder than words.
    • Involve Them in Easy Tasks: Ask for help with something simple, like choosing favorite snacks for the emergency kit or picking out a new flashlight.
    • Share Relevant News (Carefully): Point out local news stories about power outages, floods, or other disruptions that highlight the value of being prepared, without being alarmist.
    • Respect Their Pace: Don’t push too hard. Plant seeds, provide information, and be patient. Overwhelm can lead to greater resistance.
    • Focus on Their Concerns: If they’re worried about money, show how buying in bulk for preparedness can save money over time. If they’re worried about space, demonstrate efficient storage solutions.

    Remember, the goal is to build a more resilient family, not to win an argument. Patience and understanding are your most powerful tools.

    Building a Family Emergency Plan: Drills, Meet-Up Points, and Communication Trees

    A well-defined family emergency plan is the backbone of effective preparedness. It provides a clear roadmap for what to do before, during, and after a crisis. This is a critical component of family emergency planning.

    Key Components of Your Plan:

    1. Emergency Contacts:
      • List local emergency services (911), doctors, schools, and workplaces.
      • Include an out-of-state contact person. In a widespread disaster, local phone lines may be jammed, but long-distance calls might go through. Everyone should know this contact.
    2. Evacuation Routes & Meet-Up Points:
      • Primary Meet-Up Point (Near Home): A safe spot just outside your home in case of a fire (e.g., a specific tree, mailbox).
      • Secondary Meet-Up Point (Neighborhood): A location a short walk from your home in case you can’t return (e.g., a neighbor’s house, a park bench).
      • Tertiary Meet-Up Point (Out of Area): A designated place further away, perhaps a relative’s house or a specific hotel, if you need to evacuate the entire town.
      • Map out at least two evacuation routes from your home and neighborhood.
    3. Communication Plan:
      • Cell Phones: Assume they might not work. Text messages often go through when calls don’t.
      • Two-Way Radios: FRS/GMRS radios can be invaluable for short-range communication.
      • Hand Signals/Visual Cues: Simple pre-arranged signals for “I’m okay,” “I need help,” etc.
      • Family Communication Tree: Who calls whom? Designate one person to contact the out-of-state contact, who then relays messages to other family members.
    4. Shelter-in-Place Procedures:
      • Identify a safe room in your home for severe weather (e.g., interior room, basement).
      • Know how to shut off utilities (water, gas, electricity) if instructed or necessary.
    5. Emergency Kits:
      • Go-Bags/Bug-Out Bags (BOBs): Individual bags with essentials for 72 hours.
      • Shelter-in-Place Kit: Supplies for 2 weeks at home (food, water, medical, sanitation).
      • Vehicle Kit: Jumper cables, first aid, blankets, water, non-perishable food.

    Practice Makes Perfect: Drills!

    Regular drills are essential. They don’t have to be elaborate or scary. Make them fun and educational:

    • “Power Outage Night”: Spend an evening using only flashlights, cooking on a camp stove, and playing board games.
    • “Evacuation Race”: Time how quickly everyone can get to the primary meet-up point.
    • “First Aid Scenario”: Stage a minor injury and have family members practice their first aid skills.

    Review your plan at least annually, or whenever there are significant changes (new job, new school, new family member). Keep a printed copy in your emergency binder and a digital copy accessible to all family members.

    Community & Connection: Extending Preparedness Beyond Your Household

    While family preparedness is paramount, true resilience is amplified by strong community ties. No family is an island, and in a major disaster, your immediate neighbors and local community will be your first responders.

    • Know Your Neighbors: Introduce yourselves, exchange contact information, and identify who might need extra help (elderly, disabled) or who has valuable skills (medical, construction).
    • Join or Form a Neighborhood Watch: These groups often have established communication networks that can be repurposed for emergency alerts.
    • Participate in CERT (Community Emergency Response Team) Training: These programs teach basic disaster response skills (fire safety, light search and rescue, team organization, disaster medical operations). It’s an excellent way to gain skills and connect with like-minded individuals.
    • Mutual Aid Agreements: Discuss with trusted neighbors how you might help each other in an emergency (e.g., sharing resources, providing shelter).
    • Support Local First Responders: Understand their capabilities and limitations. Don’t expect them to be everywhere at once in a widespread event.
    • Volunteer: Engage with local charities or organizations that focus on disaster relief. This not only helps your community but also provides valuable experience and connections.

    Building a network of prepared individuals and families creates a robust safety net that extends far beyond your own four walls. It transforms individual preparedness into collective resilience.

    Community & Connection: Extending Preparedness Beyond Your Household
    Community & Connection: Extending Preparedness Beyond Your Household: Community & Connection: Extending Preparedness Beyond Your Household.

    Conclusion: A Resilient Family is a Strong Family

    Integrating preparedness into family life doesn’t require a radical overhaul or a constant state of anxiety. It’s a gradual, ongoing process of education, skill-building, and thoughtful planning that strengthens family bonds and fosters a profound sense of security. By shifting the narrative from fear to empowerment, involving every family member in age-appropriate roles, and making preparedness a natural part of daily routines, you can build a household that is not just ready for emergencies, but also more confident, resourceful, and connected.

    Start small, celebrate progress, and remember that every step you take towards preparedness is a step towards a more resilient, self-reliant, and ultimately, stronger family. The greatest bunker is not a concrete structure, but the unbreakable spirit of a family united in purpose.

    Frequently Asked Questions (FAQ)

    Q: How do I start family preparedness if my family is completely new to it?
    A: Begin with the basics and keep it simple. Start by creating a small emergency kit with water, a flashlight, and a first-aid kit. Then, discuss a simple family emergency plan, like a fire escape route and a meeting point. Focus on one small step at a time, making it a positive, collaborative effort rather than an overwhelming task.
    Q: What’s the most important first step for family emergency planning?
    A: The single most important first step is to establish a clear communication plan and designated meet-up points. Knowing how to contact each other and where to go if separated is critical in any emergency. Practice memorizing an out-of-state contact number and identifying safe spots near your home and in your neighborhood.
    Q: How can I keep my kids from getting scared while teaching them about emergencies?
    A: Frame preparedness as a game or an adventure. Focus on the skills they’re learning and the confidence they’re gaining, rather than the scary scenarios. Use age-appropriate language, involve them in fun activities like “survival scavenger hunts,” and always emphasize that these preparations help keep them safe and strong, not that they’re in constant danger.
    Q: How often should we practice our family emergency plan?
    A: You should review and practice your family emergency plan at least once a year, or whenever there are significant changes in your family (e.g., new school, new job, moving). Shorter, focused drills (like a fire drill or a “power outage night”) can be done more frequently, perhaps quarterly, to keep skills fresh and reinforce good habits.
    Q: What are some budget-friendly ways to build emergency supplies?
    A: Start by using what you have – rotate your pantry food, keep extra water bottles, and gather old blankets. Buy items gradually, a few extra cans of food or a gallon of water each grocery trip. Look for sales, buy in bulk when possible, and prioritize essential items like water, food, and a basic first-aid kit before investing in more expensive gear.
  • From Patchwork to Paradise: Finally Integrating Permaculture for a Resilient Survival Homestead

    From Patchwork to Paradise: Finally Integrating Permaculture for a Resilient Survival Homestead

    From Patchwork to Paradise: Finally Integrating Permaculture for a Resilient Survival Homestead

    In a world increasingly defined by uncertainty, the concept of self-sufficiency has moved from a fringe idea to a mainstream imperative. For many preppers, this has traditionally meant stockpiling supplies, building bunkers, and practicing tactical skills. While these are undoubtedly vital components of preparedness, they often overlook a critical, long-term strategy: building a living, breathing system that regenerates itself. This is where the profound wisdom of a permaculture survival homestead enters the picture, offering not just resilience, but true abundance. It’s the “aha!” moment when you realize that instead of constantly replenishing dwindling stores, you can design a system that continuously produces, protects, and sustains itself, transforming your property from a collection of disparate elements into a thriving, integrated ecosystem.

    Related TacticalProof reading: How to Grow Your Own Chicken Feed: Crops, Layout, and Year-Round Planning | Sustainable Homestead Technologies 2026: Future-Proofing Your Homestead: Sustainable Technologies for 2026 and Beyond

    Beyond Basic Gardening: Understanding Permaculture Principles for Survival

    Permaculture, a portmanteau of “permanent agriculture” and “permanent culture,” is more than just a set of gardening techniques; it’s a design philosophy rooted in observing natural ecosystems and applying those patterns to human settlements. For a survival homestead, these principles are not merely academic; they are blueprints for long-term viability. The core ethics—Earth Care, People Care, and Fair Share—guide every decision, ensuring that your actions benefit the environment, your community, and future generations.

    Consider the key design principles:

    • Observe & Interact: Before digging, spend time understanding your land’s microclimates, water flow, sun paths, and existing flora/fauna. This prevents costly mistakes and leverages natural advantages.
    • Catch & Store Energy: Think beyond solar panels. This means harvesting rainwater, building thermal mass into structures, and creating windbreaks. In a grid-down scenario, stored energy is life.
    • Obtain a Yield: Every element in your design should serve multiple functions and produce something useful—food, fiber, fuel, or even just beauty.
    • Apply Self-Regulation & Accept Feedback: Monitor your systems. If something isn’t working, adapt. Nature is constantly providing feedback; learn to listen.
    • Use & Value Renewable Resources & Services: Prioritize solar, wind, water, and biological resources. Reduce reliance on finite, external inputs.
    • Produce No Waste: In nature, one organism’s waste is another’s food. Design systems where outputs become inputs elsewhere (e.g., chicken manure for compost, greywater for irrigation).
    • Design from Patterns to Details: Start with the big picture (zones, sectors) and then fill in the specifics.
    • Integrate Rather Than Segregate: Connect elements so they support each other. Chickens under fruit trees, nitrogen-fixing plants near heavy feeders.
    • Use Small & Slow Solutions: Gradual, incremental changes are often more sustainable and resilient than large, rapid interventions.
    • Use & Value Diversity: Monocultures are fragile. A diverse range of plants, animals, and skills creates resilience against pests, diseases, and unforeseen challenges.
    • Use Edges & Value the Marginal: The most productive areas in nature are often at the interfaces (e.g., forest edge, shoreline). Maximize these transition zones.
    • Creatively Use & Respond to Change: Be adaptable. Acknowledge that change is inevitable and design systems that can evolve.

    For the prepper, these principles translate directly into enhanced food security, reduced vulnerability, and a more robust, self-reliant way of life. It’s about building systems that thrive, even when external systems fail.

    Zone Planning for Resilience: Optimizing Your Homestead Layout

    One of the most practical applications of permaculture for a survival homestead is zone planning. This method organizes your property based on how frequently you interact with different elements, minimizing effort and maximizing efficiency. Imagine a series of concentric circles radiating out from your home, each with a specific purpose:

    • Zone 0: The Home Itself

      This is your command center. Focus here on energy efficiency (insulation, passive solar design), water conservation (low-flow fixtures, greywater recycling for non-potable uses), and indoor food production (sprouting, microgreens, indoor herb gardens). Consider a rocket mass heater for efficient heating and cooking, and ensure secure, accessible storage for emergency supplies.

    • Zone 1: The Intensive Garden

      Immediately adjacent to your home, this zone is for elements requiring daily attention. Think salad greens, culinary herbs, high-value vegetables, and small fruit bushes. This is where you’d place your most frequently used tools, a small compost bin for kitchen scraps, and perhaps a worm farm. Accessibility is key; you want to be able to step out and harvest quickly, even in inclement weather.

    • Zone 2: The Main Homestead Garden

      A bit further out, this zone accommodates your main annual vegetable beds, small fruit trees, berry patches, and perhaps a chicken coop. These elements require regular, but not daily, attention. Design for easy access for weeding, harvesting, and animal care. Consider integrating chickens into an orchard system for pest control and fertilization, but ensure they are contained to prevent damage to young plants.

    • Zone 3: Staple Crops & Orchards

      This zone is for less frequently visited areas, focusing on staple crops (potatoes, corn, beans, squash), larger orchards, and perhaps larger livestock like goats or sheep. These systems are designed to be more self-sufficient, requiring less intensive management. Think about establishing food forests here, mimicking natural woodland ecosystems for long-term, low-maintenance food production.

    • Zone 4: Semi-Wild & Managed Forest

      This outer zone is for managed woodlands, foraging areas, timber production, and larger pasture for livestock. It’s where you might collect firewood, wild edibles, or medicinal plants. Intervention is minimal, focusing on sustainable harvesting and ecosystem health. This zone also serves as a buffer against external threats.

    • Zone 5: Wilderness

      The outermost zone is left wild, for observation and learning. It’s a place to study natural patterns, biodiversity, and ecological processes without human interference. This zone is crucial for understanding the health of your local ecosystem and provides a benchmark for your managed areas.

    Safety Warning: When planning your zones, especially for a survival homestead, consider defensibility. Ensure clear lines of sight from your home to critical areas, and integrate natural barriers or deterrents where appropriate. Water sources and primary food production areas should be within easily defensible zones.

    From Patchwork to Paradise: Finally Integrating Permaculture for a Resilient Survival Homestead
    From Patchwork to Paradise: Finally Integrating Permaculture for a Resilient Survival Homestead.

    By thoughtfully applying zone planning, you create an efficient, resilient, and defensible homestead that minimizes labor and maximizes yield, even under duress.

    Water Harvesting & Management: Creating Self-Sufficient Systems

    Water is life, and in a survival scenario, a reliable, clean water source is paramount. Permaculture design prioritizes catching, storing, and efficiently using every drop of water that falls on or flows through your property. The goal is to create self-sufficient water systems that reduce reliance on external infrastructure.

    Rainwater Harvesting

    The simplest and often most effective method is rainwater harvesting. Install gutters on all structures (house, sheds, barns) and direct them into food-grade storage tanks or cisterns. For potable water, you’ll need a first-flush diverter to remove initial contaminants and a robust filtration system (e.g., sediment filter, carbon filter, UV sterilizer) before consumption. A good rule of thumb for tank sizing is to calculate your roof area and average annual rainfall, then factor in your daily consumption needs. For example, a 1,000 sq ft roof in an area with 30 inches of annual rainfall can yield approximately 18,000 gallons per year (1 sq ft x 1 inch rain = 0.623 gallons).

    Passive Water Management: Swales & Contouring

    Beyond tanks, permaculture excels at passive water management. Swales are level ditches dug along contours with a berm on the downhill side. They slow, spread, and sink water into the landscape, recharging groundwater and passively irrigating plants planted on the berm. This is especially effective on slopes. Keyline design takes this further, using specific plowing patterns to distribute water evenly across a landscape, preventing erosion and enhancing soil moisture.

    Greywater Systems

    Greywater (water from sinks, showers, and laundry, but NOT toilets) can be a valuable resource for irrigation. Simple systems can direct greywater directly to specific plants or mulch basins. However, it’s crucial to use biodegradable, plant-friendly soaps and detergents. Safety Warning: Never use greywater on root crops or leafy greens that will be eaten raw, and avoid contact with edible parts of plants. Always filter out lint and food particles to prevent clogging and pathogen buildup.

    Ponds & Dams

    For larger properties, strategically placed ponds or dams can store significant amounts of water for irrigation, aquaculture (raising fish), and even fire suppression. Design them with overflow systems that direct excess water to other beneficial areas, creating a cascading water system. Consider lining them with clay or specialized liners to prevent seepage if your soil is too porous.

    By integrating these diverse water management strategies, your permaculture survival homestead can become remarkably resilient to drought and independent of municipal water supplies.

    Building Soil & Fertility: The Foundation of Long-Term Food Security

    The health of your soil directly dictates the health and abundance of your food supply. In permaculture, the mantra is clear: “Feed the soil, not the plant.” Chemical fertilizers offer a short-term boost but degrade soil structure and biology over time, making your homestead dependent on external inputs. A resilient survival homestead relies on building living, fertile soil that continuously regenerates itself.

    Composting: The Heartbeat of Your Homestead

    Composting is non-negotiable. Establish multiple composting systems: hot compost piles for rapid decomposition of garden and kitchen waste, cold compost bins for slower breakdown, and vermicomposting (worm bins) for nutrient-rich castings from kitchen scraps. Ensure your compost is diverse in materials (greens and browns) and turned regularly for aerobic decomposition. Practical Tip: A well-managed compost pile can reach temperatures high enough to kill most weed seeds and pathogens, making it a safe and effective soil amendment.

    Sheet Mulching / Lasagna Gardening

    This no-dig method is excellent for transforming lawns or compacted areas into productive garden beds. Lay down layers of cardboard (weed barrier), followed by alternating layers of organic materials like straw, leaves, grass clippings, compost, and manure. This mimics natural forest floor processes, building soil structure and fertility over time with minimal effort. It also conserves moisture and suppresses weeds.

    Cover Cropping & Green Manures

    When garden beds are not actively producing food crops, plant cover crops like clover, vetch, rye, or buckwheat. These plants protect the soil from erosion, suppress weeds, add organic matter, and some (legumes) fix nitrogen from the atmosphere, making it available to subsequent crops. Turn them into the soil before they go to seed, or simply chop-and-drop them as a mulch.

    Chop-and-Drop

    In food forests and perennial systems, practice chop-and-drop. Prune branches and leaves from dynamic accumulator plants (e.g., comfrey, borage) or nitrogen fixers (e.g., Siberian pea shrub) and simply leave them on the ground around other plants. This returns nutrients to the soil, builds organic matter, and acts as a living mulch, suppressing weeds and conserving moisture.

    Biochar

    Consider incorporating biochar, a charcoal-like substance made from biomass pyrolysis. When added to soil, it dramatically improves water retention, nutrient cycling, and microbial habitat, providing benefits that can last for centuries. It’s a long-term investment in soil health.

    By focusing on these soil-building strategies, you create a robust, self-sustaining food production system that will feed your family for generations, reducing your reliance on external inputs and enhancing your overall resilience.

    Integrating Animals & Guilds: Maximizing Productivity and Minimizing Work

    A truly integrated permaculture survival homestead views animals not just as products (meat, eggs, milk) but as active participants in the ecosystem, performing vital functions that reduce human labor and enhance productivity. Similarly, plant guilds mimic natural plant communities, creating mutually beneficial relationships.

    Animals as Workers

    • Chickens: Beyond eggs and meat, chickens are excellent pest controllers (slugs, insects), weeders (in controlled environments), and fertilizer spreaders. Use chicken tractors to move them across garden beds for tilling and fertilizing, or allow them to free-range in orchards during dormant seasons.
    • Ducks: Even better than chickens for slug and snail control, ducks are also excellent foragers and can help manage insect populations in wetter areas.
    • Goats & Sheep: Ideal for brush clearing, pasture management, and producing milk and meat. Goats are particularly good at clearing woody invasives. Ensure robust fencing to protect your garden areas.
    • Pigs: With careful management, pigs can be used for land clearing and tilling, especially in areas you want to convert from forest to pasture or garden. Their rooting behavior can prepare ground for planting.

    Safety Warning: Integrating animals requires significant knowledge of their specific needs, diseases, and behaviors. Proper housing, feed, water, and veterinary care (or knowledge of natural remedies) are crucial. Fencing must be secure to protect both your animals and your plants from damage.

    Plant Guilds: Nature’s Cooperatives

    A plant guild is a synergistic grouping of plants that work together to support a central element, usually a fruit tree. Each plant in the guild serves multiple functions:

    • Central Element: A fruit or nut tree (e.g., apple, pecan).
    • Nitrogen Fixers: Plants like clover, lupine, or Siberian pea shrub enrich the soil with nitrogen.
    • Dynamic Accumulators: Deep-rooted plants like comfrey or borage draw up minerals from the subsoil, making them available to other plants when their leaves are chopped and dropped.
    • Pest Deterrents: Aromatic herbs like mint, garlic, or marigolds can repel harmful insects.
    • Pollinator Attractors: Flowers like calendula or yarrow bring in beneficial insects that pollinate crops and prey on pests.
    • Groundcovers: Strawberries or creeping thyme suppress weeds and keep the soil cool and moist.
    • Support Plants: Trellises for climbing beans or peas that also fix nitrogen.

    A classic example is the “Three Sisters” guild: corn provides a stalk for beans to climb, beans fix nitrogen for the corn, and squash provides groundcover, suppressing weeds and conserving moisture. By designing these multi-functional relationships, you create a resilient, low-maintenance system that maximizes yields and minimizes external inputs.

    This integration of animals and plants into harmonious guilds transforms your homestead into a highly productive, self-regulating ecosystem, a true testament to resilient design.

    Energy & Waste Management: Closing the Loops on Your Homestead

    True self-sufficiency on a permaculture survival homestead extends beyond food and water to encompass energy and waste. The goal is to minimize reliance on external energy grids and transform waste into valuable resources, effectively “closing the loops” within your system.

    Renewable Energy Systems

    Prioritize efficiency first, then generation. Insulate your home, use passive solar design for heating and lighting, and choose energy-efficient appliances. Once demand is minimized, consider:

    • Solar Photovoltaic (PV): Panels generate electricity. A robust off-grid system includes panels, charge controller, battery bank, and inverter. Sizing is critical; calculate your daily energy consumption and factor in days of autonomy (how long your batteries can power your home without sun).
    • Solar Thermal: Heats water directly for domestic use or radiant floor heating. Much more efficient for heating water than PV.
    • Small-Scale Wind Turbines: Can be effective in consistently windy locations, often complementing solar PV for a more reliable year-round energy supply.
    • Wood Gasifiers: Convert wood or biomass into a combustible gas that can power engines or generators, offering an alternative fuel source if you have abundant wood resources.
    • Rocket Mass Heaters: Highly efficient wood-burning stoves that capture and store heat in a thermal mass (e.g., a bench or wall), radiating warmth for hours after the fire goes out, using minimal fuel.

    Waste as a Resource

    In a permaculture system, there is no waste, only misplaced resources. Embrace the concept of upcycling and creative reuse.

    • Humanure Composting: A more advanced technique, humanure (composted human waste) can be safely used to fertilize non-food crops or fruit trees, returning valuable nutrients to the soil. Safety Warning: This requires careful management, proper carbon-rich cover materials, and sufficient composting time (1-2 years) to ensure pathogen destruction. Research and follow established guidelines meticulously.
    • Biogas Digesters: Convert organic waste (animal manure, food scraps) into methane gas for cooking or heating, producing a nutrient-rich liquid fertilizer as a byproduct. These can be scaled from small backyard units to larger farm systems.
    • Recycling & Upcycling: Beyond traditional recycling, think creatively. Old tires can become raised garden beds, plastic bottles can be used for greenhouse construction, and scrap wood can be used for hugelkultur beds or biochar production.

    From Patchwork to Paradise: Finally Integrating Permaculture for a Resilient Survival Homestead
    From Patchwork to Paradise: Finally Integrating Permaculture for a Resilient Survival Homestead.

    By diligently managing energy and waste, your homestead becomes a closed-loop system, minimizing its environmental footprint and maximizing its independence from external supply chains, a critical factor for long-term survival.

    Conclusion: The Journey to a Truly Integrated & Resilient Homestead

    The journey to establishing a permaculture survival homestead is not a sprint, but a marathon—a continuous process of observation, design, implementation, and adaptation. It’s a profound shift from merely preparing for disaster to proactively designing a life of abundance and resilience. By embracing permaculture principles, you move beyond simply stockpiling goods to cultivating a living system that provides food, water, energy, and shelter, all while regenerating the environment around you.

    This holistic approach transforms your property into a dynamic, self-sustaining ecosystem where every element serves multiple functions, and waste is a concept of the past. You’ll find that the benefits extend far beyond mere survival; they encompass a deeper connection to nature, enhanced food quality, reduced workload over time, and a profound sense of security that comes from true self-reliance.

    Start small. Observe your land. Implement one or two permaculture principles. Build a rain barrel, start a compost pile, or plant a small guild. Learn from your successes and your failures. The most resilient homesteads are those that have evolved over time, shaped by the unique conditions of their environment and the dedicated stewardship of their inhabitants. The paradise you envision is not a distant dream; it’s a design waiting to be implemented, one thoughtful step at a time, creating a legacy of resilience for generations to come.

    Frequently Asked Questions (FAQ)

    What’s the biggest difference between traditional prepping and permaculture for survival?
    Traditional prepping often focuses on accumulating and storing resources (e.g., food, water, fuel) for a finite period. Permaculture for survival, conversely, focuses on designing and building living systems that continuously produce and regenerate these resources, reducing reliance on external inputs and creating long-term self-sufficiency rather than just short-term readiness.
    How long does it take to establish a functional permaculture survival homestead?
    Establishing a fully functional permaculture homestead is an ongoing process, not a one-time event. You can see significant progress in 3-5 years for basic food and water systems, but a truly mature food forest or integrated system can take 10-20 years to reach its full potential. The key is to start small, implement incrementally, and continuously observe and adapt.
    Can permaculture truly provide all my food needs?
    With thoughtful design, sufficient land, and dedicated effort, a permaculture system can provide a significant portion, if not all, of your family’s food needs. This often involves a diverse range of annual vegetables, perennial fruits and nuts, and integrated animal systems. It requires a shift in diet to align with what your land can sustainably produce.
    Is permaculture only for large properties?
    Absolutely not. Permaculture principles can be applied to any scale, from a small urban balcony (e.g., container gardening, vertical gardens, worm bins) to a suburban backyard (e.g., intensive raised beds, rainwater harvesting, small food forests) to large rural acreages. The principles remain the same; the scale and specific techniques adapt to the available space.
    What’s the first step for someone new to permaculture?
    The very first step is observation. Spend time (at least a full year, if possible) observing your property: how sun moves, where water flows, prevailing winds, existing plants and animals. Then, start with small, manageable projects like building a compost pile, installing a rain barrel, or creating a small herb spiral near your kitchen. Education (books, courses) is also invaluable before making major changes.
  • The Prepper’s First 90 Days: A Step-by-Step Roadmap for Beginners

    The Prepper’s First 90 Days: A Step-by-Step Roadmap for Beginners

    The Prepper’s First 90 Days: A Step-by-Step Roadmap for Beginners

    Embarking on the journey of preparedness can feel daunting, a vast landscape of skills, supplies, and scenarios. But what if there was a clear, actionable prepper roadmap for beginners? This comprehensive guide will break down your initial three months into manageable, impactful steps, transforming overwhelm into empowered action. Whether you’re just starting preparedness due to recent events or a long-held desire for self-reliance, this article provides the foundational survival steps you need to build a robust preparedness framework.

    Related TacticalProof reading: Combat-Proven Comfort: How Tactical Clothing Enhances Survival in Harsh Environments | The Frugal Prepper’s Starter Kit: Essential Items You Already Own or Can Get Cheaply | How to Make a DIY Millbank Bag for Wilderness Water Filtration

    Introduction: Welcome to Preparedness – Why Start Now?

    In an increasingly unpredictable world, personal preparedness isn’t about paranoia; it’s about responsibility, resilience, and peace of mind. From natural disasters like hurricanes, earthquakes, and blizzards to economic instability or localized emergencies, the ability to care for yourself and your loved ones without immediate external aid is invaluable. This beginner prepper guide is designed to help you overcome overwhelm by focusing on achievable goals, ensuring you build a solid foundation without breaking the bank or sacrificing your sanity. Your journey starts now, not with fear, but with foresight.

    Week 1-4: Mindset & Initial Assessment

    The first month is dedicated to introspection, planning, and understanding your unique preparedness landscape. This is where you lay the psychological and analytical groundwork for everything that follows.

    Understanding Your ‘Why’

    Before you buy a single item, define your motivation. Are you preparing for:

    • Natural Disasters: Earthquakes, floods, wildfires, blizzards, hurricanes?
    • Economic Instability: Job loss, supply chain disruptions, inflation?
    • Civil Unrest: Localized disturbances, widespread societal breakdown?
    • Personal Emergencies: Medical crisis, home invasion, power outage?

    Your ‘why’ will dictate your priorities. For instance, someone in a hurricane zone will prioritize water storage and evacuation plans differently than someone concerned about long-term economic collapse.

    Basic Risk Scan: What Threats Do You Face?

    Take a critical look at your immediate environment and lifestyle. Consider:

    1. Geographic Location: What natural disasters are common in your area? (e.g., coastal flood zones, earthquake faults, tornado alley).
    2. Local Infrastructure: How reliable are your utilities (power, water, gas)? How close are hospitals, fire stations, and police?
    3. Home Structure: Is your home vulnerable to specific threats (e.g., old wiring for fire, basement for flooding)?
    4. Family Needs: Do you have infants, elderly, or individuals with special medical needs? Pets? These require specific considerations.
    5. Work/Commute: What would happen if you couldn’t get home from work?

    Practical Tip: Create a simple spreadsheet or notebook entry listing potential threats and their likelihood/impact. This helps prioritize your efforts.

    Budgeting for Preparedness

    Preparedness doesn’t have to be expensive. Decide what you can realistically spend each month. Even $20-$50 can make a significant difference over time. Focus on high-impact, low-cost items first.

    Initial Skill Assessment

    What skills do you already possess? First aid? Basic tool use? Gardening? Identify gaps. Skills are often more valuable than gear.

    The Prepper's First 90 Days: A Step-by-Step Roadmap for Beginners
    The Prepper's First 90 Days: A Step-by-Step Roadmap for Beginners.

    Week 5-8: The ‘Grab & Go’ Foundation

    With your mindset and assessment complete, it’s time to build the tangible core of your preparedness: the ability to evacuate quickly and sustain yourself for a short period.

    Emergency Kits: The Bug-Out Bag (BOB) & Get-Home Bag (GHB)

    These are your immediate lifelines. Focus on a 72-hour survival window.

    The Bug-Out Bag (BOB) – For Evacuation

    This bag should be ready to go at a moment’s notice, containing essentials for 72 hours away from home. Each family member capable of carrying one should have their own, tailored to their needs.

    • Water: 1 gallon per person per day (or a reliable filter/purifier).
    • Food: Non-perishable, high-calorie, easy-to-prepare items (e.g., MREs, energy bars, dried fruit).
    • First Aid Kit: Comprehensive, including prescription meds, pain relievers, bandages, antiseptic wipes, trauma dressing.
    • Shelter: Emergency blanket, tarp, small tent.
    • Fire: Lighter, waterproof matches, ferro rod.
    • Tools: Multi-tool, knife, duct tape, cordage (paracord).
    • Light: Headlamp with extra batteries, small flashlight.
    • Navigation: Map of your area, compass (and know how to use them).
    • Communication: Whistle, hand-crank/solar radio, fully charged power bank for phone.
    • Hygiene: Wet wipes, hand sanitizer, toothbrush, travel soap.
    • Documents: Copies of vital documents (ID, insurance, medical records) in a waterproof bag.
    • Cash: Small denominations.
    • Clothing: Layers appropriate for your climate.

    Safety Warning: Ensure any knives or tools are stored safely and legally. Practice packing and carrying your BOB to ensure it’s manageable.

    The Get-Home Bag (GHB) – For Commuters

    Smaller than a BOB, kept in your vehicle or at work. Designed to get you home if primary transportation is unavailable. Focus on sturdy walking shoes, water, basic first aid, communication, and a map of your route.

    Water: The Ultimate Priority

    You can survive weeks without food, but only days without water. This month, focus on:

    • Storage: Aim for 1 gallon per person per day for at least 3 days. Store in food-grade containers in a cool, dark place.
    • Purification: Invest in a reliable water filter (e.g., Sawyer Mini, Lifestraw) and purification tablets (e.g., iodine, chlorine dioxide). Understand how to boil water effectively.
    • Identification of Sources: Know where you can find water locally (e.g., rain collection, natural springs, even your water heater’s reservoir).

    Communication Basics

    When the grid goes down, your smartphone might be useless.

    • NOAA Weather Radio: A hand-crank or solar-powered model is essential for emergency broadcasts.
    • Family Communication Plan: Establish an out-of-state contact person for family members to check in with if local lines are down. Designate a meeting point if you can’t return home.
    • Basic Walkie-Talkies: For short-range communication within your immediate group or property.

    Week 9-12: Home & Hearth Security

    The final month of your initial 90-day preparedness plan shifts focus to your home base, ensuring it can sustain you for longer periods and withstand common disruptions.

    Basic Food Storage: The 3-Month Supply

    This isn’t about exotic freeze-dried meals (yet). It’s about storing what you already eat.

    1. Inventory Your Pantry: What do you have? What do you regularly consume?
    2. Buy Extra: Each grocery trip, buy 2-3 extra non-perishable items you normally use (e.g., canned goods, pasta, rice, beans, cooking oil, salt, sugar).
    3. Rotate Stock (FIFO): Use the ‘First In, First Out’ method. Place new items at the back, older items at the front. This prevents spoilage.
    4. Storage Conditions: Store food in a cool, dark, dry place. Use airtight containers to protect against pests and moisture. Mylar bags with oxygen absorbers are excellent for long-term storage of dry goods.
    5. Consider Comfort Foods: Don’t forget items that boost morale, like coffee, tea, chocolate, or spices.

    Concrete Example: Start with a 3-day supply, then expand to a week, then a month. Focus on staples like 25 lbs of rice, 10 lbs of beans, several cases of canned vegetables/fruits, and a few jars of peanut butter. This is a practical and affordable way of building your food storage.

    Home Safety & Security

    Your home is your primary shelter. Protect it.

    • Fire Safety: Check smoke detectors and carbon monoxide detectors. Have fire extinguishers on each floor and know how to use them. Plan and practice fire escape routes.
    • Basic Security: Reinforce doors and windows. Consider motion-sensor lights. Keep a sturdy baseball bat or similar tool readily accessible (and legally permissible) for self-defense.
    • Tool Kit: A well-stocked basic tool kit (hammer, screwdrivers, wrench, pliers, utility knife) is essential for minor repairs.
    • Emergency Shut-offs: Know how to turn off your main water valve, gas line, and electrical breaker. This is crucial in emergencies like burst pipes or gas leaks.

    Power Outage Preparedness

    Power outages are common and can last for hours or days.

    • Lighting: Stock up on flashlights, headlamps, lanterns (battery-powered or solar-powered are safest). Avoid candles if possible due to fire risk.
    • Heating/Cooling: If you rely on electricity for heat/AC, consider alternative methods. For heat, extra blankets, sleeping bags, and warm clothing are vital. A non-electric space heater (like a propane-fueled catalytic heater) can be an option, but requires proper ventilation and safety precautions.
    • Cooking: A propane camping stove or a small charcoal grill (used OUTDOORS ONLY!) can be used for cooking. Stock extra fuel.
    • Refrigeration: Have coolers and ice packs ready. Plan to consume perishable foods first.
    • Charging: Power banks, solar chargers, and car chargers are crucial for keeping essential devices running.

    Safety Warning: Never use generators or charcoal grills indoors due to carbon monoxide poisoning risk. Ensure proper ventilation for any alternative heating or cooking methods.

    The Prepper's First 90 Days: A Step-by-Step Roadmap for Beginners
    The Prepper's First 90 Days: A Step-by-Step Roadmap for Beginners.

    Beyond 90 Days: Building Sustainable Habits & Expanding Skills

    Congratulations! You’ve completed your initial 90-day preparedness plan. This isn’t the end, but merely the beginning. Preparedness is a lifestyle, not a one-time event.

    • Regular Drills: Practice your evacuation routes, fire drills, and communication plans.
    • Skill Development: Learn advanced first aid (CPR, wilderness first aid), basic mechanics, gardening, food preservation (canning, dehydrating), self-defense, knot tying, navigation without GPS.
    • Community Building: Connect with like-minded individuals or local preparedness groups. A strong community is a powerful asset.
    • Expand Supplies: Gradually increase your food and water storage to 6 months or even a year. Consider long-term storage solutions.
    • Gear Upgrades: As your budget allows, upgrade critical gear (e.g., a more robust water filter, a quality tent, a solar generator).
    • Financial Preparedness: Build an emergency fund. Reduce debt. Diversify investments.

    Common Pitfalls to Avoid for New Preppers

    As you navigate this journey, be mindful of these common traps:

    • Information Overload: The sheer volume of information can be paralyzing. Stick to your plan, focus on one step at a time.
    • The ‘Shiny Object’ Syndrome: Don’t get distracted by every new gadget. Prioritize needs over wants. A good knife is more important than a fancy laser sight.
    • Going into Debt: Preparedness should enhance your security, not jeopardize your financial stability. Buy what you can afford.
    • Ignoring Skills: Gear without skills is useless. Invest time in learning and practicing.
    • Isolation: While personal preparedness is key, a strong network of trusted individuals is invaluable. Don’t become a lone wolf.
    • Lack of Rotation: Food and water expire. Batteries die. Rotate your stock regularly.
    • Neglecting Maintenance: Check your gear, bags, and supplies periodically. Are batteries fresh? Is anything damaged?

    Resources for Continued Learning

    Your learning should never stop. Here are some avenues:

    • Books & Manuals: Survival guides, first aid manuals, field guides for edible plants.
    • Online Forums & Communities: Engage with experienced preppers, but always verify information.
    • Local Classes: Look for courses in first aid, CPR, self-defense, ham radio operation, wilderness survival, or gardening.
    • Government Agencies: FEMA, Ready.gov, and local emergency management agencies offer valuable, free resources and guides.
    • TacticalProof.com: Continue to explore our articles for in-depth guides and expert insights on advanced preparedness topics.

    FAQ: Your Preparedness Questions Answered

    Q: How much money should I spend on preparedness?
    A: There’s no fixed amount. Start with what you can comfortably afford, even if it’s just $20-$50 a month. Focus on high-impact, low-cost items first (water, basic first aid, food you already eat). Consistency is more important than large, sporadic purchases.
    Q: What’s the single most important thing to prep for first?
    A: Water. You can survive weeks without food but only days without water. Secure a minimum of 1 gallon per person per day for 3-7 days, and have purification methods. After water, a comprehensive first aid kit is paramount.
    Q: Is it okay to tell others I’m prepping?
    A: Exercise caution. While building a community is beneficial, openly broadcasting your preparedness levels can make you a target. Share information selectively with trusted family and friends who share your values and commitment to preparedness. Focus on encouraging others to be prepared, rather than detailing your personal inventory.
    Q: How do I store food long-term without it going bad?
    A: For long-term storage (1+ years), focus on dry staples like rice, beans, pasta, and oats. Store them in airtight containers (Mylar bags with oxygen absorbers inside food-grade buckets are ideal) in a cool, dark, dry place. Rotate your stock regularly using the ‘First In, First Out’ (FIFO) method for everyday pantry items.
    Q: What’s the difference between a Bug-Out Bag (BOB) and a Get-Home Bag (GHB)?
    A: A Bug-Out Bag (BOB) is designed for evacuation, containing 72 hours of supplies for survival away from home. A Get-Home Bag (GHB) is smaller, kept in your vehicle or at work, and contains essentials to help you travel on foot back to your home base if primary transportation is unavailable.

    Conclusion: Your Journey Has Begun

    You’ve taken the crucial first steps on your preparedness journey. By following this prepper roadmap for beginners, you’ve moved from contemplation to concrete action, building a foundation of resilience for yourself and your loved ones. Remember, preparedness is an ongoing process of learning, adapting, and refining. Stay vigilant, stay informed, and keep building your skills. The peace of mind that comes from knowing you’re ready for what may come is an invaluable reward.

  • From Foraging Basics to a Wild Pantry: Finally Integrating Wild Foods into Your Survival Diet

    From Foraging Basics to a Wild Pantry: Finally Integrating Wild Foods into Your Survival Diet

    From Foraging Basics to a Wild Pantry: Finally Integrating Wild Foods into Your Survival Diet

    In the realm of self-reliance and preparedness, the ability to identify a few wild edibles is a foundational skill. But true mastery lies not just in recognition, but in the seamless, sustainable wild food integration into your daily and long-term survival diet. This isn’t about a sporadic snack; it’s about transforming your relationship with the land, understanding its rhythms, and building a resilient food system that can sustain you and yours through any challenge. We’re moving beyond the occasional nibble to a comprehensive strategy for a wild pantry, ensuring year-round access to nature’s bounty.

    Related TacticalProof reading: How to Design Shelters for Extreme Weather

    Introduction: The Evolution of a Forager – Beyond Identification

    Many aspiring foragers begin with a field guide, meticulously learning to identify common plants like Dandelion, Plantain, or Chickweed. This initial phase is vital, but it’s merely the first step on a much longer journey. To truly integrate wild foods, you must evolve from a plant identifier to an ecological observer, a seasonal strategist, and ultimately, a skilled processor and preserver. This evolution demands a deeper understanding of botany, ecology, nutrition, and even primitive food technology. It’s about cultivating a mindset that sees the landscape not just as scenery, but as a living, breathing grocery store, pharmacy, and hardware store all rolled into one.

    The goal is to shift from reactive foraging (finding what’s available) to proactive foraging (planning harvests, managing resources, and ensuring a continuous supply). This involves understanding not just what to eat, but when to harvest it, how to process it for maximum nutrition and storage, and where to find it reliably without depleting the resource. This article will guide you through this advanced progression, equipping you with the knowledge to make wild foods a cornerstone of your preparedness plan.

    Understanding Your Ecosystem: Bioregional Foraging and Seasonal Cycles

    Effective foraging is inherently bioregional. What thrives in the Pacific Northwest will differ significantly from the Sonoran Desert or the Appalachian Mountains. Your first task is to become intimately familiar with your specific ecosystem – its climate, soil types, water sources, and dominant plant communities. This knowledge forms the bedrock of wild edibles year-round availability.

    Mapping Your Bioregion

    • Topography and Microclimates: Understand how elevation, aspect (north vs. south-facing slopes), proximity to water bodies, and forest cover create microclimates that influence plant growth. A shaded ravine might hold moisture-loving plants long after a sunny hillside has dried out.
    • Soil Composition: Different plants prefer different soils. Acidic soils, alkaline soils, sandy, loamy, or clay-rich soils each host distinct flora. Learn to identify these soil types in your area.
    • Water Sources: Rivers, streams, lakes, ponds, and even seasonal seeps are magnets for specific wild edibles. Cattails, Watercress, and various sedges and rushes thrive in or near water.
    • Succession Stages: Observe areas of disturbance (old fields, logging clearings, burned areas) versus mature forests. Each stage of ecological succession offers different foraging opportunities. Pioneer species often provide abundant early-season greens, while mature forests yield nuts and fungi.

    The Rhythms of the Seasons: Phenology for Foragers

    Phenology is the study of cyclic and seasonal natural phenomena, especially in relation to climate and plant and animal life. For the advanced forager, phenology is a critical tool for predicting peak harvest times. It’s not enough to know that Elderberries ripen in late summer; you need to know when they ripen in your specific location relative to other natural events.

    • Spring: The Awakening: Early spring brings tender greens (Dandelion, Violet, Chickweed, Garlic Mustard), young shoots (Fiddleheads, Asparagus), and tree saps (Maple, Birch). This is a time of rapid growth and high moisture content.
    • Summer: Abundance and Flowers: Berries (Raspberry, Blackberry, Elderberry), edible flowers (Red Clover, Daylily), and developing seeds become prominent. Many plants are in full leaf, offering a different set of edibles.
    • Autumn: The Harvest of Storage: Nuts (Acorns, Walnuts, Hickories), roots (Burdock, Chicory, Wild Carrot), and late-season fruits dominate. This is the time to gather calorie-dense foods for winter storage.
    • Winter: Dormancy and Persistence: While seemingly barren, winter still offers evergreens (Pine needles for tea), persistent berries (Wintergreen, Juniper), and roots that can be dug from unfrozen ground. Inner bark of certain trees can also provide sustenance.

    Practical Tip: Keep a detailed foraging journal. Record dates, locations, weather conditions, and the specific stage of growth for each plant you encounter. Note when certain insects appear or birds migrate, as these can be phenological indicators for plant readiness.

    The Rhythms of the Seasons: Phenology for Foragers
    The Rhythms of the Seasons: Phenology for Foragers: The Rhythms of the Seasons: Phenology for Foragers.

    Maximizing Nutritional Yield: Identifying Calorie-Dense Wild Foods

    Survival isn’t just about eating; it’s about consuming enough calories and nutrients to sustain energy, warmth, and cognitive function. While many wild greens are packed with vitamins and minerals, they often lack the caloric density needed for long-term survival. This section focuses on foraging for calories, identifying those wild foods that can truly fuel your body.

    Starchy Roots and Tubers

    These are nature’s potatoes and carrots, often overlooked but incredibly valuable.

    • Cattail (Typha latifolia): Often called the “supermarket of the swamp.” The rhizomes (roots) are starchy and edible year-round, especially in late fall and winter when starch content is highest. They can be peeled, boiled, roasted, or dried and ground into flour. Young shoots are also edible.
    • Burdock (Arctium lappa): The taproot of first-year plants is a substantial food source. Harvest in late fall or early spring before the plant bolts. It can be peeled, boiled, roasted, or stir-fried.
    • Wild Carrot/Queen Anne’s Lace (Daucus carota): The taproot of first-year plants is edible, resembling a small, pale carrot. Be absolutely certain of identification, as its deadly poisonous look-alike, Water Hemlock, can be found in similar habitats.
    • Chicory (Cichorium intybus): The taproot can be roasted and ground as a coffee substitute or boiled as a vegetable.
    • Groundnut (Apios americana): A climbing vine that produces edible tubers along its rhizomes. These are highly nutritious and can be boiled, roasted, or fried.

    Nuts and Seeds: Nature’s Concentrated Energy

    Nuts are incredibly calorie-dense due to their high fat and protein content. They are a cornerstone of a wild pantry.

    • Acorns (various Quercus species): Abundant and highly caloric, but require processing to leach out bitter tannins. White oak acorns are generally less tannic than red oak. Leaching can be done with hot or cold water. Once leached, they can be dried and ground into flour for baking or thickening.
    • Black Walnuts (Juglans nigra) and Hickories (Carya species): Rich in healthy fats and protein. Require significant effort to crack and extract the meat, but the caloric reward is immense.
    • Pine Nuts (various Pinus species): Found in the cones of certain pine species. High in fat and protein, delicious roasted.
    • Wild Rice (Zizania aquatica): A semi-aquatic grass producing highly nutritious grains. Requires specific harvesting and processing techniques (parching, hulling, winnowing).
    • Amaranth (Amaranthus species): Tiny, protein-rich seeds from a common “weed.” Can be harvested in large quantities and used like quinoa or popped.

    Fats and Oils

    While less common, some wild plants can provide sources of fat.

    • Sunflower (Helianthus annuus): Wild varieties produce smaller but still oil-rich seeds.
    • Hickory Nuts and Walnuts: Can be pressed for oil, though this is labor-intensive.

    Safety Warning: Accurate identification is paramount, especially with roots and seeds. Many poisonous plants have edible look-alikes. Always use multiple identification features and consult reliable field guides. When in doubt, do not eat it. Perform a small quantity edibility test if you are absolutely certain of identification but new to consuming a particular plant.

    Sustainable Harvesting: Ensuring Future Abundance and Ethical Practices

    The core principle of sustainable wild food integration is to harvest in a way that ensures the long-term health and abundance of the plant populations. This is not just about personal ethics; it’s about preserving a vital resource for yourself and future generations. This section covers ethical harvesting practices and techniques.

    The Forager’s Code of Conduct

    1. Positive Identification: Never harvest or consume a plant unless you are 100% certain of its identity.
    2. Permission and Legality: Always obtain permission before foraging on private land. Be aware of local, state, and federal regulations regarding foraging in parks, forests, and protected areas. Some plants may be protected.
    3. The 10% Rule (or Less): A common guideline is to never harvest more than 10% of a healthy, abundant patch. For rare or slow-growing plants, harvest even less, or none at all.
    4. Harvest from Abundant Populations: Focus on areas where the target plant is thriving and widespread. Avoid harvesting from sparse or struggling populations.
    5. Leave the Best: Allow the strongest, healthiest plants to go to seed to ensure future generations.
    6. Harvest Cleanly: Use appropriate tools (sharp knife, trowel) to minimize damage to the plant and its surroundings. Cut stems cleanly, don’t rip. When digging roots, carefully backfill the hole.
    7. Spread Your Impact: Don’t repeatedly harvest from the exact same spot. Rotate your foraging locations to allow plants to recover.
    8. Understand the Plant’s Life Cycle: Harvest leaves from a plant that can regrow them, roots from a plant that won’t be killed by the harvest (e.g., taproots of first-year biennials, or sections of rhizomes).
    9. Avoid Contaminated Areas: Do not harvest near roadsides (exhaust fumes, heavy metals), industrial sites, agricultural fields (pesticides, herbicides), or areas with known water pollution.
    10. Educate Others: Share your knowledge of sustainable practices with fellow foragers.

    Tools for the Ethical Forager

    • Sharp Knife or Shears: For clean cuts of leaves, stems, and flowers.
    • Small Trowel or Digging Stick: For carefully extracting roots and tubers.
    • Basket or Cloth Bag: Allows air circulation, preventing spoilage, and reduces plastic waste.
    • Gloves: Protects hands from thorns, irritating sap, or dirt.
    • Field Guide and Journal: Essential for identification and record-keeping.

    Example: Dandelion Root Harvest: Instead of digging up every Dandelion you see, target first-year plants in late fall or early spring. Dig only a few from a large patch, ensuring you leave plenty to flower and reseed. Carefully extract the taproot, clean it, and backfill the hole. This ensures a continuous supply.

    Processing and Preservation: Turning Wild Harvests into Storable Provisions

    Harvesting is only half the battle. To truly build a wild pantry and achieve sustainable wild food integration, you must master processing and preservation techniques. This transforms perishable wild foods into shelf-stable provisions, extending their utility far beyond their fresh season.

    Drying: The Most Versatile Method

    Drying removes moisture, inhibiting microbial growth and enzyme activity. It’s suitable for most wild greens, herbs, fruits, and even some roots and mushrooms.

    • Air Drying: Best for herbs and thin-leaved greens. Tie in small bundles and hang in a warm, dry, well-ventilated area out of direct sunlight.
    • Dehydrator: Provides controlled heat and airflow, ideal for fruits (berries, sliced apples), mushrooms, and thicker greens. Follow specific temperature guidelines for each food type.
    • Sun Drying: Effective in hot, dry climates for fruits and some vegetables. Requires protection from insects and dew.
    • Oven Drying: Use the lowest setting with the door slightly ajar to allow moisture to escape. Monitor constantly to prevent cooking.

    Examples: Dried Dandelion leaves for tea, dried Elderberries for immune syrup, dried mushrooms for soups, dried cattail flour.

    Fermentation: Enhancing Nutrition and Shelf Life

    Fermentation uses beneficial microorganisms to preserve food and often enhances its nutritional profile and digestibility.

    • Lacto-Fermentation: Ideal for greens (e.g., wild sauerkraut from Garlic Mustard or Dandelion greens), roots (fermented Burdock), and some fruits. Requires salt, water, and an anaerobic environment.
    • Vinegar Production: Wild fruits (e.g., crabapples, wild grapes) can be fermented into vinegar.

    Examples: Kimchi from wild greens, pickled Milk Thistle stems, fermented wild berries.

    Oil and Fat Extraction

    While labor-intensive, extracting oils from nuts provides a concentrated energy source.

    • Cold Pressing: Best for nuts like Black Walnuts or Hickories. Requires specialized equipment or significant manual effort. The resulting oil is highly caloric and flavorful.

    Flour Production

    Turning starchy roots, nuts, and seeds into flour is a game-changer for long-term storage and versatility.

    • Acorn Flour: After leaching tannins, dried acorns can be ground into a gluten-free flour.
    • Cattail Flour: Dried cattail rhizomes can be ground into a starchy flour.
    • Wild Rice Flour: Ground wild rice provides a nutritious, gluten-free option.
    • Amaranth Flour: Tiny seeds can be ground into a protein-rich flour.

    Other Methods

    • Infusions and Tinctures: For medicinal plants, alcohol or oil infusions can extract beneficial compounds for long-term storage.
    • Jams, Jellies, and Syrups: For wild fruits like berries, crabapples, or Elderberries. Requires sugar or other sweeteners and proper canning techniques.
    • Root Cellaring: For certain roots and tubers (e.g., Burdock, Wild Carrot), if conditions are right (cool, dark, humid).

    Safety Warning: When preserving, proper hygiene is critical to prevent spoilage and foodborne illness. Follow established guidelines for drying, fermenting, and canning. Ensure foods are fully dried before storage to prevent mold. Use airtight containers for dried goods.

    Integrating Wild Foods into Daily Meals: Recipes and Menu Planning

    The ultimate goal of sustainable wild food integration is to move beyond emergency rations and make wild edibles a regular, delicious part of your diet. This requires creativity, experimentation, and a willingness to adapt traditional recipes.

    Simple Substitutions and Enhancements

    • Greens: Replace or supplement spinach, lettuce, or kale with wild greens like Dandelion, Plantain, Chickweed, or young Garlic Mustard in salads, stir-fries, soups, or smoothies.
    • Herbs: Use wild mints, Thyme, or Oregano varieties to flavor dishes. Pine needles can make a refreshing tea.
    • Berries: Incorporate wild raspberries, blackberries, blueberries, or Elderberries into oatmeal, yogurt, pies, jams, or sauces.
    • Roots: Use roasted Burdock root as a side dish, or add chopped Wild Carrot to stews. Cattail rhizomes can be boiled and mashed like potatoes.
    • Nuts: Add crushed Black Walnuts or Hickories to baked goods, salads, or as a crunchy topping. Acorn flour can partially replace wheat flour in breads and pancakes.

    Sample Wild Food Recipes

    Wild Green Pesto

    • 2 cups mixed wild greens (Garlic Mustard, Dandelion, Violet leaves, Chickweed)
    • 1/2 cup wild nuts (pine nuts, walnuts, or hickory nuts)
    • 2-3 cloves wild garlic or ramps (if available), or cultivated garlic
    • 1/2 cup olive oil (or rendered animal fat for survival)
    • Salt and pepper to taste
    • Optional: a squeeze of lemon juice, a sprinkle of wild cheese

    Blend all ingredients in a mortar and pestle or food processor until smooth. Adjust oil for desired consistency. Serve with pasta, spread on crackers, or use as a condiment.

    Acorn & Cattail Flatbread

    • 1 cup leached acorn flour
    • 1/2 cup cattail rhizome flour
    • 1/2 tsp salt
    • Water as needed
    • Optional: rendered animal fat or wild seeds for flavor

    Combine flours and salt. Gradually add water, mixing until a stiff dough forms. Knead briefly. Roll out thinly. Cook on a hot, dry griddle or flat stone until browned and cooked through. This provides significant calories.

    Elderberry Immune Syrup

    • 1 cup dried elderberries
    • 3 cups water
    • 1 cinnamon stick (optional)
    • 1 inch fresh ginger, sliced (optional)
    • 1 cup honey (or maple syrup)

    Combine elderberries, water, cinnamon, and ginger in a pot. Bring to a boil, then reduce heat and simmer for 30-45 minutes until liquid is reduced by about half. Strain out solids, pressing to extract all liquid. Let cool to lukewarm, then stir in honey. Store in a sealed jar in the refrigerator. Take a spoonful daily for immune support.

    Menu Planning for Wild Food Integration

    Think seasonally. Plan meals around what is currently abundant. In spring, focus on fresh greens and shoots. Summer brings berries and flowers. Fall is for nuts and roots. Winter relies on preserved goods and persistent evergreens.

    Practical Tip: Start small. Introduce one new wild food into your diet each week or month. Learn its taste, texture, and how it interacts with other ingredients. This gradual approach builds confidence and culinary skill.

    Menu Planning for Wild Food Integration
    Menu Planning for Wild Food Integration: Menu Planning for Wild Food Integration.

    Building a Wild Food Calendar: Tracking Abundance and Planning Harvests

    A personalized wild food calendar is an indispensable tool for creating a wild food calendar and ensuring a continuous supply of wild edibles. It moves you from reactive foraging to strategic planning, allowing you to anticipate harvests and manage your time effectively for advanced foraging techniques.

    Components of Your Wild Food Calendar

    1. Monthly Breakdown: Organize your calendar by month or even by week.
    2. Plant Species: List the specific wild edibles you’ve identified in your area.
    3. Peak Harvest Times: Note the ideal window for harvesting each plant part (e.g., Dandelion leaves in early spring, roots in late fall; Elderflowers in early summer, berries in late summer).
    4. Location Details: Record precise locations (GPS coordinates, landmarks, specific habitat descriptions) where you’ve found abundant patches.
    5. Harvesting Notes: Include specific ethical harvesting guidelines for each plant (e.g., “only take 5% of this patch,” “cut above the first true leaves”).
    6. Processing Notes: Briefly jot down the best preservation methods for each item (e.g., “dry for tea,” “leach and grind for flour,” “ferment for kimchi”).
    7. Phenological Indicators: Note other natural events that coincide with a plant’s readiness (e.g., “when Oak leaves are mouse-ear size, serviceberry is blooming”).
    8. Quantity Harvested & Stored: Keep track of how much you’ve gathered and preserved to monitor your pantry levels.
    9. Observations: Any other relevant notes about weather, plant health, or new discoveries.

    How to Create and Use Your Calendar

    • Start Simple: Begin with 5-10 common, easily identifiable plants in your area. Expand as your knowledge grows.
    • Observe and Record: Spend time in nature, actively observing. When you find a plant, record its location, what stage it’s in, and the date.
    • Update Annually: Your calendar will evolve. Weather patterns change, and plant populations fluctuate. Review and update it each year.
    • Plan Your Forays: Use the calendar to plan specific foraging trips. Instead of just wandering, you’ll know exactly what you’re looking for and where to find it.
    • Anticipate Needs: If you know you’ll need acorn flour for winter, your calendar will remind you when to gather acorns in the fall.

    Example Calendar Entry (June):

    • Plant: Elderflower (Sambucus canadensis)
    • Peak Harvest: Early-Mid June (when flowers are fully open, before berries form)
    • Location: Along creek bed, south side of old logging road, near large sycamore. GPS: 34.123, -84.456
    • Harvesting: Snip entire flower clusters. Take no more than 20% from any single bush. Leave plenty for berries.
    • Processing: Dry for tea, make fritters, infuse in vinegar.
    • Phenology: Coincides with wild roses blooming.
    • Notes: Check for aphids before harvesting.

    This systematic approach ensures you don’t miss peak harvest times and helps you build a diverse and resilient wild food supply, supporting wild edibles year-round.

    Conclusion: The Self-Reliant Forager – A True Master of the Land

    The journey from basic plant identification to comprehensive sustainable wild food integration is a profound one. It transforms you from a passive consumer to an active participant in your local ecosystem, fostering a deep connection to the land and an unparalleled sense of self-reliance. By mastering bioregional observation, prioritizing calorie-dense foods, adhering to ethical harvesting practices, and becoming proficient in preservation, you build a wild pantry that can sustain you through any season or crisis.

    The wild food calendar becomes your strategic blueprint, guiding your efforts and ensuring a continuous flow of nature’s bounty. This isn’t just about survival; it’s about thriving, about reclaiming ancient knowledge, and about living in harmony with the natural world. Embrace the challenge, hone your skills, and become the self-reliant forager – a true master of the land, capable of feeding yourself and your community from the abundance that surrounds you.

    Frequently Asked Questions about Wild Food Integration


  • Financial Fortress: Securing Your Assets and Documents for Post-Disaster Recovery

    Financial Fortress: Securing Your Assets and Documents for Post-Disaster Recovery

    Financial Fortress: Securing Your Assets and Documents for Post-Disaster Recovery

    In the realm of survival and preparedness, the focus often gravitates towards tangible assets: food, water, shelter, and self-defense. While these physical provisions are undeniably critical, a truly comprehensive preparedness strategy must extend beyond the immediate and into the realm of financial resilience. Neglecting your financial disaster preparedness can leave you vulnerable even if your pantry is stocked and your bug-out bag is packed. A robust financial fortress ensures that when the dust settles, you have the means to rebuild, recover, and regain stability. This article will guide you through the essential steps to secure your assets, protect vital documents, and navigate the complex financial landscape that emerges in the wake of a crisis.

    Related TacticalProof reading: How to Make a Bugout Plan for You and Your Family | The Frugal Prepper’s Starter Kit: Essential Items You Already Own or Can Get Cheaply | How to Sharpen a Knife Without a Sharpener: 9 Wilderness and Household Methods

    Building Your Emergency Fund: How Much, Where to Keep It, and Ensuring Accessibility

    The cornerstone of any sound financial disaster preparedness plan is a well-funded emergency savings account. This isn’t just for job loss; it’s your lifeline when disaster strikes, covering immediate needs, temporary housing, and unexpected expenses that insurance might not immediately cover.

    How Much is Enough?

    • The 3-6 Month Rule: Financial experts generally recommend having at least three to six months’ worth of essential living expenses saved. For preparedness-minded individuals, aiming for six months to a year is even better, especially if you have dependents, a single income, or a high-deductible insurance plan.
    • Calculate Your Essentials: Don’t just guess. Itemize your absolute necessities: mortgage/rent, utilities, food, transportation, insurance premiums, and essential medical costs. Exclude discretionary spending like dining out or entertainment.

    Where to Keep It: Liquidity and Safety

    Your emergency fund needs to be liquid (easily accessible) but also safe from immediate risks and inflation erosion.

    • High-Yield Savings Account: This is often the best choice. It’s separate from your checking account, making it less tempting to dip into for non-emergencies, and it earns a modest interest rate. Choose an FDIC-insured bank.
    • Money Market Account: Similar to a savings account but may offer slightly higher interest rates and sometimes limited check-writing privileges. Also FDIC-insured.
    • Certificates of Deposit (CDs) with Laddering: For larger sums, consider a CD ladder. You invest in several CDs with staggered maturity dates (e.g., 3-month, 6-month, 1-year). This allows you to access portions of your funds periodically without penalty, while still earning higher interest than a standard savings account.
    • Small Cash Stash: Keep a small amount of cash (e.g., $500-$2,000) in small denominations in a secure, fireproof, waterproof safe at home. ATMs and credit card systems may be down after a major disaster. This is for immediate, short-term needs only.

    Ensuring Accessibility

    • Multiple Access Points: Ensure you have debit cards for your emergency fund accounts. Consider having accounts at different banks, especially if you live in an area prone to widespread power outages or infrastructure damage.
    • Off-Site Information: Keep a secure, encrypted list of account numbers, bank contact information, and PINs (if absolutely necessary, but generally not recommended to store PINs directly) in an off-site location or secure cloud storage accessible only by you or a trusted individual.
    • Trusted Contact: Designate a trusted family member or friend (preferably out of your immediate area) who knows where your critical financial information is stored and has limited access instructions in case you are incapacitated.

    Protecting Important Documents: Identification, Deeds, Wills, and Medical Records (Physical & Digital)

    Imagine trying to prove your identity, ownership of your home, or access medical care without your critical documents. It’s a nightmare scenario. Protecting these papers is paramount for post-disaster recovery.

    Essential Documents to Secure:

    • Personal Identification: Passports, driver’s licenses, birth certificates, social security cards, marriage licenses.
    • Financial Records: Bank account numbers, investment statements, credit card numbers (front and back copies), loan documents, tax returns (last 3-5 years).
    • Property Records: Deeds, titles (home, vehicle, boat), mortgage documents, property surveys.
    • Insurance Policies: Homeowner’s/renter’s, auto, health, life, flood, earthquake policies – including policy numbers and contact information for agents/companies.
    • Legal Documents: Wills, trusts, powers of attorney (financial and medical), guardianship papers.
    • Medical Records: Vaccination records, prescription lists, medical history, health insurance cards.
    • Contact Lists: Emergency contacts, doctors, lawyers, insurance agents, family members.

    Physical Protection Strategies:

    • Fireproof and Waterproof Safe: Invest in a high-quality safe rated for both fire and water protection. Keep original, irreplaceable documents here.
    • Go-Bag/Evacuation Kit: For documents you might need immediately during an evacuation (e.g., ID, insurance cards, small cash), keep copies in a waterproof pouch within your bug-out bag.
    • Off-Site Storage: For truly critical originals (like deeds or wills), consider a bank safe deposit box. This offers excellent security but remember it’s only accessible during bank hours and may be inaccessible after a widespread disaster. A trusted friend or family member out of your immediate area can also hold copies.

    Financial Fortress: Securing Your Assets and Documents for Post-Disaster Recovery
    Financial Fortress: Securing Your Assets and Documents for Post-Disaster Recovery.

    Digital Protection Strategies:

    • Scan Everything: Convert all important documents into high-resolution digital files (PDFs are ideal).
    • Encrypted USB Drive: Store digital copies on an encrypted USB drive. Keep one copy in your home safe and another in your go-bag.
    • Secure Cloud Storage: Utilize reputable, encrypted cloud services (e.g., Google Drive with strong passwords and 2FA, Dropbox, OneDrive, specialized secure document storage services). Ensure you understand their security protocols.
    • Password Manager: Use a robust password manager (e.g., LastPass, 1Password, Bitwarden) to store login credentials for all your online financial accounts and cloud services. Share emergency access with a trusted individual if you become incapacitated.
    • Regular Backups: Implement a 3-2-1 backup strategy: 3 copies of your data, on 2 different media types, with 1 copy off-site.

    Safety Warning: Never store original Social Security cards or birth certificates in a bug-out bag unless absolutely necessary for immediate evacuation. These are extremely sensitive documents. Copies are usually sufficient for temporary needs.

    Understanding and Optimizing Insurance Coverage: Home, Auto, Flood, Earthquake, and Life Policies

    Insurance is your financial safety net. After a disaster, it’s often the primary mechanism for rebuilding your life. Don’t wait for a crisis to understand your policies.

    Key Insurance Types and Considerations:

    • Homeowner’s/Renter’s Insurance:
      • Replacement Cost vs. Actual Cash Value (ACV): Always opt for replacement cost value (RCV) coverage. ACV pays out based on the depreciated value of your items, which will leave you with less money to replace them.
      • Contents Coverage: Ensure your personal belongings are adequately covered. Take an inventory (photos, videos, receipts) of your possessions.
      • Additional Living Expenses (ALE): This covers costs if you can’t live in your home after a covered disaster (hotel, food, laundry). Understand its limits and duration.
      • Deductibles: Know your deductible amount. Can you afford to pay it out-of-pocket immediately after a disaster?
    • Flood Insurance: Standard homeowner’s policies DO NOT cover flood damage. If you live in a flood-prone area (even if not in a designated flood zone), you need a separate policy, typically through the National Flood Insurance Program (NFIP) or a private insurer. There’s often a 30-day waiting period for new policies to take effect.
    • Earthquake Insurance: Similar to flood, earthquake damage is usually excluded from standard policies. If you’re in an earthquake-prone region, this is a must. Deductibles can be very high (often a percentage of the home’s value).
    • Auto Insurance: Ensure you have comprehensive coverage, which protects against damage from non-collision events like fire, theft, vandalism, and natural disasters.
    • Life Insurance: While not directly for property recovery, life insurance provides crucial financial support for your dependents if you are no longer able to provide for them. Review beneficiaries regularly.
    • Umbrella Policy: Provides additional liability coverage beyond your home and auto policies, offering an extra layer of protection for your assets.

    Optimizing Your Coverage:

    • Annual Review: Review all your policies annually with your agent. Life changes (renovations, new assets, family changes) require policy adjustments.
    • Understand Exclusions: Know exactly what your policies do and do not cover.
    • Document Everything: Keep detailed records of your home’s contents (photos, videos, receipts). This is invaluable for filing claims.
    • Know Your Agent: Have your agent’s direct contact information readily available.

    Digital Asset Protection: Secure Backups, Cloud Storage, and Robust Password Management

    In our increasingly digital world, your financial life is intertwined with your online presence. Protecting your digital assets is as crucial as securing physical documents.

    Secure Backups:

    • Automated Cloud Backups: Use services like Backblaze, Carbonite, or iCloud/Google Drive for automated backups of your entire computer. Ensure these are encrypted.
    • External Hard Drives: Maintain at least one external hard drive for local backups. Keep it disconnected when not backing up to protect against ransomware or power surges. Store one copy off-site.
    • Critical Files Only: For truly vital documents, consider multiple layers of backup: encrypted USB, secure cloud, and a physical copy.

    Cloud Storage Best Practices:

    • Encryption: Choose cloud providers that offer end-to-end encryption for your data.
    • Two-Factor Authentication (2FA): Enable 2FA on all your cloud accounts. This adds a critical layer of security, requiring a second verification step (e.g., a code from your phone) in addition to your password.
    • Strong, Unique Passwords: Never reuse passwords. Each online account should have a long, complex, unique password.

    Robust Password Management:

    A password manager is no longer a luxury; it’s a necessity for digital asset protection.

    • Centralized Security: Tools like LastPass, 1Password, Bitwarden, or Dashlane securely store all your login credentials behind one master password.
    • Password Generation: They can generate strong, random passwords for you, eliminating the need to remember complex strings.
    • Emergency Access: Most reputable password managers offer an emergency access feature, allowing a trusted individual to gain access to your vault under specific, pre-defined conditions (e.g., after a waiting period).
    • Digital Legacy Planning: Beyond passwords, consider what happens to your social media, email, and other online accounts if you’re incapacitated or pass away. Many services offer options for designating a legacy contact.

    Legal Preparedness: Wills, Powers of Attorney, and Guardianship Considerations Before a Crisis

    Financial preparedness isn’t just about money; it’s about ensuring your wishes are honored and your loved ones are protected. Legal documents are the framework for this.

    Wills and Trusts:

    • Last Will and Testament: This document dictates how your assets will be distributed after your death. Without one, state laws will decide, which may not align with your wishes.
    • Executor: Designate a trustworthy executor who will manage your estate.
    • Beneficiaries: Clearly name beneficiaries for all your assets, including bank accounts, investment accounts, and life insurance policies. These often supersede your will, so ensure they are up-to-date.
    • Trusts: For more complex estates, or to avoid probate, a trust might be beneficial. Consult an estate planning attorney.

    Powers of Attorney (POA):

    These documents allow someone else to make decisions on your behalf if you become incapacitated.

    • Durable Financial Power of Attorney: Designates someone to manage your financial affairs (paying bills, managing investments) if you’re unable to. This is crucial if you’re hospitalized or otherwise unable to act.
    • Medical Power of Attorney (Healthcare Proxy): Designates someone to make healthcare decisions for you if you cannot. Often accompanied by an Advance Directive or Living Will, which outlines your wishes regarding medical treatment.
    • Selecting an Agent: Choose someone you trust implicitly, who understands your values, and is capable of handling complex situations. Name a successor agent in case your primary choice is unavailable.

    Guardianship for Minors:

    If you have minor children, this is perhaps the most critical legal preparedness step.

    • Designate Guardians: Your will should clearly name guardians for your minor children in the event of your death or incapacitation. Discuss this with your chosen guardians beforehand to ensure they are willing and able.
    • Temporary Guardianship: Consider a temporary guardianship agreement or a notarized letter granting a trusted individual the authority to care for your children for a short period if you are separated from them during a disaster.

    Actionable Tip: Consult with an estate planning attorney to draft these documents. DIY kits can be tempting, but an attorney ensures they are legally sound and tailored to your specific situation and state laws.

    Managing Debt and Credit in a Crisis: Communication with Lenders and Monitoring Credit Reports

    A disaster can severely impact your ability to meet financial obligations. Proactive management is key to preventing long-term credit damage.

    Proactive Communication with Lenders:

    • Don’t Wait: If you anticipate difficulty making payments due to a disaster, contact your lenders (mortgage, auto, credit card, student loan) immediately.
    • Inquire About Hardship Programs: Many lenders have disaster relief programs, forbearance options, or payment deferrals. These can temporarily suspend or reduce payments without damaging your credit.
    • Document Everything: Keep a log of all communications: dates, names of representatives, what was discussed, and any agreements made. Get agreements in writing if possible.

    Understanding Forbearance and Deferment:

    • Forbearance: Allows you to temporarily stop or reduce your mortgage payments. Interest usually continues to accrue, and the missed payments will need to be repaid later (often as a lump sum or added to the loan balance).
    • Deferment: Often applies to student loans, allowing you to postpone payments. Interest may or may not accrue depending on the loan type.
    • Impact on Credit: While these programs are designed to help, ensure you understand if and how they will be reported to credit bureaus. Ideally, they should not negatively impact your credit score if you adhere to the terms.

    Monitoring Credit Reports:

    • Post-Disaster Vigilance: Identity theft and fraud often spike after disasters. Monitor your credit reports closely for any unauthorized activity.
    • Free Annual Reports: You are entitled to a free credit report from each of the three major bureaus (Equifax, Experian, TransUnion) annually via AnnualCreditReport.com. Stagger your requests (e.g., one every four months) to monitor throughout the year.
    • Fraud Alerts/Credit Freezes: Consider placing a fraud alert or a credit freeze on your reports if you suspect your personal information has been compromised.

    Post-Disaster Financial Recovery: Navigating FEMA, Grants, Loans, and Tax Implications

    The immediate aftermath of a disaster is chaotic, but understanding the recovery resources available can significantly ease the burden.

    Federal Emergency Management Agency (FEMA):

    • Individual Assistance: If your area is declared a federal disaster zone, you can apply for Individual Assistance from FEMA. This can include grants for temporary housing, home repairs, and other serious disaster-related needs not covered by insurance.
    • Registration: Register with FEMA as soon as possible. You’ll need your Social Security number, insurance information, and details about the damage.
    • Keep Records: Document all damage with photos and videos. Keep receipts for all disaster-related expenses.

    Small Business Administration (SBA) Loans:

    • Disaster Loans: The SBA offers low-interest disaster loans to homeowners, renters, businesses, and non-profits to repair or replace damaged property not covered by insurance.
    • Types of Loans: These include Home and Personal Property Loans, Business Physical Disaster Loans, and Economic Injury Disaster Loans (EIDL).

    Charitable Organizations and Local Aid:

    • Red Cross, Salvation Army, Local Charities: These organizations often provide immediate relief, including food, shelter, and financial assistance for basic needs.
    • Community Funds: Many communities establish local disaster relief funds. Research and apply if available.

    Financial Fortress: Securing Your Assets and Documents for Post-Disaster Recovery
    Financial Fortress: Securing Your Assets and Documents for Post-Disaster Recovery.

    Tax Implications:

    • Casualty Losses: You may be able to deduct casualty losses (damage to your property from a sudden, unexpected event) on your federal income tax return. There are specific rules and thresholds.
    • IRS Guidance: The IRS often provides specific guidance and extensions for disaster victims. Consult IRS publications or a tax professional.
    • Keep Receipts: Maintain meticulous records of all expenses related to the disaster and recovery, as well as any insurance reimbursements or grants received.

    FAQ: Financial Disaster Preparedness

    Q: How much cash should I keep on hand for a disaster?
    A: It’s advisable to keep a small amount of cash, typically $500-$2,000, in small denominations in a secure, fireproof, waterproof safe at home. This is for immediate needs when electronic systems might be down. Your main emergency fund should be in a liquid, insured bank account.
    Q: Should I store original documents in a bank safe deposit box?
    A: For truly irreplaceable originals like deeds or wills, a bank safe deposit box offers excellent security. However, remember it’s only accessible during bank hours and may be inaccessible after a widespread disaster. It’s crucial to have secure digital copies and potentially physical copies with a trusted out-of-area contact as well.
    Q: What’s the most important insurance policy for disaster recovery?
    A: While all insurance is important, homeowner’s or renter’s insurance with replacement cost value (RCV) coverage is paramount for property recovery. Crucially, ensure you have separate flood and/or earthquake insurance if you live in a prone area, as these are typically excluded from standard policies.
    Q: How often should I review my financial preparedness plan?
    A: You should review your financial preparedness plan, including emergency fund status, document protection, and insurance policies, at least annually. Major life events (marriage, birth of a child, home purchase, new job) also warrant an immediate review and update.
    Q: What’s the first financial step to take immediately after a disaster?
    A: After ensuring personal safety, the first financial step is to contact your insurance companies to file claims. Simultaneously, if your area is declared a federal disaster zone, register with FEMA. Begin documenting all damage with photos and videos, and keep receipts for all immediate disaster-related expenses.
  • The Frugal Prepper’s Starter Kit: Essential Items You Already Own or Can Get Cheaply

    The Frugal Prepper’s Starter Kit: Essential Items You Already Own or Can Get Cheaply

    The Frugal Prepper’s Starter Kit: Essential Items You Already Own or Can Get Cheaply

    The idea of preparing for emergencies often conjures images of expensive bunkers, high-tech gear, and massive stockpiles. For many, the perceived cost barrier is enough to deter them from even starting. However, true preparedness isn’t about how much money you spend; it’s about resourcefulness, knowledge, and making the most of what you have. This article provides a comprehensive frugal prepper checklist, demonstrating how you can build a robust survival kit using items you already own, repurpose common household goods, and acquire essential supplies without breaking the bank. Get ready to embrace budget survival gear and discover that being prepared is far more accessible than you think.

    Related TacticalProof reading: How to Build a Root Cellar on a Budget: 5 DIY Designs Under $500 | Best Hand Grain Mill for Preppers: Manual vs Motorized Options Compared | How to Raise Meat Rabbits for Survival: Breeds, Housing, and Year-Round Production

    Phase 1: Inventory Your Home – What You Already Have

    Before you buy anything, take stock of your current possessions. You’ll be surprised at how many items in your home can serve a dual purpose in an emergency. This initial inventory is the cornerstone of any cheap prepper supplies strategy.

    Food & Water

    • Canned Goods: Check your pantry for non-perishable items like canned vegetables, fruits, beans, soups, and meats. Ensure they have a long shelf life and rotate them regularly.
    • Dry Goods: Rice, pasta, oats, flour, sugar, salt, and spices are excellent long-term storage items.
    • Bottled Water: Any bottled water you have for daily consumption can be part of your emergency supply.
    • Pet Food: Don’t forget your furry friends! Inventory their dry and canned food.

    First Aid & Hygiene

    • Basic First Aid Kit: Most homes have bandages, antiseptic wipes, pain relievers, and antibiotic ointment. Consolidate these.
    • Prescription Medications: Keep a small emergency supply if possible, or at least a current list of all medications.
    • Hygiene Products: Soap, shampoo, toothbrushes, toothpaste, toilet paper, feminine hygiene products, and hand sanitizer are crucial.
    • Towels & Rags: Old towels can be repurposed for cleaning, bandages, or insulation.

    Tools & Utilities

    • Flashlights & Batteries: Gather all working flashlights and any spare batteries.
    • Matches/Lighters: Essential for fire starting.
    • Basic Tool Kit: Hammer, screwdriver set, pliers, wrench – useful for minor repairs.
    • Duct Tape: The ultimate multi-purpose repair tool.
    • Knives/Multi-tools: Any sharp knife or multi-tool you own is valuable.

    Clothing & Shelter

    • Warm Clothing: Old sweaters, jackets, hats, gloves, and thermal underwear can provide crucial warmth.
    • Blankets/Sleeping Bags: Any extra blankets, quilts, or old sleeping bags are vital for warmth.
    • Tarps/Plastic Sheeting: Often found in garages or sheds, these can be used for temporary shelter or ground cover.

    Practical Tip: Create a physical checklist as you go through your home. This helps you visualize your existing resources and identify immediate gaps.

    Phase 2: Repurpose and Reuse – Creative Solutions for Common Items

    Ingenuity is a prepper’s best friend. Many everyday items can be given a new life as essential survival gear. This is where your DIY prepper essentials truly shine.

    Water Storage & Purification

    • Plastic Bottles/Jugs: Cleaned soda bottles, milk jugs, or laundry detergent containers (thoroughly rinsed!) can store water.
    • Bathtub: In an impending emergency, fill your bathtub with water for non-potable uses like flushing toilets.
    • Coffee Filters/Cloth: Can be used for pre-filtering turbid water before boiling or chemical treatment.

    Cooking & Heating

    • Tin Cans: Large coffee cans or soup cans can be turned into simple stoves (with proper ventilation and safety precautions) or used for cooking over a fire.
    • Aluminum Foil: Can be shaped into cooking vessels or used to wrap food for cooking over coals.
    • Lint/Cotton Balls: Excellent fire starters when combined with petroleum jelly.

    Light & Communication

    • Glass Jars: With a wick and some cooking oil, a glass jar can become a makeshift oil lamp. (Safety Warning: Always use caution with open flames. Ensure good ventilation and never leave unattended.)
    • Old Cell Phones: Even without service, an old cell phone can still dial 911 in many areas and can be used for its flashlight function.
    • Hand-Crank Radios: If you have an old one, ensure it still works.

    First Aid & Hygiene

    • Old T-shirts/Sheets: Can be torn into strips for bandages, slings, or cleaning cloths.
    • Plastic Bags: Can be used for waste disposal, collecting rainwater, or protecting items from moisture.
    • Buckets with Lids: Can be repurposed as emergency toilets with a sturdy liner.

    Practical Tip: Keep a designated “repurpose bin” for items you identify as having survival potential before they hit the trash or recycling.

    First Aid & Hygiene
    First Aid & Hygiene: First Aid & Hygiene.

    Phase 3: Smart Shopping Strategies – Thrift Stores, Sales, and Bulk Buys

    Once you’ve exhausted your home inventory and repurposing options, it’s time to fill the gaps. This doesn’t mean spending a fortune. Smart shopping is key to building your prepper on a shoestring kit.

    Thrift Stores & Second-Hand Shops

    • Warm Clothing: High-quality wool sweaters, sturdy jackets, hats, gloves, and scarves are often found at a fraction of retail price. Look for natural fibers like wool or down for superior warmth.
    • Blankets & Sleeping Bags: Inspect carefully for tears or damage, but good quality blankets and even sleeping bags can be found. Wash thoroughly before use.
    • Backpacks & Bags: A sturdy backpack is essential for a bug-out bag. Thrift stores often have durable, older models that are built to last.
    • Cooking Pots & Utensils: Cast iron skillets, stainless steel pots, and basic cutlery are common finds.
    • Books: Survival guides, first aid manuals, and gardening books can be invaluable resources.

    Sales, Clearance Racks, & Discount Stores

    • Non-Perishable Food: Stock up on canned goods, pasta, rice, and beans when they go on sale. Look for “buy one, get one free” offers.
    • Batteries: Often on sale around holidays or in bulk packs.
    • First Aid Supplies: Bandages, antiseptic, pain relievers, and medical tape can be found cheaply at dollar stores or on clearance.
    • Hygiene Items: Soap, toothpaste, toilet paper, and feminine hygiene products are frequently discounted.
    • Candles & Lighters: Basic emergency lighting and fire starting.

    Bulk Buys & Co-ops

    • Grains & Legumes: Rice, beans, oats, and pasta are significantly cheaper when bought in large quantities (e.g., 25-50 lb bags). Store them properly in airtight containers to prevent pests.
    • Water Filters: While some filters can be pricey, look for sales on reputable brands or consider a larger, more economical filter system if your budget allows for one significant purchase.
    • Salt & Sugar: Essential for food preservation and energy, these are very affordable in bulk.

    Practical Tip: Always check the expiration dates on food items, even if they’re on sale. For non-food items, inspect for quality and durability.

    Phase 4: DIY Solutions for Basic Needs (Simple, non-complex builds)

    Some of the most critical survival items can be created with minimal cost and a bit of effort. These DIY prepper essentials empower you with practical skills and affordable preparedness.

    DIY Water Filter (Basic)

    While not a substitute for boiling or chemical treatment, a basic DIY filter can remove larger particulates from water, making subsequent purification more effective.

    • Materials: An empty plastic bottle (cut bottom off), coffee filter or cloth, layers of charcoal (from a campfire, crushed), sand (fine and coarse), gravel, and a collection container.
    • Construction: Layer the materials inside the inverted bottle: cloth/coffee filter at the bottom, then charcoal, fine sand, coarse sand, and finally gravel. Pour dirty water through.
    • Safety Warning: This filter does NOT remove bacteria, viruses, or chemical contaminants. ALWAYS follow with boiling for at least one minute (three minutes at high altitudes) or use purification tablets for potable water.

    Simple Rocket Stove

    A rocket stove is incredibly fuel-efficient and can be made from common materials.

    • Materials: Two large tin cans (e.g., coffee cans), a smaller tin can, tin snips, and a marker.
    • Construction: Cut openings and assemble the cans to create an L-shaped combustion chamber.
    • Safety Warning: Use outdoors only, away from flammable materials. Ensure stable placement.

    Emergency Oil Lamp

    A simple, long-lasting light source.

    • Materials: A glass jar (mason jar works well), cooking oil (vegetable, olive), a cotton shoelace or strip of cotton cloth for a wick, and a small piece of metal or a bottle cap to hold the wick.
    • Construction: Thread the wick through the metal holder, allowing a small portion to extend above. Fill the jar with oil, submerge the wick, and let it soak. Light the exposed wick.
    • Safety Warning: Never leave an open flame unattended. Keep away from children and pets. Ensure good ventilation.

    Basic Tarp Shelter

    With a tarp and some rope, you can create various shelters.

    • Materials: A tarp (even a cheap blue one), paracord or strong rope, and stakes (can be fashioned from sticks).
    • Construction: Learn basic knots (e.g., taut-line hitch, bowline). Practice setting up A-frame, lean-to, or diamond fly configurations.

    Practical Tip: Practice these DIY skills before an emergency. Knowing how to build and use them effectively is as important as having the materials.

    Essential Categories on a Budget: Food, Water, First Aid, Light, Warmth, Shelter

    Let’s break down the core components of any survival kit, focusing on affordable preparedness strategies for each.

    Food Storage (Affordable & Long-Term)

    • Staple Grains & Legumes: Rice, beans (dried), oats, and pasta are incredibly cost-effective and calorie-dense. Buy in bulk and store in Mylar bags with oxygen absorbers or food-grade buckets.
    • Canned Goods: Canned vegetables, fruits, meats (tuna, chicken), and soups are excellent. Look for sales and stock up.
    • Cooking Oil & Salt: Essential for cooking and preservation.
    • Sugar/Honey: For energy and morale.
    • Gardening: Even a small container garden can supplement your food supply. Seeds are cheap and provide a renewable resource.
    • Foraging Knowledge: Learning about edible plants in your area is free and invaluable.

    Water Purification & Storage

    • Water Purification Tablets: Very inexpensive and effective. Keep a good supply.
    • Bleach (Unscented, Regular): Can be used to purify water (2 drops per liter, let stand 30 minutes). Check labels for active ingredient (sodium hypochlorite 5-6%).
    • Large Water Containers: Food-grade plastic barrels or even thoroughly cleaned 2-liter soda bottles for storage.
    • Rainwater Collection: A simple tarp and a bucket can collect significant amounts of water.

    First Aid & Medical

    • DIY First Aid Kit: Combine items from your home (bandages, antiseptic, pain relievers, gauze, medical tape, tweezers) with a few cheap additions like a thermometer, small scissors, and safety pins.
    • Knowledge: Take a basic first aid or CPR course. Many community centers offer these affordably or even free.
    • Herbal Remedies: Learn about local medicinal plants (e.g., plantain for stings, willow bark for pain).

    Light Sources

    • Candles: Cheap and provide both light and a little warmth. Stock up on tea lights or pillar candles.
    • Flashlights: Prioritize LED flashlights for efficiency. Look for hand-crank or solar-powered options to reduce battery dependence.
    • Headlamps: Allow for hands-free operation.
    • Oil Lamps: As described in the DIY section, these are very economical.

    Warmth & Shelter

    • Layered Clothing: The most effective way to stay warm. Focus on natural fibers like wool (thrift store find!) and synthetic layers.
    • Mylar Blankets: Very cheap, compact, and effective for retaining body heat.
    • Sleeping Bags: Look for used ones at thrift stores or on sale.
    • Tarps: Versatile for shelter, ground cover, or rain collection.
    • Tent: A small, used tent can provide significant protection.

    Safety Warning: When storing food, ensure proper sealing and rotation to prevent spoilage and pest infestation. For water, always prioritize purification methods for drinking water.

    Warmth & Shelter
    Warmth & Shelter: Warmth & Shelter.

    Prioritization: What to Acquire First When Funds Are Limited

    When you’re building your frugal prepper checklist, it’s crucial to prioritize. Focus on the most immediate threats to life first. This hierarchy ensures your limited funds are spent on the most impactful items.

    1. Water: The human body can only survive a few days without water. Focus on purification methods (tablets, bleach, filter) and storage.
    2. Shelter & Warmth: Exposure to the elements can be deadly. Tarps, blankets, warm clothing, and a way to make fire are critical.
    3. First Aid: The ability to treat injuries and illnesses can prevent minor issues from becoming life-threatening.
    4. Food: While important, humans can survive weeks without food. Prioritize calorie-dense, non-perishable staples.
    5. Light & Communication: Flashlights, candles, and a hand-crank radio for information.
    6. Security: While not always a budget item, basic self-defense knowledge and tools can be important.
    7. Sanitation: Buckets, soap, and hygiene products prevent disease.

    Practical Tip: Remember, knowledge and skills are free. Learning how to purify water, build a fire, administer first aid, or tie essential knots costs nothing but your time and effort, and these skills are priceless.

    Conclusion: Building Resilience Without Breaking the Bank

    Preparedness is not a luxury; it’s a responsibility. As this frugal prepper checklist demonstrates, you don’t need a massive budget to build resilience. By taking inventory of what you already own, creatively repurposing common items, shopping smartly, and embracing DIY solutions, you can assemble a comprehensive survival kit. The journey of becoming an affordable preparedness expert is ongoing. Start small, prioritize your needs, and continuously learn new skills. Every step you take, no matter how small or inexpensive, brings you closer to being truly tactical proof against life’s uncertainties. Your most valuable assets are your ingenuity and your will to prepare.

    Frequently Asked Questions (FAQ)

    Q: What’s the absolute first thing a frugal prepper should do?
    A: The very first step is to conduct a thorough home inventory. You’ll be amazed at how many essential items you already possess. This helps you identify true gaps before spending any money.
    Q: How can I store food cheaply for the long term?
    A: Focus on bulk dry goods like rice, beans, and oats. Store them in food-grade 5-gallon buckets with gamma seal lids or in Mylar bags with oxygen absorbers. These methods are cost-effective and provide excellent protection against pests and moisture.
    Q: Are DIY water filters safe to drink from?
    A: Basic DIY water filters (like sand/charcoal filters) are excellent for removing sediment and larger particles, making the water clearer. However, they do NOT remove bacteria, viruses, or chemical contaminants. You MUST follow DIY filtration with a purification method like boiling, chemical tablets, or a certified filter to make water safe for drinking.
    Q: What are some free or very cheap preparedness skills I can learn?
    A: Absolutely! Learning basic first aid, CPR, fire starting without matches, knot tying, how to purify water, and identifying edible plants in your local area are all free skills that are incredibly valuable. Many resources are available online or at local libraries.
    Q: How often should I rotate my cheap prepper supplies?
    A: For food and water, a “first in, first out” (FIFO) system is best. Aim to consume and replace items with shorter shelf lives (e.g., canned goods) every 6-12 months. For long-term staples, check them annually. Non-food items like batteries should be checked every 6 months, and first aid supplies should be inspected for expiration dates regularly.
  • Humid vs Dry Cold Storage for Food Preservation: How to Set Up Both in Your Basement or Root Cellar

    Humid vs Dry Cold Storage for Food Preservation: How to Set Up Both in Your Basement or Root Cellar

    Humid vs Dry Cold Storage for Food Preservation: How to Set Up Both in Your Basement or Root Cellar

    For the serious prepper, homesteader, or gardener, extending the shelf life of your harvest beyond a few weeks is paramount. While canning, freezing, and dehydrating are excellent methods, nothing quite matches the simplicity and energy efficiency of cold storage for many types of produce. However, the common misconception is that a single cold, dark room will suffice for all your storage needs. The truth is, optimal food preservation hinges on understanding the critical differences between humid vs dry cold storage food preservation. Attempting to store onions, carrots, and apples in the same environment is a recipe for premature spoilage. This guide will walk you through setting up distinct humid and dry cold storage zones in your basement or root cellar, ensuring your bounty lasts longer and retains its quality.

    Related TacticalProof reading: How to Build a Bushcraft Meat Smoker in the Wild: Pit, Tripod, and Teepee Designs | How to Build a Root Cellar on a Budget: 5 DIY Designs Under $500 | How to Make Pemmican: The Ultimate Survival Food That Lasts for Years

    Why One Cold Storage Room Isn’t Enough: Humidity Requirements by Crop

    Imagine a carrot and an onion. Both are root vegetables (though onions are bulbs), but their biological makeup and storage needs are vastly different. A carrot is primarily water, and its goal in storage is to retain that moisture. An onion, on the other hand, needs to be kept dry to prevent sprouting and rot. This fundamental difference highlights why a ‘one-size-fits-all’ approach to cold storage is ineffective.

    Most produce continues to respire and transpire (lose moisture) after harvest. The rate at which this happens is heavily influenced by temperature and humidity. High humidity environments (90-95% Relative Humidity or RH) are crucial for root crops, leafy greens, and some fruits to prevent shriveling, wilting, and moisture loss. These items thrive when their environment mimics the cool, damp soil they grew in.

    Conversely, low humidity environments (60-75% RH) are essential for alliums (onions, garlic), winter squash, and sweet potatoes. These crops require good air circulation and drier conditions to prevent mold, rot, and premature sprouting. Excess moisture in their storage environment can quickly turn a healthy harvest into a spoiled mess.

    Understanding these distinct needs is the first step toward maximizing your food preservation efforts and minimizing waste. By creating separate zones, you can cater to the specific demands of each crop, significantly extending their viability.

    Ideal Conditions Chart: Temperature and Humidity for 30+ Common Stored Foods

    To effectively plan your cold storage setup, you need precise targets. The following chart provides ideal temperature and humidity ranges for a wide variety of common garden produce. Use this as your primary reference when designing your humid and dry cold storage zones.

    Food Item Ideal Temp (°F / °C) Ideal Humidity (RH%) Storage Type
    Apples 30-32°F / -1-0°C 90-95% Humid
    Beets 32-35°F / 0-2°C 90-95% Humid
    Cabbage 32-35°F / 0-2°C 90-95% Humid
    Carrots 32-35°F / 0-2°C 90-95% Humid
    Celery 32-35°F / 0-2°C 90-95% Humid
    Pears 30-32°F / -1-0°C 90-95% Humid
    Potatoes (late season) 38-40°F / 3-4°C 90-95% Humid
    Turnips 32-35°F / 0-2°C 90-95% Humid
    Parsnips 32-35°F / 0-2°C 90-95% Humid
    Rutabagas 32-35°F / 0-2°C 90-95% Humid
    Kohlrabi 32-35°F / 0-2°C 90-95% Humid
    Leeks 32-35°F / 0-2°C 90-95% Humid
    Radishes (winter) 32-35°F / 0-2°C 90-95% Humid
    Jerusalem Artichokes 32-35°F / 0-2°C 90-95% Humid
    Celeriac 32-35°F / 0-2°C 90-95% Humid
    Onions (cured) 40-50°F / 4-10°C 60-75% Dry
    Garlic (cured) 40-50°F / 4-10°C 60-75% Dry
    Winter Squash 50-55°F / 10-13°C 60-75% Dry
    Pumpkins 50-55°F / 10-13°C 60-75% Dry
    Sweet Potatoes (cured) 55-60°F / 13-16°C 80-90% Slightly Humid/Warm Dry
    Herbs (dried) Room Temp <60% Dry (Ambient)
    Dry Beans/Grains Room Temp <60% Dry (Ambient)
    Canned Goods Room Temp <60% Dry (Ambient)
    Eggs 30-32°F / -1-0°C 70-80% Humid (Fridge)
    Citrus Fruits 40-50°F / 4-10°C 85-90% Humid
    Pomegranates 32-40°F / 0-4°C 90-95% Humid
    Quince 32-40°F / 0-4°C 90-95% Humid
    Cranberries 32-35°F / 0-2°C 90-95% Humid
    Cured Meats 50-60°F / 10-16°C 60-70% Dry
    Nuts (in shell) 32-40°F / 0-4°C 60-70% Dry

    Note on Sweet Potatoes: While they prefer a slightly higher humidity than other ‘dry’ items, their ideal temperature is significantly warmer than typical humid cold storage. This often means they need their own dedicated zone or to be stored in a warmer, slightly humid part of the dry zone.

    How to Create a Humid Cold Storage Zone (90-95% RH) for Root Crops and Leafy Greens

    The goal here is to replicate the cool, damp conditions of undisturbed soil. This zone is ideal for carrots, beets, parsnips, turnips, potatoes, cabbage, apples, and pears. Achieving high humidity while maintaining low temperatures requires careful planning and execution.

    1. Location and Insulation

    • Choose the Coolest Spot: In a basement, this is often an interior corner, away from heat sources like furnaces or water heaters, and preferably against an exterior wall that is below grade. For a true root cellar, subterranean placement is inherent.
    • Vapor Barrier is Key: To maintain high humidity within the zone and prevent moisture migration into other areas or structural elements, a robust vapor barrier is essential. Use 6-mil polyethylene sheeting on the warm side of any insulation (i.e., towards the living space if partitioning a basement).
    • Insulate Walls and Ceiling: Rigid foam insulation (XPS or EPS) is excellent for this. Aim for R-value appropriate for your climate, typically R-10 to R-20. Seal all seams with foil tape and caulk. If you have an earthen root cellar, the earth itself provides insulation, but you may still need to insulate the door and any vents.
    • Flooring: An earthen floor is ideal as it naturally contributes to humidity. If you have a concrete floor, you can cover a section with a layer of sand or gravel that can be periodically dampened. Ensure proper drainage if you plan to introduce significant moisture.

    2. Humidity Generation and Retention

    • Damp Media Storage: This is the most effective method for root crops. Layer vegetables in bins or barrels with damp sand, sawdust, peat moss, or even shredded newspaper. The medium should be moist but not soaking wet. Check periodically and re-dampen as needed.
    • Water Trays/Wet Burlap: Place shallow trays of water on the floor or hang wet burlap sacks. The evaporation will increase ambient humidity.
    • Misting: A hand mister can be used periodically to lightly mist the air or the storage media, especially if you notice produce beginning to shrivel.
    • Minimal Ventilation: Unlike dry storage, humid storage requires less air exchange to retain moisture. A small, adjustable vent to the outside or another cool area can help regulate temperature, but keep it mostly closed to maintain humidity.

    3. Storage Methods for Specific Crops

    • Root Vegetables (Carrots, Beets, Parsnips): Trim tops, but leave about an inch of stem. Do not wash. Layer in damp sand or sawdust in sturdy bins. Ensure no roots are touching each other.
    • Potatoes: Cure for 1-2 weeks at 50-60°F (10-16°C) and high humidity before storing. Store in open crates or burlap sacks, away from apples (apples release ethylene gas which can cause potatoes to sprout). Keep them in the dark to prevent greening.
    • Cabbage: Store whole heads on shelves or hang them by their roots. You can also wrap them in newspaper or plastic wrap to retain moisture.
    • Apples & Pears: Store individually wrapped in newspaper to prevent ethylene gas from affecting other fruits and to contain any rot. Place in shallow crates.

    Safety Warning: High humidity environments can be prone to mold and mildew. Ensure good air circulation within the storage containers (e.g., perforated bins, not sealed plastic bags) and regularly inspect produce for spoilage. Remove any rotting items immediately.

    3
    3. Storage Methods for Specific Crops: 3.

    How to Create a Dry Cold Storage Zone (60-75% RH) for Onions, Garlic, and Squash

    This zone prioritizes air circulation and lower humidity to prevent rot and sprouting. It’s perfect for cured onions, garlic, winter squash, pumpkins, and sweet potatoes.

    1. Location and Insulation

    • Choose a Slightly Warmer Spot: This zone can be in a slightly warmer part of your basement or root cellar, as many of these items prefer temperatures in the 40-55°F (4-13°C) range.
    • Good Airflow is Paramount: Unlike humid storage, you want to encourage air movement. If partitioning, ensure your walls allow for some air exchange or incorporate vents.
    • Insulation: While insulation helps stabilize temperature, a vapor barrier is less critical than in the humid zone, and in some cases, you might want a more breathable wall to help dissipate moisture. However, if sharing a wall with the humid zone, ensure that wall is properly sealed on the humid side.
    • Flooring: A concrete floor is perfectly acceptable here. Avoid introducing additional moisture.

    2. Humidity Reduction and Air Circulation

    • Curing is Crucial: Before storing, all onions, garlic, and winter squash must be properly cured. This involves drying them in a warm, well-ventilated area for several weeks until their outer skins are dry and papery (onions/garlic) or their rinds are hard (squash). This step is non-negotiable for long-term storage.
    • Excellent Ventilation: This is the cornerstone of dry cold storage. Install intake and exhaust vents, ideally on opposite sides of the room, to create a cross-breeze. Consider a small, low-speed fan to aid air circulation, especially if natural airflow is limited.
    • Elevated Storage: Never store these items directly on the floor. Use slatted shelves, mesh bags, or hang them to allow air to circulate all around the produce.
    • Avoid Overcrowding: Give each item space. Overcrowding restricts airflow and creates microclimates of higher humidity, encouraging spoilage.

    3. Storage Methods for Specific Crops

    • Onions & Garlic: After curing, store in mesh bags, old pantyhose (tied between each bulb), or braided and hung from the ceiling. This allows maximum air circulation. Ensure they are completely dry before storing. This is how to store onions long term effectively.
    • Winter Squash & Pumpkins: Store on sturdy shelves, ideally on a layer of cardboard or straw to prevent direct contact with the shelf surface. Do not stack them too high. Keep stems intact.
    • Sweet Potatoes: Cure for 1-2 weeks at 85-90°F (29-32°C) and 85-90% RH (a warm, humid room) immediately after harvest. After curing, store at 55-60°F (13-16°C) and 80-90% RH. This is a unique requirement, often needing a dedicated space or a warmer, slightly more humid corner of your dry storage.

    Safety Warning: While less prone to mold than humid storage, poor ventilation can still lead to issues. Regularly check for soft spots, mold, or sprouting. Proper curing is your first line of defense against spoilage.

    3
    3. Storage Methods for Specific Crops: 3.

    DIY Humidity Monitoring and Control on a Budget

    You don’t need expensive commercial equipment to manage your root cellar humidity control. Simple tools and techniques can be highly effective.

    1. Monitoring Tools

    • Hygrometers: These devices measure relative humidity. Digital hygrometers are inexpensive and generally more accurate than analog ones. Place one in each zone.
    • Thermometers: Essential for monitoring temperature. Many digital hygrometers also include a thermometer.
    • Calibration: Periodically check your hygrometer’s accuracy. The salt test (placing the hygrometer in a sealed bag with a capful of salt and a few drops of water) is a common DIY method to verify it reads around 75% RH.

    2. Increasing Humidity (for Humid Zone)

    • Water Trays: Shallow pans of water on the floor will evaporate and raise humidity. Add pebbles to increase surface area for evaporation.
    • Wet Burlap/Towels: Hang damp burlap sacks or towels. Re-wet as they dry out.
    • Damp Storage Media: As mentioned, using damp sand, peat moss, or sawdust for root crops directly contributes to the microclimate humidity.
    • Misting: A simple spray bottle can be used to mist the air or storage media periodically.

    3. Decreasing Humidity (for Dry Zone)

    • Improved Ventilation: The most effective method. Ensure adequate intake and exhaust vents. Consider a small exhaust fan on a timer.
    • Air Circulation: Use a small oscillating fan to keep air moving, preventing stagnant, humid pockets.
    • Desiccants (Use with Caution): Materials like calcium chloride (often sold as moisture absorbers) can reduce humidity. However, they are chemical and should be kept away from food. Silica gel packets can be used for very small, contained areas but are not practical for a whole room.
    • Avoid Water Sources: Ensure no leaky pipes or standing water in the dry zone.

    Partitioning a Single Basement into Dual Climate Zones

    Transforming a single basement into a sophisticated basement food storage setup with distinct humid and dry cold storage zones is achievable with some DIY effort. The key is creating effective barriers and managing air exchange.

    1. Planning and Layout

    • Identify Zones: Map out the coolest, most stable area for humid storage. The slightly warmer, better-ventilated area can be for dry storage.
    • Consider Access: Plan for easy access to both zones without compromising their respective climates.
    • Existing Features: Utilize existing walls, windows, or doors if possible.

    2. Constructing the Partition Walls

    • Temporary Solutions (for renters or short-term needs):
      • Heavy-Duty Plastic Sheeting: Use 6-mil polyethylene sheeting, creating a floor-to-ceiling barrier. Secure it tightly with furring strips, tape, and caulk to minimize air leakage. This is a budget-friendly option for a basic separation.
      • Rigid Foam Panels: Cut rigid foam insulation panels to fit between floor joists and against walls. Seal seams with foil tape. This offers better insulation than plastic sheeting.
    • Permanent Solutions (for homeowners):
      • Framed Walls: Construct standard 2×4 framed walls. For the humid zone, ensure a continuous vapor barrier (6-mil poly) on the warm side of the insulation (facing the rest of the basement). Fill cavities with batt insulation (fiberglass or rock wool). For the dry zone, insulation is still good for temperature stability, but the vapor barrier can be less critical or even omitted if you want some breathability, depending on your basement’s overall humidity.
      • Insulated Doors: Install solid, insulated doors for each zone. Weatherstrip all around the door frame to create a tight seal. An exterior-grade door is ideal for the humid zone.
      • Airlock/Vestibule: If space allows, creating a small antechamber or airlock between the main basement and the humid zone can further help stabilize conditions by preventing a direct rush of warmer, drier air when the door is opened.

    3. Managing Temperature and Ventilation Between Zones

    • Temperature Gradient: The humid zone will naturally be cooler. If your dry zone needs to be warmer (e.g., for sweet potatoes), you might need a small, low-wattage heater with a thermostat in that zone, or place it in a naturally warmer part of the basement.
    • Independent Ventilation: Each zone needs its own ventilation system.
      • Humid Zone: Minimal, controlled ventilation to the outside. A single intake and exhaust vent with dampers that can be mostly closed.
      • Dry Zone: More robust ventilation. Cross-ventilation with intake and exhaust vents, possibly aided by a small fan.
    • Sealing Penetrations: Seal all gaps around pipes, wires, and vents with expanding foam or caulk to prevent unwanted air and moisture transfer between zones.

    Safety Considerations: When working with electrical components (fans, heaters), ensure proper wiring and safety. If using rigid foam insulation, be aware of fire codes; some types require a thermal barrier (like drywall) over them. Always prioritize structural integrity and fire safety in your construction.

    FAQ: Your Cold Storage Questions Answered

    Can I use a regular refrigerator for cold storage?
    A regular refrigerator is typically too cold and too dry for many root vegetables (causing them to shrivel) and too humid for others like onions (causing them to rot). It’s best for short-term storage of most produce, but not ideal for long-term cold storage which requires specific, stable temperature and humidity ranges that a fridge doesn’t provide for bulk storage.
    How often should I check my stored produce?
    It’s advisable to check your stored produce at least once a week, or every few days for more perishable items. Remove any spoiled items immediately to prevent mold or rot from spreading to healthy produce. Early detection can save a significant portion of your harvest.
    Is ventilation really that important in a root cellar?
    Yes, ventilation is crucial, though its application differs between zones. In dry storage, it removes excess moisture and ethylene gas. In humid storage, minimal ventilation helps regulate temperature and prevents stale air, but it must be carefully managed to retain humidity. Proper air exchange prevents the buildup of gases that accelerate spoilage and inhibits mold growth.
    What’s the biggest mistake people make with cold storage?
    The most common mistake is assuming one environment fits all. Trying to store onions, carrots, and squash in the same conditions will lead to one or more spoiling prematurely. Understanding and creating distinct humid vs dry zones, tailored to specific crop needs, is the single most important factor for successful long-term cold storage.
    Can I use a dehumidifier in a dry cold storage zone?
    Yes, a small dehumidifier can be effective in a dry cold storage zone, especially in naturally damp basements. However, ensure it’s rated for the cool temperatures of your storage area (many household dehumidifiers struggle below 60°F/15°C) and monitor its operation to prevent over-drying, which can also be detrimental to some produce like sweet potatoes.

    Conclusion

    Mastering the art of cold storage for food preservation is a vital skill for anyone committed to self-sufficiency and reducing food waste. By understanding the distinct needs of your harvest and implementing dedicated humid and dry cold storage zones, you can significantly extend the life of your produce. Whether you’re building a dedicated root cellar or partitioning a section of your basement, the principles of temperature stability, humidity control, and proper ventilation remain paramount. Invest the time and effort now, and enjoy the fruits (and vegetables) of your labor for months to come, secure in the knowledge that your pantry is truly resilient.

  • How to Recondition Lead-Acid Batteries for Off-Grid Solar: Desulfation, Epsom Salt, and When to Replace

    How to Recondition Lead-Acid Batteries for Off-Grid Solar: Desulfation, Epsom Salt, and When to Replace

    How to Recondition Lead-Acid Batteries for Off-Grid Solar: Desulfation, Epsom Salt, and When to Replace

    how to recondition lead acid batteries is central to this guide. For anyone relying on an off-grid solar system, lead-acid batteries are the heart of your power storage. However, over time, these workhorses can lose their capacity, leaving you with less power and a looming replacement cost. The good news is that it’s often possible to extend their life. This comprehensive guide will show you how to recondition lead-acid batteries using various methods, including desulfation, Epsom salt treatments, and equalization charging, helping you maximize your investment and maintain reliable off-grid power.

    Why Lead-Acid Batteries Lose Capacity: Sulfation Explained in Plain English

    The primary culprit behind lead-acid battery degradation is a process called sulfation. When a lead-acid battery discharges, the sulfuric acid in the electrolyte reacts with the lead plates, forming lead sulfate. During recharging, this lead sulfate is typically converted back into lead and sulfuric acid, ready for the next cycle.

    However, if a battery is left in a discharged state for too long, or is consistently undercharged, the lead sulfate crystals can harden and grow on the battery plates. These hard crystals act as an insulator, preventing the electrolyte from reacting with the plate material. This reduces the battery’s active surface area, increases its internal resistance, and severely limits its ability to accept and hold a charge. In essence, the battery loses capacity because a significant portion of its plates becomes inactive.

    Common causes of sulfation include:

    • Undercharging: Not fully recharging the battery after use.
    • Deep Discharges: Regularly discharging the battery below 50% state of charge.
    • Sitting Discharged: Leaving a battery discharged for extended periods.
    • High Temperatures: Accelerates the sulfation process.

    Understanding sulfation is key to understanding why reconditioning methods work, as they all aim to reverse or mitigate this crystal buildup.

    Tools and Safety Gear You Need Before You Start

    Working with lead-acid batteries involves corrosive acid and explosive gases. Safety is paramount. Do not skip this section.

    Essential Safety Gear:

    • Safety Goggles/Face Shield: Protects eyes from acid splashes.
    • Acid-Resistant Gloves: Neoprene or rubber gloves are ideal.
    • Protective Apron/Old Clothes: To prevent acid damage to skin and clothing.
    • Adequate Ventilation: Batteries produce hydrogen gas during charging, which is highly flammable. Work in a well-ventilated area, preferably outdoors or in a garage with open doors.
    • Baking Soda and Water: A mixture to neutralize spilled acid. Keep it readily available.
    • First Aid Kit: For immediate response to any accidents.

    Required Tools and Materials:

    • Hydrometer: Essential for measuring the specific gravity of the electrolyte in each cell, indicating its state of charge and health.
    • Voltmeter/Multimeter: To measure battery voltage.
    • Smart Battery Charger: Ideally one with a desulfation or equalization mode.
    • Distilled Water: ONLY use distilled water for topping up electrolyte levels. Tap water contains minerals that can damage battery plates.
    • Epsom Salt (Magnesium Sulfate): For the Epsom salt reconditioning method.
    • Plastic Funnel and Syringe/Turkey Baster: For safely adding/removing electrolyte.
    • Battery Terminal Cleaner/Wire Brush: To clean corroded terminals.
    • Battery Terminal Puller (Optional): If terminals are stuck.
    • Load Tester (Optional but Recommended): For accurately assessing battery health after reconditioning.

    How to Recondition Lead-Acid Batteries for Off-Grid Solar: Desulfation, Epsom Salt, and When to Replace
    How to Recondition Lead-Acid Batteries for Off-Grid Solar: Desulfation, Epsom Salt, and When to Replace.

    Method 1: Epsom Salt Reconditioning Step by Step

    The Epsom salt method is a traditional, often last-ditch effort to revive severely sulfated batteries. It’s based on the idea that magnesium sulfate can help break down lead sulfate crystals. This method is more invasive and carries higher risks, so proceed with caution and only on batteries that are otherwise considered dead.

    Step-by-Step Process:

    1. Safety First: Don your safety gear (goggles, gloves, apron) and ensure you’re in a well-ventilated area.
    2. Clean and Inspect: Disconnect the battery from your system. Clean the battery terminals thoroughly with a wire brush. Inspect the battery case for any cracks, bulges, or leaks. If you find any, do not proceed; the battery is unsafe.
    3. Discharge the Battery: If the battery still holds some charge, discharge it safely using a small load (e.g., a 12V light bulb) until its voltage drops significantly (e.g., below 10.5V for a 12V battery). This minimizes the risk of acid overflow during the next steps.
    4. Remove Cell Caps: Carefully pry open the cell caps (vent caps) on top of the battery. Set them aside in a clean, safe place.
    5. Check Electrolyte Levels and Specific Gravity: Use your hydrometer to measure the specific gravity of each cell. Note down the readings. Severely sulfated cells will likely show very low and inconsistent readings.
    6. Prepare Epsom Salt Solution: Mix 1 cup (approximately 240g) of pure Epsom salt (magnesium sulfate) with 1 gallon (approximately 3.8 liters) of hot distilled water. Stir until the salt is completely dissolved.
    7. Remove Some Electrolyte: Using your syringe or turkey baster, carefully remove about 1/3 to 1/2 of the existing electrolyte from each cell. Be extremely careful not to spill acid. Dispose of the removed acid properly according to local regulations (often by neutralizing with baking soda and then disposing).
    8. Add Epsom Salt Solution: Slowly and carefully pour the warm Epsom salt solution into each cell using a plastic funnel, filling it to the normal electrolyte level (usually just above the plates). Do not overfill.
    9. Charge Slowly: Connect your smart charger and set it to a low amperage (e.g., 2-5 amps for a typical deep cycle battery). Charge the battery for 24-48 hours, or until the voltage stabilizes and the specific gravity readings improve.
    10. Monitor and Repeat (if necessary): After the initial charge, let the battery rest for a few hours. Re-check the specific gravity of each cell. If readings have improved but are not yet optimal, you can try another slow charge cycle. Some recommend a series of charge/discharge cycles (using a small load) to help break down the crystals further.
    11. Final Check and Top-Up: Once you’re satisfied with the specific gravity readings (aim for consistent readings around 1.265 for a fully charged cell), replace the cell caps. If electrolyte levels are low, top up ONLY with distilled water.

    Warning: This method is not guaranteed to work and can sometimes damage the battery further if not done correctly. It’s most effective on batteries with mild to moderate sulfation, not those with physically damaged plates or shorted cells.

    Method 2: Equalization Charging with a Smart Charger

    Equalization charging is a controlled overcharge that helps to remove soft sulfation and balance the specific gravity and voltage across all cells in a battery bank. It’s a standard maintenance procedure for flooded lead-acid batteries and is less invasive than the Epsom salt method.

    What is Equalization?

    During normal operation, individual cells within a battery can become slightly unbalanced due to manufacturing variations, temperature differences, or uneven discharge. Equalization brings all cells to a uniform, fully charged state by applying a higher voltage (typically 15-16V for a 12V battery) for a controlled period. This causes the electrolyte to bubble vigorously, which helps to dislodge lead sulfate crystals from the plates and mix the electrolyte, preventing stratification (where the acid settles at the bottom).

    When to Equalize:

    • Regular Maintenance: Many manufacturers recommend equalizing flooded lead-acid batteries monthly or quarterly, especially in off-grid systems.
    • After Deep Discharge: If the battery has been deeply discharged and not fully recharged promptly.
    • Inconsistent Hydrometer Readings: If specific gravity readings vary significantly between cells.
    • Low Specific Gravity: If the overall specific gravity is consistently low even after a full charge.

    Step-by-Step Process:

    1. Safety First: Ensure excellent ventilation. Hydrogen gas is produced during equalization. Wear safety goggles and gloves.
    2. Check Electrolyte Levels: Before starting, check the electrolyte levels in all cells. If any are low, top up ONLY with distilled water to just above the plates. Do not overfill, as bubbling will occur.
    3. Disconnect Loads: Disconnect all loads from the battery bank to prevent damage from the higher equalization voltage.
    4. Connect Smart Charger: Connect your smart charger or charge controller (if it has an equalization feature) to the battery.
    5. Initiate Equalization: Follow your charger’s instructions to start the equalization cycle. Most modern chargers have an automatic equalization mode.
    6. Monitor Temperature: Keep an eye on the battery’s temperature. If it gets excessively hot to the touch, stop the equalization immediately.
    7. Observe Gassing: You should see vigorous bubbling in all cells. This indicates the process is working.
    8. Monitor Specific Gravity: Periodically check the specific gravity of each cell. The equalization is complete when the specific gravity readings stop rising for several consecutive readings (e.g., every hour). This usually takes 1-4 hours, but can vary.
    9. Terminate and Reconnect: Once complete, terminate the equalization cycle, allow the battery to rest for an hour, and then reconnect your loads.


    Practical Tip: Equalization is most effective for preventing and reversing soft sulfation. It’s a crucial part of off-grid battery maintenance.

    Method 3: Pulse Desulfation Devices – Do They Actually Work?

    Pulse desulfation devices are electronic gadgets that claim to reverse sulfation by sending high-frequency, low-amperage pulses through the battery. The theory is that these pulses resonate with the lead sulfate crystals, causing them to break down and convert back into active material.

    How They Work (The Theory):

    These devices typically connect directly to the battery terminals and operate continuously or during charging. They emit short, high-frequency electrical pulses designed to shatter the crystalline structure of the lead sulfate, allowing it to re-dissolve into the electrolyte.

    Effectiveness and Reality:

    • Preventative vs. Curative: Pulse desulfators are generally more effective as a preventative measure or for treating mild, newly formed sulfation. When used regularly on healthy batteries, they might help extend life by preventing hard sulfation from forming.
    • Limited Success on Hard Sulfation: For batteries with severe, long-standing hard sulfation, their effectiveness is often limited. The energy in the pulses may not be sufficient to break down large, dense crystals.
    • Not a Magic Bullet: Don’t expect a pulse desulfator to revive a truly dead battery with shorted cells or physically damaged plates. They cannot repair internal damage.
    • Best Used in Conjunction: Some users report better results when using a pulse desulfator in conjunction with a smart charger that has a desulfation mode, or after an equalization charge.

    While anecdotal evidence varies, scientific studies on their efficacy are mixed. If you choose to use one, consider it an investment in preventative maintenance rather than a guaranteed fix for a severely degraded battery.

    How to Test Whether Your Reconditioned Battery Is Worth Keeping

    After investing time and effort into reconditioning, it’s crucial to objectively assess if the battery has genuinely improved and is reliable enough for your off-grid system. Don’t rely solely on voltage readings; a battery can show good voltage but have no capacity.

    Key Testing Methods:

    1. Specific Gravity Test (Hydrometer):
      • Procedure: After the battery has rested for at least 4-6 hours post-charge, use a hydrometer to measure the specific gravity of each cell.
      • Interpretation: For a fully charged flooded lead-acid battery, readings should be consistent across all cells, typically between 1.265 and 1.280 (check your battery’s specifications). Inconsistent readings (a difference of 0.050 or more between cells) indicate an issue, possibly a weak or shorted cell.
    2. Open Circuit Voltage Test (Multimeter):
      • Procedure: After the battery has rested for at least 12-24 hours (to allow surface charge to dissipate), measure the voltage across the terminals with a multimeter.
      • Interpretation: A healthy, fully charged 12V battery should read around 12.6V to 12.8V. While this indicates charge, it doesn’t tell you about capacity.
    3. Load Test (Battery Load Tester or Known Load):
      • Procedure: The most accurate way to assess capacity. Use a dedicated battery load tester (which applies a specific resistive load for a short period) or connect a known, constant load (e.g., an inverter powering a 100W light bulb) to the battery. Monitor the voltage drop under load.
      • Interpretation: A healthy battery should maintain its voltage above a certain threshold (e.g., 10.5V for a 12V battery) for the specified duration of the load test. A rapid voltage drop indicates poor capacity. For a more precise capacity test, discharge the battery with a known load (e.g., 10A) and time how long it takes to reach 50% depth of discharge (DoD). Compare this to the battery’s rated capacity.
    4. Internal Resistance Test (Advanced Multimeter/Tester):
      • Procedure: Some advanced battery testers can measure internal resistance.
      • Interpretation: A high internal resistance indicates sulfation or other internal damage, reducing the battery’s ability to deliver current.

    How to Recondition Lead-Acid Batteries for Off-Grid Solar: Desulfation, Epsom Salt, and When to Replace
    How to Recondition Lead-Acid Batteries for Off-Grid Solar: Desulfation, Epsom Salt, and When to Replace.

    Conclusion: If your reconditioned battery shows significantly improved and consistent specific gravity readings, holds a stable open-circuit voltage, and performs reasonably well under a load test, it might be worth keeping. However, if it only shows marginal improvement or still has inconsistent cell readings, its reliability for critical off-grid use is questionable.

    When to Stop Wasting Time and Replace the Battery

    While reconditioning can extend battery life, there comes a point when the effort outweighs the benefit, or the battery simply cannot be saved. Knowing when to replace is crucial for the reliability and safety of your off-grid system.

    Clear Signs of Irreparable Damage:

    • Bulging or Swollen Case: This indicates severe internal pressure, often due to overheating, overcharging, or internal short circuits. A bulging battery is extremely dangerous and should be replaced immediately.
    • Cracked or Leaking Case: Any visible cracks or electrolyte leaks mean the battery is compromised and unsafe. The acid is corrosive, and the battery’s internal structure is likely damaged.
    • Persistent Low Specific Gravity in One Cell: If, after multiple reconditioning attempts and equalization charges, one or more cells consistently show significantly lower specific gravity readings compared to others, it’s a strong indicator of a shorted cell or permanent internal damage. This cell will drag down the performance of the entire battery.
    • Inability to Hold a Charge: If the battery quickly loses voltage after being charged, or cannot hold a significant load for more than a very short period, its capacity is likely too degraded to be useful.
    • Excessive Heat During Charging: While some warmth is normal, if the battery becomes excessively hot to the touch during charging, it indicates high internal resistance and potential internal damage. This is a fire hazard.
    • Visible Plate Damage: If you can see warped, corroded, or crumbling plates through the cell openings, the battery is beyond repair.
    • Battery Age: Even with perfect maintenance, lead-acid batteries have a finite lifespan (typically 5-10 years for deep cycle batteries, depending on type and usage). If your battery is well past its expected cycle life, replacement is often the most practical solution.

    Cost-Benefit Analysis:

    Consider the time, effort, and cost of reconditioning attempts versus the cost of a new battery. For critical off-grid applications, reliability is paramount. A battery that has been extensively reconditioned but still shows signs of weakness might leave you without power when you need it most. Sometimes, the peace of mind and guaranteed performance of a new battery are worth the investment.

    Proper disposal of old lead-acid batteries is also important. They contain hazardous materials and should be recycled at designated battery recycling centers.

    Frequently Asked Questions (FAQ)

    Q: Is Epsom salt safe for all types of lead-acid batteries?
    A: The Epsom salt method is primarily intended for flooded (wet cell) lead-acid batteries, which allow access to the electrolyte. It is NOT recommended for sealed batteries like AGM (Absorbed Glass Mat) or Gel batteries, as you cannot access or replace their electrolyte, and attempting to do so can damage them or make them unsafe.
    Q: How often should I equalize my off-grid flooded lead-acid batteries?
    A: For off-grid systems, equalization is often recommended monthly or quarterly, especially if you regularly experience deep discharges or notice inconsistent specific gravity readings. Always refer to your battery manufacturer’s guidelines, as recommendations can vary.
    Q: Can I recondition a completely dead battery (0 volts)?
    A: A battery reading 0 volts likely has a shorted cell or severe internal damage, making it extremely difficult, if not impossible, to recondition successfully. Most chargers won’t even attempt to charge a battery with such low voltage. While some extreme methods exist, the success rate is very low, and it’s often safer and more practical to replace it.
    Q: What’s the difference between soft and hard sulfation?
    A: Soft sulfation consists of newly formed, small lead sulfate crystals that are relatively easy to break down and convert back into active material through equalization charging or gentle desulfation. Hard sulfation involves larger, dense, and more stubborn crystals that have been present for a longer time. These are much harder to remove and often require more aggressive methods like the Epsom salt treatment, with a lower chance of full recovery.
    Q: Will reconditioning restore my battery to 100% of its original capacity?
    A: In most cases, no. Reconditioning aims to recover a significant portion of lost capacity, but it’s rare to restore a degraded battery to its original, brand-new performance. The goal is to extend its useful life and improve its reliability, not to make it new again.
  • GMRS vs Ham Radio for Preppers: Which License-Free or Licensed Radio Should You Buy First?

    GMRS vs Ham Radio for Preppers: Which License-Free or Licensed Radio Should You Buy First?

    GMRS vs Ham Radio for Preppers: Which License-Free or Licensed Radio Should You Buy First?

    Related TacticalProof reading: How to Set Up Meshtastic for Off-Grid Communication: A Prepper’s Complete Guide | How to Build a DIY Solar Still for Emergency Water Purification: Ground, Box, and Pit Designs | How to Build a Faraday Cage from a Trash Can: Step-by-Step EMP Protection

    Why Every Prepper Needs a Communication Plan Beyond Cell Phones

    GMRS vs ham radio preppers is central to this guide. In an increasingly interconnected yet fragile world, relying solely on cellular networks for communication is a gamble no serious prepper should take. Natural disasters, widespread power outages, cyberattacks, or even localized emergencies can render cell towers inoperable, leaving you and your loved ones isolated. When the grid goes down, your smartphone becomes an expensive paperweight. This stark reality underscores the critical need for a robust, off-grid communication plan.

    A comprehensive prepper communication strategy isn’t just about having a radio; it’s about having redundant systems that can function independently of commercial infrastructure. It’s about maintaining contact with your family, coordinating with your community, and accessing vital information when traditional channels fail. For many, the initial dive into emergency radio communication often leads to a fundamental question: GMRS vs ham radio for preppers – which is the right starting point, and how do they fit into a larger survival strategy?

    This article will dissect both GMRS (General Mobile Radio Service) and Ham Radio (Amateur Radio Service), comparing their strengths, weaknesses, and ideal use cases for preppers. We’ll explore licensing, range, cost, and usability, ultimately guiding you toward building a layered communication stack that ensures you’re never truly disconnected.

    GMRS Explained: No-Test Licensing, Range Limits, and Repeater Access

    The General Mobile Radio Service (GMRS) is an excellent entry point for preppers seeking reliable, short-to-medium range communication without the steep learning curve or testing requirements of amateur radio. Think of GMRS as a step up from basic FRS (Family Radio Service) walkie-talkies, offering more power and the crucial ability to use repeaters.

    No-Test Licensing: Easy Entry for the Whole Family

    One of GMRS’s most significant advantages for preppers is its straightforward licensing process. Unlike ham radio, there’s no exam to pass. You simply apply for a license from the Federal Communications Commission (FCC) online, pay a fee (currently $35, valid for 10 years), and you’re good to go. Crucially, a single GMRS license covers you and your immediate family members, making it incredibly practical for family preparedness plans. This means your spouse, children, and even grandparents can legally operate GMRS radios under your license.

    Equipment and Power: More Punch Than FRS

    GMRS radios operate on UHF (Ultra High Frequency) bands, specifically between 462 MHz and 467 MHz. While some channels are shared with FRS radios, GMRS allows for significantly higher power output:

    • Handheld Radios (HTs): Typically up to 5 watts.
    • Mobile Radios (Vehicle-mounted): Up to 50 watts.
    • Base Stations (Home-mounted): Up to 50 watts.

    This increased power, especially from mobile and base units with external antennas, translates directly into greater range and reliability compared to the 2-watt limit of FRS radios. You can find a wide array of GMRS-specific radios, from rugged handhelds to powerful mobile units designed for vehicles or fixed installations.

    Range Limits: Line-of-Sight with a Repeater Boost

    Like all UHF radio services, GMRS is primarily line-of-sight (LOS). This means its range is heavily influenced by terrain, obstacles (buildings, hills, dense foliage), and antenna height. Typical ranges you can expect:

    • Handhelds (HTs) in urban/suburban areas: 1-5 miles.
    • Handhelds (HTs) in open terrain: 5-10 miles.
    • Mobile/Base with external antenna: 10-30+ miles, depending on antenna height and local topography.

    However, the game-changer for GMRS is repeater access. GMRS repeaters are privately owned stations, often located on high points, that receive signals on one frequency and re-transmit them on another. This effectively extends the communication range dramatically, often covering entire counties or regions. Accessing a repeater requires a radio capable of transmitting and receiving on different frequencies (duplex operation) and knowing the repeater’s input/output frequencies and tone (CTCSS/DCS) codes. Many repeaters are open for public use, while others may require permission or a small donation to the owner.

    Practical Tip: Before an emergency, identify and program local GMRS repeaters into your radios. Websites like MyGMRS.com are excellent resources for finding repeaters in your area.

    Range Limits: Line-of-Sight with a Repeater Boost
    Range Limits: Line-of-Sight with a Repeater Boost: Range Limits: Line-of-Sight with a Repeater Boost.

    Pros and Cons for Preppers:

    • Pros:
      • Easy, no-test licensing for the entire family.
      • Relatively inexpensive equipment.
      • Good for local, family, and neighborhood communication.
      • Repeater access significantly extends range.
      • Simple to operate for non-technical users.
    • Cons:
      • Limited frequency spectrum compared to ham radio.
      • Range is still primarily line-of-sight without repeaters.
      • Not designed for long-distance or inter-state communication.
      • Less power and fewer features than many ham radios.

    Ham Radio Explained: What the Technician License Gets You

    Amateur Radio, affectionately known as Ham Radio, is the gold standard for resilient, self-sufficient communication. It’s a hobby, a service, and a vital tool for emergency preparedness, offering unparalleled versatility and global reach. While it requires more commitment than GMRS, the rewards for preppers are immense.

    The Technician License: Your Gateway to the Airwaves

    To operate a ham radio, you must pass an exam administered by volunteer examiners. The entry-level license is the Technician Class license. This exam covers basic electronics, radio theory, operating practices, and FCC rules. While it requires some study, it’s entirely achievable for anyone willing to put in the effort. Many free online resources, study guides, and practice tests are available (e.g., HamStudy.org). Once you pass, your license is valid for 10 years and can be renewed without retesting.

    Unlike GMRS, each individual operator must hold their own ham radio license. There is no “family license” for ham radio.

    Privileges and Frequencies: Beyond Line-of-Sight

    The Technician license grants you privileges on a wide array of frequencies, primarily in the VHF (Very High Frequency) and UHF bands, similar to GMRS. This means you can use handhelds, mobile radios, and base stations for local and regional communication, including access to a vast network of ham radio repeaters. These repeaters are often linked, allowing for communication across much larger areas than GMRS repeaters typically cover.

    However, the Technician license also grants you limited privileges on certain HF (High Frequency) bands. While primarily for digital modes (like FT8, JS8Call) and Morse code (CW), it also allows for some voice operation on 10 meters. This is where ham radio truly distinguishes itself: HF bands are capable of long-distance (DX) communication, bouncing signals off the ionosphere to reach across continents, even globally, without relying on repeaters or satellites. This capability is absolutely critical for grid-down, long-term survival scenarios.

    Equipment and Power: A World of Options

    Ham radio equipment ranges from inexpensive dual-band handhelds (HTs) to sophisticated multi-band, multi-mode base stations capable of thousands of watts. Power limits are significantly higher than GMRS:

    • VHF/UHF: HTs typically 5-8 watts, mobile/base 50-100 watts.
    • HF: Technician licensees have limited HF voice privileges on 10 meters (up to 200 watts PEP) and extensive digital/CW privileges on 80, 40, 15, and 10 meters (up to 200 watts PEP). General and Extra class licenses allow for even higher power and more HF bands, including global voice communication.

    The sheer variety of equipment and modes available to ham operators is staggering. Beyond voice, hams can transmit data, images, and even video. Digital modes like Winlink allow for email over radio, APRS (Automatic Packet Reporting System) provides real-time tracking and messaging, and Meshtastic (using LoRa technology) can create local mesh networks for off-grid data communication.

    Pros and Cons for Preppers:

    • Pros:
      • Unparalleled versatility and long-distance (HF) capabilities.
      • Access to a vast network of repeaters and emergency communication groups (ARES/RACES).
      • Digital modes for data, email, and tracking (Winlink, APRS, Meshtastic).
      • Higher power limits for greater range and reliability.
      • A deep well of knowledge and community support for self-sufficiency.
      • Can operate completely off-grid with solar/battery power.
    • Cons:
      • Requires passing an exam (Technician is entry-level).
      • Steeper learning curve for operation and theory.
      • Can be more expensive to get into, especially for HF.
      • Each operator requires their own license.
      • More complex equipment and programming.

    Practical Tip: Join a local amateur radio club. They offer classes, mentorship, and often have equipment to try out. This is invaluable for learning and staying current.

    Head-to-Head Comparison: Range, Cost, Learning Curve, and Family Usability

    To help you decide between GMRS and Ham radio, let’s break down the key differences that matter most to preppers.

    Range: Local vs. Global Potential

    • GMRS: Primarily local and regional. Handhelds typically 1-5 miles, mobile/base 10-30+ miles with good antenna placement. Repeaters significantly extend this, often covering a county or more. Excellent for neighborhood watch, family coordination within a specific area, or convoy communication.
    • Ham Radio (Technician): Local and regional on VHF/UHF, similar to GMRS but with access to a much larger, often linked, repeater network. Crucially, the Technician license also grants limited HF privileges, opening the door to inter-state and even international communication (though primarily digital/CW at this level). With a General or Extra license, global voice communication becomes standard.

    Cost: Entry-Level vs. Investment

    • GMRS: Generally lower entry cost. A license is $35 for 10 years (covers family). Decent handheld radios start around $30-$50. A good mobile radio might be $100-$200. Total initial setup for a family could be under $200.
    • Ham Radio (Technician): License exam fee is typically $10-$15. Handheld radios start around $30-$50 (e.g., Baofeng UV-5R). A quality dual-band mobile radio might be $200-$400. If you want to explore HF, even with Technician privileges, an HF transceiver can range from $500 to several thousand dollars, plus antennas and power supplies. The initial investment can be higher, but the capabilities are far greater.

    Learning Curve: Plug-and-Play vs. Dedicated Study

    • GMRS: Very low learning curve. Get your license, buy a radio, and you’re ready to talk. Programming repeaters might take a little effort, but basic operation is intuitive.
    • Ham Radio: Moderate to steep learning curve. Requires studying for and passing an exam. Understanding radio theory, operating procedures, and FCC regulations takes time. Programming radios, understanding antenna theory, and learning different modes of operation are ongoing processes. This is a hobby that rewards continuous learning.

    Family Usability: Shared vs. Individual Licenses

    • GMRS: One license covers an entire immediate family. This is a huge advantage for preppers who want to equip their whole household for emergency communication without individual testing.
    • Ham Radio: Each individual operator must obtain their own license. While this ensures a higher level of competency, it means every family member who wants to transmit must pass the Technician exam.

    Emergency Communication Focus:

    • GMRS: Ideal for localized emergencies, maintaining contact with immediate family, neighborhood watch, and short-range convoy communication. It’s quick to deploy and easy for everyone to use.
    • Ham Radio: Unmatched for comprehensive emergency communication. It provides local, regional, and potentially global reach. Ham operators are often integral to official emergency response networks (ARES/RACES) and can provide vital communication links when all else fails. Its ability to send data (Winlink) is a significant advantage for reporting and receiving information.

    Neither service is inherently “better” than the other; they serve different, complementary roles in a robust prepper communication plan.

    Building a Layered Prepper Communication Stack: GMRS + Ham + Meshtastic

    The most effective prepper communication plan is not about choosing one radio service over another, but about building a resilient, layered stack of communication tools. Each layer offers different capabilities, ranges, and redundancies, ensuring you have options no matter the scenario. Here’s how GMRS, Ham Radio, and other technologies like Meshtastic can integrate into a powerful system.

    Layer 1: Immediate & Local (FRS/GMRS)

    This is your primary layer for close-quarters communication with your immediate family or small group. Think of it as your “walkie-talkie” layer, but with more power and range than basic FRS.

    • Purpose: Intra-family communication, neighborhood watch, short-range convoy, bug-out bag comms.
    • Equipment: GMRS handheld radios (HTs), FRS radios (compatible with GMRS on shared channels).
    • Advantages: Easy to use, no test for GMRS license (family covered), readily available, quick deployment.
    • Range: 1-10 miles (HTs), up to 30+ miles with repeaters/mobile units.
    • Example: Coordinating tasks around your property, communicating between vehicles in a convoy, checking in with neighbors during a local power outage.
    Layer 1: Immediate & Local (FRS/GMRS)
    Layer 1: Immediate & Local (FRS/GMRS): Layer 1: Immediate & Local (FRS/GMRS).

    Layer 2: Extended Local & Regional (Ham Radio VHF/UHF)

    Once you’ve mastered GMRS, stepping up to Ham Radio Technician class opens up a much wider world of local and regional communication, often linking into established emergency networks.

    • Purpose: Wider community communication, accessing official emergency nets (ARES/RACES), regional coordination, longer-range local comms.
    • Equipment: Ham radio dual-band HTs, mobile radios, base stations.
    • Advantages: Access to a vast network of repeaters (often linked), higher power limits, more robust equipment, participation in organized emergency communication groups.
    • Range: 5-50+ miles (HTs/mobile), potentially hundreds of miles with linked repeaters.
    • Example: Participating in a county-wide emergency drill, communicating with a regional prepper group, monitoring local emergency broadcasts.

    Layer 3: Long-Distance & Global (Ham Radio HF)

    This is the ultimate layer for true grid-down resilience, offering communication capabilities that transcend local infrastructure.

    • Purpose: Inter-state and international communication, sending/receiving critical information when all other systems fail, independent of local infrastructure.
    • Equipment: HF transceiver, appropriate antennas (dipole, vertical, end-fed wire), power supply (battery/solar capable).
    • Advantages: Global reach, unaffected by local infrastructure failures, diverse modes (voice, digital, CW), self-sufficient.
    • Range: Hundreds to thousands of miles, globally.
    • Example: Contacting family members across the country, receiving intelligence from distant sources, sending email via Winlink when the internet is down. (Note: Technician license has limited HF privileges, General/Extra opens full HF voice).

    Layer 4: Digital & Data (Meshtastic, APRS, Winlink)

    Beyond voice, the ability to send and receive data off-grid is a game-changer for preppers. These technologies leverage radio waves for text, location, and even email.

    • Meshtastic: An open-source, decentralized mesh network using LoRa radio modules (often based on ESP32 microcontrollers). It allows for off-grid text messaging, GPS location sharing, and data transfer between nodes, creating a resilient local network without internet or cell service. Excellent for short-to-medium range, peer-to-peer data.
    • APRS (Automatic Packet Reporting System): A ham radio digital mode for real-time tactical digital communications. Used for tracking vehicles/people, sending short messages, weather data, and emergency alerts. Requires a ham license.
    • Winlink: A global email system that operates over radio. It allows licensed ham operators to send and receive email, files, and position reports without internet access, using HF or VHF/UHF radio. Invaluable for critical information exchange.

    Developing Your Prepper Communication Plan:

    1. Assess Your Needs: Who do you need to communicate with? How far away are they? What kind of information do you need to exchange?
    2. Identify Key Locations: Home, bug-out location, work, family members’ homes.
    3. Train Your Family: Everyone should know how to use the basic communication tools.
    4. Program Your Radios: Store essential frequencies, repeater information, and emergency channels.
    5. Practice Regularly: Conduct drills, participate in nets, and test your equipment.
    6. Define Protocols: Establish check-in times, call signs, and message formats.

    By integrating these layers, you create a robust, adaptable communication system that can withstand a wide range of emergencies, ensuring you and your group remain connected and informed.

    Recommended Starter Kits Under $150 for Each Radio Service

    Getting started in emergency radio doesn’t have to break the bank. Here are some solid, budget-friendly options for both GMRS and Ham radio, keeping the prepper in mind.

    GMRS Starter Kit (Under $150)

    This kit focuses on ease of use and family communication.

    • Radios (Choose one or two):
      • BaoFeng UV-5G or UV-9G (GMRS Specific): These are GMRS-certified versions of the popular UV-5R/UV-9R. They are affordable, dual-band (VHF/UHF), and can access GMRS frequencies legally. Expect to pay around $40-$60 per radio. (Note: A standard UV-5R is NOT GMRS certified and should not be used on GMRS frequencies for transmission, though it can receive them.)
      • Wouxun KG-805G: A step up in quality and GMRS-specific design. Excellent audio and build quality. Around $80-$100.
      • Midland GXT1000VP4 (Bubble Pack): While less powerful and versatile than the BaoFeng/Wouxun, these are very user-friendly, come in pairs, and are ready to go out of the box. Good for basic family use. Around $60-$80 for a pair.
    • Antenna Upgrade (Essential for HTs):
      • Nagoya NA-771G (GMRS Specific): A longer, more efficient antenna than the stock rubber ducky. Improves range significantly. Around $20.
    • Power/Charging:
      • Extra batteries or a 12V car charger are always a good idea.

    Total Estimated Cost: $60 – $150 (for one radio with antenna, or a basic pair of Midland radios).

    Safety Warning: Always ensure you are using GMRS-certified radios on GMRS frequencies. Using non-certified radios (like a standard Baofeng UV-5R) for transmission on GMRS is illegal and can result in fines.

    Ham Radio (Technician) Starter Kit (Under $150)

    This kit focuses on getting you on the air for local ham communication after you pass your Technician exam.

    • License Exam Fee: ~$10-$15.
    • Radio (Choose one):
      • BaoFeng UV-5R (Standard Dual-Band): The ubiquitous entry-level ham radio. Inexpensive, versatile, and a great learning platform. Around $30-$40.
      • Yaesu FT-4XR: A more robust, higher-quality alternative to the Baofeng, often considered a better long-term investment. Around $80-$100.
      • Anytone AT-D878UVII Plus (used): If you can find a used one in this price range, it offers DMR digital capabilities, which is a significant upgrade. New ones are over $200.
    • Antenna Upgrade (Essential for HTs):
      • Nagoya NA-771 (Ham Specific): A longer, more efficient antenna for VHF/UHF ham bands. Improves range significantly. Around $20.
    • Programming Cable:
      • A USB programming cable (e.g., CHIRP compatible) is essential for easily programming frequencies and repeaters into your radio. Around $10-$15.
    • Study Material:
      • ARRL Ham Radio License Manual or free online resources like HamStudy.org.

    Total Estimated Cost: $70 – $150 (including exam fee, radio, antenna, and cable).

    Practical Tip: Once you have your ham radio, learn to program it manually, but also use software like CHIRP with a programming cable. This makes managing frequencies and repeaters much easier.

    FAQ: GMRS vs Ham Radio for Preppers

    Can GMRS and Ham radios talk to each other?
    No, not directly and legally. GMRS and Ham radio operate on different frequency allocations and under different regulations. While some dual-band ham radios can technically transmit on GMRS frequencies (and vice-versa for some GMRS radios on ham frequencies), doing so is illegal unless the radio is specifically certified for both services and you hold the appropriate license for the service you are transmitting on. It’s best practice to keep them separate to avoid legal issues and ensure proper operation.
    Is a GMRS license really necessary?
    Yes, absolutely. While many people operate GMRS radios without a license, it is illegal to transmit on GMRS frequencies without one. The FCC can issue significant fines for unlicensed operation. The license is inexpensive ($35 for 10 years and covers your entire immediate family) and easy to obtain online, so there’s no good reason not to get one. It ensures you’re operating legally and responsibly.
    What’s the absolute best radio for a prepper?
    There isn’t one “best” radio; it depends on your specific needs, budget, and commitment to learning. For simple, family-wide local communication, GMRS is often the best starting point. For comprehensive, long-range, and data-capable emergency communication, a ham radio (especially with HF capabilities) is superior. The truly “best” solution for a prepper is a layered communication plan that incorporates multiple radio services, leveraging the strengths of each.
    How do I find local repeaters for GMRS and Ham radio?
    For GMRS repeaters, MyGMRS.com is an excellent resource. You can search by location and find repeater details. For Ham radio repeaters, resources like RepeaterBook.com or the ARRL Repeater Directory are invaluable. Many local ham radio clubs also maintain lists of repeaters in their area. Always verify repeater status and access tones before relying on them.
    Can I use a Baofeng UV-5R for both GMRS and Ham?
    A standard Baofeng UV-5R is certified for Amateur Radio use, not GMRS. While it can be programmed to transmit on GMRS frequencies, doing so is illegal as it lacks GMRS certification. To legally operate on GMRS, you need a GMRS-certified radio (like a Baofeng UV-5G or UV-9G, or a Wouxun KG-805G). For ham radio, a standard UV-5R is perfectly legal once you have your Technician license.
  • How to Make Pine Needle Tea: Identification, Foraging, and Brewing for Survival Vitamin C

    How to Make Pine Needle Tea: Identification, Foraging, and Brewing for Survival Vitamin C

    How to Make Pine Needle Tea: Identification, Foraging, and Brewing for Survival Vitamin C

    In a survival scenario, access to essential nutrients can quickly become a matter of life and death. Among the most critical is Vitamin C, a deficiency of which leads to scurvy – a debilitating and potentially fatal condition. While citrus fruits are often our go-to source, they are rarely available in the wilderness. This is where the humble pine tree becomes an invaluable ally. Learning how to make pine needle tea is a fundamental survival skill, offering a potent, readily available source of Vitamin C and other beneficial compounds.

    This comprehensive guide will equip you with the knowledge to confidently identify safe pine species, responsibly forage their needles, and brew a life-sustaining tea. We’ll delve into the nuances of preparation, compare its nutritional value to common sources, and explore other medicinal applications, ensuring you’re prepared to harness the power of the forest’s natural pharmacy.

    Related TacticalProof reading: How to Brain Tan a Deer Hide Into Buckskin: The Complete Bushcraft Guide | The 10-Item Minimalist Bushcraft Kit: What to Carry When You Want to Carry Almost Nothing

    Why Pine Needle Tea Matters in a Survival Scenario

    Imagine being stranded, far from civilization, with limited supplies. Days turn into weeks, and your body begins to show signs of distress: fatigue, muscle weakness, joint pain, and bleeding gums. These are classic symptoms of scurvy, a disease caused by severe Vitamin C deficiency. Without Vitamin C, the body cannot produce collagen, a vital protein for connective tissues, wound healing, and maintaining blood vessel integrity.

    In a survival context, scurvy is a death sentence. It impairs your ability to perform essential tasks, makes you susceptible to infection, and ultimately leads to organ failure. This is precisely why pine needle tea is not just a pleasant beverage but a critical survival tool. Pine trees are ubiquitous across many temperate and boreal regions, making their needles an accessible and renewable resource year-round.

    Beyond its unparalleled Vitamin C content, pine needle tea also offers a range of other potential benefits:

    • Antioxidants: Pine needles contain powerful antioxidants that help combat free radicals and reduce cellular damage.
    • Respiratory Support: Traditionally used as an expectorant, it can help clear congestion and soothe coughs, invaluable when dealing with exposure-related respiratory issues.
    • Anti-inflammatory Properties: Some compounds in pine needles may help reduce inflammation throughout the body.
    • General Tonic: It can act as a mild stimulant and provide a sense of well-being, crucial for morale in stressful situations.

    Understanding its importance elevates pine needle tea from a curiosity to a cornerstone of wilderness preparedness.

    How to Identify Safe Pine Species (And the Toxic Ones to Avoid)

    This is arguably the most critical section of this guide. Misidentification can lead to severe illness or even death. While many true pine species (genus Pinus) are safe for tea, several look-alikes and even some pines are toxic. When in doubt, do NOT consume.

    Key Identification Features of True Pines (Safe for Tea)

    True pines are characterized by their needles growing in bundles, called fascicles, held together at the base by a small sheath. The number of needles per fascicle is a primary identification clue:

    • Eastern White Pine (Pinus strobus): The gold standard for pine needle tea. Needles are soft, flexible, 2-5 inches long, and grow in bundles of five. They have a distinct bluish-green hue.
    • Scots Pine (Pinus sylvestris): Common in Europe and widely planted in North America. Needles are stiff, twisted, 1.5-3 inches long, and grow in bundles of two. The bark on the upper trunk is often orange-red and flaky.
    • Red Pine (Pinus resinosa): Needles are dark green, brittle, 4-6 inches long, and grow in bundles of two. They snap cleanly when bent.
    • Lodgepole Pine (Pinus contorta): Needles are yellowish-green, twisted, 1-3 inches long, and grow in bundles of two.
    • Ponderosa Pine (Pinus ponderosa): Needles are long (5-10 inches), dark green, and grow in bundles of two or three. CAUTION: While some sources list Ponderosa as safe, others warn against it, particularly for pregnant women, as it contains isocupressic acid, which can cause abortion in cattle. Due to this controversy, it’s best to avoid it if other safe options are available, especially for those who are pregnant or have underlying health conditions.

    Other Safe Conifers (Not True Pines, but often used for tea):

    • Spruce (Picea spp.): Needles are short, stiff, four-sided (roll them between your fingers – they feel square), and grow individually attached to small woody pegs. They are generally safe and make a good tea.
    • Fir (Abies spp.): Needles are flat, soft, blunt-tipped, and grow individually. They leave a smooth circular scar when pulled off. Fir tea is also generally safe and pleasant.

    How to Make Pine Needle Tea: Identification, Foraging, and Brewing for Survival Vitamin C
    How to Make Pine Needle Tea: Identification, Foraging, and Brewing for Survival Vitamin C.

    Toxic Conifers and Look-Alikes to Absolutely AVOID

    Mistaking these for safe pines can be fatal. Learn to identify them:

    • Yew (Taxus spp.): HIGHLY TOXIC! Yew needles are flat, dark green, and grow individually (not in bundles). They have a distinct red, fleshy berry (aril) instead of a cone. Every part of the yew plant, except the fleshy part of the aril, is poisonous. Ingesting even a small amount can cause heart failure.
    • Norfolk Island Pine (Araucaria heterophylla): A common houseplant, not a true pine. Its needles are soft, scale-like, and grow densely on branches. It is toxic if ingested.
    • Cypress (Cupressus spp.) and Cedar (Cedrus spp.): These are not true pines. Their foliage is typically scale-like or awl-shaped, not long needles in bundles. While some species might not be acutely toxic, many can cause digestive upset or other adverse reactions. Best to avoid for tea.
    • Larch (Larix spp.): A deciduous conifer, meaning it loses its needles in winter. Needles are soft, light green, and grow in clusters (not bundles with a sheath) on short shoots. While generally considered safe for tea, it’s not a true pine and its flavor profile differs.

    Always remember: If the needles are not in bundles of 2, 3, or 5 (or are clearly spruce/fir with their distinct individual needle characteristics), and you cannot positively identify the species, do not use it for tea. Err on the side of extreme caution.

    When and How to Harvest Pine Needles

    Once you’ve confidently identified a safe pine species, the next step is responsible and effective harvesting.

    When to Harvest

    Pine needles can be harvested year-round. However, there are a few considerations:

    • New Growth (Spring/Early Summer): The freshest, lightest green tips of the branches (often called ‘candles’) are generally preferred. They tend to have a milder flavor and are believed by some to have a higher concentration of certain volatile compounds.
    • Mature Needles (Year-Round): Older, darker green needles are perfectly fine and still packed with nutrients. They might have a stronger, more resinous flavor.
    • Avoid Winter Stress: While available, needles from trees under severe winter stress might not be as vibrant or potent.

    How to Harvest Responsibly

    1. Choose Healthy Trees: Select vibrant, green trees that show no signs of disease, insect infestation, or discoloration. Avoid trees near roadsides, industrial areas, or agricultural fields where they might be exposed to pollutants, pesticides, or herbicides.
    2. Select Fresh Needles: Look for bright green needles that are firm and pliable. Avoid any that are yellowing, brown, brittle, or covered in excessive sap or fungus.
    3. Harvest from Lower Branches: It’s often easier and less damaging to the tree to harvest from lower branches. You can also look for fallen branches that are still fresh and green, especially after a storm.
    4. Use Clean Tools: If cutting, use clean shears or a sharp knife. Often, you can simply snap off small sprigs by hand.
    5. Don’t Over-Harvest: Take only what you need and never strip a tree bare. Harvest sparingly from multiple trees if possible, ensuring the tree’s health and continued growth. A good rule of thumb is to take no more than 10-15% of the needles from any single branch.
    6. Inspect Thoroughly: Before brewing, always inspect your harvested needles for any insects, dirt, or debris. A quick rinse under clean water is recommended.

    Remember, sustainable foraging ensures that this valuable resource remains available for future needs.

    Step-by-Step Brewing: Hot Steep, Sun Tea, and Decoction Methods

    Once you have your fresh, safely identified pine needles, it’s time to transform them into a nourishing tea. The method you choose can influence the flavor and nutrient retention.

    General Preparation for All Methods:

    1. Rinse: Thoroughly rinse your pine needles under clean, running water to remove any dirt, dust, or small insects.
    2. Chop (Optional but Recommended): For better flavor extraction and nutrient release, chop the needles into smaller pieces (1/4 to 1/2 inch long). This increases their surface area.

    1. Hot Steep (Infusion Method) – Best for Vitamin C Retention

    This is the most common and recommended method for preserving Vitamin C, which can degrade at very high temperatures.

    1. Ratio: Use approximately 1-2 tablespoons of chopped pine needles per 8 ounces (1 cup) of water. Adjust to your taste preference.
    2. Heat Water: Bring fresh, clean water to a boil, then immediately remove it from the heat. Let it sit for 1-2 minutes to cool slightly (ideally around 180-200°F or 82-93°C). This prevents scorching the needles and helps preserve heat-sensitive Vitamin C.
    3. Steep: Place the chopped pine needles in a mug or teapot. Pour the slightly cooled hot water over them.
    4. Cover and Steep: Cover the mug/pot to trap the volatile oils and heat. Steep for 5-15 minutes. A longer steep will yield a stronger flavor.
    5. Strain and Serve: Strain out the needles. Your pine needle tea is ready!

    Tip: The tea will have a light green to amber color and a distinct, refreshing pine aroma and taste. You can add honey, maple syrup, or a squeeze of lemon (if available) to enhance the flavor.

    2. Sun Tea (Cold Infusion Method) – Maximum Vitamin C Retention

    This gentle method uses the sun’s warmth for a slow infusion, ideal for maximizing Vitamin C preservation as no direct heat is applied.

    1. Prepare: Place 2-4 tablespoons of chopped pine needles into a clean, clear glass jar or pitcher.
    2. Add Water: Fill the jar with cold, clean water.
    3. Sun Bathe: Cover the jar and place it in direct sunlight for 4-8 hours. The longer it sits, the stronger the tea will be.
    4. Strain and Serve: Once steeped to your liking, strain out the needles and enjoy.

    Tip: Sun tea is incredibly refreshing, especially in warmer climates. It’s a great option if you have plenty of daylight and want a milder, cooler beverage.

    3. Decoction Method – For Stronger Extraction (Less Ideal for Vitamin C)

    A decoction involves simmering the plant material, which is excellent for extracting tougher compounds from bark or roots, but less ideal for heat-sensitive Vitamin C. Use this method if you’re primarily interested in other compounds or a very strong, resinous flavor, or if you’re using older, tougher needles.

    1. Ratio: Use 2-3 tablespoons of chopped pine needles (and optionally a small piece of inner bark, if safely harvested and identified) per 8 ounces of water.
    2. Simmer: Place the needles and water in a pot. Bring to a boil, then immediately reduce the heat to a gentle simmer.
    3. Cook: Simmer, covered, for 10-20 minutes.
    4. Strain and Serve: Strain out the plant material and serve.

    Caution: The decoction method will significantly reduce the Vitamin C content compared to hot steeping or sun tea. It will also produce a much stronger, more resinous flavor that some may find less palatable.

    Nutritional Breakdown: Vitamin C Content Compared to Citrus

    The primary reason pine needle tea is revered in survival circles is its exceptional Vitamin C content. While exact figures can vary based on pine species, growing conditions, freshness, and brewing method, pine needles are consistently cited as a powerhouse of this essential nutrient.

    Pine Needles vs. Citrus Fruits

    Many sources suggest that pine needles can contain 4-5 times more Vitamin C by weight than oranges. To put this into perspective:

    • A medium orange typically contains around 70 mg of Vitamin C.
    • A single cup of properly brewed pine needle tea could potentially deliver hundreds of milligrams of Vitamin C, easily meeting and exceeding the recommended daily allowance (RDA) of 75-90 mg for adults.

    This makes pine needle tea an incredibly efficient and accessible source of Vitamin C in environments where citrus is non-existent. It’s not just about meeting the RDA; in a survival situation, a higher intake might be beneficial to support the body under stress, aid wound healing, and bolster the immune system.

    Beyond Vitamin C: Other Nutritional Contributions

    While Vitamin C is the star, pine needles offer more:

    • Vitamin A (Carotenes): Pine needles contain precursors to Vitamin A, essential for vision, immune function, and skin health.
    • Antioxidants: Rich in flavonoids and other phenolic compounds, these antioxidants help protect cells from oxidative stress.
    • Minerals: Trace amounts of minerals like potassium and magnesium may also be present.
    • Chlorophyll: The green pigment itself has detoxifying and energizing properties.

    The combination of these nutrients makes pine needle tea a holistic tonic, far more than just a scurvy preventative. It supports overall vitality, which is paramount when resources are scarce and the body is under constant strain.

    How to Make Pine Needle Tea: Identification, Foraging, and Brewing for Survival Vitamin C
    How to Make Pine Needle Tea: Identification, Foraging, and Brewing for Survival Vitamin C.

    Other Medicinal Uses and How to Dry Pine Needles for Storage

    The utility of pine needles extends beyond their immediate nutritional value. They have a long history of traditional medicinal use, and knowing these applications can further enhance your survival toolkit.

    Traditional Medicinal Uses

    • Expectorant and Decongestant: The volatile oils in pine needles, particularly alpha-pinene, act as natural expectorants, helping to loosen phlegm and clear respiratory passages. This makes pine needle tea excellent for coughs, colds, bronchitis, and sinus congestion. Inhaling the steam from a hot cup of tea can also provide relief.
    • Anti-inflammatory: Compounds found in pine needles may help reduce inflammation, offering relief for sore muscles, joint pain, or general body aches common in strenuous survival situations.
    • Antiseptic and Antimicrobial: The essential oils possess antiseptic properties. A strong brew can be used topically as a wash for minor cuts, scrapes, or skin irritations to help prevent infection.
    • Diuretic: Pine needle tea can act as a mild diuretic, helping the body flush out excess fluids and toxins.
    • Circulatory Support: Some traditional uses suggest it can help improve circulation.
    • Mood Enhancer: The refreshing aroma and taste can have a calming and uplifting effect, providing a much-needed psychological boost in stressful environments.

    How to Dry Pine Needles for Storage

    While fresh needles are ideal for maximum Vitamin C, drying them allows for long-term storage, ensuring you have access to their other medicinal properties when fresh foraging isn’t possible or convenient. Be aware that drying will significantly reduce the Vitamin C content, but the other beneficial compounds will largely remain.

    1. Clean and Prepare: Thoroughly rinse fresh pine needles and pat them dry. You can chop them into smaller pieces before drying to speed up the process.
    2. Air Drying:
      • Spread the needles in a single layer on a clean, dry screen, baking sheet, or cloth.
      • Place them in a warm, dry, well-ventilated area, out of direct sunlight. Direct sunlight can degrade some compounds.
      • Turn them periodically to ensure even drying.
      • Drying can take several days to a week, depending on humidity and temperature. They are fully dry when they are brittle and snap easily.
    3. Dehydrator Method:
      • Spread needles in a single layer on dehydrator trays.
      • Set the dehydrator to a low temperature (around 95-105°F or 35-40°C).
      • This method is faster, typically taking 4-8 hours.
    4. Storage:
      • Once completely dry, store the pine needles in an airtight container (glass jars with tight-fitting lids are ideal).
      • Keep the container in a cool, dark place, away from moisture and direct light.
      • Properly dried and stored pine needles can last for 6-12 months, though their potency will gradually diminish over time.

    Dried pine needles can be used to make tea, added to potpourri for their scent, or even ground into a powder for topical applications or to add to salves.

    Frequently Asked Questions About Pine Needle Tea

    Q: Can pregnant women drink pine needle tea?

    A: It is generally advised that pregnant women avoid pine needle tea. Some pine species, particularly Ponderosa Pine, contain compounds like isocupressic acid that have been linked to abortion in cattle. While the effects on humans are not fully understood, the risk is not worth taking. Always consult with a healthcare professional before consuming any herbal remedies during pregnancy.

    Q: What does pine needle tea taste like?

    A: The taste of pine needle tea can vary depending on the species and freshness of the needles. Generally, it has a refreshing, slightly resinous, and earthy flavor with citrusy undertones. Many describe it as tasting like a walk through a pine forest. Younger needles tend to be milder, while older needles can be more pungent.

    Q: How much pine needle tea can I drink daily?

    A: Start with a small amount (e.g., one cup) to assess your body’s reaction. For general wellness or Vitamin C supplementation in a survival scenario, 1-2 cups per day is a common recommendation. Excessive consumption might lead to digestive upset in some individuals. Always listen to your body.

    Q: Are spruce and fir needles safe for tea?

    A: Yes, spruce (Picea spp.) and fir (Abies spp.) needles are generally considered safe for tea and are often used interchangeably with true pine needles. They also provide Vitamin C and other beneficial compounds. Just like with pines, ensure positive identification and avoid yew, which can be mistaken for fir due to its flat needles, but is highly toxic.

    Q: Does boiling water destroy Vitamin C in pine needles?

    A: Yes, Vitamin C is heat-sensitive and can degrade when exposed to high temperatures for prolonged periods. To maximize Vitamin C retention, it’s best to use water that has just come off the boil (around 180-200°F or 82-93°C) rather than actively boiling water directly on the needles. The sun tea (cold infusion) method retains the most Vitamin C.

    Conclusion

    Mastering the art of making pine needle tea is more than just a culinary skill; it’s a vital component of wilderness survival and preparedness. From the critical identification of safe species to the nuanced methods of brewing, each step ensures you can reliably tap into the forest’s abundant source of Vitamin C and other medicinal compounds. In a world where modern conveniences can vanish in an instant, the ability to forage and prepare natural remedies like pine needle tea empowers you with self-reliance and resilience. Practice these skills, respect the environment, and carry this invaluable knowledge with you – it could very well be the difference-maker when it matters most.

  • How to Build a Primitive Fish Trap: Weir, Funnel, and Bottle Designs for Survival Fishing

    How to Build a Primitive Fish Trap: Weir, Funnel, and Bottle Designs for Survival Fishing

    How to Build a Primitive Fish Trap: Weir, Funnel, and Bottle Designs for Survival Fishing

    In a true survival scenario, every calorie counts, and every moment spent on a task must yield maximum return. While a rod and reel might be your go-to for a leisurely afternoon of angling, when your life depends on it, passive fishing methods become invaluable. Knowing how to make a fish trap is a fundamental skill that can provide a consistent, low-effort protein source, freeing you to focus on other critical survival tasks like shelter building, water purification, or signaling for rescue. This comprehensive guide will walk you through constructing three distinct types of primitive fish traps: the robust stick-and-stone weir, the versatile woven funnel basket, and the ingenious plastic bottle trap, equipping you with the knowledge to secure food when it matters most.

    Related TacticalProof reading: The 10-Item Minimalist Bushcraft Kit: What to Carry When You Want to Carry Almost Nothing | 9 Primitive Cooking Methods Without Pots or Pans: Bushcraft Techniques for Survival

    Why Passive Fishing Beats Rod-and-Reel in a Survival Situation

    In a survival scenario, active fishing demands precious energy and constant attention. Passive fishing methods, conversely, offer a strategic advantage by working for you around the clock with minimal oversight. This efficiency is paramount when every calorie and minute are critical.

    • Energy Conservation: Building and setting a trap requires an initial effort, but once in place, it operates autonomously. This frees you to dedicate energy to other vital tasks like shelter, water, or fire.
    • Multi-Tasking Capability: With traps working in the background, you effectively multiply your efforts. You can be foraging, setting snares, or maintaining camp while your traps are catching fish.
    • Consistent Protein Source: A properly constructed and strategically placed trap can yield a more consistent catch than sporadic active fishing, providing a steady supply of vital protein and fats.
    • Stealth and Safety: Traps, especially those made from natural materials, can be camouflaged and checked discreetly, reducing your footprint and maintaining a lower profile.
    • Adaptability: Primitive fish traps can be adapted to various aquatic environments and constructed from a wide array of natural or improvised materials, making them a universal survival skill.

    Mastering these techniques isn’t just about catching fish; it’s about understanding the environment, conserving resources, and maximizing your chances of survival. Let’s dive into the practical construction methods.

    How to Build a Stick-and-Stone Fish Weir in a Stream

    The fish weir is one of the oldest and most effective primitive fish trap designs, utilized by indigenous cultures worldwide for millennia. It’s essentially a barrier constructed across a stream or river that funnels fish into a collection area, particularly effective for migratory fish or those moving between feeding and spawning grounds.

    1. Site Selection: The Foundation of Success

    Choosing the right location is critical for a successful fish weir. Look for:

    • Shallow, Flowing Water: Ideal depth is typically knee to waist-deep, allowing for easier construction and effective channeling.
    • Natural Choke Points: Narrow sections, areas between large rocks, or bends in the river reduce material needs and leverage natural topography.
    • Moderate Current: A steady, moderate flow is best; too strong makes construction difficult, too weak may not guide fish effectively.
    • Abundant Materials: Ensure plenty of rocks, sturdy sticks, and perhaps some mud or clay nearby for sealing.

    2. Gathering Materials

    You’ll need:

    • Sturdy Sticks/Small Logs: 1-3 inches in diameter, long enough to span water depth plus enough to be driven into the streambed. Hardwoods like oak or strong saplings are preferred.
    • Rocks/Stones: Various sizes for anchoring and building walls.
    • Optional: Mud, Clay, or Sod: To help seal gaps between rocks and sticks, increasing efficiency.
    • Tools: A sturdy stick or heavy rock for driving stakes.

    3. Construction Steps: The V-Shape Weir

    The most common and effective design is the V-shape, with the point of the ‘V’ facing downstream, where your collection area will be.

    1. Establish the Baseline: Drive stout sticks into the streambed from one bank to the other, forming the two arms of your ‘V’. Angle them slightly upstream for stability. Space them closely (e.g., 4-6 inches apart) to prevent fish from swimming through.
    2. Reinforce with Rocks: Pile rocks around the base of each stick for stability and to create a solid barrier. Fill gaps with smaller stones, gravel, or mud/clay.
    3. Build the Walls: Continue building up the walls of the ‘V’ using more sticks and rocks. The height should be just above water level to prevent fish from swimming over. Ensure the structure is robust against the current.
    4. Form the Funnel: The two arms of the ‘V’ should converge to a narrow opening (6-12 inches) at the downstream point, funneling fish.
    5. Create the Collection Area: Just beyond the ‘V’ opening, construct a small, enclosed collection area. This can be a woven basket, a rock-and-stick enclosure, or a deepened natural depression. Fish should easily enter but find it difficult to exit. Ensure it’s deep enough to keep fish alive.
    6. Check for Leaks and Reinforce: Observe the weir for gaps where water (and fish) can escape. Fill these with smaller stones, gravel, mud, or packed leaves/grass for maximum effectiveness.

    Safety Warning: When working in moving water, be mindful of slippery footing. If the current is strong, proceed with extreme caution. Never build a weir that completely blocks a major waterway, as this can have significant ecological impacts and may be illegal.

    Maintenance: Check your weir daily. Remove debris that accumulates and harvest your catch regularly to prevent spoilage and keep the trap clear.

    3
    3. Construction Steps: The V-Shape Weir: 3.

    Weaving a Primitive Funnel Basket Trap From Saplings and Vines

    A woven basket trap is a highly effective and portable primitive fish trap that can be deployed in various water bodies. Its design relies on a one-way funnel entrance, allowing fish to swim in but making it difficult for them to find their way out. This method requires a bit more skill and time than a weir but offers greater flexibility in placement.

    1. Material Selection and Preparation

    The quality of your materials directly impacts the trap’s durability and effectiveness.

    • Flexible Saplings (Ribs): Look for straight, flexible saplings or branches, about 1/4 to 1/2 inch in diameter. Willow, hazel, or dogwood are good choices. You’ll need about 10-15 pieces, each 3-5 feet long.
    • Weaving Material (Weavers): Thinner, more flexible material like smaller diameter saplings, split inner bark (cedar, basswood), strong vines (grapevine, honeysuckle), or tough roots. You’ll need a substantial amount.
    • Cordage (Optional): Natural cordage (e.g., twisted inner bark fibers) can be used for binding.
    • Tools: A sharp stone, shell, or knife for cutting and splitting.

    Tip: Soaking saplings and weavers in water for a few hours (or overnight) makes them much more pliable and easier to work with, reducing breakage.

    2. Constructing the Outer Basket Frame

    1. Create the Base Ring: Bend a long, flexible sapling into a sturdy ring, overlapping and lashing the ends. This will be the trap’s mouth.
    2. Insert the Ribs: Sharpen one end of your remaining saplings (ribs) and drive them into the ground in a circle, slightly larger than your base ring. Bend the top ends inwards to form a dome or teardrop shape.
    3. Attach Ribs to Base Ring: Position the base ring around the ribs (6-12 inches from the ground) and lash each rib securely to it, ensuring even spacing.
    4. Form the Dome/Point: Gather and bind the top ends of all ribs tightly at the apex, creating the closed end of your trap’s skeletal structure.

    3. Weaving the Basket Body

    Weave the flexible weavers through the ribs to create the solid body of the trap.

    1. Start Weaving: Begin weaving from the base ring upwards. Tuck one end of a long weaver into a rib lashing, then weave it over and under successive ribs, spiraling upwards.
    2. Tighten the Weave: Push each row down firmly against the previous one to create a tight, fish-proof barrier. If weavers are short, tuck the end and start a new one.
    3. Continue to the Apex: Continue weaving until you reach the apex where the ribs are bound. A tighter, more consistent weave increases effectiveness.

    4. Crafting the Inner Funnel

    This critical component creates the one-way entrance.

    1. Select Funnel Ribs: Choose 4-6 thinner, flexible saplings, about 1-2 feet long.
    2. Form the Cone: Bind one end of these saplings together. Spread the other ends out to form an inverted cone shape.
    3. Weave the Funnel: Use thinner weavers to create a cone that tapers to a narrow opening (1-3 inches) at the bound end. The wider end of the cone should fit inside the trap’s mouth.
    4. Insert and Secure: Insert the wide end of the funnel into the main basket’s mouth, with the narrow opening pointing inwards. Secure the funnel to the main basket’s base ring with lashing, ensuring no gaps.

    5. Adding a Bait Door and Retrieval Cord

    • Bait Door: Create a small, hinged door on the side of the trap, near the apex, for inserting bait and removing fish. Cut a few weavers and ribs, leaving one side attached as a hinge, and secure it with a simple toggle or tie-off.
    • Retrieval Cord: Attach a long, strong piece of cordage to the apex of the trap to retrieve it from deeper water or secure it to an anchor.

    Tip: For added durability and camouflage, rub mud or clay into the weave, or cover with local vegetation.

    5
    5. Adding a Bait Door and Retrieval Cord: 5.

    The 5-Minute Plastic Bottle Fish Trap for Quick Protein

    When time is of the essence, or natural materials are scarce, a plastic bottle can be transformed into a surprisingly effective and quick-to-deploy fish trap. This DIY fish trap is a fantastic example of improvisation and resourcefulness for quick protein.

    1. Materials Needed

    • Large Plastic Bottle: A 2-liter soda bottle is ideal; water bottles work for smaller fish.
    • Sharp Tool: A knife, razor blade, sharp rock, or heated piece of metal for cutting.
    • Cordage: String, fishing line, shoelaces, or plastic bag strips for securing and retrieval.
    • Bait: Whatever is available (see bait section below).

    2. Construction Steps: Fast and Effective

    1. Prepare the Bottle: Remove labels and rinse thoroughly.
    2. Cut the Bottle: Carefully cut the top section of the bottle off, just below where the shoulder begins to curve inwards. You’ll have a larger bottom section and a smaller top section (neck and cap).
    3. Invert the Top: Remove the bottle cap. Invert the top section and place it inside the larger bottom section, so the bottle neck points inwards, creating a funnel.
    4. Secure the Funnel: Prevent the inverted top from separating. Punch or melt 3-4 small holes around the rim of the inverted funnel and corresponding holes on the bottom section. Thread cordage through these holes and tie securely. (If available, staples or strong waterproof tape can also be used.)
    5. Add Bait: Place your chosen bait inside the trap, at the very bottom.
    6. Attach Retrieval Cord: Punch or melt another hole near the top edge of the assembled trap. Thread a long piece of cordage through and tie it securely. This cord is for lowering, retrieving, and anchoring the trap.

    Safety Warning: Cutting plastic can be tricky and sharp edges can cause injury. Always cut away from your body. If melting holes, do so in a well-ventilated area and avoid inhaling fumes.

    Deployment: Lower the trap into the water, ensuring it’s fully submerged and resting on the bottom. Anchor the retrieval cord to a secure bankside object or submerged log. Check your trap frequently, ideally every few hours, to harvest your catch and refresh bait.

    Bait Selection, Placement Strategy, and Legal Considerations

    Building a trap is only half the battle; knowing how to bait it effectively and where to place it are equally important for maximizing your catch. Furthermore, understanding the legal implications of trapping is crucial, even in a survival context.

    1. Effective Bait Selection

    Fish are attracted by scent, sight, and sometimes sound. The best bait is often what’s naturally available in the environment.

    • Worms and Insects: Earthworms, grubs, crickets, grasshoppers, and larvae are universally appealing. Dig for them in damp soil or under logs.
    • Small Fish/Fish Guts: If you catch a small fish, cut it into pieces or use its entrails. The scent of distressed or dead fish is a powerful attractant for larger predatory fish.
    • Berries and Fruits: In areas where fish feed on fallen berries or fruits (e.g., mulberries), these can be excellent bait. Crush them slightly to release scent.
    • Crushed Plants: Some strong-smelling aquatic plants, when crushed, can release oils that attract certain fish species.
    • Shiny Objects: Small pieces of aluminum foil or bright plastic can sometimes attract curious fish in clear water.

    Tip: Place bait inside a small, porous bag (like cloth or mesh) within the trap. This allows scent to disperse without fish eating the bait directly, keeping them interested and searching within the trap.

    2. Strategic Placement for Maximum Catch

    Where you place your trap is often more important than the trap itself.

    • Near Cover: Fish feel safe and often feed near submerged logs, rock piles, weed beds, overhanging banks, or dense aquatic vegetation.
    • Drop-Offs and Ledges: Areas where bottom depth changes abruptly are often highways for fish moving between shallow feeding grounds and deeper, safer waters.
    • Current Breaks: In streams and rivers, fish often congregate in calmer water downstream of obstacles or in eddies, where they can rest and ambush food.
    • Shaded Areas: During hot days, fish often seek cooler, shaded areas.
    • Migration Routes: If you observe fish moving in a particular pattern, place your weir or traps along these routes.
    • Multiple Traps: Don’t rely on just one. Set several in different locations and depths to increase your chances and identify productive spots.

    Observation is Key: Spend time observing the water before placing your traps. Look for signs of fish activity: ripples, jumping fish, or areas where insects are abundant.

    3. Legal and Ethical Considerations

    It is paramount to understand that in most developed countries, building and deploying primitive fish traps (weirs, basket traps, even bottle traps) is illegal without specific permits, even on private land. Fishing regulations are in place to manage fish populations and prevent overfishing or ecological damage.

    • Survival vs. Sport: The techniques described here are strictly for genuine, life-threatening survival situations where conventional fishing methods are impossible or impractical, and your life depends on securing food. They are not for recreational use or casual foraging.
    • Check Local Laws: In a non-survival context, always consult your local fish and wildlife regulations before attempting any fishing activity. Penalties for illegal trapping can be severe.
    • Environmental Impact: Primitive weirs, if not properly constructed and removed, can alter stream flow, impede fish migration, and damage aquatic habitats. In a survival situation, your priority is sustenance, but be mindful of your impact where possible.
    • Ethical Harvesting: In a survival scenario, only take what you need to survive. Avoid wasteful killing. If you catch more than you can immediately consume or preserve, consider releasing the excess, especially if they are breeding-age fish.

    Mastering these primitive fishing techniques is a powerful addition to your survival toolkit, offering a reliable path to sustenance when all other options are exhausted. Practice these skills responsibly and ethically, and you’ll be better prepared for whatever challenges lie ahead.

    Frequently Asked Questions (FAQ)

    Q: How often should I check my primitive fish trap?

    A: In a survival situation, check your traps as frequently as possible, ideally every 2-4 hours during daylight, and at least once in the morning. This prevents spoilage, reduces the chance of predators stealing your fish, and allows you to re-bait or adjust the trap as needed.

    Q: Can I use these traps in saltwater?

    A: Yes, the principles of weirs and funnel traps can be adapted for saltwater environments. However, saltwater fish species, tidal currents, and material availability will differ. For weirs, consider tidal flats or estuaries. For basket traps, ensure materials are robust enough for saltwater and stronger currents. Bait selection will also need to be adjusted for marine species.

    Q: What’s the best bait for a primitive fish trap?

    A: The “best” bait is often what’s naturally available and what local fish species are accustomed to eating. Generally, strong-smelling baits are most effective. Good options include earthworms, grubs, crushed insects, small pieces of other fish (especially their guts), crushed berries, or strong-smelling aquatic plants. The goal is to create a scent trail that lures fish into the trap.

    Q: How can I make my woven basket trap more durable?

    A: To increase durability, use strong, rot-resistant saplings and vines. Soaking materials before weaving makes them more pliable. Weave tightly and consistently. After construction, you can rub mud or clay into the weave to fill gaps and add a protective layer. Some traditional methods involve smoking the finished trap over a low fire to harden the wood and make it more resistant to decay.

  • How to Raise Meat Rabbits for Survival: Breeds, Housing, and Year-Round Production

    How to Raise Meat Rabbits for Survival: Breeds, Housing, and Year-Round Production

    How to Raise Meat Rabbits for Survival: Breeds, Housing, and Year-Round Production

    In an uncertain world, self-sufficiency is paramount. When considering sustainable protein sources for a survival scenario or simply a more resilient lifestyle, few options rival the efficiency and productivity of rabbits. This comprehensive guide will walk you through the essentials of raising meat rabbits for survival, covering everything from selecting the best breeds to ensuring year-round production and even utilizing their valuable hides.

    Related TacticalProof reading: Beyond the Pantry: Cultivating Resilience Through Long-Term Skill Development

    Why Rabbits Are the Best Survival Livestock for Small Spaces

    Rabbits offer a unique set of advantages that make them ideal for preppers, homesteaders, and anyone looking to secure a reliable food source, especially in limited spaces. Their attributes align perfectly with the demands of a survival or off-grid environment:

    • Rapid Reproduction: A single doe can produce 4-6 litters per year, with each litter averaging 6-10 kits. This means a small breeding colony can quickly scale to provide a substantial amount of meat.
    • Efficient Feed Conversion: Rabbits are herbivores that convert forage, hay, and garden scraps into high-quality protein more efficiently than many other livestock, especially in terms of space and water usage.
    • Small Footprint: Unlike larger animals, rabbits require minimal space. A small backyard, shed, or even a garage corner can house a productive colony.
    • Quiet and Clean: They are relatively quiet animals, making them less likely to draw unwanted attention in a discreet setup. With proper management, their waste can be easily composted and used as a valuable garden fertilizer.
    • High-Quality Protein: Rabbit meat is lean, white, and nutritious, comparable to chicken. It’s an excellent source of protein, low in fat, and easily digestible.
    • Versatile Byproducts: Beyond meat, rabbit hides can be tanned for leather or fur, and their manure is a ‘cold’ fertilizer that can be applied directly to gardens without burning plants.
    • Low Water Requirements: While they need fresh water daily, their overall water consumption is significantly less than cattle or pigs.

    These factors combine to make rabbits an unparalleled choice for sustainable protein production in a survival context, offering resilience and self-reliance.

    Top 5 Meat Rabbit Breeds Ranked for Preppers

    Choosing the right breed is crucial for maximizing your meat production and ensuring the health and vigor of your colony. When considering best meat rabbit breeds preppers should look for traits like fast growth rate, good meat-to-bone ratio, docile temperament, and adaptability. Here are our top picks:

    1. New Zealand White

    • Why they’re #1: The quintessential meat rabbit. New Zealands are known for their rapid growth, excellent meat quality, and large litters. They reach market weight (5-6 lbs) in just 8-10 weeks. Their docile nature makes them easy to handle, and their white fur is highly prized for tanning.
    • Prepper Advantage: Fast turnaround, consistent production, good hide value.
    • Average Adult Weight: 9-12 lbs.

    2. Californian

    • Why they’re #2: A close second to the New Zealand, the Californian was developed by crossing New Zealands with Himalayans. They share many of the New Zealand’s desirable traits – fast growth, good muscling, and large litters. They have distinctive black points (ears, nose, feet, tail) on a white body.
    • Prepper Advantage: Excellent meat producers, good feed conversion, hardy.
    • Average Adult Weight: 8-10 lbs.

    3. Silver Fox

    • Why they’re #3: An American heritage breed known for its unique ‘silvered’ black fur and exceptional meat quality. Silver Foxes grow a bit slower than New Zealands or Californians but offer a very broad, deep body with a high meat-to-bone ratio. They are also excellent mothers and have a calm temperament. Their hides are highly valued.
    • Prepper Advantage: Dual-purpose (meat and fur), excellent mothering instincts, hardy.
    • Average Adult Weight: 9-12 lbs.

    4. Rex

    • Why they’re #4: While primarily known for their luxurious, velvety fur, Rex rabbits also produce a good amount of lean, flavorful meat. They have a slightly slower growth rate than the top two, but their unique fur adds significant value, making them a true dual-purpose breed. They come in various colors.
    • Prepper Advantage: High-value fur, good meat quality, calm disposition.
    • Average Adult Weight: 7.5-10.5 lbs.

    5. Champagne d’Argent

    • Why they’re #5: One of the oldest French meat breeds, the Champagne d’Argent is known for its beautiful silvered fur (born black, they ‘silver’ as they mature) and fine-grained meat. They are good producers, though slightly slower to mature than New Zealands. They are known for being hardy and good mothers.
    • Prepper Advantage: Hardy, good meat and fur, historical reliability.
    • Average Adult Weight: 9-12 lbs.

    Tip for Preppers: Consider starting with New Zealands or Californians for pure meat production due to their rapid growth. If you have the space and desire for valuable hides, integrate Silver Fox or Rex into your breeding program.

    5
    5. Champagne d'Argent: 5.

    Housing Setup: Colony vs Hutch for Different Scenarios

    The choice between a colony system and individual hutches depends on your available space, resources, management style, and specific survival scenario. Both have distinct advantages and disadvantages when considering how to raise rabbits for meat efficiently.

    Hutch System (Individual Cages)

    The most common commercial and backyard setup, individual hutches offer maximum control and hygiene.

    • Advantages:
      • Disease Control: Prevents the spread of parasites and diseases between rabbits.
      • Breeding Control: Easy to manage breeding cycles, track litters, and prevent unwanted pregnancies.
      • Predator Protection: Well-built hutches offer better protection against ground predators.
      • Hygiene: Waste drops through wire bottoms, keeping rabbits cleaner and reducing odor if properly managed.
      • Individual Feeding: Ensures each rabbit gets its share of food.
    • Disadvantages:
      • Cost: Can be more expensive to build or buy multiple hutches.
      • Labor Intensive: Requires more daily cleaning of individual cages and watering.
      • Space: Can take up more linear space if not stacked.
      • Less Natural: Rabbits have less room to exercise and express natural behaviors.
    • Construction Tips:
      • Size: Minimum 24″x24″x18″ for a single rabbit, larger for does with litters (e.g., 30″x36″x18″).
      • Materials: 14-gauge galvanized wire (1″x2″ for sides/top, 1/2″x1″ or 1″x1″ for bottom). Wood frames can be used, but wire is easier to clean.
      • Nest Boxes: Essential for does. Provide a dark, enclosed space (e.g., 10″x10″x10″) that can be removed for cleaning.
      • Protection: Elevate hutches off the ground. Consider a roof and windbreaks for outdoor setups.

    Colony System (Communal Enclosure)

    A colony system involves housing multiple rabbits together in a larger, fenced area, often with access to the ground. This mimics a more natural environment.

    • Advantages:
      • Lower Cost: Can be cheaper to build one large enclosure than many small hutches.
      • Less Labor: Less daily cleaning, as rabbits spread their waste over a larger area.
      • Natural Behavior: Allows rabbits to dig, run, and socialize, potentially reducing stress.
      • Foraging: If on pasture, rabbits can supplement their diet by foraging.
    • Disadvantages:
      • Disease Risk: Higher risk of disease and parasite transmission.
      • Breeding Control: Difficult to manage breeding, leading to overpopulation or inbreeding.
      • Predator Vulnerability: Requires robust predator-proofing (digging barriers, secure top).
      • Aggression: Bucks will fight, and does can be territorial, leading to injuries or deaths.
      • Sanitation: Can become unsanitary quickly if not managed well, especially in wet conditions.
    • Construction Tips:
      • Size: Aim for at least 10-15 sq ft per adult rabbit.
      • Fencing: Heavy-gauge wire mesh (e.g., hardware cloth) buried at least 12-18 inches deep to prevent digging out or in.
      • Overhead Protection: A secure top or netting to deter aerial predators.
      • Shelter: Provide multiple hide boxes, tunnels, or shelters for rabbits to escape aggression and weather.
      • Separate Bucks: Always house bucks individually or in separate, secure areas to prevent fighting and uncontrolled breeding.

    Survival Rabbits Homestead Tip: For preppers, a hybrid approach might be best: individual hutches for breeding does and bucks, and a larger, secure colony pen for growing kits after weaning. This balances control with space efficiency.

    Feeding Rabbits Without Commercial Pellets: Forage, Garden Scraps, and Hay

    Relying solely on commercial pellets in a survival situation is unrealistic. Learning to feed your rabbits from natural sources is a critical skill for long-term self-sufficiency. This section focuses on sustainable, non-commercial feeding strategies.

    The Foundation: Hay and Forage

    • Hay: Good quality hay (timothy, orchard grass, alfalfa for growing kits/lactating does) should form the bulk of a rabbit’s diet. It provides essential fiber for digestive health. Store hay in a dry, well-ventilated area to prevent mold.
    • Forage: This is where rabbits truly shine in a survival context. They can eat a wide variety of wild plants. Always introduce new forages slowly and in small amounts to avoid digestive upset.
      • Safe Wild Plants: Dandelion (leaves, flowers, roots), plantain (broadleaf and narrowleaf), clover (red and white), comfrey (in moderation), chickweed, yarrow, raspberry leaves, blackberry leaves, willow leaves/twigs, maple leaves (in moderation).
      • Harvesting: Collect forage from areas free of pesticides, herbicides, and heavy traffic. Wash thoroughly.
      • Drying: In abundance, forage can be dried and stored for winter use, much like hay.

    Garden Scraps and Cultivated Fodder

    • Safe Garden Scraps: Carrot tops, beet greens, radish tops, kale, collard greens, turnip greens, parsley, cilantro, basil, mint, pea pods, broccoli leaves/stems (in moderation), apple slices (no seeds), pear slices (no seeds).
    • Cultivating Fodder: Consider dedicating a portion of your garden to rabbit-specific crops. Alfalfa, clover, comfrey, and various leafy greens can be grown specifically for your rabbits. Sprouted grains (barley, wheat) can also provide fresh greens, especially in winter.
    • Root Crops: While not a primary food, small amounts of carrots, beets, and turnips can be given as treats or supplements.

    Supplemental Grains (Use Sparingly)

    In a true survival scenario, grains might be scarce. However, if available, whole oats, barley, or black oil sunflower seeds can provide extra energy, especially for breeding does or growing kits. Always introduce grains slowly and in very small quantities to avoid digestive issues.

    What to AVOID (Safety Warning!)

    Many common plants are toxic to rabbits. Never feed:

    • Rhubarb (leaves and stalks)
    • Potatoes (all parts, especially green parts)
    • Tomato plants (leaves, stems, unripe fruit)
    • Avocado
    • Iceberg lettuce (can cause diarrhea)
    • Cabbage (can cause gas in large quantities)
    • Onions, garlic, chives
    • Most house plants (e.g., lilies, philodendrons)
    • Acorns, oak leaves
    • Nightshade family plants
    • Anything moldy or spoiled

    Always research a plant before feeding it to your rabbits. When in doubt, leave it out.

    Breeding Schedule for Maximum Year-Round Meat Production

    A well-managed breeding program is the cornerstone of consistent meat production. Understanding the rabbit’s reproductive cycle and planning your schedule will ensure a steady supply of meat rabbits small space can sustain.

    Rabbit Reproductive Basics

    • Sexual Maturity: Most meat breeds reach sexual maturity around 5-7 months.
    • Gestation Period: Approximately 31 days.
    • Litter Size: 6-10 kits is common.
    • Weaning Age: 4-6 weeks.

    The 42-Day Breeding Cycle (Recommended for Survival)

    This aggressive but sustainable cycle allows a doe to produce up to 6-7 litters per year while still allowing her adequate recovery time. It’s ideal for maximizing output when meat is a priority.

    1. Day 1: Breed Doe. Take the doe to the buck’s cage (never the other way around, as the doe can be territorial). Observe two successful breedings, then return the doe to her hutch.
    2. Day 28: Provide Nest Box. Three days before kindling, place a clean nest box with fresh hay or straw in the doe’s hutch. She will pull fur to line it.
    3. Day 31: Kindling (Birth). The doe will give birth. Check the nest box within 24 hours to remove any stillborn kits and ensure all live kits are warm and fed. Handle kits minimally and gently.
    4. Day 14 (of kits’ age): Re-breed Doe. While the kits are still nursing, re-breed the doe. This is the key to the 42-day cycle. Her hormones are still active from nursing, making her receptive.
    5. Day 28 (of kits’ age): Remove Nest Box. Kits will be exploring the hutch.
    6. Day 42 (of kits’ age): Wean Kits. Separate the kits from the mother. Move them to a grow-out pen or individual hutches. The doe will be due to kindle her next litter in 3-4 days.

    Important Considerations:

    • Buck Management: One healthy buck can service 8-10 does. Rotate bucks if you have more than one to prevent overworking.
    • Doe Health: Monitor your does closely. If a doe looks thin, stressed, or has consistently small litters, give her a break for a cycle or two, or consider culling her from the breeding program.
    • Record Keeping: Essential! Keep detailed records of breeding dates, kindling dates, litter sizes, and kit health. This helps track productivity and identify problem breeders.
    • Environmental Factors: Extreme heat or cold can negatively impact breeding success. Provide shade and ventilation in summer, and protection from drafts in winter.

    Humane Processing and Butchering Basics

    Processing rabbits is a necessary skill for anyone relying on them for meat. The goal is to be quick, clean, and humane. While this section provides basics, hands-on learning from an experienced individual or detailed video tutorials are highly recommended.

    Preparation and Tools

    • Cleanliness: Work in a clean, sanitized area. Have clean water readily available.
    • Tools:
      • Sharp knife (boning knife or utility knife)
      • Gambrel or sturdy hook for hanging
      • Buckets for waste and water
      • Gloves (optional, but recommended for hygiene)
    • Rabbit Age: Rabbits are typically processed at 8-12 weeks for optimal tenderness and size (3-5 lbs dressed weight).

    The Process (Overview)

    1. Stunning/Dispatch: The most critical step for humane processing. A quick, firm blow to the back of the head (cervical dislocation) or a specialized rabbit dispatch tool renders the animal unconscious instantly. This must be done swiftly and effectively.
    2. Bleeding: Immediately after stunning, hang the rabbit by its hind legs. Make a deep cut across the throat to sever the jugular vein and carotid artery. Allow it to bleed out completely into a bucket. This is crucial for meat quality.
    3. Head and Feet Removal: Once bled, remove the head and front feet at the joints.
    4. Skinning: Make an incision around each hock and down the inside of the hind legs to meet at the vent. Carefully peel the skin down, using your knife only when necessary to separate connective tissue. The skin should peel off like a sweater.
    5. Evisceration: Make a shallow incision down the belly from the sternum to the pelvis, being careful not to puncture the intestines. Cut around the anus. Reach inside and pull out the organs. The heart, liver, and kidneys are edible and can be saved. Discard the rest.
    6. Cleaning: Rinse the carcass thoroughly inside and out with cold water. Pat dry.
    7. Chilling: Immediately chill the carcass in an ice bath or refrigerator for several hours (or overnight) before butchering further or packaging. This improves meat quality and safety.

    Safety Warning: Always prioritize safety and hygiene. Wear appropriate protective gear. If you are new to this, seek guidance from an experienced individual. Improper stunning can cause undue suffering.

    Tanning Rabbit Hides for Leather and Fur Projects

    Don’t let valuable resources go to waste! Rabbit hides can be tanned into soft leather or luxurious fur, providing material for clothing, pouches, or other essential items in a survival scenario.

    Basic Tanning Method (Salt and Alum)

    This is a relatively simple method suitable for home use.

    1. Fleshing: Immediately after skinning, lay the hide fur-side down on a flat, sturdy surface (e.g., a fleshing beam). Carefully scrape off all meat, fat, and membrane from the flesh side using a dull knife or fleshing tool. This is critical for successful tanning.
    2. Salting: Generously rub non-iodized salt into the flesh side of the hide. Roll it up, flesh-side in, and place it in a cool, dry place for 2-3 days. The salt draws out moisture.
    3. Rehydrating & Washing: After salting, shake off excess salt. Soak the hide in clean water for a few hours to rehydrate and remove remaining salt. Wash thoroughly with mild soap (e.g., dish soap) to remove dirt and grease. Rinse well.
    4. Pickling (Optional but Recommended): For better penetration of the tanning solution, you can pickle the hide. Mix 1 gallon of water with 1 cup of salt and 1/2 cup of pickling acid (e.g., citric acid or formic acid, or even white vinegar in a pinch, though less effective). Soak the hide for 24-48 hours, stirring occasionally.
    5. Alum Tanning Solution: Prepare a solution: 1 gallon of water, 1 lb non-iodized salt, 1/2 lb aluminum sulfate (alum). Stir until dissolved.
    6. Tanning: Submerge the hide in the alum solution. Stir daily. Small rabbit hides may be tanned in 3-7 days. The hide should feel pliable and no longer slimy.
    7. Neutralizing (if pickled): If you pickled the hide, neutralize it after tanning by soaking in a solution of 1 gallon water and 1 tablespoon baking soda for 30 minutes.
    8. Oiling: Squeeze out excess water. Apply a thin, even coat of tanning oil (e.g., neatsfoot oil, mink oil, or even olive oil in a pinch) to the flesh side. This keeps the leather soft.
    9. Softening/Breaking: As the hide dries, it will become stiff. Repeatedly stretch, pull, and work the hide over a dull edge (e.g., a wooden dowel or edge of a table) until it becomes soft and pliable. This is the most labor-intensive part.

    Uses for Tanned Hides: Small pouches, glove linings, trim for clothing, small blankets, insulation. The fur side can be used for warmth, while the leather side offers durability.

    Basic Tanning Method (Salt and Alum)
    Basic Tanning Method (Salt and Alum): Basic Tanning Method (Salt and Alum).

    Expected Yields: How Many Rabbits Feed a Family of Four

    Understanding the potential output of your rabbitry is essential for planning and ensuring food security. The goal of survival rabbits homestead is to provide a consistent, sustainable protein source.

    Individual Rabbit Yield

    • Live Weight at Processing (8-12 weeks): 5-6 lbs for New Zealands/Californians.
    • Dressed Weight (meat only, no head, feet, skin, organs): Approximately 50-60% of live weight. So, a 5-6 lb rabbit yields 2.5-3.6 lbs of meat.
    • Edible Organs: Heart, liver, kidneys add a small amount of additional protein and nutrients.

    Family of Four Calculation

    Let’s assume a family of four consumes rabbit meat 2-3 times per week, with each meal requiring roughly 1-1.5 lbs of meat (depending on other meal components).

    • Meat per week: 2 meals x 1.5 lbs/meal = 3 lbs; 3 meals x 1.5 lbs/meal = 4.5 lbs. Let’s average 3.75 lbs per week.
    • Rabbits per week: If each rabbit yields 3 lbs of meat, you’d need approximately 1.25 rabbits per week (3.75 lbs / 3 lbs/rabbit).
    • Rabbits per year: 1.25 rabbits/week x 52 weeks/year = 65 rabbits per year.

    Breeding Colony Size to Achieve 65 Rabbits/Year

    Using the 42-day breeding cycle, a healthy doe can produce 6-7 litters per year, averaging 6-8 kits per litter that reach market weight.

    • Kits per doe per year: 6 litters x 7 kits/litter = 42 kits.
    • Number of Does Needed: To produce 65 rabbits, you would need approximately 65 / 42 = 1.55 does.

    Practical Recommendation: To ensure consistent supply, account for potential losses (small litters, kit mortality, breeding failures, culling unproductive does). A breeding colony of 3-4 healthy does and 1 buck is a robust starting point for a family of four, providing a buffer and allowing for rotation of does. This setup can easily produce 100+ rabbits annually, giving you surplus for trade, storage, or larger consumption.

    This small-scale, high-yield system demonstrates why meat rabbits are an ideal choice for sustainable protein in a limited space, offering significant food security for your family.

    Frequently Asked Questions (FAQ)

    Q: Can rabbits be raised entirely on forage and garden scraps without commercial pellets?

    A: Yes, it is absolutely possible, and a crucial skill for survival. The key is providing a wide variety of safe forages, ensuring a constant supply of good quality hay, and supplementing with safe garden scraps. It requires careful observation of your rabbits’ health and condition, as well as knowledge of local edible plants. Growing specific fodder crops like alfalfa or comfrey can also significantly boost your self-sufficiency.

    Q: How much water do rabbits need daily?

    A: An adult rabbit typically drinks 4-8 ounces (1/2 to 1 cup) of water per day, but lactating does can drink significantly more, sometimes up to 3-4 times that amount. Always provide fresh, clean water, especially in hot weather or when feeding a dry diet of hay and forage. Water bottles or heavy ceramic crocks are common choices.

    Q: What are the common health issues to watch out for in a rabbit colony?

    A: Common issues include snuffles (respiratory infection), ear mites, fur mites, coccidiosis (intestinal parasite, especially in young kits), and fly strike (in unsanitary conditions). Good ventilation, cleanliness, proper nutrition, and quarantine of new animals are your best defenses. In a survival scenario, prevention is paramount as veterinary care may be unavailable.

    Q: Is rabbit meat safe to eat if the rabbit was sick?

    A: It depends on the illness. Generally, if a rabbit shows signs of severe illness, especially systemic infections or unknown diseases, it should not be consumed. Minor issues like a broken leg or a superficial wound, if the animal was otherwise healthy, might be acceptable after careful inspection and proper cooking. When in doubt, it’s always safer to discard the meat to avoid potential health risks.

    Q: How long can rabbit meat be stored without refrigeration?

    A: Without refrigeration, rabbit meat will spoil quickly, typically within hours, especially in warm temperatures. For survival, methods like smoking, salting, or drying (jerky) would be necessary for long-term storage. Canning (pressure canning) is another option if you have the equipment and supplies. Fresh meat should be consumed or preserved immediately after processing.

  • 9 Primitive Cooking Methods Without Pots or Pans: Bushcraft Techniques for Survival

    9 Primitive Cooking Methods Without Pots or Pans: Bushcraft Techniques for Survival

    9 Primitive Cooking Methods Without Pots or Pans: Bushcraft Techniques for Survival

    In a survival scenario or during a deep bushcraft expedition, relying on modern cooking gear isn’t always an option. Whether you’ve lost your pack, your equipment is damaged, or you’re simply challenging yourself to live off the land, knowing how to prepare food without pots, pans, or even a grill is a critical skill. Mastering these primitive cooking methods not only enhances your self-reliance but also connects you to ancient traditions of sustenance. This guide will equip you with practical, time-tested bushcraft cooking techniques to turn raw ingredients into nourishing meals using only natural resources and fire.

    Related TacticalProof reading: Do Fire Starters Expire? | Fire Building Techniques for Survival Situations | How to Build a DIY Rocket Stove: 3 Designs Using Bricks, Cans, and Cinder Blocks

    Why Primitive Cooking Skills Matter for Preppers and Bushcrafters

    For preppers, the ability to cook without conventional tools is a cornerstone of true preparedness. In a long-term grid-down situation, your stainless steel cookware might eventually wear out, or you might not have access to the fuel sources it requires. Learning these methods ensures you can always cook, regardless of external circumstances. For bushcrafters, it’s about deepening your connection to nature, honing your resourcefulness, and proving your capability in the wild. These skills are not just about survival; they’re about thriving.

    • Resourcefulness: Teaches you to utilize natural materials effectively.
    • Adaptability: Prepares you for situations where modern gear is unavailable.
    • Self-Reliance: Reduces dependence on manufactured goods and external systems.
    • Historical Connection: Links you to the ingenuity of our ancestors.

    1. Ash Cooking: Wrapping Food in Leaves Over Coals

    Ash cooking, sometimes called ‘coal baking,’ is one of the simplest and most effective campfire cooking without pots methods. It involves wrapping food in natural materials and burying it directly in hot embers or ashes. The slow, even heat cooks the food thoroughly, often steaming it within its natural wrapper.

    Materials Needed:

    • Fire: A well-established fire that has burned down to a good bed of coals.
    • Food: Root vegetables (potatoes, sweet potatoes, yams), corn on the cob, small fish, or even small cuts of meat.
    • Wrapping Material: Large, non-toxic leaves (e.g., burdock, cabbage, banana, grape leaves), wet clay, or mud. If available, aluminum foil can be used for convenience, but the goal here is primitive.

    How to Do It:

    1. Prepare Your Fire: Build a robust fire and let it burn for at least an hour until you have a deep bed of glowing red coals and a good amount of ash.
    2. Prepare the Food: Clean your food thoroughly. For root vegetables, you can leave the skin on. For fish, gut and scale it.
    3. Wrap the Food: Tightly wrap your food in several layers of wet leaves. The moisture in the leaves will help steam the food and prevent it from burning. If using clay or mud, completely encase the food in a thick layer (at least 1/2 inch thick).
    4. Bury in Coals: Rake aside some of the top ash to expose the hottest coals. Place your wrapped food directly onto the coals. Cover it completely with more hot coals and then a layer of ash.
    5. Cook: Cooking times vary greatly depending on the food size and coal temperature. Small potatoes might take 45-60 minutes, while a larger fish could take 1.5-2 hours. You can test doneness by carefully digging up a piece and checking its tenderness.
    6. Retrieve and Enjoy: Once cooked, carefully rake away the coals and ash. The outer layers of leaves or clay will be charred or hardened. Peel them away to reveal perfectly cooked, moist food.

    Practical Tips & Safety:

    • Leaf Selection: Always be 100% sure the leaves you use are non-toxic. When in doubt, use wet clay or mud.
    • Moisture: Ensure leaves are wet to prevent them from igniting and to create steam.
    • Hot Coals: Use a stick or shovel to handle coals and food. The ashes will retain heat for a long time.
    • Doneness: It’s better to overcook slightly than undercook, especially with meat or fish.

    2. Hot Rock Boiling: Heating Water Without a Fireproof Container

    Hot rock boiling is an ingenious survival cooking method that allows you to boil water or cook stews without a metal pot. It relies on heating rocks in a fire and then transferring that heat to a liquid in a non-fireproof container.

    Materials Needed:

    • Fire: A good fire to heat your rocks.
    • Rocks: Select dense, non-porous, dry rocks (e.g., granite, basalt, slate). Avoid river rocks or any rocks that show signs of moisture, as they can explode when heated. Rocks should be fist-sized or slightly larger.
    • Water Container: A natural container that can hold water but isn’t fireproof. Examples include a hollowed-out log, a large piece of bark folded and sealed with clay, a woven basket lined with clay, or even an animal stomach.
    • Tongs/Sticks: Two sturdy green sticks to act as tongs for handling hot rocks.
    • Water/Food: Whatever you intend to boil or cook (e.g., water for purification, broth, small pieces of meat or vegetables).

    How to Do It:

    1. Prepare Your Container: Ensure your chosen container is watertight. If using bark, fold it carefully and seal any seams with wet clay. If using a log, ensure it’s clean.
    2. Heat the Rocks: Place several suitable rocks directly into your fire. Let them heat thoroughly until they are glowing red or very hot to the touch (use a stick to test). This can take 30-60 minutes.
    3. Fill Container: Fill your container with the water or ingredients you wish to boil.
    4. Transfer Hot Rocks: Using your green stick tongs, carefully retrieve a hot rock from the fire. Gently lower it into your water container. You’ll hear a sizzle and see steam immediately.
    5. Repeat: As the rock cools, remove it (it will still be hot, but cooler than the fresh ones) and replace it with another glowing hot rock from the fire. Continue this process, rotating hot rocks in and out of the container, until your water boils or your food is cooked.

    Practical Tips & Safety:

    • Rock Safety is Paramount: NEVER use wet or porous rocks. The trapped moisture can turn to steam and cause the rock to explode violently, sending shrapnel flying. Always select dry, dense rocks.
    • Container Stability: Ensure your container is stable and won’t tip over when rocks are added.
    • Steam Burns: Be wary of the steam produced when rocks hit the water.
    • Rock Cleaning: Brush off any ash or debris from the rocks before placing them in your food/water.
    Practical Tips & Safety:
    Practical Tips & Safety:: Practical Tips & Safety:.

    3. Plank Cooking: Securing Meat to Wood Near the Fire

    Plank cooking is a flavorful bushcraft cooking technique that imparts a smoky essence to food, particularly fish. It involves securing food to a wooden plank and positioning it upright near a fire, allowing radiant heat to cook it slowly.

    Materials Needed:

    • Fire: A steady, medium-sized fire with good radiant heat.
    • Plank: A sturdy, green (freshly cut) hardwood plank, about 1-2 inches thick and larger than your food. Good choices include oak, maple, alder, cedar (for flavor), or fruitwoods. Avoid resinous woods like pine.
    • Food: Whole fish (like salmon or trout fillets), chicken breasts, or thin cuts of meat.
    • Fasteners: Small green wood pegs, thorns, or natural cordage (like inner bark fibers) to secure the food to the plank.

    How to Do It:

    1. Prepare the Plank: Find a suitable green hardwood plank. If possible, split it to create a flat surface.
    2. Prepare the Food: Clean and prepare your food. For fish, butterfly it open. Season if desired.
    3. Attach Food to Plank: Lay the food flat on the plank. Use your chosen fasteners to secure it firmly. If using pegs, drill small holes through the fish and into the plank. If using cordage, wrap it tightly around the food and plank.
    4. Position Near Fire: Prop the plank upright near the fire, angled so the food faces the flames. The distance from the fire is crucial: too close, and the plank will burn; too far, and the food won’t cook. You should be able to hold your hand at the plank’s surface for about 5-7 seconds before it becomes uncomfortable.
    5. Cook: The food will cook slowly from the radiant heat. Turn the plank periodically to ensure even cooking. The plank itself will char slightly, adding to the smoky flavor. Cooking times can range from 1-3 hours depending on food thickness and fire intensity.

    Practical Tips & Safety:

    • Wood Selection: Use only non-toxic, green hardwoods. Dry wood will catch fire too easily.
    • Fire Management: Maintain a consistent fire. Adjust the distance of the plank as needed.
    • Prevent Burning: If the plank starts to char too quickly, move it further from the fire or douse the edges with a little water.
    • Doneness: Fish is done when it flakes easily. Meat should reach appropriate internal temperatures.

    4. Spit Roasting: Building a Campfire Rotisserie from Green Wood

    Spit roasting is a classic primitive cooking method for larger cuts of meat or whole small game. It involves impaling food on a rotating spit over an open fire, allowing for even cooking and self-basting.

    Materials Needed:

    • Fire: A long, narrow bed of coals is ideal for even heat distribution.
    • Spit: A long, straight, sturdy piece of green hardwood (e.g., oak, maple, ash) that is strong enough to support the food without bending. Sharpen one end to skewer the food.
    • Uprights/Supports: Two sturdy, forked green branches driven into the ground on either side of the fire to hold the spit.
    • Food: Whole small game (rabbit, squirrel, bird), large fish, or substantial chunks of meat.

    How to Do It:

    1. Build Your Fire: Create a long, narrow fire. Let it burn down to a good bed of coals for consistent, radiant heat.
    2. Construct the Supports: Drive two forked green branches into the ground on opposite sides of your fire. Ensure they are stable and tall enough to hold the spit above the coals, allowing enough clearance for the food to rotate without touching the fire.
    3. Prepare the Spit: Select a straight, strong green branch. Remove any small twigs. Sharpen one end to a point.
    4. Skewer the Food: Carefully skewer your prepared food onto the spit. For whole animals, ensure it’s centered and secured so it won’t spin freely on the spit. You might need to use smaller green twigs to pin limbs or flaps of skin to the main body.
    5. Position and Rotate: Rest the spit on the forked uprights. Position it so the food is directly over the coals, but not so close that it burns. Begin rotating the spit slowly and continuously. This ensures even cooking and prevents one side from charring.
    6. Cook: Spit roasting can take a significant amount of time, from 1 to several hours, depending on the size of the food and the heat of the fire. Basting with natural fats or water can help keep the meat moist.

    Practical Tips & Safety:

    • Stability: Ensure your uprights and spit are very stable. A falling spit could mean lost food or a fire hazard.
    • Green Wood: Using green wood for the spit and supports prevents them from burning through quickly.
    • Rotation: Consistent rotation is key for even cooking. You can rig a simple mechanism to automate rotation if you’re feeling ambitious, but manual rotation is common.
    • Doneness: Use a sharp stick to test for doneness. Juices should run clear for poultry, and meat should be tender.

    5. Clay Baking: Encasing Fish and Game in River Clay

    Clay baking is an ancient and incredibly effective survival cooking method that creates a natural, self-basting oven. Food encased in clay cooks slowly, trapping moisture and flavor, and the hardened clay shell makes for easy cleanup.

    Materials Needed:

    • Fire: A good fire that will produce a deep bed of hot coals.
    • Clay: Clean, pliable river clay or mud. Test it for impurities (small rocks, organic matter) and ensure it’s sticky enough to form a solid shell.
    • Food: Whole fish (gutted, but scales can be left on), small birds (plucked and gutted), or root vegetables.

    How to Do It:

    1. Prepare Your Fire: Build a fire and let it burn down to a substantial bed of hot coals.
    2. Prepare the Food: Clean and prepare your food. For fish, gut it but you can leave the scales on; they’ll come off with the clay. For birds, pluck and gut them. Season the inside if desired.
    3. Prepare the Clay: Knead the clay to ensure it’s pliable and free of large debris. If it’s too dry, add a little water; if too wet, let it dry slightly or mix in some dry earth.
    4. Encase the Food: Roll out a thick slab of clay (about 1/2 to 1 inch thick) large enough to completely encase your food. Place the food in the center and fold the clay around it, sealing all seams to create an airtight package. Ensure there are no cracks.
    5. Bake in Coals: Rake aside some coals. Place the clay-encased food directly onto the hot coals. Cover it completely with more hot coals and then a layer of ash.
    6. Cook: Cooking times vary. A medium-sized fish might take 1-1.5 hours, while a small bird could take 2-3 hours. The clay will harden and turn brick-like.
    7. Retrieve and Open: Once cooked, carefully dig up the hardened clay ball. Let it cool slightly, then crack it open (a rock or stick can help). The food inside will be perfectly steamed, and for fish, the scales and skin will often stick to the clay, leaving clean, moist flesh.

    Practical Tips & Safety:

    • Clay Quality: Good clay is essential. It should be free of large rocks and organic matter that could cause it to crack or explode.
    • Airtight Seal: A complete, airtight seal is crucial for steaming and preventing ash from getting into the food.
    • Doneness: The clay will be very hot. Use caution when cracking it open. Ensure the food is cooked through.
    • Cleanup: This method is fantastic for cleanup, as the mess stays within the clay shell.

    6. Earth Oven (Hangi) Pit Cooking: Underground Slow Roasting

    The earth oven, or Hangi (a traditional Maori method), is a large-scale primitive cooking method for slow-roasting substantial amounts of food. It uses retained heat from hot rocks in an underground pit to cook food for many hours, resulting in incredibly tender and moist results.

    Materials Needed:

    • Pit: A dug pit, typically 2-3 feet deep and wide, depending on the amount of food.
    • Firewood: A large quantity of firewood to heat the rocks.
    • Rocks: Many dense, non-porous rocks (similar to hot rock boiling) to line the pit.
    • Food: Larger game, whole birds, root vegetables, corn on the cob.
    • Greenery: Fresh, non-toxic leaves (e.g., banana leaves, large dock leaves, wet grass) to create a steaming layer.
    • Water: A bucket or container of water.
    • Cover: A tarp, large flat stones, or a thick layer of dirt to seal the pit.

    How to Do It:

    1. Dig the Pit: Dig a pit of appropriate size. Line the bottom with some of your chosen rocks.
    2. Build a Fire: Build a large, hot fire directly in the pit, on top of the rocks. Add more rocks to the fire as it burns, ensuring they get thoroughly heated (glowing red). This can take several hours.
    3. Prepare Food: While the fire burns, prepare your food. Wrap individual items in leaves or natural fibers if desired.
    4. Remove Coals & Layer Rocks: Once the rocks are superheated and the fire has burned down, carefully remove any remaining large embers or unburnt wood from the pit. Evenly distribute the hot rocks at the bottom of the pit.
    5. Add Greenery: Immediately place a thick layer of wet, green leaves or grass directly on top of the hot rocks. This creates a steaming layer and protects the food.
    6. Load Food: Place your food on top of the greenery. Layer larger items at the bottom, smaller items on top.
    7. Add More Greenery & Water: Add another thick layer of wet greenery over the food. Pour a small amount of water over the greenery; this will create a burst of steam when it hits the hot rocks.
    8. Seal the Pit: Quickly cover the pit. Use a tarp, large flat stones, or a thick layer of dirt. The goal is to create an airtight seal to trap the heat and steam.
    9. Cook: Let the food cook for several hours (4-8 hours, depending on size). The pit will act like a slow cooker.
    10. Unearth and Enjoy: Carefully unseal the pit, remove the top layers, and retrieve your perfectly cooked, tender, and moist food.

    Practical Tips & Safety:

    • Rock Safety: Again, use only dry, dense rocks to prevent explosions.
    • Steam Burns: Be extremely careful when opening the pit; a large amount of superheated steam will escape.
    • Pit Stability: Ensure the pit walls are stable and won’t collapse.
    • Patience: This is a slow cooking method. Plan accordingly.
    Practical Tips & Safety:
    Practical Tips & Safety:: Practical Tips & Safety:.

    7. Direct Coal Cooking: Throwing Meat Straight on Embers

    Direct coal cooking is perhaps the most primal and straightforward primitive cooking method. It involves placing food directly onto clean, glowing embers. This method provides a fantastic sear and smoky flavor.

    Materials Needed:

    • Fire: A fire that has burned down to a bed of clean, hardwood coals (no flames, minimal ash).
    • Food: Steaks, burgers, thick-cut vegetables (bell peppers, onions), corn on the cob (with husk on).
    • Tongs/Sticks: A sturdy stick or two to flip the food.

    How to Do It:

    1. Prepare Your Coals: Build a fire using hardwood (oak, maple, hickory). Let it burn down until you have a deep bed of glowing red coals with very little flame or black char. Rake the coals to create an even cooking surface.
    2. Prepare the Food: Season your food as desired. For corn, leave the husk on. For meat, ensure it’s relatively dry on the surface for a good sear.
    3. Place on Coals: Carefully place your food directly onto the clean, glowing coals.
    4. Cook and Flip: Cook for a few minutes on one side until a good crust forms. Flip with a stick or tongs. Repeat until cooked to your desired doneness. For corn, rotate it periodically.
    5. Clean and Serve: Once cooked, remove the food from the coals. Brush off any clinging ash before eating. For corn, peel back the charred husk.

    Practical Tips & Safety:

    • Clean Coals: Only use clean, glowing coals. Avoid flames or black, sooty wood, which will impart a bitter taste.
    • Hardwood: Hardwoods produce better, longer-lasting coals and superior flavor.
    • Ash Brush: Always brush off excess ash before eating.
    • Doneness: This method cooks quickly. Keep a close eye on your food to prevent overcooking.

    8. Reflector Fire Baking: Using Heat Walls for Bread and Biscuits

    Reflector baking is a clever bushcraft cooking technique that harnesses radiant heat to bake items like flatbreads, biscuits, or small cakes without an oven. It uses a reflective surface to direct heat from a fire onto the food.

    Materials Needed:

    • Fire: A small to medium-sized fire with good flames for radiant heat.
    • Reflector: A large, flat rock, a section of a log, a piece of bark, or even a makeshift wall of smaller rocks. The surface facing the fire should be relatively flat.
    • Baking Surface: A flat, clean rock, a piece of bark, or a flat stick to place your dough on.
    • Dough: Simple flour and water dough for flatbreads or biscuits.

    How to Do It:

    1. Build Your Fire: Build a fire against a natural reflector (like a large rock face) or construct a reflector wall using logs or rocks. The fire should be positioned so its heat radiates towards your baking area.
    2. Position the Reflector: Place your chosen reflector (rock, log, bark) upright, angled slightly towards the fire.
    3. Prepare the Dough: Mix your flour and water to form a stiff dough. Flatten it into thin cakes or biscuits.
    4. Place Dough: Place your dough on your baking surface (flat rock, bark, or stick).
    5. Position for Baking: Place the baking surface with the dough in front of the reflector, facing the fire. The reflector will bounce the heat from the fire back onto the dough, creating an oven-like effect. Adjust the distance from the fire to control the heat.
    6. Bake: Turn the dough periodically to ensure even baking. This method is slower than direct heat but prevents burning. Baking times vary based on dough thickness and fire intensity, typically 20-40 minutes.

    Practical Tips & Safety:

    • Stable Reflector: Ensure your reflector is stable and won’t fall over.
    • Heat Control: Adjust the distance of your food from the fire to prevent burning. A consistent fire is key.
    • Dough Thickness: Thinner doughs will cook faster and more evenly.
    • Doneness: Bread is done when it’s golden brown and sounds hollow when tapped.

    9. Stone Griddle Frying: Flat Rock Surface Cooking

    Stone griddle frying is an excellent primitive cooking method for cooking smaller, flatter items. It utilizes a large, flat, heat-retaining stone as a natural griddle or frying pan.

    Materials Needed:

    • Fire: A fire that can heat a large, flat stone.
    • Stone Griddle: A large, flat, smooth, dense, non-porous stone (e.g., slate, granite). Ensure it’s completely dry and free of cracks.
    • Food: Thin slices of meat, fish fillets, eggs, flatbreads, chopped vegetables.
    • Fat/Oil (Optional): Rendered animal fat or plant oil (if available) to prevent sticking.

    How to Do It:

    1. Select and Prepare Stone: Find a suitable flat stone. Clean it thoroughly. Place it directly in or next to your fire, ensuring it’s level.
    2. Heat the Stone: Let the stone heat up slowly and thoroughly. This can take 30-60 minutes, depending on the stone’s thickness and the fire’s intensity. It should be hot enough that a drop of water sizzles and evaporates quickly.
    3. Prepare Food: Slice your food thinly for quicker, more even cooking.
    4. Cook on Griddle: If you have fat, lightly grease the hot stone. Place your food directly onto the hot stone.
    5. Flip and Cook: Cook until done, flipping as needed. The stone will retain heat well, allowing for consistent cooking.

    Practical Tips & Safety:

    • Stone Selection: As with hot rock boiling, avoid wet or porous rocks to prevent explosions. Test the stone’s integrity by heating it slowly before cooking.
    • Even Heat: Ensure the stone heats evenly. Rotate it or adjust its position in the fire if necessary.
    • Sticking: If you don’t have fat, food might stick. Keep a stick handy to scrape and flip.
    • Hot Surface: The stone will remain extremely hot for a long time after the fire dies down.

    Choosing the Right Method for Your Situation and Available Resources

    The best primitive cooking method depends entirely on your specific circumstances:

    • Available Resources: Do you have access to clay, large flat rocks, or specific types of wood?
    • Type of Food: Are you cooking small roots, a whole fish, or a large game animal?
    • Time & Effort: Do you need a quick meal (direct coal) or can you invest hours in a slow roast (earth oven)?
    • Group Size: Are you cooking for one or a larger group?
    • Weather Conditions: Rain might make pit cooking challenging, while a strong wind could make reflector baking difficult.

    Always assess your environment, the food you have, and the time available. Practice these techniques in a controlled environment before relying on them in a true survival situation. Adaptability and ingenuity are your greatest tools.

    FAQ: Primitive Cooking Methods

    Q: Is it safe to eat food cooked directly on coals?

    A: Yes, it can be safe, provided you use clean, glowing hardwood coals without flames or excessive ash. The key is to brush off any clinging ash before consumption. The high heat quickly sears the food, and the contact time with ash is minimal. Avoid cooking on coals from treated wood or unknown sources.

    Q: What kind of rocks are safe to use for hot rock boiling or griddles?

    A: Always use dense, non-porous, and completely dry rocks such as granite, basalt, or slate. Avoid river rocks, sandstone, or any rocks that appear wet or have visible cracks, as trapped moisture can turn to steam and cause them to explode when heated, posing a serious safety risk.

    Q: How do I know if the leaves I’m using for ash cooking are non-toxic?

    A: If you are not 100% certain about a leaf’s identification and toxicity, do not use it for cooking. Stick to universally recognized safe options like large cabbage leaves, burdock leaves (after proper identification), or banana leaves if in a tropical environment. When in doubt, use wet clay or mud as a wrapper instead.

    Q: Can I use any type of wood for spit roasting or plank cooking?

    A: No. For spit roasting and plank cooking, always use green (freshly cut) hardwood that is non-toxic. Good choices include oak, maple, alder, or fruitwoods. Avoid resinous woods like pine, fir, or spruce, as they can impart unpleasant flavors and burn too quickly. Also, avoid any known toxic woods.

    Q: How can I tell if my food is cooked through using these primitive methods?

    A: Without a thermometer, you must rely on visual cues and texture. For meat, juices should run clear, and the meat should be firm but not tough. For fish, it should flake easily with a stick. For root vegetables, they should be tender when pierced. It’s always safer to slightly overcook than to risk consuming undercooked food, especially in a survival situation.

  • How to Make a DIY Millbank Bag for Wilderness Water Filtration

    How to Make a DIY Millbank Bag for Wilderness Water Filtration

    How to Make a DIY Millbank Bag for Wilderness Water Filtration

    In a survival scenario, access to clean drinking water is paramount. While modern portable filters are excellent, understanding fundamental, low-tech solutions can be a lifesaver when technology fails or supplies run out. One such robust and time-tested method is the Millbank Bag. This article will guide you through creating your own DIY Millbank Bag, a crucial piece of gear for any serious prepper or bushcrafter looking to master wilderness water filtration.

    What Is a Millbank Bag and Why Preppers Should Know About It

    The Millbank Bag is a simple yet incredibly effective water pre-filter, originally developed by the British Army. Its design is deceptively straightforward: a cone-shaped canvas bag with a tight weave that allows water to slowly seep through, trapping sediment, silt, and larger particulate matter. It’s not a water purifier – it won’t remove bacteria, viruses, or chemical contaminants – but its role in a multi-stage filtration system is indispensable.

    For preppers, the Millbank Bag represents a cornerstone of self-reliance. Its advantages are numerous:

    • Simplicity: No moving parts, no cartridges to replace, no batteries. It’s a purely mechanical filter.
    • Durability: Made from sturdy canvas, a well-constructed Millbank Bag can last for years with proper care.
    • Effectiveness: It excels at removing turbidity, turning murky, silty water into clear water, significantly extending the life of subsequent purification methods like boiling, chemical treatment, or microfilters.
    • Low Cost: Materials are inexpensive and readily available.
    • Reliability: It works consistently in a wide range of environments, from muddy rivers to stagnant ponds.

    Understanding how to make a Millbank Bag and integrate it into your water procurement strategy provides a robust, sustainable solution for obtaining clearer water, which is the first critical step towards making it safe to drink.

    Materials and Fabric Selection: Canvas Weight, Weave Density, and Rot-Proofing

    The success of your DIY Millbank Bag hinges on selecting the right materials, primarily the canvas itself. Don’t skimp here; quality materials ensure longevity and performance.

    Canvas Selection: The Heart of the Filter

    • Weight: Aim for a medium-heavy canvas, typically 10-12 oz per square yard. Lighter canvas (e.g., 7-8 oz) might be too permeable and not filter fine enough, while heavier canvas (e.g., 14 oz+) could be too slow or even impede water flow significantly. The 10-12 oz range strikes an excellent balance.
    • Weave Density: Look for a tightly woven canvas. A plain weave is common and effective. You want a fabric that feels dense and stiff, not loose or flimsy. The tighter the weave, the finer the particles it can trap.
    • Material Type: 100% cotton canvas is traditional and works well. It swells when wet, further tightening the weave and improving filtration. Synthetic blends might not swell as effectively.
    • Color: Natural, undyed canvas is preferred to avoid any potential chemical leaching into your water.

    Rot-Proofing and Longevity

    Canvas, being a natural fiber, is susceptible to mold, mildew, and rot, especially when stored damp. While traditional Millbank Bags were often treated, for a DIY version, the best rot-proofing strategy is diligent maintenance:

    • Thorough Drying: Always dry your bag completely after each use before storing it. Hang it in a well-ventilated area, preferably in sunlight.
    • Cleaning: Rinse it thoroughly to remove trapped sediment.
    • Storage: Store in a dry, breathable bag (like a mesh stuff sack) rather than a sealed plastic bag.

    If you wish to pre-treat your canvas, consider natural options like beeswax or a diluted copper naphthenate solution (ensure it’s food-safe or thoroughly rinsed and cured if used for water contact, though many prefer to avoid chemicals entirely for drinking water applications). For most preppers, proper drying is the simplest and safest method.

    Other Essential Materials:

    • Thread: Heavy-duty polyester or nylon thread. Cotton thread can rot. Polyester/nylon is strong, rot-resistant, and durable.
    • Hanging Loop Material: A sturdy piece of nylon webbing (1-inch wide, about 6-8 inches long) or a length of paracord (550 cord) for hanging the bag.
    • Optional: A small brass or stainless steel grommet for the hanging loop attachment point can add durability, though a reinforced stitched loop is also effective. Seam sealant (like McNett Seam Grip) can be applied to exterior seams for extra waterproofing, though the canvas itself will swell to seal.
    Other Essential Materials:
    Other Essential Materials:: Other Essential Materials:.

    Practical Tip: Before cutting, wash and dry your canvas once. This pre-shrinks the fabric, preventing significant shrinkage after your bag is made and first used.

    Step-by-Step Sewing Instructions With Measurements

    Creating your how to make a Millbank Bag doesn’t require advanced sewing skills, but precision and strong seams are vital for its performance and durability. We’ll aim for a finished bag roughly 10-12 inches wide at the top and 18-20 inches deep, tapering to a point.

    1. Cut the Fabric

    • Start with a rectangular piece of canvas approximately 22 inches wide by 24 inches long. This will give you enough material for seams and the conical shape.
    • Fold the canvas in half lengthwise, so you have a piece 11 inches wide by 24 inches long.
    • From the folded edge, measure down about 2 inches from the top. Mark this point.
    • From the bottom corner of the folded edge, measure in about 1 inch. Mark this point.
    • Draw a line from the top mark (2 inches down) to the bottom mark (1 inch in). This will create the taper for the cone.
    • Cut along this line. When unfolded, you should have a roughly trapezoidal shape with a wider top and a narrower bottom.
    • Alternatively, for a simpler cone, you can cut a large semicircle or a segment of a circle. However, the folded trapezoid method is often easier for beginners and yields a good shape.

    2. Hem the Top Edge

    • Along the widest edge (the top of your bag), fold over the raw edge by 1/2 inch, press, then fold over another 1 inch and press again.
    • Stitch this hem securely using your heavy-duty thread. This creates a strong opening and a channel for a drawstring if you choose to add one later (though not strictly necessary for a Millbank Bag).

    3. Sew the Main Seam (Side Seam)

    • With the fabric still folded (or fold it in half again, right sides together, if you cut it as a single piece), align the raw edges of the tapered side.
    • Using a strong straight stitch, sew a seam 1/2 inch from the edge, from the top hem down to the point. Backstitch at the beginning and end for reinforcement.
    • For added durability and to prevent fraying, consider a French seam:
      1. Sew the seam with wrong sides together, 1/4 inch from the edge. Trim the seam allowance closely.
      2. Turn the bag inside out (right sides together). Press the seam flat.
      3. Sew a second seam 3/8 inch from the folded edge, enclosing the raw edges of the first seam. This creates a very strong, clean finish.

    4. Form the Point (Bottom Seam)

    • The beauty of the Millbank Bag is its conical shape. If you used the trapezoidal method and sewed a single side seam, the bottom will naturally form a point.
    • Reinforce this point heavily. Stitch across the very tip multiple times, or create a small, flat bottom by folding the point slightly and stitching across it to create a small, reinforced triangle.
    • Safety Tip: Ensure all seams are incredibly strong. Water weight can put significant stress on the fabric and stitching. Double-stitching or using a French seam is highly recommended.

    5. Attach the Hanging Loop

    • Cut a 6-inch length of 1-inch nylon webbing or a loop of paracord.
    • Fold the webbing in half to create a loop.
    • Position the raw ends of the loop on the outside of the bag, centered at the top opening, just below the hem.
    • Stitch the loop securely to the bag with multiple passes, forming a box stitch or an ‘X’ box stitch for maximum strength. This point will bear the full weight of the water.
    • If using a grommet, punch a hole through the top hem and insert the grommet, then thread your paracord loop through it. Reinforce the area around the grommet with extra stitching.

    Hand Sewing Tip: If sewing by hand, use a thimble and a strong needle (e.g., a denim needle). Use a backstitch for all seams, ensuring each stitch overlaps the previous one for maximum strength. Waxing your thread can also add durability and reduce tangling.

    How to Prime, Use, and Maintain Your DIY Millbank Bag in the Field

    Once your DIY Millbank Bag is complete, it’s not quite ready for immediate use. Proper priming and field techniques are essential for optimal performance and longevity.

    Priming Your Millbank Bag

    Priming is a critical first step that prepares the canvas for filtration:

    1. Soak: Submerge your new Millbank Bag completely in clean water for at least 12-24 hours. This allows the cotton fibers to fully swell and tighten the weave. You’ll notice the canvas becoming softer and more pliable.
    2. Rinse: After soaking, rinse the bag thoroughly, inside and out, to remove any loose fibers or manufacturing residues. You might see some discoloration in the initial rinse water; this is normal.
    3. Initial Filtration Test: Fill the bag with clean water and let it filter through. The flow rate might be slow initially, but it should improve slightly as the fibers settle. This also helps to flush out any remaining fine particles from the canvas itself.

    Once primed, your bag is ready for the field.

    Using Your Millbank Bag in the Field

    1. Source Selection: Always choose the clearest water source available. While the Millbank Bag handles turbid water well, starting with clearer water reduces the load on the filter and extends its life.
    2. Setup: Hang your Millbank Bag from a sturdy branch, tripod, or any elevated point. Ensure there’s enough clearance below to place a collection vessel (pot, bottle, another filter) directly underneath the point of the bag.
    3. Fill Slowly: Gently pour water into the bag. Avoid splashing or disturbing sediment at the bottom of your water source. If the water is extremely silty, you might pre-settle it in a separate container for a few minutes before pouring it into the bag.
    4. Wait and Collect: The water will slowly seep through the canvas, dripping from the point of the bag. The flow rate will depend on the canvas weave, water turbidity, and how well the bag is primed. Be patient; this is not a fast process.
    5. Subsequent Purification: CRITICAL SAFETY WARNING: The water collected from a Millbank Bag is *not* safe to drink directly. It is only pre-filtered. You must follow up with a purification method such as boiling (for 1 minute at a rolling boil, 3 minutes at altitudes above 6,500 feet), chemical treatment (iodine, chlorine dioxide), or a certified microfilter to remove bacteria, viruses, and protozoa.
    Using Your Millbank Bag in the Field
    Using Your Millbank Bag in the Field: Using Your Millbank Bag in the Field.

    Practical Tip: If the flow rate becomes too slow, gently agitate the water in the bag or lightly scrub the outside of the bag with your hand to dislodge trapped particles from the canvas pores. Never squeeze or wring the bag forcefully, as this can damage the fibers or seams.

    Maintenance and Storage

    Proper care ensures your Millbank Bag remains a reliable tool for years:

    • Rinse After Use: As soon as possible after use, rinse the bag thoroughly with clean water, inside and out, to remove all trapped sediment. You can gently backflush it by pouring clean water into the point and letting it flow upwards and out the top.
    • Inspect: Check for any tears, holes, or fraying seams. Repair immediately with heavy-duty thread.
    • Dry Completely: This is the most crucial step. Hang the bag in a well-ventilated area, preferably in direct sunlight, until it is bone dry. Even slight dampness can lead to mold and mildew, which will degrade the canvas and impart unpleasant tastes/odors to your water.
    • Storage: Store the completely dry bag in a breathable container, such as a mesh bag or cloth sack, in a cool, dry place. Avoid airtight plastic bags, which can trap moisture and promote mildew growth.

    By following these steps, your canvas water filter bag will be ready whenever you need it most.

    Millbank Bag vs. Commercial Filters: When to Use Each

    In the world of wilderness water filtration, both the traditional Millbank Bag and modern commercial filters have their place. Understanding their strengths and weaknesses allows you to build a comprehensive and resilient water procurement strategy.

    Strengths of the Millbank Bag:

    • Robustness: No moving parts to break, no ceramic elements to crack, no membranes to clog irreversibly. It’s incredibly durable.
    • Simplicity: Easy to use, understand, and maintain.
    • Cost-Effective: Very low initial cost and no ongoing replacement parts.
    • Excellent Pre-Filter: Unmatched at removing heavy sediment, silt, and large particulates from extremely turbid water. This is its primary and most valuable role.
    • Repairable: A tear can often be patched or stitched in the field.
    • Long-Term Viability: With proper care, it can last indefinitely, making it ideal for long-term survival scenarios or remote living.

    Strengths of Commercial Filters:

    • Pathogen Removal: Most modern commercial filters (e.g., Sawyer, Katadyn, Lifestraw) are designed to remove bacteria, protozoa, and sometimes viruses (depending on pore size), making water safe to drink directly.
    • Speed: Many pump or squeeze filters offer a faster flow rate for clean water.
    • Portability: Often compact and lightweight, ideal for backpacking where every ounce counts.
    • Convenience: Some integrate directly with water bottles or hydration bladders.

    When to Use Each (and How They Work Together):

    The key isn’t to choose one over the other, but to understand how they complement each other:

    • Use the Millbank Bag for Turbid Water: When your water source is visibly murky, muddy, or full of suspended particles (e.g., a rain-swollen river, a stagnant pond, glacial meltwater), the Millbank Bag should be your first line of defense. It will clarify the water, making it suitable for the next stage.
    • Use Commercial Filters for Pathogen Removal: Once the water has been pre-filtered by the Millbank Bag, it’s ready for a commercial filter. Running clear water through your microfilter will drastically extend its lifespan, prevent clogging, and maintain its flow rate. This synergy is incredibly powerful.
    • Millbank Bag as a Backup: In a true survival situation, your commercial filter might break, freeze, or clog beyond repair. A Millbank Bag provides a reliable, low-tech backup for obtaining clear water, which can then be boiled or chemically treated.
    • When Weight/Space is Critical: For fast-and-light backpacking where water sources are generally clear, a commercial filter might be sufficient on its own. However, always consider the potential for unexpected turbid water.
    • Long-Term Preparedness: For a home preparedness kit or a bug-out location, having a bushcraft water filtration system that includes a Millbank Bag ensures you have a sustainable method for handling even the dirtiest water sources.

    By integrating a canvas water filter bag into your preparedness strategy, you gain a versatile and resilient capability that enhances the effectiveness and longevity of your other water purification tools. It’s a testament to the power of simple, well-engineered solutions in complex environments.

    Frequently Asked Questions About DIY Millbank Bags

    Q: Can a Millbank Bag remove viruses or bacteria?

    A: No, a Millbank Bag is a pre-filter designed to remove sediment, silt, and larger particulates. Its weave is not fine enough to block microscopic pathogens like bacteria, viruses, or protozoa. Water filtered through a Millbank Bag must always be further purified by boiling, chemical treatment, or a certified microfilter before consumption.

    Q: How fast does a Millbank Bag filter water?

    A: The filtration rate varies significantly depending on the canvas weave, the turbidity of the water, and how well the bag is primed. It is generally a slow process, often taking several minutes to an hour or more to filter a liter of heavily turbid water. It’s designed for patience and continuous, passive filtration rather than rapid on-demand purification.

    Q: What’s the best way to clean a Millbank Bag?

    A: After each use, rinse the bag thoroughly with clean water, inside and out, to remove trapped sediment. You can gently backflush it by pouring clean water into the point and letting it flow upwards. Avoid harsh scrubbing or detergents. The most critical step is to ensure it is completely air-dried in a well-ventilated area, preferably in sunlight, before storage to prevent mold and mildew.

    Q: Can I use different fabrics for a DIY Millbank Bag?

    A: While other natural fabrics like denim or heavy cotton twill might seem plausible, traditional 10-12 oz cotton canvas is highly recommended. Its specific weave and fiber properties (swelling when wet) are optimized for effective pre-filtration. Synthetic fabrics typically do not swell and may not filter as effectively or consistently.

    Q: How long will a DIY Millbank Bag last?

    A: With proper construction, careful priming, and diligent maintenance (especially thorough drying after each use), a DIY Millbank Bag made from quality canvas can last for many years, providing reliable service as a pre-filter in countless wilderness scenarios.

  • How to Set Up Meshtastic for Off-Grid Communication: A Prepper’s Complete Guide

    How to Set Up Meshtastic for Off-Grid Communication: A Prepper’s Complete Guide

    How to Set Up Meshtastic for Off-Grid Communication: A Prepper’s Complete Guide

    In an increasingly interconnected world, the thought of a grid-down scenario or widespread communication failure can be daunting for any preparedness-minded individual. Traditional communication methods often rely on fragile infrastructure, making them vulnerable during emergencies. This is where Meshtastic for preppers emerges as a game-changer. Meshtastic is an open-source, decentralized mesh network protocol that leverages LoRa (Long Range) radio technology to enable text messaging and location sharing without relying on cell towers, satellites, or the internet. For preppers, this means a resilient, private, and low-power communication system that can operate when everything else fails. This comprehensive guide will walk you through everything you need to know, from selecting the right hardware to building a robust neighborhood emergency mesh network.

    What Is Meshtastic and Why Preppers Are Adopting It

    Meshtastic is more than just a communication app; it’s an entire ecosystem built around LoRa radio modules. LoRa is a spread spectrum modulation technique derived from chirp spread spectrum (CSS) technology. It allows for very long-range communication with minimal power consumption, albeit at low data rates. Unlike Wi-Fi or Bluetooth, LoRa is designed for sending small packets of data over many miles, making it ideal for text messages, GPS coordinates, and sensor data.

    The ‘mesh’ aspect of Meshtastic is crucial. Instead of communicating directly with a central server, Meshtastic devices form a peer-to-peer network. Each device acts as a repeater, forwarding messages from other nodes until they reach their intended recipient. This creates a self-healing, resilient network where the more devices there are, the stronger and more extensive the network becomes. If one node goes down, messages can simply route around it.

    Key Benefits for Preppers:

    • Off-Grid Capability: Operates entirely without internet, cell service, or external infrastructure. Perfect for grid-down communication.
    • Decentralized and Resilient: No single point of failure. The mesh network automatically routes messages around downed nodes.
    • Low Power Consumption: LoRa devices can run for days or even weeks on small batteries, especially when configured as static repeaters.
    • Private and Secure: Messages are end-to-end encrypted, offering a level of privacy not always found in commercial solutions.
    • Location Sharing: Built-in GPS on many devices allows for automatic location sharing, critical for coordinating during emergencies.
    • Cost-Effective: Hardware is relatively inexpensive, making it accessible for widespread deployment.
    • Open Source: The open-source nature means continuous development, community support, and transparency.

    Imagine a scenario where cell towers are down, and landlines are out. With a Meshtastic network, you could still send vital messages to family members across town, coordinate with neighborhood watch groups, or share critical intelligence about local conditions. This capability makes Meshtastic an indispensable tool in any prepper’s communication arsenal.

    Hardware Buying Guide: Best Devices Under $50

    Getting started with Meshtastic requires a compatible LoRa-enabled microcontroller board. While there are many options, some stand out for their reliability, features, and affordability. When choosing a device, consider factors like built-in GPS, screen, battery management, and antenna connector type (SMA is common and preferred).

    Recommended Devices:

    • LilyGo T-Beam (ESP32 LoRa with GPS): This is arguably the most popular and versatile Meshtastic device. It features an ESP32 microcontroller, a LoRa radio module (usually SX1276 or SX1278 for 433/868/915 MHz), a GPS module, and a battery management circuit for 18650 batteries. Prices typically range from $25-$45.

      • Pros: Integrated GPS, good battery life with 18650, robust community support, external antenna connector.
      • Cons: Requires an 18650 battery (often sold separately), can be slightly larger.
      • Tip: Look for versions with a pre-soldered antenna connector and a good quality GPS module.
    • Heltec LoRa 32 (ESP32 LoRa with OLED): A compact option, often featuring an OLED display but typically lacking integrated GPS. It’s great for static nodes or when GPS isn’t a primary concern. Prices are usually $20-$35.

      • Pros: Compact, built-in OLED screen, good for basic messaging and static repeaters.
      • Cons: No integrated GPS (can be added externally), smaller battery capacity.
      • Tip: Excellent for a low-cost, always-on repeater node in a fixed location.
    • LilyGo T-Echo (NRF52840 LoRa with GPS and E-Paper): A newer, more advanced option using an NRF52840 microcontroller, offering lower power consumption and Bluetooth 5.0. It often includes GPS and an e-paper display. Prices are usually $40-$60, sometimes slightly above the $50 mark but worth considering for its features.

      • Pros: Extremely low power, e-paper display (always on, low power), integrated GPS, modern microcontroller.
      • Cons: Higher price point, slightly newer ecosystem (though well-supported).
      • Tip: Ideal for a personal, portable device where battery life and a clear display are paramount.

    What to Look For When Buying:

    • Frequency: Ensure the device supports the correct LoRa frequency for your region (e.g., 915 MHz for North America, 868 MHz for Europe, 433 MHz for some regions globally). Using the wrong frequency is illegal and won’t work.
    • Antenna Connector: SMA or u.FL are common. SMA is generally preferred for its robustness and compatibility with a wide range of aftermarket antennas.
    • Battery Management: Look for integrated 18650 battery holders and charging circuits. This simplifies power management.
    • GPS: Highly recommended for portable devices to enable location sharing and mapping features.
    • Screen: An OLED or E-Paper display can be very useful for checking status, messages, and settings without needing a phone.

    Safety Warning: Always ensure you are using the correct frequency for your region. Operating on unauthorized frequencies can lead to legal penalties. Also, be careful when handling Li-ion batteries (like 18650s); use reputable brands and proper charging practices to avoid fire hazards.

    What to Look For When Buying:
    What to Look For When Buying:: What to Look For When Buying:.

    Step-by-Step First-Time Setup and Channel Configuration

    Setting up your first Meshtastic device is straightforward, even for beginners. This guide assumes you have a compatible device (like a LilyGo T-Beam) and a smartphone (Android or iOS).

    Phase 1: Flashing the Firmware

    1. Install Drivers (if needed): For Windows users, you might need to install CP210x or CH340 drivers for your computer to recognize the ESP32 board. Search for “CP210x driver” or “CH340 driver” online and install the appropriate one.
    2. Connect Your Device: Use a high-quality USB-C or Micro-USB cable (depending on your device) to connect your Meshtastic board to your computer. Ensure the cable supports data transfer, not just charging.
    3. Use the Web Flasher: The easiest way to flash firmware is using the official Meshtastic Web Flasher. Open a Chromium-based browser (Chrome, Edge, Brave) and navigate to flasher.meshtastic.org.
    4. Select Device and Firmware: The flasher should automatically detect your device type. Choose the latest stable firmware version. If you have a specific board (e.g., T-Beam), ensure it’s selected. Click “Install.”
    5. Select Port: A pop-up will appear asking you to select the serial port. Choose the one corresponding to your Meshtastic device (it might be labeled something like “USB Serial Device” or “CP210x UART Bridge”). Click “Connect.”
    6. Flash and Wait: The flasher will now download and install the firmware. This process can take a few minutes. Do not disconnect your device until it’s complete and you see a success message.
    7. Disconnect and Power On: Once flashed, disconnect the device from your computer. If it has a battery, it should power on automatically. If not, connect the battery or a power source.

    Phase 2: Connecting to Your Smartphone and Basic Configuration

    1. Install the Meshtastic App: Download the official Meshtastic app from the Google Play Store (Android) or Apple App Store (iOS).
    2. Enable Bluetooth: On your smartphone, ensure Bluetooth is enabled.
    3. Open the App and Connect: Open the Meshtastic app. It will scan for nearby Meshtastic devices. Select your device from the list and tap “Connect.” You might need to grant location permissions for Bluetooth scanning to work.
    4. Initial Setup: The app will guide you through initial setup.

      • Set a Name: Choose a unique name for your device (e.g., “PrepperBase1,” “MobileNodeAlpha”).
      • Set a Role: For most users, “Client” is appropriate. If you’re setting up a dedicated repeater, choose “Router.”
      • Set Region: Confirm your LoRa frequency region (e.g., 915 MHz).
    5. Channel Configuration (Crucial for Preppers):

      • Default Channel: By default, all Meshtastic devices join a “Primary” channel. This is fine for initial testing but is not secure for private communications.
      • Creating a Private Channel: Go to the “Channels” section in the app. Tap the ‘+’ icon to create a new channel.
      • Channel Name: Give your channel a descriptive name (e.g., “AlphaTeam,” “NeighborhoodWatch”).
      • Channel PSK (Pre-Shared Key): This is your encryption key. Generate a strong, random PSK and share it ONLY with trusted individuals who will be part of your network. Do not use simple passwords. The app can generate a random one for you. Write it down securely!
      • Channel LongFast/ShortSlow: These settings determine range vs. speed. For preppers prioritizing range, “LongFast” or “LongSlow” are often preferred. Experiment with these settings in your environment.
      • Add Members: Share the channel name and PSK with your trusted contacts. They will need to manually add this channel to their Meshtastic app using the exact same name and PSK.
    6. Send Your First Message: Once connected and channels are configured, go to the “Messages” tab and try sending a message. If you have another device on the same channel, it should receive it.

    Practical Tip: Always keep a physical record of your channel PSKs in a secure location (e.g., a waterproof notebook in your bug-out bag). If your phone or device is lost, you’ll need these to rejoin your network.

    Extending Range: Antennas, Solar Nodes, and Repeater Placement

    The advertised range of LoRa can be impressive, but real-world performance is heavily influenced by terrain, obstacles, and antenna quality. For a robust LoRa mesh network prepper setup, optimizing range is paramount.

    Antenna Upgrades:

    The small whip antennas that come with most devices are basic. Upgrading your antenna is the single most effective way to improve range.

    • Omnidirectional Antennas: These radiate and receive signals in all directions. Ideal for mobile nodes or central repeaters that need to cover a wide area.

      • Types: Fiberglass omni antennas (often 5dBi or 8dBi gain) are common.
      • Placement: The higher, the better. Mount them on a mast, roof, or even a tall tree. Line of sight is critical.
      • Example: A 915 MHz 5dBi fiberglass omni antenna mounted 20 feet high can significantly extend your coverage compared to a stock antenna.
    • Directional Antennas (Yagi or Panel): These focus the signal in a specific direction, offering much higher gain but requiring precise aiming. Ideal for point-to-point links or extending a network into a specific valley or distant location.

      • Types: Yagi antennas (e.g., 915 MHz 10dBi Yagi) or flat panel antennas.
      • Placement: Must be aimed directly at the intended receiving node. Requires careful planning and potentially a compass.
      • Example: If you need to reach a specific family member 10 miles away over hilly terrain, a pair of well-aimed Yagi antennas could establish that link.
    • Antenna Cable: Use the shortest possible, high-quality LMR-200 or LMR-400 equivalent cable to connect your antenna. Longer or thinner cables introduce signal loss. Avoid cheap RG-174 cables for anything but very short runs.

    Safety Warning: When installing outdoor antennas, be extremely mindful of power lines. Always assume power lines are live and maintain a safe distance. Consider hiring a professional for complex rooftop installations.

    Solar-Powered Nodes and Repeaters:

    For truly resilient off grid communication without internet, static repeater nodes need independent power. Solar power is the ideal solution.

    • Components:

      • Meshtastic Device: A low-power board like the T-Echo or a T-Beam with an 18650 battery holder.
      • Small Solar Panel: A 5W-10W 5V solar panel is often sufficient for continuous operation.
      • Charge Controller: Many Meshtastic boards have basic charge controllers built-in for 18650 batteries. For larger battery banks, a dedicated MPPT solar charge controller is recommended.
      • Battery: An 18650 Li-ion battery (or a small LiFePO4 battery pack for more robust solutions) to store power for nighttime operation.
      • Weatherproof Enclosure: A NEMA-rated enclosure to protect the electronics from the elements.
    • Deployment: Place solar nodes in locations with good sun exposure and, crucially, good line of sight to other nodes in your network. Elevated positions are key.
    • Example: A solar-powered T-Beam with an external 8dBi omni antenna mounted on a pole on a hill overlooking your neighborhood could act as a central repeater, significantly boosting the range for everyone.

    Strategic Repeater Placement:

    The strength of a mesh network lies in its ability to route messages through multiple nodes. Strategic placement of repeaters is vital for maximizing coverage, especially in challenging terrain.

    • Line of Sight (LOS): LoRa performs best with clear line of sight. Identify high points in your area (hills, tall buildings, water towers) that can serve as repeater locations.
    • Triangulation: Instead of a single central repeater, consider placing multiple repeaters that form a triangle or polygon around your target area. This provides redundancy and better coverage.
    • Choke Points: Identify areas where communication is likely to fail (e.g., valleys, dense urban areas). Place repeaters at the edges of these zones to bridge the gap.
    • Community Nodes: Encourage trusted neighbors to set up their own Meshtastic devices as repeaters. The more nodes, the stronger the network.
    • Mapping: Use tools like Google Earth or dedicated RF planning software to visualize line of sight between potential node locations. Conduct range tests with your devices to confirm theoretical coverage.

    Concrete Example: In a suburban area with some hills, you might place one solar repeater on the highest point of your property, another on a neighbor’s two blocks away, and a third on a local community building (with permission). This creates a robust backbone for your local grid down communication network.

    Strategic Repeater Placement:
    Strategic Repeater Placement:: Strategic Repeater Placement:.

    Building a Neighborhood Emergency Mesh Network

    A Meshtastic network truly shines when it’s a collaborative effort. Building a neighborhood emergency mesh network transforms individual preparedness into community resilience.

    Steps to Establish a Community Network:

    1. Educate and Recruit: Start by explaining Meshtastic to trusted neighbors, community leaders, and local preparedness groups. Highlight its benefits for emergency communication. Demonstrate its capabilities.
    2. Standardize Hardware (Optional but Recommended): While not strictly necessary, agreeing on a common device (e.g., LilyGo T-Beam) can simplify troubleshooting and firmware updates for the group.
    3. Establish a Primary Emergency Channel: Create a dedicated, secure channel with a strong PSK that all participants will join. This will be your main communication channel during an emergency.

      • Channel Name: Keep it clear and identifiable (e.g., “Sector7Emergency,” “OakwoodPrepNet”).
      • PSK Management: Distribute the PSK securely (e.g., in person, via encrypted message). Emphasize that it should not be shared outside the trusted group.
    4. Designate Repeater Locations: Identify key locations for static, always-on repeater nodes. These could be on rooftops, in attics, or on poles at trusted members’ homes. Prioritize high elevation and clear line of sight.

      • Power: Encourage solar-powered setups for repeaters to ensure continuous operation.
      • Security: Ensure repeater nodes are physically secure from tampering or theft.
    5. Conduct Regular Drills and Testing: A network is only as good as its last test. Schedule regular communication drills (e.g., monthly) where everyone checks in, sends messages, and confirms network functionality. Test range and message delivery under various conditions.
    6. Develop Communication Protocols: Agree on simple protocols for emergency communication:

      • Message Format: E.g., [CALLSIGN/NAME] [LOCATION] [STATUS] [MESSAGE]
      • Priority Levels: E.g., URGENT, INFO, ROUTINE
      • Check-in Times: During an emergency, agree on specific times for everyone to check in.
    7. Create a Local Mesh Map: Use a physical map or a digital tool (like Google My Maps) to plot the locations of all active nodes and repeaters. This helps visualize coverage and identify gaps.

    Practical Tip: Consider setting up a secondary, less secure “public” channel for broader community announcements or for new members to join before being vetted for the private emergency channel. This allows for wider reach while maintaining security for critical communications.

    Meshtastic vs. Ham Radio vs. GMRS: Which Do You Actually Need?

    Each communication method has its strengths and weaknesses. For preppers, understanding these differences is key to building a layered and redundant communication strategy. There isn’t a single “best” solution; rather, it’s about having the right tool for the right job.

    Meshtastic:

    • Pros:

      • No License Required (for low power): In most regions, operating Meshtastic at low power (e.g., 100mW or less) on ISM bands (915/868/433 MHz) does not require a license. Check local regulations.
      • Data/Text Focused: Excellent for sending short messages, GPS coordinates, sensor data.
      • Mesh Networking: Self-healing, decentralized, resilient.
      • Low Power: Devices can run for extended periods on battery.
      • Encryption: End-to-end encryption for private communications.
      • Cost-Effective: Hardware is relatively inexpensive.
    • Cons:

      • No Voice: Primarily text-based (though experimental voice over LoRa exists, it’s not practical for general use).
      • Low Bandwidth: Not suitable for large files or streaming.
      • Limited Range (per hop): While mesh extends overall range, individual device-to-device range is limited compared to high-power Ham.
    • Best Use Case for Preppers: Local neighborhood communication, family coordination, sharing critical data (location, status), establishing a resilient data backbone where internet/cell is down.

    Ham Radio (Amateur Radio):

    • Pros:

      • Long Range Voice & Data: Capable of continent-spanning communication (HF) or local/regional voice (VHF/UHF).
      • High Power: Can transmit at much higher power levels than Meshtastic or GMRS.
      • Versatile: Supports voice, digital modes (FT8, Winlink for email), image transmission, satellite communication.
      • Robust Infrastructure: Repeaters, emergency nets, and a vast community of experienced operators.
    • Cons:

      • License Required: Requires passing an FCC (or equivalent) exam.
      • Higher Cost: Equipment can be significantly more expensive, especially for HF.
      • Learning Curve: Requires technical knowledge and practice.
      • No Native Encryption: Voice and most digital modes are unencrypted (though some digital modes offer obfuscation).
    • Best Use Case for Preppers: Long-distance communication, monitoring emergency broadcasts, coordinating with regional groups, voice communication with trained operators, robust backup for all scenarios.

    GMRS (General Mobile Radio Service):

    • Pros:

      • Voice Focused: Excellent for local voice communication.
      • Easy to Use: Simpler operation than Ham radio, often push-to-talk.
      • Repeaters Available: Can use GMRS repeaters for extended range (requires a repeater-capable radio).
      • Family License: One license covers an entire family.
      • Higher Power than FRS: Up to 50 watts on some channels.
    • Cons:

      • License Required: Requires an FCC license (no exam, just a fee).
      • No Data/Text (natively): Primarily voice.
      • Limited Channels: Fewer channels than Ham radio.
      • No Encryption: Communications are in the clear.
    • Best Use Case for Preppers: Short-range family communication, convoy communication, local neighborhood voice communication, simple and effective voice backup.

    Which Do You Actually Need?

    Ideally, a prepper should aim for a multi-layered communication strategy:

    • Meshtastic: Your primary local, private, data-focused network for neighborhood coordination and family status updates when internet/cell is down.
    • GMRS: Your go-to for simple, local voice communication with family and immediate neighbors.
    • Ham Radio: Your long-range, versatile backbone for regional/national communication, emergency monitoring, and advanced capabilities.

    Each system fills a critical gap. Meshtastic excels where privacy and data are key, GMRS for simple voice, and Ham for ultimate range and versatility. Investing in all three, and learning to use them proficiently, provides the most robust grid down communication plan.

    FAQ: Meshtastic for Preppers

    Q: Is Meshtastic truly secure and private for prepper communications?

    A: Yes, Meshtastic offers strong end-to-end encryption for all messages sent on a private channel. This means only devices with the correct Pre-Shared Key (PSK) can decrypt and read your messages. For preppers, this is a significant advantage over unencrypted radio services like GMRS or standard Ham radio voice communications. However, physical security of your devices and secure management of your PSK are still crucial.

    Q: What is the realistic range of a Meshtastic device?

    A: The range of a single Meshtastic device (point-to-point) varies wildly based on terrain, antenna quality, and power settings. In urban areas with obstructions, it might be less than a mile. In open, flat terrain with good antennas and line of sight, it can easily reach 5-10 miles, and even up to 20+ miles in ideal conditions (e.g., mountain-to-mountain). The true power of Meshtastic, however, comes from its mesh networking, where messages hop between devices, effectively extending the network’s overall reach far beyond any single device’s direct range.

    Q: Do I need a license to operate Meshtastic?

    A: In most countries, operating Meshtastic on the ISM (Industrial, Scientific, and Medical) bands (e.g., 915 MHz in North America, 868 MHz in Europe, 433 MHz globally) at low power levels (typically 100mW or less) does not require an individual license. These bands are generally license-free for low-power, short-range devices. However, it is crucial to verify the specific regulations for LoRa/ISM band usage in your country and region, as power limits and allowed frequencies can vary. Always operate responsibly and within legal limits.

    Q: Can Meshtastic replace my cell phone during an emergency?

    A: Meshtastic can provide a critical communication lifeline when cell networks are down, but it’s not a direct replacement for a cell phone. It’s primarily for text-based messages and location sharing, not voice calls, video, or high-bandwidth data. Think of it as a highly resilient, private, off-grid pager and GPS tracker. It’s an excellent addition to your communication toolkit, offering capabilities that cell phones lack in a grid-down scenario, but it complements, rather than replaces, other forms of communication.

  • How to Build a Faraday Cage from a Trash Can: Step-by-Step EMP Protection

    How to Build a Faraday Cage from a Trash Can: Step-by-Step EMP Protection

    How to Build a Faraday Cage from a Trash Can: Step-by-Step EMP Protection

    In an increasingly unpredictable world, safeguarding your essential electronics from an Electromagnetic Pulse (EMP) event is a critical preparedness measure. While commercial solutions exist, learning how to build a diy faraday cage offers a cost-effective and empowering way to protect your vital gear. This comprehensive guide will walk you through constructing a robust Faraday cage using a common galvanized trash can, providing reliable EMP protection DIY for your most valuable electronics.

    An EMP, whether from a high-altitude nuclear detonation or a powerful solar flare (Coronal Mass Ejection – CME), can render unprotected electronics useless across vast areas. From communication devices to medical equipment, the potential for widespread disruption is immense. A properly constructed Faraday cage acts as an electromagnetic shield, diverting the pulse around its contents and keeping your devices operational when you need them most.

    Related TacticalProof reading: How to Build a Survival Cache: Containers, Contents, and Concealment | Improvised Wilderness Weapons

    What Is a Faraday Cage and How Does It Block EMP?

    At its core, a Faraday cage is an enclosure made of a conductive material that blocks electromagnetic fields. It’s named after Michael Faraday, who demonstrated the principle in 1836. The science behind it is elegant: when an external electromagnetic field (like an EMP) encounters the conductive material of the cage, it induces currents within that material. These induced currents generate an opposing electromagnetic field that effectively cancels out the external field inside the enclosure.

    Think of it like water flowing around a rock. The water (EMP) is diverted around the rock (Faraday cage), leaving the space behind the rock (inside the cage) calm and unaffected. For a Faraday cage to be effective against an EMP, it must meet several key criteria:

    • Conductive Material: The enclosure must be made of a good electrical conductor, such as steel, aluminum, copper, or galvanized iron.
    • Complete Enclosure: The conductive material must form a continuous, unbroken shell around the protected items. Even small gaps or holes can allow electromagnetic energy to leak through.
    • Grounding (Optional but Recommended): While not strictly necessary for the basic principle, grounding the cage can help dissipate induced currents more effectively, especially for larger or more permanent installations.
    • Internal Insulation: The items inside the cage must not touch the conductive walls. This is crucial because if an item touches the wall, the induced currents can transfer directly to the device, defeating the purpose.

    An EMP generates a very fast, high-amplitude electromagnetic pulse. This pulse can induce massive currents and voltages in electronic circuits, causing them to overload, burn out, or simply cease to function. A Faraday cage provides a ‘safe zone’ where these destructive fields cannot penetrate, preserving the integrity of your sensitive electronics.

    Materials You Need: Galvanized Trash Can vs. Ammo Can vs. Foil Layers

    When considering materials for your how to make a faraday cage project, you have several options, each with pros and cons. For this guide, we’ll focus on the galvanized trash can method due to its balance of effectiveness, capacity, and affordability.

    Galvanized Trash Can (Recommended for this Guide)

    • Pros: Excellent conductivity (steel with zinc coating), readily available, relatively inexpensive, good capacity for multiple items, durable, often comes with a tight-fitting lid.
    • Cons: Can be bulky, requires careful insulation inside.
    • Why it’s ideal: The galvanized steel provides a robust, continuous conductive shell. Its size allows for storing a decent amount of gear, making it practical for family preparedness.

    Metal Ammo Can

    • Pros: Extremely durable, airtight (often waterproof), excellent conductivity, compact.
    • Cons: Limited capacity, more expensive per cubic inch than a trash can.
    • Best for: Small, critical items like radios, flash drives, or a single tablet.

    Aluminum Foil Layers

    • Pros: Very cheap, accessible, flexible.
    • Cons: Less robust, difficult to create a truly continuous, unbroken shield without gaps, prone to tearing, requires many layers for effectiveness, and insulation is still needed.
    • Best for: Emergency, temporary, or very small items. Not recommended for long-term, reliable protection.

    Materials List for Your Galvanized Trash Can Faraday Cage:

    1. Galvanized Steel Trash Can with Lid: Choose a sturdy one, ideally 20-30 gallons, ensuring the lid fits snugly. Look for one without large dents or holes.
    2. Non-Conductive Liner/Insulation:
      • Heavy-duty Plastic Trash Bag (3-6 mil thick): At least two, preferably three, to line the inside.
      • Cardboard Boxes/Sheets: To create an inner box or layers for separation.
      • Foam Padding/Bubble Wrap: For cushioning and additional insulation.
      • Mylar Emergency Blankets (Optional but Recommended): Can add an extra layer of reflective shielding and insulation.
    3. Duct Tape or Aluminum Tape: For sealing seams of inner liners and securing insulation.
    4. Silicone Sealant (Optional): For sealing any potential gaps around the lid rim if it’s not perfectly tight.
    5. Desiccant Packs (e.g., Silica Gel): To absorb moisture and prevent corrosion, especially important for electronics.
    6. Tools: Utility knife or scissors.

    Safety Warning: When handling metal edges, be mindful of sharp points. Wear gloves if necessary. Ensure your work area is clean and well-lit.

    Materials List for Your Galvanized Trash Can Faraday Cage:
    Materials List for Your Galvanized Trash Can Faraday Cage:: Materials List for Your Galvanized Trash Can Faraday Cage:.

    Step-by-Step Build: The Galvanized Trash Can Method

    This method focuses on creating multiple layers of insulation and shielding within a conductive galvanized trash can. The key is to ensure no electronic device ever directly touches the metal walls of the can.

    Step 1: Prepare the Trash Can

    1. Clean Thoroughly: Wash the inside and outside of the galvanized trash can with soap and water. Ensure it’s completely dry before proceeding. Any moisture trapped inside can damage electronics over time.
    2. Inspect for Damage: Check the can and lid for any significant dents, holes, or rust. While small imperfections might be okay, large gaps could compromise the cage’s effectiveness. The lid should fit as snugly as possible.

    Step 2: Create the First Layer of Insulation (Air Gap & Plastic)

    1. Line with Heavy-Duty Plastic Bags: Take your first heavy-duty plastic trash bag. Carefully open it and place it inside the galvanized can, pushing it down to conform to the bottom and sides. Ensure the bag extends over the rim of the can. This bag serves as the primary non-conductive barrier between your electronics and the metal can.
    2. Add a Second Bag (Optional but Recommended): For extra protection, place a second plastic bag inside the first, ensuring it also extends over the rim. This doubles the insulation and provides redundancy.
    3. Secure the Bags: Fold the excess plastic from the bags over the rim of the trash can and secure it with duct tape. This prevents the bags from slipping down and exposing the metal.

    Step 3: Build the Inner Cardboard Box/Structure

    1. Construct an Inner Cardboard Box: Using cardboard sheets or disassembled cardboard boxes, create an inner box that fits snugly but not tightly inside the plastic-lined trash can. This inner box will hold your electronics and provide another layer of non-conductive separation. You can cut cardboard to line the bottom and sides, or construct a full box.
    2. Ensure Air Gaps: The cardboard should ideally create a small air gap between itself and the plastic liner, and between the electronics and the cardboard. Air is a good insulator.
    3. Secure Cardboard: Use duct tape to assemble your cardboard structure. Ensure all cardboard edges are taped to prevent items from slipping through to the plastic liner.

    Step 4: Add Mylar and Foam (Enhanced Protection)

    1. Line with Mylar (Optional): If using Mylar emergency blankets, line the inside of your cardboard box with one or two layers. Mylar is reflective and can offer additional shielding, though its primary role here is as another non-conductive layer. Secure with tape.
    2. Add Foam Padding: Place a layer of foam padding or bubble wrap at the bottom of your cardboard structure. This provides cushioning for your electronics and further insulates them from the bottom of the can.

    Step 5: Load Your Electronics and Desiccants

    1. Wrap Individual Items: For maximum protection, wrap individual sensitive electronics (e.g., radios, phones, hard drives) in additional layers of bubble wrap, foam, or even small Mylar bags. This provides localized insulation and cushioning.
    2. Place Desiccant Packs: Distribute several desiccant packs (silica gel) throughout the cage, especially among your electronics. Moisture is a silent killer of electronics, and these packs will help keep the internal environment dry.
    3. Load Electronics: Carefully place your wrapped electronics inside the insulated cardboard box. Arrange them so they don’t touch each other or the cardboard walls directly if possible. Use additional foam or bubble wrap to fill any significant gaps and prevent items from shifting.

    Step 6: Seal the Cage

    1. Add Top Insulation: Place a final layer of foam padding or bubble wrap on top of your electronics.
    2. Close the Inner Liner: Fold the plastic bags (and Mylar, if used) over the top of your electronics, sealing them within the inner non-conductive layers. Use duct tape to create a tight seal for these inner bags.
    3. Secure the Lid: Place the galvanized trash can lid firmly on top. Ensure it creates the tightest possible seal. If there are any noticeable gaps around the rim, you can use aluminum tape or silicone sealant to further seal the lid to the can, creating a more complete conductive enclosure.

    Your faraday cage trash can is now complete! Store it in a cool, dry place, away from direct sunlight or extreme temperatures.

    Testing Your Faraday Cage with a Radio and Cell Phone

    While a true EMP test requires specialized equipment, you can perform a simple, practical test to gauge the effectiveness of your faraday cage for electronics. This test checks if the cage can block common radio frequencies.

    The Radio Test:

    1. Tune a Radio: Find an AM/FM radio station that comes in clearly and strongly in your location. Note the station and volume level.
    2. Place Radio Inside: Turn the radio on and place it inside your fully assembled and sealed Faraday cage.
    3. Listen for Silence: Close the lid securely. You should hear the radio signal become significantly weaker or disappear entirely. If you still hear the station clearly, your cage has a leak.
    4. Troubleshoot: If the signal persists, re-check your insulation layers. Ensure no part of the radio is touching the metal can. Verify the lid is sealed tightly and there are no gaps in the conductive shell.

    The Cell Phone Test:

    1. Make a Call: Use a second cell phone to call the phone you intend to place inside the cage. Ensure the phone rings.
    2. Place Phone Inside: Place the active cell phone (the one you called) inside your sealed Faraday cage.
    3. Attempt to Call Again: From the second phone, try calling the phone inside the cage.
    4. Check for ‘Not Available’: If the Faraday cage is working, the call should go straight to voicemail or give a ‘subscriber not available’ message. If the phone inside rings, your cage is not effective.
    5. Troubleshoot: Similar to the radio test, re-examine all layers, insulation, and the lid seal.

    Important Note: These tests are indicative, not definitive. They confirm the cage can block common radio frequencies, which is a good sign, but an EMP is a much more powerful and broadband event. However, a cage that passes these tests is significantly better than no protection at all.

    The Cell Phone Test:
    The Cell Phone Test:: The Cell Phone Test:.

    What to Store Inside: Priority Electronics for Post-EMP Recovery

    Deciding what to store in your Faraday cage is crucial. Focus on items that would be indispensable for communication, navigation, information, and survival in a post-EMP scenario. Prioritize functionality over luxury.

    Communication & Information:

    • Handheld Ham Radio or GMRS/FRS Radios: Essential for local and potentially long-distance communication. Include spare batteries.
    • Shortwave Radio: For receiving news and information from distant stations.
    • Solar/Hand-Crank NOAA Weather Radio: Critical for local weather alerts and emergency broadcasts.
    • Old-School Cell Phone (Pre-Smartphone Era): Some older, simpler phones might be more resilient, but still benefit from protection.
    • USB Drives/External Hard Drives: Loaded with critical data: survival guides, maps, medical information, family photos, important documents (scanned).
    • Laptop/Tablet (Older Models Preferred): For accessing stored information. Ensure it’s fully charged before storage and periodically re-charge.
    • E-Reader: Loaded with books, manuals, and guides.

    Navigation & Power:

    • GPS Unit (Handheld): While satellite systems might be affected, a standalone unit with pre-downloaded maps could still function or at least help with initial orientation.
    • Solar Charger for USB Devices: To recharge phones, radios, and other small electronics. Include necessary cables.
    • Power Bank (Charged): A fully charged portable battery pack.
    • AA/AAA Battery Charger (Solar or Hand-Crank): Along with rechargeable batteries.

    Medical & Miscellaneous:

    • Digital Multimeter: For testing circuits and batteries.
    • Small Medical Devices: If you rely on a specific electronic medical device (e.g., blood glucose monitor, pulse oximeter), consider protecting a spare.
    • Headlamps/Flashlights (LED): While not directly EMP-vulnerable, having a protected spare is wise.

    Pro Tip: Store all items with their necessary charging cables, adapters, and spare batteries. Label everything clearly. Consider vacuum-sealing items to protect against moisture and dust.

    Common Faraday Cage Mistakes That Leave Your Gear Exposed

    Building a Faraday cage isn’t just about throwing electronics into a metal box. Several common errors can severely compromise its effectiveness, leaving your valuable gear vulnerable to an EMP.

    1. Lack of Internal Insulation:

      Mistake: Placing electronics directly against the conductive walls of the cage.

      Why it’s wrong: If an EMP strikes, currents are induced in the cage walls. If your device touches the wall, these currents can jump directly into your electronics, frying them just as if they were unprotected. This is perhaps the most critical mistake.

      Solution: Always use multiple layers of non-conductive material (plastic bags, cardboard, foam, bubble wrap) to create a significant air gap and physical barrier between your electronics and the metal enclosure. Aim for at least 1-2 inches of separation if possible.

    2. Incomplete Enclosure or Gaps:

      Mistake: Having holes, cracks, or loose-fitting lids in the conductive shell.

      Why it’s wrong: Electromagnetic fields can penetrate even small openings. A Faraday cage must be a continuous, unbroken conductive surface. A loose lid or a small hole acts as an antenna, allowing EMP energy to leak inside.

      Solution: Ensure your chosen container (e.g., galvanized trash can) is free of significant damage. The lid must fit snugly. For added security, consider sealing the lid’s rim with aluminum tape or silicone sealant after closing, especially for long-term storage.

    3. Using Non-Conductive Materials:

      Mistake: Relying solely on plastic containers, wood boxes, or thin layers of aluminum foil without a robust, continuous conductive shell.

      Why it’s wrong: Plastic and wood offer no EMP protection. While aluminum foil is conductive, it’s very difficult to create a truly continuous, gap-free, and durable enclosure with it alone. Multiple layers of foil can offer some attenuation, but it’s generally inferior to a solid metal container.

      Solution: Stick to proven conductive materials like galvanized steel, aluminum, or copper. If using foil, it should be as an additional layer within a more robust primary cage, or for very temporary, low-stakes protection.

    4. Ignoring Moisture Control:

      Mistake: Sealing electronics in an airtight container without addressing humidity.

      Why it’s wrong: Trapped moisture can lead to corrosion, mold, and short circuits over time, especially in a sealed environment. This can damage your electronics even without an EMP event.

      Solution: Always include several desiccant packs (like silica gel) inside your Faraday cage. Replace them periodically if the cage is opened frequently or if you live in a very humid environment. Vacuum-sealing individual items can also add a layer of moisture protection.

    5. Overlooking Cables and Accessories:

      Mistake: Protecting only the main electronic devices but forgetting their essential cables, chargers, and spare batteries.

      Why it’s wrong: A protected radio is useless without its antenna or charging cable. These accessories are just as vulnerable to EMP as the main device.

      Solution: Store all necessary cables, chargers, adapters, and spare batteries (preferably rechargeable ones with a solar charger) alongside their respective devices within the Faraday cage. Ensure they are also insulated from the cage walls.

    6. Infrequent Inspection:

      Mistake: Building the cage and then forgetting about it for years.

      Why it’s wrong: Materials can degrade, desiccant packs can become saturated, and batteries can discharge. You need to ensure your preparedness measures remain viable.

      Solution: Periodically (e.g., every 6-12 months) open your Faraday cage, inspect the contents, check desiccant packs, and recharge any rechargeable batteries. This also gives you an opportunity to update your stored information or replace outdated devices.

    FAQ: Your Faraday Cage Questions Answered

    Q: Does a Faraday cage need to be grounded?
    A: For a simple DIY Faraday cage like the trash can method, grounding is not strictly necessary for it to function. The cage works by creating an equipotential surface that diverts the electromagnetic field around its contents. However, for larger or more permanent installations, grounding can help dissipate the induced currents more effectively and is generally recommended for optimal performance and safety.
    Q: Can I use multiple layers of aluminum foil instead of a galvanized trash can?
    A: While multiple layers of aluminum foil can offer some degree of protection, it is generally less reliable and durable than a solid metal container like a galvanized trash can or ammo can. It’s very difficult to create a truly continuous, gap-free shield with foil, and it’s prone to tearing. For robust, long-term EMP protection, a solid metal enclosure with proper internal insulation is highly recommended over foil alone.
    Q: How long will electronics last inside a Faraday cage?
    A: The Faraday cage itself doesn’t have a ‘lifespan’ for protecting against EMP, as long as its structural integrity (conductive shell and insulation) remains intact. However, the electronics inside have their own shelf life. Batteries will discharge over time, and components can degrade. It’s crucial to periodically inspect your stored items, recharge batteries, and replace desiccant packs every 6-12 months to ensure your gear remains functional.
    Q: What’s the most important thing to remember when building a Faraday cage?
    A: The single most important rule is to ensure that your electronics never, under any circumstances, touch the conductive walls of the Faraday cage. There must always be a significant layer of non-conductive material (like plastic, cardboard, foam, or an air gap) separating your devices from the metal. Failure to do this will allow induced currents to jump to your devices, rendering the cage useless.

    Conclusion

    Building a diy faraday cage from a galvanized trash can is a practical, affordable, and empowering step towards enhancing your preparedness. By following these steps, you can create a reliable shield against the potentially devastating effects of an EMP, safeguarding your essential electronics and ensuring you have the tools you need for communication, information, and recovery in a crisis. Don’t wait for a disaster to strike; take action today to protect your future.

  • How to Build a DIY Fog Net for Off-Grid Water Collection

    How to Build a DIY Fog Net for Off-Grid Water Collection

    How to Build a DIY Fog Net for Off-Grid Water Collection

    Water is the most critical resource for survival, yet it’s often the most overlooked until a crisis hits. For those committed to true off-grid living or robust preparedness, diversifying water sources is paramount. While rain catchment and well drilling are common strategies, an often-underestimated method for atmospheric water harvesting is fog collection. Learning how to build a diy fog catcher can provide a surprisingly consistent and clean water supply, especially in regions prone to fog.

    This comprehensive guide from TacticalProof.com will walk you through the science, materials, and step-by-step construction of your own fog net, empowering you to tap into an otherwise invisible resource for your long-term water independence.

    Related TacticalProof reading: Can You Drink Morning Dew?

    What Is Fog Harvesting and Why Preppers Should Care

    Fog harvesting, also known as cloud water harvesting or atmospheric water harvesting, is the process of collecting water droplets from fog using large vertical nets. These nets intercept the tiny water particles suspended in the air, causing them to coalesce and drip into a collection trough below. While it might sound like a niche technology, communities in arid, fog-prone regions worldwide have relied on it for decades, demonstrating its viability as a sustainable water source.

    For preppers and survivalists, the implications are significant:

    • Water Independence: Reduces reliance on municipal water systems, which can fail during disasters or economic collapse.
    • Renewable Resource: Fog is a naturally occurring phenomenon, making it a perpetually renewable water source in suitable climates.
    • Low-Tech Solution: A fog net water collection system requires no electricity, complex machinery, or specialized skills beyond basic construction, making it ideal for off-grid scenarios.
    • Complementary System: It can supplement rain catchment, especially during dry seasons when fog might still be present.
    • Clean Water Potential: Fog water is often purer than surface water, requiring less treatment for potable use, though filtration is always recommended.

    Imagine a scenario where your well pump fails, or a prolonged drought renders your rain barrels empty. A properly sited and constructed fog net could be the difference between dehydration and survival. It’s a testament to ingenuity and leveraging natural processes for self-sufficiency.

    How Fog Nets Work: The Science of Droplet Capture

    The principle behind a fog net is deceptively simple, yet rooted in physics. Fog consists of microscopic water droplets, typically 1 to 40 micrometers in diameter, suspended in the air. Unlike rain, these droplets are too small to fall as precipitation but are carried by wind.

    When these fog-laden air currents encounter a fine mesh net, several things happen:

    1. Interception: The tiny water droplets, unable to pass through the mesh pores, collide with the fibers of the net.
    2. Coalescence: Upon impact, the droplets adhere to the mesh fibers. As more droplets collide and stick, they merge with existing droplets, growing larger due to surface tension.
    3. Gravity and Drainage: Once the accumulated water droplets become large enough and heavy enough to overcome the surface tension holding them to the mesh, gravity pulls them downwards. They run along the fibers, eventually dripping into a collection trough positioned at the bottom of the net.

    The effectiveness of a fog net hinges on several factors:

    • Mesh Material and Structure: The ideal mesh has a specific pore size and fiber thickness that maximizes droplet capture while minimizing air resistance. Too fine, and it blocks too much airflow; too coarse, and droplets pass through. Hydrophilic (water-attracting) materials can enhance collection.
    • Wind Speed: Moderate wind speeds are crucial. Too little wind, and fog won’t effectively impact the net. Too much wind, and collected droplets can be blown off before they drain, or the net itself can be damaged.
    • Fog Density: The more water droplets present in the air (denser fog), the greater the potential for collection.
    • Net Orientation: The net must be oriented perpendicular to the prevailing fog-bearing winds to maximize exposure.

    Understanding this science allows for informed material selection and optimal placement, ensuring your fog water collector diy project yields the best possible results.

    Materials List: Mesh Types, Frames, and Collection Troughs

    Building an effective fog net requires careful selection of materials that are durable, weather-resistant, and optimized for water capture. Here’s a breakdown of what you’ll need for a standard 1-square-meter (approximately 3.3 ft x 3.3 ft) experimental or small-scale fog catcher:

    1. Mesh Material (The Heart of Your Fog Catcher)

    This is the most critical component. Specialized fog-collecting mesh exists (e.g., Raschel mesh, often made of polypropylene), but for a DIY project, you can adapt more readily available materials.

    • Recommended: Shade Cloth (30-35% density): This is often the best balance of availability, cost, and performance for DIY. Look for UV-stabilized, woven polyethylene shade cloth with a density around 30-35%. The weave creates small openings that effectively intercept droplets. Avoid solid tarps or very dense shade cloths.
    • Alternative 1: Insect Screen (Fiberglass or Aluminum): Standard window screen can work, especially fiberglass, which is flexible and UV resistant. Aluminum is more rigid but can corrode over time. The pore size is generally larger than ideal, so efficiency might be lower than shade cloth.
    • Alternative 2: Bird Netting (Fine Mesh): Some very fine bird netting (e.g., 1/4-inch or 1/2-inch mesh) can be adapted, but ensure the individual strands are thin enough not to create too much air resistance.
    • What to Avoid: Anything too dense (like a tarp or heavy canvas) will block airflow and collect minimal water. Anything too open (like large-hole garden netting) will let most droplets pass through.

    Quantity: For a 1m x 1m net, you’ll need a piece of mesh at least 1.2m x 1.2m to allow for securing to the frame.

    2. Frame Materials (Support and Stability)

    The frame holds the mesh taut and upright. It needs to be sturdy enough to withstand wind and UV exposure.

    • Recommended: PVC Pipe (Schedule 40, 1-inch or 1.25-inch diameter): PVC is inexpensive, lightweight, easy to work with, and weather-resistant.
    • Alternative 1: Treated Lumber (2x2s or 2x4s): More robust but heavier and requires more maintenance (sealing/painting).
    • Alternative 2: Metal Conduit (EMT or Galvanized Steel): Very durable but heavier, more expensive, and requires specialized tools for cutting/bending.

    Quantity for 1m x 1m PVC Frame:

    • 4 x 1-meter (approx. 3.3 ft) lengths of PVC pipe for the main square.
    • 2 x 1-meter (approx. 3.3 ft) lengths for vertical support legs (or longer if you want to elevate it significantly).
    • 4 x 90-degree PVC elbows.
    • 2 x PVC T-connectors (for attaching legs to the bottom bar).
    • PVC cement and primer (for permanent joints).

    3. Collection Trough (Water Channeling)

    This sits at the bottom of the net to catch dripping water.

    • Recommended: PVC Gutter or Half-Round Rain Gutter: Easy to install, lightweight, and designed for water collection.
    • Alternative: Split PVC Pipe (4-inch or 6-inch diameter): Cut a length of large-diameter PVC pipe lengthwise to create a trough.
    • Alternative: Repurposed Plastic Container: A long, narrow plastic container (e.g., a window planter box) can work if sealed properly.

    Quantity: 1 x 1-meter (approx. 3.3 ft) length of gutter or pipe, with end caps and an outlet fitting.

    4. Water Storage Container

    A clean bucket, barrel, or cistern to store the collected water. Ensure it has a lid to prevent contamination and evaporation.

    5. Fasteners and Miscellaneous

    • UV-Resistant Zip Ties or Bungee Cords: For attaching the mesh to the frame.
    • Drill and Bits: For making holes, if needed.
    • Saw or Pipe Cutter: For cutting frame materials.
    • Measuring Tape and Marker.
    • Shovel/Post-hole Digger: If burying support legs.
    • Rope/Guy Wires and Stakes: For added stability, especially in windy areas.
    • Silicone Sealant: For sealing trough end caps and outlet.
    • Fine Mesh Screen/Filter: To cover the trough outlet and prevent debris from entering your storage container.

    Safety Tip: Always wear appropriate personal protective equipment (PPE) like safety glasses and gloves when cutting or assembling materials.

    Step-by-Step Build: A 1-Square-Meter Fog Catcher

    This guide focuses on building a simple, freestanding 1m x 1m PVC frame fog catcher. This size is manageable for a DIY project and effective for testing or supplementary water collection.

    Tools You’ll Need:

    • PVC pipe cutter or hacksaw
    • Measuring tape
    • Marker
    • Drill with small bit (for drainage holes if needed)
    • Gloves and safety glasses
    • Rubber mallet (optional, for fitting PVC)

    Construction Steps:

    Step 1: Cut PVC Pipes for the Frame

    Using your pipe cutter or hacksaw, cut the PVC pipes to the following lengths:

    • 4 pieces: 1 meter (39.4 inches) each for the main square (top, bottom, and two sides).
    • 2 pieces: 1 meter (39.4 inches) each for the vertical support legs. You can make these longer if you plan to elevate the net significantly, but 1m is a good starting point for a compact unit.

    Ensure cuts are clean and straight for a snug fit.

    Step 2: Assemble the Main Frame

    1. Take two 1-meter pipes and two 90-degree elbows. Apply PVC primer to the ends of the pipes and inside the elbows, then apply PVC cement. Quickly join them to form an ‘L’ shape. Repeat for the other two 1-meter pipes and two elbows.
    2. Now you have two ‘L’ shapes. Connect them with the remaining two 1-meter pipes and the final two 90-degree elbows to form a complete 1m x 1m square frame. Ensure all joints are firmly seated and allowed to cure according to cement instructions (usually 15-30 minutes before handling, 24 hours for full strength).

    Step 3: Attach the Support Legs

    1. Locate the bottom horizontal bar of your square frame.
    2. Take your two PVC T-connectors. Apply primer and cement to the ends of the bottom bar and the T-connectors, then attach one T-connector to each end of the bottom bar, ensuring the third opening of the ‘T’ faces downwards.
    3. Apply primer and cement to one end of each 1-meter support leg and insert them into the downward-facing openings of the T-connectors.
    4. Allow all cemented joints to cure fully.

    You now have a freestanding 1m x 1m frame with two legs.

    Construction Steps:
    Construction Steps:: Construction Steps:.

    Step 4: Prepare and Attach the Collection Trough

    1. Take your 1-meter gutter or split PVC pipe. If using a split PVC pipe, ensure the edges are smooth to prevent cuts.
    2. Attach end caps to both ends of the trough using silicone sealant to ensure a watertight seal.
    3. Drill a small hole (e.g., 1/2-inch or 3/4-inch) near one end of the trough, on the bottom or side, to serve as an outlet. Insert a small hose barb fitting or a short piece of pipe and seal it with silicone.
    4. Position the trough directly beneath the bottom horizontal bar of your frame, between the two support legs. It should sit just below the mesh area to catch all drips.
    5. Secure the trough to the support legs or the bottom frame bar using zip ties, U-bolts, or custom brackets. Ensure it has a slight slope (about 1-2 degrees) towards the outlet end to facilitate drainage.

    Step 5: Install the Mesh

    1. Lay your chosen mesh material (e.g., 30-35% shade cloth) flat.
    2. Center the 1m x 1m PVC frame over the mesh.
    3. Starting from the top, begin attaching the mesh to the frame using UV-resistant zip ties. Thread a zip tie through the mesh and around the PVC pipe, pulling it taut. Space zip ties every 6-8 inches (15-20 cm).
    4. Work your way down one side, then the other, pulling the mesh taut as you go. The goal is to create a flat, wrinkle-free surface.
    5. Finally, attach the bottom of the mesh to the bottom frame bar, ensuring it extends just into the collection trough or directly above it, allowing water to drip freely into the trough without wicking away.
    6. Trim any excess mesh.

    Important: The mesh must be taut. Loose mesh will flap in the wind, reducing efficiency and potentially damaging the net.

    Step 6: Connect to Storage

    Connect a hose or pipe from the trough’s outlet to your chosen water storage container (e.g., a clean 5-gallon bucket or a larger barrel). Place a fine mesh screen or filter over the trough outlet to prevent leaves, insects, or debris from entering your storage.

    Your diy fog catcher is now ready for deployment!

    Optimizing Placement: Elevation, Wind Patterns, and Geography

    Building the net is only half the battle; proper placement is crucial for maximizing your water yield. A poorly sited net will collect little to no water, regardless of its construction quality.

    1. Understand Local Fog Patterns

    • Observation is Key: Spend time observing when and where fog forms and moves in your area. Is it a morning phenomenon? Does it roll in from a specific direction?
    • Topography: Fog often collects in valleys, low-lying areas, or on the windward slopes of hills and mountains. Coastal areas are prime locations due to sea fog.
    • Prevailing Winds: Identify the direction from which fog-bearing winds typically blow. Your net must be oriented perpendicular to this direction. If winds shift, you might need multiple nets or a rotatable design.

    2. Elevation Matters

    Fog tends to be denser and more consistent at certain elevations. While ground-level fog exists, higher elevations (e.g., hilltops, ridges) often intercept cloud layers that are essentially high-altitude fog.

    • Avoid Obstructions: Place your net away from trees, buildings, or other structures that could block airflow or create wind shadows.
    • Higher is Often Better: If possible, site your net on a slight rise or elevated platform. Even a few feet can make a difference.

    3. Wind Flow and Turbulence

    • Laminar Flow: You want smooth, uninterrupted airflow through your net. Avoid areas with excessive turbulence, which can reduce collection efficiency and stress the net.
    • Wind Tunnels: Natural wind tunnels (e.g., between two hills or buildings) can concentrate fog and increase wind speed, potentially boosting collection.
    • Anchor Securely: Regardless of placement, high winds are a reality. Use guy wires, stakes, or heavy bases to anchor your fog catcher firmly. A collapsing net yields no water.

    4. Geographical Considerations

    • Coastal Regions: Often experience advection fog (sea fog) that rolls inland. These are excellent locations.
    • Mountainous Areas: Orographic fog forms when moist air is forced upwards over mountains, cooling and condensing. Nets on windward slopes can be very effective.
    • Inland Valleys: Radiation fog can form in valleys on clear, calm nights. While often less dense, it can still be a source.

    Practical Tip: Before committing to a permanent installation, consider setting up a small test net in various locations on your property. Monitor its performance over several foggy periods to identify the optimal spot. A simple anemometer (wind speed meter) can also help you understand local wind dynamics.

    4
    4. Geographical Considerations: 4.

    Realistic Yield Expectations: How Much Water You’ll Actually Get

    Managing expectations is crucial for any atmospheric water harvesting project. While a harvest water from fog system can be incredibly valuable, it’s not a magic faucet. The amount of water you collect will vary significantly based on several factors:

    Factors Influencing Yield:

    • Fog Density: The primary factor. Denser fog means more water droplets available for capture.
    • Wind Speed: Optimal wind speeds are typically between 5-15 km/h (3-9 mph). Too low, and droplets don’t impact the net effectively; too high, and collected water can be blown off.
    • Net Size: A larger net surface area will naturally collect more water. Our 1-square-meter net is a good starting point, but larger installations (e.g., 40-100 sq meters) are used for community projects.
    • Mesh Type: Specialized fog mesh (e.g., Raschel mesh) can be more efficient than DIY alternatives, but even shade cloth can perform adequately.
    • Duration of Fog Events: Longer periods of fog mean more collection time.
    • Net Orientation and Placement: As discussed, optimal siting is critical.

    Typical Yield Ranges:

    For a 1-square-meter net, realistic yields can range from:

    • Low-end: 0.5 to 2 liters per square meter per foggy day in moderately foggy conditions.
    • High-end: 3 to 10+ liters per square meter per foggy day in very dense fog with optimal wind conditions.

    For example, a 1m x 1m net in a good location might yield 2-5 liters (0.5-1.3 gallons) on a typical foggy day. This might not sound like much, but it’s enough for drinking and cooking for one person, or to supplement other sources. Over a week of consistent fog, this adds up.

    Water Quality Considerations:

    Fog water is generally considered cleaner than rainwater collected from roofs, as it hasn’t picked up contaminants from surfaces. However, it’s not sterile. It can still contain:

    • Airborne Particulates: Dust, pollen, soot.
    • Microorganisms: Bacteria, viruses (less common than in surface water but possible).
    • Chemical Pollutants: Especially in industrial or urban areas.

    Recommendation: Always filter fog water before consumption. A simple gravity filter (e.g., Sawyer filter, Berkey-type filter) is highly recommended for removing particulates and pathogens. For long-term storage, consider adding a small amount of bleach (e.g., 1/4 teaspoon per gallon) or using UV purification.

    Combining Fog Collection With Rain Catchment for Year-Round Supply

    The true strength of a diy fog catcher for preparedness lies in its ability to integrate with and complement other water collection methods. Relying on a single source is a vulnerability; diversifying creates resilience.

    Synergistic Benefits:

    • Seasonal Complement: In many regions, fog is more prevalent during cooler, drier seasons when rainfall is scarce. Rain catchment excels during wet seasons. Combining them provides a more consistent year-round supply.
    • Increased Total Yield: Each system contributes to your overall water reserves, reducing the risk of running dry.
    • Redundancy: If one system fails (e.g., a gutter breaks, a net tears), the other can still provide water.
    • Optimized Storage: You can use a common storage system (cisterns, barrels) for both fog and rain water, simplifying management.

    Integration Strategies:

    1. Shared Storage: Design your fog net’s collection trough to drain into the same primary storage tank as your rainwater harvesting system. Ensure the fog net’s inlet to the tank is screened to prevent debris.
    2. Independent but Linked: You could have separate initial collection barrels for fog and rain, then use a transfer pump or gravity to move water into a larger, central storage system. This allows for separate quality control if desired.
    3. Modular Expansion: Start with a small fog net and a basic rain barrel. As your needs grow or you gain experience, you can add more fog nets, expand your rain catchment area, or increase storage capacity.

    Practical Example: Imagine a coastal property where winter brings frequent fog but less rain, and summer brings heavy but infrequent thunderstorms. A fog net provides a steady trickle during winter, while a robust rain catchment system fills tanks during summer downpours. Together, they ensure a more stable water supply throughout the year.

    Remember, preparedness is about layers of defense. A fog water collector diy project adds a vital layer to your water security strategy, making your off-grid setup more robust and resilient against environmental fluctuations and unforeseen challenges.

    Frequently Asked Questions About DIY Fog Catchers

    Q: How much does it cost to build a DIY fog net?

    A: The cost for a 1-square-meter DIY fog net can range from $50 to $150, depending on the materials chosen. PVC pipe and shade cloth are generally inexpensive, while specialized mesh or metal frames would increase the cost. This estimate doesn’t include the cost of a large storage container, which you might already have or can acquire separately.

    Q: Is fog water safe to drink directly?

    A: While fog water is often cleaner than surface water, it’s not sterile. It can contain airborne dust, pollen, and potentially microorganisms. For potable use, it is highly recommended to filter fog water through a reliable water filter (e.g., a ceramic or activated carbon filter) and consider purification methods like boiling or UV treatment, especially if you are unsure of the air quality in your area.

    Q: How durable is a DIY fog net, especially in strong winds?

    A: The durability depends heavily on the frame material and how securely it’s anchored. A PVC frame, while lightweight, can be susceptible to strong winds if not properly braced with guy wires and stakes. Metal or treated lumber frames offer more rigidity. UV-resistant mesh and zip ties are crucial for longevity. Regular inspection and maintenance are essential to ensure the net withstands weather conditions.

    Q: Can I build a larger fog net for more water?

    A: Yes, larger fog nets are common in commercial and community projects. However, scaling up a DIY design requires careful consideration of structural integrity. A larger net will experience significantly more wind load, necessitating a much stronger frame, more robust anchoring, and potentially a modular design. For DIY, it’s often better to build several smaller, well-placed nets rather than one massive, potentially unstable one.

    Q: What maintenance does a fog net require?

    A: Maintenance is relatively low. Regularly check the mesh for tears or debris (leaves, bird droppings) that could block airflow or contaminate water. Ensure the collection trough is clear and draining properly. Inspect frame connections and anchors for wear or looseness, especially after strong winds. Periodically clean the mesh with a gentle rinse to remove accumulated dust or algae, which can reduce efficiency.

  • How to Make Pemmican: The Ultimate Survival Food That Lasts for Years

    How to Make Pemmican: The Ultimate Survival Food That Lasts for Years

    How to Make Pemmican: The Ultimate Survival Food That Lasts for Years

    In the realm of survival and preparedness, few foods command as much respect and utility as pemmican. This ancient, nutrient-dense superfood, originally developed by indigenous peoples of North America, is renowned for its incredible shelf life, portability, and sustained energy release. For preppers, homesteaders, and anyone serious about self-reliance, knowing how to make pemmican is an indispensable skill. It’s not just food; it’s a compact, calorie-rich insurance policy against lean times, offering unparalleled sustenance when other options are scarce.

    Pemmican is essentially a concentrated mixture of dried, pulverized lean meat and rendered animal fat (tallow). Its genius lies in its simplicity and the synergistic preservation qualities of its components. Unlike jerky, which is merely dried meat, pemmican incorporates fat, making it a complete caloric source that can sustain an individual for extended periods. This article will guide you through every critical step, from selecting the right ingredients to proper storage, ensuring your homemade pemmican is a reliable cornerstone of your survival pantry.

    Related TacticalProof reading: How to Preserve Meat Without Refrigeration: 7 Proven Methods for Long-Term Storage

    What Is Pemmican and Why Preppers Swear By It

    Pemmican, derived from the Cree word ‘pimîhkân’ meaning ‘fat, grease,’ is a traditional food that has fueled explorers, trappers, and indigenous communities for centuries. Its historical significance is matched only by its practical benefits in modern survival scenarios. At its core, pemmican is a blend of dried, powdered lean meat and rendered animal fat, often with the addition of dried berries or other flavorings.

    Why is pemmican considered the ultimate survival food?

    • Exceptional Shelf Life: When prepared and stored correctly, pemmican can last for decades, even without refrigeration. This makes it ideal for long-term food storage and bug-out bags.
    • Nutrient Density: It provides a balanced macronutrient profile of protein and fat, offering sustained energy and satiety. The fat content is crucial for calorie intake and absorption of fat-soluble vitamins.
    • Portability and Compactness: A small block of pemmican packs a tremendous caloric punch, making it incredibly efficient for carrying on expeditions or in emergency kits where space and weight are critical.
    • Versatility: While often eaten raw, pemmican can be crumbled into stews, fried, or rehydrated, offering flexibility in consumption.
    • Energy Sustenance: The combination of protein and fat provides a slow, steady release of energy, preventing the sugar crashes associated with carbohydrate-heavy foods.

    For preppers, the appeal of pemmican lies in its resilience. It doesn’t require cooking, is impervious to temperature fluctuations (within reason), and provides essential nutrients without the need for complex preparation or refrigeration. It’s a testament to ancestral wisdom, offering a simple yet profoundly effective solution to the challenge of long-term food security.

    Choosing the Right Meat: Beef, Venison, and What to Avoid

    The foundation of excellent pemmican begins with the right meat. The goal is lean, high-quality muscle meat, free from excessive fat or connective tissue. The type of animal you choose will influence the flavor and texture of your final product.

    Ideal Meat Choices:

    • Beef: Lean cuts like round, sirloin, or flank steak are excellent. They are readily available, relatively inexpensive, and dry well. Ensure you trim all visible fat.
    • Venison (Deer): A traditional choice, venison is naturally very lean and imparts a robust, gamey flavor. Backstrap and hindquarter cuts are ideal.
    • Bison/Buffalo: Another historically accurate and superb choice, bison is lean and offers a rich flavor profile.
    • Elk/Moose: Similar to venison, these game meats are lean and provide excellent results.

    What to Avoid:

    • Pork: While some traditional recipes might include pork, its fat content is generally less stable than beef or game fat, making it more prone to rancidity over long storage periods. For maximum shelf life, it’s best to avoid.
    • Poultry (Chicken, Turkey): These meats are too lean and their fat is highly unstable, leading to rapid spoilage. They are unsuitable for pemmican.
    • Fatty Cuts of Meat: Even with ideal choices like beef or venison, it is absolutely critical to trim ALL visible fat from the meat before drying. Any residual fat in the meat itself will go rancid long before the tallow, compromising your pemmican’s shelf life.

    Preparation for Drying:

    Once you’ve selected your lean meat, prepare it for drying:

    1. Trim Meticulously: Remove every speck of visible fat, gristle, and connective tissue. This is arguably the most important step for long-term storage.
    2. Slice Thinly: Cut the meat into very thin strips, ideally against the grain, about 1/8 to 1/4 inch thick. Thinner slices dry faster and more thoroughly.
    3. Optional Marinade (Short-Term Pemmican): For pemmican intended for shorter-term consumption (a few months), a light marinade of salt, pepper, and perhaps a dash of Worcestershire sauce can add flavor. However, for true long-term survival pemmican, it’s best to stick to plain, unseasoned meat to avoid introducing moisture or ingredients that could shorten shelf life.

    Safety Tip: Always work with clean hands and sanitized equipment to prevent bacterial contamination, especially when preparing meat for drying.

    Step-by-Step Pemmican Recipe With Exact Ratios

    This section details the core process of how to make pemmican, focusing on precise steps and ratios for optimal results and longevity. The fundamental ratio for pemmican is typically 1:1 by weight of dried meat to rendered tallow, though some prefer a slightly higher fat content (e.g., 60% fat, 40% meat) for increased caloric density and palatability.

    Ingredients:

    • 1 pound (approx. 450g) very lean meat (beef, venison, bison), trimmed and sliced thin
    • 1 pound (approx. 450g) high-quality rendered beef or deer tallow (see next section for rendering instructions)
    • Optional: 1/4 to 1/2 cup dried berries (cranberries, blueberries), unsweetened and thoroughly dry
    • Optional: Pinch of sea salt (for flavor, but can attract moisture if too much)

    Equipment:

    • Dehydrator or oven
    • Food processor or mortar and pestle
    • Large mixing bowl
    • Saucepan or double boiler
    • Parchment paper or wax paper
    • Molds (loaf pans, silicone molds, or simply form by hand)

    Instructions:

    1. Step 1: Dry the Meat Thoroughly

      This is the most critical step for shelf life. The meat must be bone-dry, brittle, and snap when bent. Any residual moisture will lead to spoilage.

      • Dehydrator Method: Arrange thin meat strips on dehydrator trays without overlapping. Set temperature to 145-160°F (63-71°C). Dehydrate for 8-12 hours, or until completely dry and brittle. Rotate trays periodically for even drying.
      • Oven Method: Preheat oven to its lowest setting (usually 150-170°F / 65-77°C). Prop the oven door open slightly with a wooden spoon to allow moisture to escape. Arrange meat on wire racks over baking sheets. Dry for 6-12 hours, checking frequently. This method is less efficient and can be harder to control, increasing the risk of cooking the meat instead of drying it.
      • Air Drying (Traditional, but Risky): In very dry, low-humidity environments with good airflow, meat can be air-dried. However, this method carries a higher risk of spoilage and is not recommended for beginners or for long-term survival pemmican.

      Crucial Check: Once you think it’s dry, let a piece cool completely. It should be hard, stiff, and snap cleanly. If it bends or feels leathery, it needs more drying time.

    2. Step 2: Pulverize the Dried Meat

      Once the meat is completely dry and cool, it needs to be ground into a fine powder. This increases its surface area for better fat absorption and creates a uniform texture.

      • Food Processor: Break the dried meat into smaller pieces and process in a food processor until it resembles a fine powder. Do this in batches to avoid overheating the motor.
      • Mortar and Pestle: For a more traditional approach, or if you lack electricity, a mortar and pestle works effectively, though it requires more effort.
      • Coffee Grinder (Dedicated): A clean, dedicated coffee grinder can also work well for small batches.

      The finer the powder, the better the pemmican will bind and store.

    3. Step 3: Prepare the Tallow

      Ensure your rendered tallow is ready. It should be solid at room temperature, pure white or light yellow, and have a mild, clean smell. Gently melt the tallow over low heat in a saucepan or double boiler until it is liquid. Do not let it boil or smoke.

    4. Step 4: Combine Meat and Tallow

      In a large mixing bowl, combine the pulverized meat powder with the melted tallow. Start with a 1:1 ratio by weight (e.g., 1 pound meat powder to 1 pound melted tallow). Mix thoroughly with a sturdy spoon or your hands (wearing gloves) until all the meat powder is fully saturated and a thick, uniform paste forms.

      Tip: The mixture should be moist enough to hold together when pressed, but not greasy or soupy. If it’s too dry, add a little more melted tallow, a tablespoon at a time. If it’s too wet, you may need to add a bit more meat powder (if you have it) or accept a slightly softer pemmican.

    5. Step 5: Add Optional Ingredients

      If adding dried berries, stir them in now. Ensure they are completely dry and unsweetened. A pinch of sea salt can also be added for flavor, but use sparingly for long-term storage.

      How to Make Pemmican: The Ultimate Survival Food That Lasts for Years
      How to Make Pemmican: The Ultimate Survival Food That Lasts for Years.

    6. Step 6: Form the Pemmican

      Press the mixture firmly into molds (loaf pans lined with parchment paper, silicone molds, or even small containers). The key is to compress it as much as possible to remove air pockets, which can contribute to spoilage. You can also roll it into logs or form it into patties by hand.

    7. Step 7: Cool and Harden

      Allow the pemmican to cool completely at room temperature until the tallow solidifies and the block is firm. This can take several hours. Do not refrigerate immediately, as rapid cooling can sometimes lead to cracking.

    Adding Berries and Variations for Nutrition and Flavor

    While traditional pemmican is a simple meat and fat mixture, indigenous peoples often incorporated dried berries to enhance flavor, provide additional nutrients (vitamins, antioxidants), and offer a touch of sweetness. This section explores how to integrate these variations while maintaining the integrity of your survival food.

    Ideal Berry Choices:

    • Cranberries: Naturally tart, they balance the richness of the fat and are excellent sources of antioxidants. Ensure they are unsweetened and thoroughly dried.
    • Blueberries: Offer a milder sweetness and are also rich in antioxidants. Again, unsweetened and dry is key.
    • Saskatoon Berries (Serviceberries): A traditional choice in North America, these resemble blueberries and have a unique, slightly almond-like flavor.
    • Cherries: Dried, unsweetened tart cherries can also work well.

    Considerations for Adding Berries:

    • Moisture Content: This is the biggest concern. ANY residual moisture in the berries will significantly reduce the pemmican’s shelf life. Ensure your dried berries are truly desiccated and brittle. You can even re-dry commercially dried berries in your dehydrator for a few hours to be extra safe.
    • Sugar Content: While berries add flavor, their natural sugars can potentially attract moisture over very long storage periods. For ultimate, multi-decade survival pemmican, some purists omit berries entirely. For pemmican intended for 5-10 years, properly dried berries are generally fine.
    • Ratio: Use berries sparingly, typically no more than 1/4 to 1/2 cup per pound of meat powder. Too many berries can alter the texture and binding properties.

    Other Potential Variations (Use with Caution):

    • Nuts/Seeds: While adding healthy fats and protein, nuts and seeds contain their own oils which can go rancid faster than tallow. If you add them, ensure they are very dry and consider this for shorter-term pemmican (1-2 years).
    • Spices: A pinch of salt, pepper, or other dried spices can enhance flavor. Again, ensure they are completely dry and use sparingly to avoid introducing moisture.
    • Honey/Maple Syrup: Some modern pemmican recipes include a small amount of honey or maple syrup for sweetness. While these are natural preservatives, they also introduce moisture and sugars that can ferment or attract moisture over time. Avoid for long-term survival pemmican.

    Practical Tip: If you’re making pemmican for the first time, consider making a plain batch for maximum shelf life and a smaller batch with berries to test your preference and drying methods.

    Rendering Tallow the Right Way: Stovetop vs Open Fire

    The quality of your tallow is paramount to the success and longevity of your pemmican. Tallow is purified animal fat, typically from beef (suet) or deer. Properly rendered tallow is stable, odorless, and has a very high smoke point, making it an excellent preservative.

    Source of Fat:

    • Beef Suet: This is the fat found around the kidneys and loins of cattle. It’s dense, white, and has the best stability for rendering. Ask your butcher for beef suet.
    • Deer Fat: Similar to beef suet, the fat around the kidneys and backstrap of deer is excellent.
    • Other Animal Fats: While other fats exist, beef or deer tallow are superior for pemmican due to their saturated fat content and stability. Avoid pork fat (lard) or poultry fat, which are more prone to rancidity.

    Rendering Process (Stovetop Method – Recommended):

    1. Clean and Dice: Thoroughly clean the suet, removing any meat particles, blood, or connective tissue. Dice the fat into small, uniform pieces (about 1/2 to 1 inch cubes). Smaller pieces render faster and more completely.
    2. Slow Heat: Place the diced fat in a heavy-bottomed pot or Dutch oven. Add about 1/4 cup of water per pound of fat to prevent scorching initially (this is the ‘wet rendering’ method, which helps prevent burning and yields purer tallow).
    3. Gentle Simmer: Heat over very low heat. The goal is to slowly melt the fat, not fry it. Stir occasionally to prevent sticking. As the fat melts, the water will evaporate.
    4. Render Until Clear: Continue simmering until all the fat has melted and the cracklings (crispy bits of rendered tissue) sink to the bottom and turn golden brown. The liquid tallow should be clear and golden. This process can take several hours, depending on the amount of fat.
    5. Strain: Carefully strain the hot liquid tallow through a fine-mesh sieve lined with cheesecloth (several layers) or a coffee filter into a clean, heat-proof container. This removes all impurities and cracklings, which are the primary cause of rancidity.
    6. Cool and Re-render (Optional, for Purity): For ultimate purity and shelf life, allow the strained tallow to cool and solidify. Once solid, you can gently remelt it and strain it again through fresh cheesecloth. This ‘double rendering’ ensures maximum purity.
    7. Store: Pour the purified liquid tallow into clean, dry jars. Let it cool completely at room temperature before sealing. Store in a cool, dark place.

    Open Fire Method (Traditional, but Challenging):

    Rendering tallow over an open fire is possible but requires more skill and constant attention to prevent scorching or burning. The principles are the same: slow, gentle heat to melt the fat and separate it from impurities. Use a heavy cast-iron pot suspended over embers, not direct flame. Stir frequently. This method is generally less precise and harder to control for consistent purity, making the stovetop method preferable for survival pemmican.

    Safety Warning: Hot fat can cause severe burns. Always use caution when handling hot pots and liquid tallow. Never leave rendering fat unattended.

    How to Store Pemmican for Maximum Shelf Life

    The incredible pemmican long term storage capability is one of its most celebrated attributes. When properly prepared, pemmican can last for years, even decades, without refrigeration. The key is to protect it from oxygen, moisture, and heat.

    Key Storage Principles:

    • Cool and Dark: Store pemmican in a cool, dark, and dry environment. Ideal temperatures are consistently below 60°F (15°C), but it can tolerate higher temperatures for periods. Avoid direct sunlight or fluctuating temperatures.
    • Oxygen Exclusion: Oxygen is the enemy of fat, leading to rancidity.
    • Moisture Exclusion: Any moisture will promote bacterial growth and spoilage.

    Storage Methods:

    1. Individual Wrapping:

      Once your pemmican blocks or patties are completely cool and firm, wrap them tightly. This prevents air exposure and makes them easy to portion.

      • Parchment Paper or Wax Paper: Wrap each piece individually.
      • Butcher Paper: A traditional choice, it allows the pemmican to ‘breathe’ slightly while still protecting it.
      • Plastic Wrap: Can be used, but ensure it’s food-grade and wrapped very tightly.
    2. Vacuum Sealing (Highly Recommended):

      For maximum pemmican shelf life, vacuum sealing is the gold standard. Place your wrapped pemmican pieces into vacuum seal bags and seal them according to your machine’s instructions. This removes oxygen, which is the primary cause of fat rancidity.

      How to Make Pemmican: The Ultimate Survival Food That Lasts for Years
      How to Make Pemmican: The Ultimate Survival Food That Lasts for Years.

    3. Airtight Containers:

      Place your individually wrapped and/or vacuum-sealed pemmican into airtight containers (e.g., Mylar bags with oxygen absorbers, food-grade buckets with gamma seal lids, glass jars with tight-fitting lids). This provides an extra layer of protection against pests, moisture, and light.

    4. Root Cellar or Cool Pantry:

      The ideal storage location is a root cellar, a cool basement, or a dedicated pantry that maintains a stable, cool temperature. Avoid attics or garages where temperatures can fluctuate wildly.

    Signs of Spoilage:

    While pemmican is incredibly stable, it can spoil if not prepared or stored correctly. Look for these signs:

    • Rancid Odor: The most obvious sign. Tallow should smell mild and clean. A sour, metallic, or ‘crayon-like’ smell indicates rancidity.
    • Mold: Any visible mold growth means the pemmican has been exposed to moisture and is unsafe to eat.
    • Discoloration: While some natural darkening can occur, significant green, black, or unusual white spots are red flags.
    • Slimy or Sticky Texture: Should be firm and dry.

    Important Note: If you suspect your pemmican has gone bad, do not risk it. Discard it. The risks of foodborne illness outweigh the benefits.

    Common Pemmican Mistakes That Cause Spoilage

    Making pemmican is straightforward, but it requires attention to detail. A single oversight can compromise its legendary shelf life. Understanding these common pitfalls will help you create truly enduring survival food.

    1. Insufficiently Dried Meat:

      This is the number one cause of pemmican spoilage. If the meat retains any moisture, it creates an environment for bacterial growth and mold. The meat must be bone-dry, brittle, and snap when bent. Leathery or pliable meat is not dry enough.

      • Correction: Extend drying time. Ensure thin, even slices. Use a dehydrator for consistent results.
    2. Poorly Rendered or Rancid Tallow:

      Tallow must be pure and free of meat particles, blood, or connective tissue. These impurities will go rancid quickly, spoiling the entire batch. Using old or already rancid fat is also a common mistake.

      • Correction: Meticulously trim suet. Render slowly and strain thoroughly, ideally double-straining. Use fresh, high-quality suet.
    3. Adding Too Much Moisture (e.g., Undried Berries, Honey):

      Any ingredient that introduces moisture will drastically reduce shelf life. This includes insufficiently dried berries, fresh spices, or liquid sweeteners like honey or maple syrup.

      • Correction: Ensure all additions are bone-dry. For long-term pemmican, stick to plain meat and fat.
    4. Incorrect Meat-to-Tallow Ratio:

      While some flexibility exists, a ratio too low in fat can make the pemmican dry, crumbly, and less calorically dense. Too much fat, especially if not fully absorbed, can lead to a greasy product that’s harder to store and more prone to fat separation.

      • Correction: Aim for a 1:1 ratio by weight of meat powder to melted tallow as a starting point. Adjust slightly for desired consistency.
    5. Improper Storage Conditions:

      Exposure to oxygen, light, and heat will accelerate rancidity. Storing pemmican in a warm, humid, or brightly lit area will significantly shorten its life.

      • Correction: Vacuum seal, wrap tightly, and store in cool, dark, dry, airtight containers.
    6. Not Trimming All Fat from Meat:

      Even if you use lean cuts, small bits of fat left on the meat before drying will go rancid. This is different from the tallow you add; it’s the unstable fat within the muscle tissue itself.

      • Correction: Be absolutely meticulous in trimming all visible fat from the meat before slicing and drying.

    By avoiding these common mistakes, you can ensure your homemade pemmican lives up to its reputation as a truly enduring and reliable survival food. The effort invested in proper preparation will pay dividends in peace of mind and sustained nourishment.

    Frequently Asked Questions About Pemmican

    Q: How long does homemade pemmican truly last?

    A: When prepared correctly with bone-dry meat and pure, rendered tallow, and stored in cool, dark, airtight conditions (ideally vacuum-sealed), pemmican can last for many years, even decades. There are historical accounts of pemmican being consumed after 50 years. However, for practical purposes, a shelf life of 5-10 years is a reasonable expectation for well-made homemade pemmican, with some batches potentially lasting much longer.

    Q: Can I use other fats besides beef or deer tallow?

    A: While technically possible, it’s not recommended for long-term survival pemmican. Beef or deer tallow (suet) are highly saturated fats, making them very stable and resistant to rancidity. Fats from pork (lard) or poultry are less stable and will go rancid much faster, significantly reducing the pemmican’s shelf life. Stick to beef or deer tallow for best results.

    Q: Is pemmican safe to eat raw?

    A: Yes, pemmican is designed to be eaten raw. The drying process of the meat and the preservative qualities of the tallow make it safe for direct consumption. It does not require cooking, which is a major advantage in survival situations where fuel might be scarce. Some people prefer to crumble it into hot water or broth, but it’s perfectly edible as is.

    Q: Does pemmican taste good?

    A: Taste is subjective. Traditional pemmican has a savory, meaty, and fatty flavor. It’s not meant to be gourmet but rather highly functional. Some describe it as tasting like a very dense, rich jerky. The addition of dried berries can add a pleasant tartness or sweetness. It’s an acquired taste for some, but its nutritional value far outweighs any initial taste preferences.

    Q: Can I make vegetarian or vegan pemmican?

    A: No, by definition, pemmican is made from animal meat and animal fat. While you can create similar energy bars using plant-based ingredients (e.g., nuts, seeds, dried fruits, coconut oil), these would not be considered pemmican and would have different nutritional profiles and shelf life characteristics. The unique stability of animal tallow is central to pemmican’s longevity.

  • How to Grow Your Own Chicken Feed: Crops, Layout, and Year-Round Planning

    How to Grow Your Own Chicken Feed: Crops, Layout, and Year-Round Planning

    How to Grow Your Own Chicken Feed: Crops, Layout, and Year-Round Planning

    In an increasingly unpredictable world, achieving self-sufficiency on your homestead is more critical than ever. One of the most significant recurring expenses and supply chain vulnerabilities for any chicken keeper is feed. Learning to grow your own chicken feed not only slashes costs but also provides unparalleled control over the quality and nutritional content of what your flock consumes. This comprehensive guide will walk you through the essential crops, efficient garden layouts, and strategic year-round planning to ensure your chickens thrive on a homegrown diet, moving you closer to true self-sufficient chicken feed.

    Related TacticalProof reading: Are Opossums Dangerous?

    Why Growing Your Own Feed Matters for Self-Sufficiency

    The decision to cultivate your own chicken feed extends far beyond simple cost savings. It’s a foundational step towards genuine homestead resilience and food security. Here’s why it’s a game-changer:

    • Food Security & Supply Chain Independence: Relying on commercial feed means you’re at the mercy of global markets, transportation issues, and unforeseen crises. Growing your own mitigates these risks, ensuring your flock has a consistent food source regardless of external disruptions.
    • Cost Reduction: Commercial chicken feed is a significant ongoing expense. By producing your own, you drastically reduce your operational costs, making your homestead more economically viable.
    • Nutritional Control: You dictate what goes into your chickens’ diet. Avoid GMOs, questionable additives, and pesticides often found in conventional feeds. You can tailor the nutritional profile to your flock’s specific needs, leading to healthier, more productive birds.
    • Improved Flock Health: Freshly harvested, nutrient-dense crops often surpass the quality of bagged feed that may have sat in storage for months. This translates to stronger immune systems, better egg production, and overall vitality for your chickens.
    • Soil Health & Biodiversity: Integrating feed crops into your garden plan promotes healthy soil through crop rotation, cover cropping, and diverse plantings. This holistic approach benefits your entire homestead ecosystem.
    • Reduced Environmental Impact: Less reliance on industrial agriculture means a smaller carbon footprint associated with feed production and transportation.

    Embracing a homestead chicken feed garden is an investment in your future, your flock’s health, and the overall sustainability of your self-sufficient lifestyle.

    Why Growing Your Own Feed Matters for Self-Sufficiency
    Why Growing Your Own Feed Matters for Self-Sufficiency: Why Growing Your Own Feed Matters for Self-Sufficiency.

    The 8 Best Crops for Homegrown Chicken Feed

    A diverse array of crops is key to providing a balanced diet for your flock. Focus on a mix of grains for carbohydrates, legumes for protein, and leafy greens for vitamins and minerals. Here are some of the best chicken feed crops to plant:

    1. Corn (Maize)

    • Nutritional Value: High in carbohydrates (energy), moderate protein, and some healthy fats. Yellow corn provides beneficial carotenoids for vibrant yolk color.
    • Growing Tips: Plant after the last frost in well-drained, fertile soil with full sun. Space plants 8-12 inches apart in blocks for good pollination. Requires consistent moisture.
    • Harvest & Use: Harvest when kernels are hard and dry on the cob. Dry thoroughly to prevent mold. Can be fed whole (cracked for smaller birds) or ground.
    • Yield: A single plant can yield 1-2 ears, but planting in quantity is essential for feed.

    2. Sunflower

    • Nutritional Value: Excellent source of protein (up to 20%), healthy fats, and essential vitamins (E, B complex) and minerals. The seeds are highly palatable.
    • Growing Tips: Plant in full sun after the last frost. Prefers well-drained soil. Space large varieties 2-3 feet apart. Support tall plants if in windy areas.
    • Harvest & Use: Harvest when the back of the head turns yellow and seeds are plump. Protect from birds (netting) until fully mature. Dry heads thoroughly, then remove seeds. Feed whole or cracked.
    • Yield: One large head can contain hundreds of seeds.

    3. Amaranth

    • Nutritional Value: A ‘pseudo-grain’ with a high protein content (13-18%), including lysine, which is often deficient in other grains. Rich in iron, calcium, and magnesium.
    • Growing Tips: Thrives in warm weather and full sun. Tolerates poor soil and drought once established. Broadcast seeds or plant in rows 12-18 inches apart.
    • Harvest & Use: Harvest seed heads when seeds begin to drop easily. Dry thoroughly and thresh to separate seeds. Can be fed whole or ground. The leaves are also edible for chickens (and humans!).
    • Yield: Very prolific, producing large quantities of tiny seeds.

    4. Millet

    • Nutritional Value: Good source of carbohydrates, moderate protein, and various minerals. Small seeds are easy for chickens to consume.
    • Growing Tips: Warm-season crop, plant after danger of frost. Prefers full sun and well-drained soil. Can tolerate drier conditions. Broadcast or plant in rows.
    • Harvest & Use: Harvest when seed heads are mature and dry. Cut stalks, dry further if needed, then thresh. Feed whole.
    • Yield: High yield, quick growing.

    5. Wheat

    • Nutritional Value: Primary source of carbohydrates, moderate protein. A staple grain.
    • Growing Tips: Can be planted as a spring or winter crop depending on variety and climate. Requires full sun and well-drained soil. Plant in rows or broadcast.
    • Harvest & Use: Harvest when stalks and heads are golden and dry. Thresh to separate grain. Can be fed whole or ground.
    • Yield: Varies greatly by variety and growing conditions, but generally high.

    6. Oats

    • Nutritional Value: Good source of carbohydrates, moderate protein, and fiber. Very palatable to chickens.
    • Growing Tips: Cool-season crop, can be planted in early spring or fall. Tolerates a wider range of soil types than wheat.
    • Harvest & Use: Harvest when grains are plump and dry. Thresh to separate. Can be fed whole.
    • Yield: Similar to wheat, good yields in suitable climates.

    7. Peas (Field Peas, Cowpeas)

    • Nutritional Value: Excellent source of plant-based protein (20-25%), essential amino acids, and fiber. Legumes are crucial for balancing grain-heavy diets.
    • Growing Tips: Field peas are cool-season; cowpeas are warm-season. Plant in full sun. Most are vining and benefit from support. Nitrogen fixers, improving soil.
    • Harvest & Use: Harvest when pods are dry and seeds are hard. Shell and dry thoroughly. Feed whole or cracked.
    • Yield: Good yields, especially with proper support.

    8. Comfrey (Bocking 14 variety)

    • Nutritional Value: Not a grain, but an incredible nutrient accumulator. Rich in protein (up to 25% dry weight), vitamins (A, B, C), and minerals (calcium, potassium, iron).
    • Growing Tips: Perennial, grows from root cuttings. Plant in full sun to partial shade in rich, moist soil. Once established, it’s very hardy and drought-tolerant.
    • Harvest & Use: Harvest leaves frequently (every 4-6 weeks) by cutting them down to a few inches above the ground. Feed fresh, wilted, or dried and crumbled. Do not feed exclusively; use as a supplement.
    • Yield: Extremely prolific, providing multiple harvests per season for years.
    • Safety Warning: While beneficial in moderation, some sources suggest large quantities of comfrey may have liver toxicity concerns for humans and animals due to pyrrolizidine alkaloids. Feed as a supplement, not a primary feed source.

    How Much Land You Actually Need Per Chicken

    Estimating land requirements for a self-sufficient chicken feed garden is crucial. It depends on your flock size, chosen crops, and local growing conditions. A general rule of thumb for a truly self-sufficient system is to aim for 200-400 square feet per chicken for feed production, assuming you’re growing a diverse mix of grains, legumes, and greens. This accounts for crop rotation, pathways, and potential yield fluctuations.

    Example Calculation for a Small Flock (10 Chickens):

    Let’s assume you have 10 laying hens. A laying hen consumes approximately 0.25 lbs (113 grams) of feed per day. Over a year, that’s roughly 91.25 lbs (41.4 kg) per hen, or 912.5 lbs (414 kg) for 10 hens.

    • Corn: A good yield is 100-150 lbs per 1,000 sq ft. To get 400 lbs of corn, you’d need roughly 3,000-4,000 sq ft.
    • Wheat/Oats: Similar yields to corn.
    • Sunflower: Can yield 50-100 lbs per 1,000 sq ft. To get 100 lbs of sunflower seeds, you’d need 1,000-2,000 sq ft.
    • Peas/Legumes: Can yield 30-60 lbs per 1,000 sq ft.
    • Comfrey/Greens: A small patch (e.g., 100 sq ft) can provide ample greens for 10 chickens.

    Considering a diverse mix, crop rotation, and allowing for some buffer, a dedicated area of 2,000 to 4,000 square feet (roughly 0.05 to 0.1 acres) per 10 chickens is a realistic starting point for growing the bulk of their feed. This doesn’t include their coop, run, or pasture space. For smaller flocks (e.g., 3-5 chickens), you might get away with 500-1000 sq ft, especially if they free-range extensively.

    Key Considerations:

    • Soil Fertility: Highly fertile soil will produce higher yields, reducing the land needed.
    • Climate: Your growing season length and rainfall will impact crop choices and yields.
    • Crop Rotation: Essential for soil health and pest management. Plan for 3-4 year rotations, meaning you’ll need more total land than what’s actively planted in any given year.
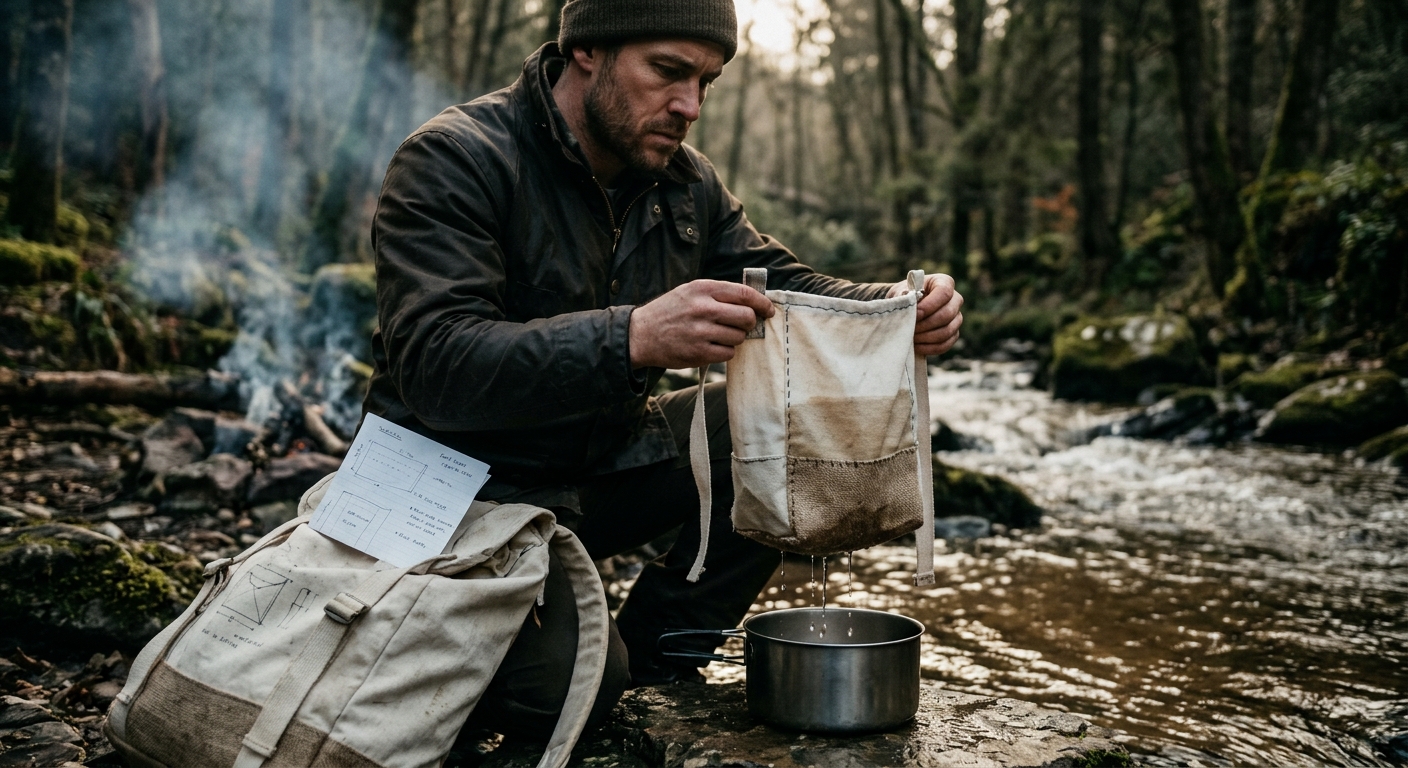
    • Free-Ranging: Chickens that free-range extensively will forage for a significant portion of their diet (insects, weeds, seeds), reducing your cultivated feed requirements.

    Seasonal Planting Calendar for Continuous Feed Production

    Year-round feed production requires careful planning, succession planting, and utilizing both warm and cool-season crops. This general calendar assumes a temperate climate; adjust for your specific hardiness zone.

    Spring (March – May)

    • Early Spring: Plant cool-season grains like oats and spring wheat. Sow field peas. Start comfrey from root cuttings if not already established.
    • Mid-Spring: Prepare beds for warm-season crops. Direct sow millet.
    • Late Spring: Plant corn and sunflowers after the last frost. Sow cowpeas.
    • Tasks: Fertilize existing comfrey. Weed actively.

    Summer (June – August)

    • Early Summer: Continue succession planting of millet and cowpeas for later harvests.
    • Mid-Summer: First harvest of oats and spring wheat. Harvest comfrey leaves every 4-6 weeks.
    • Late Summer: Corn and sunflowers begin to mature. Prepare beds for fall planting.
    • Tasks: Irrigation is critical. Monitor for pests.

    Fall (September – November)

    • Early Fall: Major harvest period for corn, sunflowers, amaranth, and cowpeas. Plant winter wheat and winter oats (if your climate allows for overwintering).
    • Mid-Fall: Final comfrey harvest before dormancy. Plant cover crops (e.g., clover, vetch) in empty beds to improve soil and provide winter forage.
    • Late Fall: Clean up garden beds. Process and store harvested grains.
    • Tasks: Prepare for winter, ensure storage is secure.

    Winter (December – February)

    • Tasks: Focus on feeding stored grains and utilizing fodder systems (see next section). Plan next year’s garden layout and crop rotations. Order seeds. Maintain winter cover crops.
    • Winter Forage: If your climate is mild, winter wheat or oats planted in fall can provide some green forage for chickens during warmer winter days.

    Succession Planting: For crops like millet, cowpeas, and even some faster-maturing corn varieties, plant small batches every 2-3 weeks during their growing season to ensure a continuous supply rather than one massive harvest.

    Sprouting and Fodder Systems for Winter Feed Gaps

    Even with careful planning, winter can present challenges for fresh feed. Sprouting grains and growing fodder are excellent ways to bridge these gaps, providing highly nutritious, fresh greens indoors.

    Benefits of Sprouts and Fodder:

    • Nutrient Boost: Sprouting increases the bioavailability of nutrients, enzymes, and vitamins (especially B vitamins and Vitamin C).
    • Digestibility: The sprouting process breaks down complex starches, making grains easier for chickens to digest.
    • Cost-Effective: A small amount of dry grain expands significantly when sprouted, stretching your feed supply.
    • Winter Greens: Provides essential fresh greens when outdoor forage is scarce.
    • Hydration: Fodder is high in water content, contributing to your flock’s hydration.

    Simple Fodder System (Tray Method):

    This method uses shallow trays to grow a dense mat of sprouted grains.

    1. Choose Your Grain: Barley, wheat, oats, and rye are excellent choices. Avoid hulled grains as they sprout poorly.
    2. Soak: Place 1-2 cups of grain (per 10 chickens) in a bucket and cover with water. Soak for 8-12 hours.
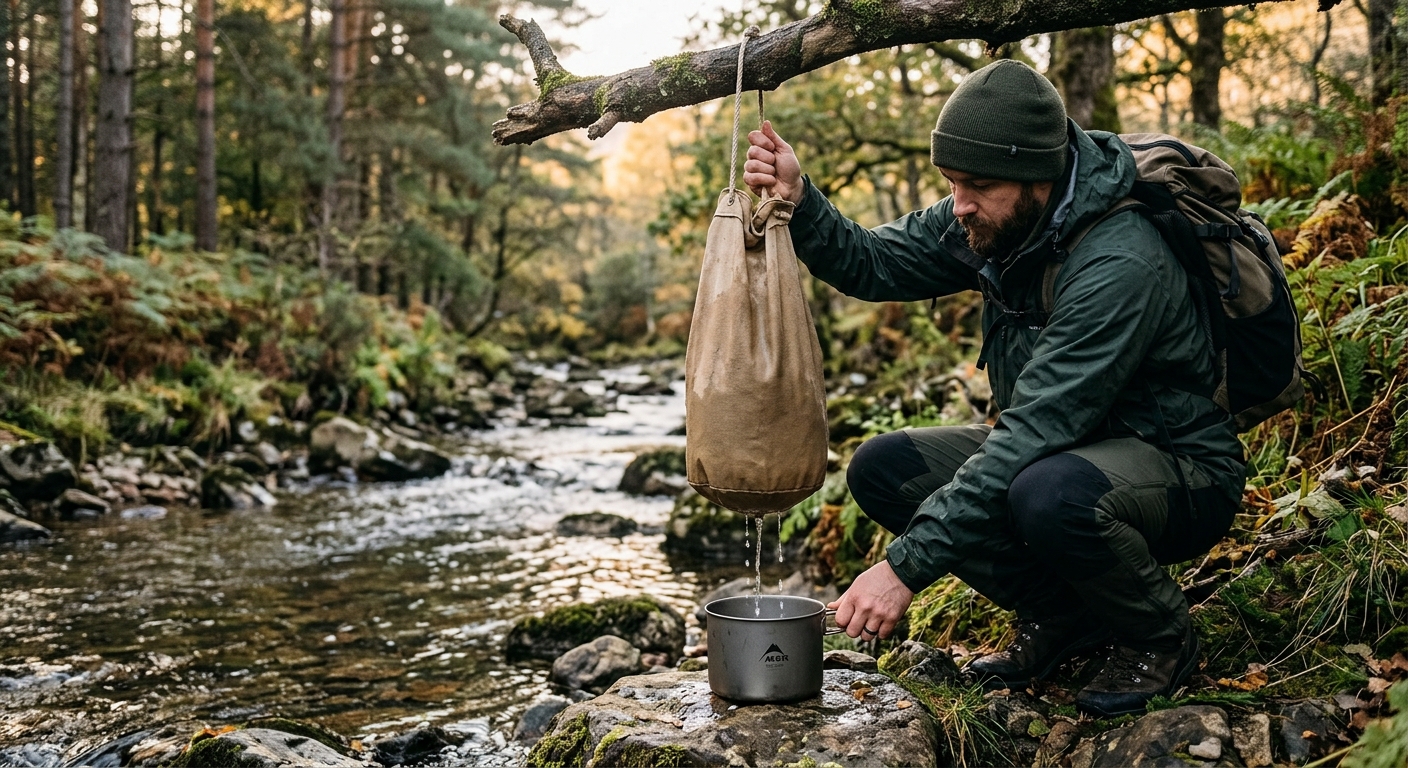
    3. Spread: Drain the soaked grain and spread it evenly in a shallow tray (e.g., a 10×20 nursery tray with drainage holes). Aim for a layer about 1/2 inch thick.
    4. Rinse & Drain: Twice daily, rinse the grains thoroughly under cool water and drain completely. Proper drainage is crucial to prevent mold.
    5. Light: Place trays in an area with indirect light or under grow lights.
    6. Harvest: In 5-7 days, you’ll have a dense mat of green sprouts, typically 4-6 inches tall. The entire mat, roots and all, can be fed to your chickens.
    7. Rotation: To ensure a continuous supply, start a new tray every day or two.

    Safety Tip: Always ensure good air circulation and drainage to prevent mold growth. If you see any signs of mold, discard the batch immediately. Clean your trays thoroughly between uses.

    Balancing Protein, Carbs, and Calcium Without Commercial Supplements

    Achieving a balanced diet for your flock using homegrown feed requires understanding their nutritional needs at different life stages. The goal is to mimic the approximate ratios found in commercial feeds, but with whole, natural ingredients.

    General Nutritional Guidelines:

    • Chicks (0-8 weeks): High protein (18-22%), moderate carbohydrates, lower calcium.
    • Growers (8-18 weeks): Moderate protein (16-18%), higher carbohydrates, lower calcium.
    • Layers (18+ weeks): Moderate protein (16-18%), moderate carbohydrates, high calcium (3.5-4.5%).
    • Broilers: High protein (20-24%), high carbohydrates for rapid growth.

    How Your Crops Contribute:

    • Carbohydrates (Energy): Corn, wheat, oats, millet, amaranth. These should form the bulk (60-70%) of your feed mix.
    • Protein: Peas (field peas, cowpeas), sunflower seeds, amaranth, comfrey. These are vital for muscle development, egg production, and overall health. Aim for 20-30% of your mix from protein sources.
    • Fats: Sunflower seeds are an excellent source of healthy fats.
    • Vitamins & Minerals: Comfrey, various leafy greens (foraged or grown), sprouted grains, and a diverse mix of crops will provide a wide spectrum.

    Natural Calcium Sources:

    Laying hens require significant calcium for strong eggshells. Without commercial supplements, you’ll need natural alternatives:

    • Crushed Oyster Shell: The gold standard. Purchase in bulk or find local sources. Offer free-choice in a separate feeder.
    • Crushed Eggshells: A sustainable option from your own flock. Bake them at 250°F (120°C) for 10-15 minutes to sterilize and make them brittle, then crush into small pieces. Offer free-choice.
    • Bone Meal: If you process your own animals, bone meal can be a source of calcium and phosphorus, but ensure it’s properly sterilized and finely ground.

    Boosting Protein & Micronutrients:

    • Insects & Worms: Allow chickens to free-range or create a compost pile to attract insects. Black soldier fly larvae are an excellent, high-protein supplement you can cultivate.
    • Foraged Greens: Dandelions, clover, plantain, and various weeds provide vitamins and minerals.
    • Fermented Grains: Fermenting your homegrown grains can increase nutrient availability and digestibility, similar to sprouting.
    • Alfalfa: A perennial legume, alfalfa can be grown and fed fresh or dried for additional protein and vitamins.

    Important Note: While striving for self-sufficiency, it’s wise to keep a small emergency supply of a high-quality commercial feed, especially for chicks or sick birds, until you’ve perfected your homegrown system.

    Harvest, Drying, and Storage for Year-Round Use

    Proper harvesting, drying, and storage are critical to preserving your homegrown chicken feed and preventing spoilage, pests, and nutrient loss.

    Harvesting Specific Crops:

    • Corn: Harvest when husks are dry and yellow/brown, and kernels are hard. Test by pressing a thumbnail into a kernel; if no milky liquid comes out, it’s ready.
    • Sunflowers: When the back of the head turns yellow, and seeds are plump. Protect from birds with netting. Cut the head with a few inches of stalk.
    • Wheat, Oats, Millet, Amaranth: Harvest when stalks and seed heads are golden brown and dry. Seeds should be hard and easily separate from the head.
    • Peas: When pods are dry and brittle, and peas inside are hard.
    • Comfrey: Cut leaves when they are mature but still green and vibrant, typically before flowering for best nutrient content.

    Drying Techniques:

    Moisture is the enemy of stored grains. Aim for a moisture content of 10-12% for safe long-term storage.

    • Air Drying (Grains & Seeds): Spread harvested grains (on the cob, in heads, or threshed) in a single layer on screens, tarps, or clean concrete in a warm, dry, well-ventilated area out of direct sunlight. Stir or turn daily. This can take several weeks.
    • Dehydrators: For smaller batches or greens like comfrey, a food dehydrator can speed up the process. Follow manufacturer instructions.
    • Hanging (Sunflowers, Corn): Hang sunflower heads or corn cobs in mesh bags or by their stalks in a dry, airy space.
    • Comfrey & Greens: Spread thinly on screens or hang in bundles in a dry, dark, well-ventilated area until brittle. Crumble for storage.

    Safety Warning: Never store grains that feel damp or have any signs of mold. Mold produces mycotoxins that are highly toxic to chickens and can be fatal.

    Threshing & Winnowing:

    Once dry, grains need to be separated from their stalks and chaff.

    • Threshing: Beat dried stalks/heads against a hard surface, or walk/drive over them on a tarp. For smaller batches, rubbing heads between your hands works.
    • Winnowing: Separate the lighter chaff from the heavier grain. Pour the threshed material from one container to another in front of a fan or on a breezy day. The wind will carry away the chaff, leaving the grain.

    Storage for Year-Round Use:

    Proper storage is paramount to protect your harvest from pests and spoilage.

    • Airtight Containers: Use food-grade buckets with gamma seal lids, Mylar bags with oxygen absorbers, or sturdy metal bins. This prevents moisture re-entry and keeps pests out.
    • Cool, Dark, Dry Location: Store containers in a basement, root cellar, or dedicated storage shed where temperatures are stable and low, and humidity is minimal.
    • Pest Control: Consider adding bay leaves or food-grade diatomaceous earth to your stored grains (mix thoroughly) as a natural pest deterrent. Regularly inspect your storage area for signs of rodents or insects.
    • Labeling: Clearly label containers with the crop type and harvest date.

    By meticulously managing your harvest and storage, you can ensure a consistent, high-quality supply of homegrown chicken feed throughout the year, even through the lean winter months.

    Storage for Year-Round Use:
    Storage for Year-Round Use:: Storage for Year-Round Use:.

    Frequently Asked Questions About Growing Your Own Chicken Feed

    Q: Can I really grow 100% of my chickens’ feed?

    A: Achieving 100% self-sufficiency is a challenging but attainable goal for dedicated homesteaders with sufficient land and time. It requires diverse crop planning, excellent soil management, and potentially supplementing with foraged items or cultivated insects. Many homesteaders aim for 70-90% self-sufficiency, using commercial feed only for specific needs (e.g., chick starter) or as an emergency backup.

    Q: What’s the most important crop to start with for a beginner?

    A: Sunflowers are an excellent starting point. They are relatively easy to grow, produce high-protein, high-fat seeds that chickens love, and are visually rewarding. Corn is another good option for carbohydrate bulk, though it requires more space.

    Q: How do I protect my crops from pests and my own chickens?

    A: For pests, employ organic methods like crop rotation, companion planting, and beneficial insects. For your chickens, fencing is essential. Designate a separate, fenced-off area for your chicken feed garden. Netting can protect ripening seed heads (like sunflowers) from wild birds.

    Q: Do I need to grind the grains for my chickens?

    A: For adult chickens, many grains like wheat, oats, millet, and cracked corn can be fed whole. However, grinding or cracking larger grains (like whole corn or sunflower seeds) makes them easier for chickens to digest, especially for smaller breeds or younger birds. A simple hand-crank grain mill can be a good investment.

    Q: How do I know if my chickens are getting enough nutrients from homegrown feed?

    A: Observe your flock closely. Healthy chickens are active, have bright eyes, glossy feathers, and consistent egg production (for layers). Poor feather quality, lethargy, reduced egg production, or soft-shelled eggs can indicate nutritional deficiencies. Regularly offering a diverse range of crops and natural calcium sources is key. Consider a soil test for your garden to ensure your crops are nutrient-dense.

  • How to Store Gasoline Long Term: Containers, Stabilizers, and Rotation Schedules

    How to Store Gasoline Long Term: Containers, Stabilizers, and Rotation Schedules

    How to Store Gasoline Long Term: Containers, Stabilizers, and Rotation Schedules

    For preppers, homesteaders, and anyone serious about emergency preparedness, understanding how to store gasoline long term is not just a convenience—it’s a critical component of self-reliance. Fuel powers generators, vehicles, chainsaws, and other essential equipment that can mean the difference between comfort and crisis during an extended grid-down scenario or natural disaster. However, gasoline is a volatile and perishable commodity, making proper storage a complex endeavor. This comprehensive guide will walk you through everything you need to know, from selecting the right containers and using effective stabilizers to implementing a robust rotation schedule and adhering to crucial safety protocols.

    Related TacticalProof reading: How Long Do Water Tablets Last?

    Why Preppers Need a Fuel Stockpile (and How Much Is Enough)

    A reliable fuel stockpile is the lifeblood of an independent household in an emergency. Imagine a prolonged power outage after a hurricane, an ice storm, or even a widespread grid failure. Without fuel, your generator is a paperweight, your chainsaw can’t clear fallen trees, and your bug-out vehicle is stranded. Beyond immediate emergencies, a fuel reserve offers economic insulation against price spikes and supply chain disruptions.

    Common Scenarios Requiring Stored Fuel:

    • Power Outages: Generators provide electricity for refrigeration, heating/cooling, well pumps, and communication.
    • Natural Disasters: Fuel for chainsaws to clear debris, vehicles for evacuation or supply runs, and generators for recovery efforts.
    • Economic Instability: Protection against fuel shortages or hyperinflation.
    • Remote Living: Ensuring access to fuel when local stations are distant or inaccessible.

    Calculating Your Fuel Needs: A Practical Approach

    Determining “how much is enough” depends entirely on your specific needs and anticipated scenarios. Start by inventorying all fuel-dependent equipment:

    1. Generators: Note their fuel consumption rate (e.g., 0.5-1 gallon per hour at half load). Estimate daily run time (e.g., 6-8 hours for critical systems).
    2. Vehicles: Consider your primary vehicle’s tank capacity and potential bug-out distance.
    3. Small Engines: Chainsaws, lawnmowers, ATVs, pressure washers – estimate their occasional use.

    Example Calculation:

    If your generator uses 0.75 gallons/hour and you plan to run it 8 hours a day for critical needs, that’s 6 gallons per day. For a 7-day emergency, you’d need 42 gallons. Add a full tank for your primary vehicle (e.g., 20 gallons) and 5-10 gallons for small engines. A reasonable starting goal might be 50-75 gallons for a typical family, aiming for 2-4 weeks of sustained operation. More ambitious preppers might aim for 3-6 months’ supply, which could easily exceed 200 gallons.

    Remember, it’s always better to overestimate slightly than to run short. However, the amount you store must also align with legal limits and your ability to store it safely.

    Approved Containers: Jerry Cans, Safety Cans, and Drum Storage Compared

    The container you choose is paramount for safe and effective long term gas storage containers. Not all containers are created equal, and using the wrong one can lead to rapid fuel degradation, dangerous leaks, or even explosions. Always prioritize containers specifically designed and certified for gasoline storage.

    1. Jerry Cans (Plastic and Metal)

    The iconic jerry can is a popular choice for its portability and durability.

    • Plastic Jerry Cans (HDPE):

      • Pros: Lighter, rust-proof, often translucent for fuel level visibility. Many are CARB (California Air Resources Board) compliant, featuring self-venting spouts to reduce evaporative emissions.
      • Cons: Can swell and contract with temperature changes, potentially leading to stress cracks over many years. Permeation (slow escape of fuel vapors) can occur, though modern HDPE cans are designed to minimize this.
      • Certifications: Look for UL (Underwriters Laboratories) or ASTM (American Society for Testing and Materials) certifications, and CARB compliance if required in your region.
      • Capacity: Typically 1-5 gallons.
    • Metal Jerry Cans (Steel):

      • Pros: Extremely durable, puncture-resistant, less prone to permeation, and excellent for long-term storage due to their robust construction. Often feature an internal lining to prevent rust.
      • Cons: Heavier, can rust if the internal lining is compromised or if stored in humid conditions without proper care. Can be more expensive.
      • Certifications: Look for UN (United Nations) certification for transport of dangerous goods, and often meet specific military specifications (e.g., NATO standard).
      • Capacity: Typically 5-20 liters (approx. 1.3-5.3 gallons).

    Key Considerations for Jerry Cans: Ensure tight-sealing caps to prevent vapor escape and contamination. Store them out of direct sunlight to minimize temperature fluctuations.

    1
    1. Jerry Cans (Plastic and Metal): 1.

    2. Safety Cans (Type I and Type II)

    Safety cans are engineered for maximum safety, especially in industrial or workshop environments, but are excellent for home storage too.

    • Features:

      • Spring-Loaded Lid: Automatically closes to prevent spills and control vapors.
      • Flame Arrestor: A mesh screen inside the spout prevents flashback ignition if a flame source is introduced.
      • Pressure Relief: Vents automatically to relieve pressure buildup from temperature changes.
    • Type I vs. Type II:

      • Type I: Single opening for both filling and pouring.
      • Type II: Two openings – one for filling and one with a flexible metal hose for pouring, offering greater control and reducing spills.
    • Materials: Typically galvanized steel with a durable powder-coat finish.
    • Certifications: Always look for UL, FM (Factory Mutual), or ULC (Underwriters Laboratories of Canada) approval.
    • Capacity: Commonly 1-5 gallons, but larger sizes up to 55 gallons are available for industrial use.
    • Pros: Superior safety features, extremely durable, excellent for long-term storage.
    • Cons: More expensive than standard jerry cans.

    3. Drum Storage (55-Gallon Drums)

    For those requiring substantial quantities of fuel, 55-gallon drums are an option, but they come with significant logistical and safety considerations.

    • Materials: Steel drums are standard, often with internal linings.
    • Pros: High volume storage, better bulk pricing on fuel.
    • Cons: Extremely heavy when full (gasoline is ~6 lbs/gallon, so 330 lbs + drum weight), requiring specialized equipment (drum dollies, pumps) for handling and dispensing. Significant space requirement. Higher risk if not properly managed.
    • Safety: Requires a dedicated, well-ventilated, fire-resistant storage area. Proper grounding and bonding are critical during transfer to prevent static discharge.
    • Certifications: UN-rated drums are essential.

    General Container Best Practices:

    • Labeling: Clearly label each container with the fuel type, date of purchase, and date stabilizer was added.
    • Airspace: Leave a small amount of airspace (about 5%) to allow for thermal expansion.
    • Storage Location: Store in a cool, dry, well-ventilated area away from ignition sources and direct sunlight.

    Fuel Stabilizers Explained: STA-BIL vs PRI-G vs SeaFoam

    Even in the best containers, gasoline will degrade over time. Oxidation, gum formation, and phase separation are common issues that can turn your valuable fuel into unusable sludge. This is where a quality fuel stabilizer for gas storage becomes indispensable. Stabilizers work by preventing these chemical reactions, extending the shelf life of gasoline significantly.

    How Gasoline Degrades

    Gasoline is a complex blend of hydrocarbons. Over time, it undergoes several degradation processes:

    • Oxidation: Exposure to oxygen causes hydrocarbons to break down, forming gums, varnishes, and sludge that can clog fuel lines and carburetors.
    • Evaporation: Lighter hydrocarbons evaporate, reducing the fuel’s octane rating and making it harder to ignite.
    • Water Absorption (Ethanol Blends): Ethanol is hygroscopic, meaning it attracts and absorbs water. When too much water is absorbed, the ethanol and water can separate from the gasoline (phase separation), forming a corrosive layer at the bottom of the tank.

    Popular Fuel Stabilizers Compared

    While many products exist, three stand out for their effectiveness in long-term storage:

    1. STA-BIL (Red Formula)

    • Mechanism: Primarily an antioxidant that prevents gum and varnish formation. It also contains corrosion inhibitors.
    • Ethanol Protection: The standard red STA-BIL does not directly prevent phase separation in ethanol-blended fuels, though it does protect against the effects of oxidation. STA-BIL Marine (blue) and STA-BIL 360 Protection are specifically formulated for ethanol protection.
    • Claimed Shelf Life: Up to 12-24 months.
    • Application: Add to fresh fuel before storage. Run the engine for a few minutes to circulate the treated fuel throughout the system.
    • Best For: General gasoline storage, small engines, and vehicles that will be stored for less than two years.

    2. PRI-G

    • Mechanism: A commercial-grade fuel treatment that not only stabilizes fuel but also reconditions old fuel by dissolving sludge and preventing new deposits. It’s a powerful antioxidant and dispersant.
    • Ethanol Protection: PRI-G is highly effective against ethanol-related issues, including phase separation, by keeping water dispersed in fine droplets that can be burned off.
    • Claimed Shelf Life: Up to 2-3 years, with some users reporting success beyond 5 years when properly applied.
    • Application: Can be added to fresh fuel for preventative maintenance or to older, degraded fuel for reconditioning.
    • Best For: Serious long-term fuel storage (2+ years), especially for larger quantities and critical applications where maximum shelf life is desired.

    3. SeaFoam Motor Treatment

    • Mechanism: A multi-purpose product that acts as a fuel stabilizer, cleaner, and lubricant. It works to liquefy gum and varnish deposits, clean fuel injectors and carburetors, and lubricate upper cylinders.
    • Ethanol Protection: Helps to control moisture and prevent corrosion, offering some protection against ethanol’s negative effects, though not as directly focused on phase separation prevention as PRI-G.
    • Claimed Shelf Life: Up to 2 years.
    • Application: Can be added to fuel tanks, crankcases, or directly into carburetor throats/intake manifolds.
    • Best For: General fuel stabilization, especially for engines that might sit for extended periods but are still occasionally used, and for cleaning fuel systems.

    Important Tip: Always follow the manufacturer’s instructions for dosage and application. Adding too little stabilizer will be ineffective, and adding too much can sometimes cause issues, though most stabilizers are forgiving.

    Step-by-Step Rotation Schedule to Keep Your Fuel Fresh

    Even with the best stabilizers, a robust rotation schedule is the ultimate safeguard against fuel degradation. Think of stabilizers as extending the grace period, but rotation ensures you’re always using relatively fresh fuel. This is a cornerstone of effective prepper fuel storage.

    The ‘First In, First Out’ (FIFO) Principle

    This is the golden rule for any stored commodity, including fuel. The oldest fuel should always be used first.

    Recommended Rotation Schedule:

    1. Initial Setup (Month 0):

      • Purchase fresh gasoline (preferably non-ethanol if available, or E10 if not).
      • Immediately add the recommended amount of your chosen fuel stabilizer (e.g., PRI-G for 2+ years, STA-BIL for 1 year).
      • Fill your approved storage containers, leaving about 5% airspace.
      • Label each container clearly with the date of stabilization and the expected expiration date.
      • Store in a cool, dark, well-ventilated area.
    2. Quarterly Check-In (Every 3 Months):

      • Visually inspect containers for leaks, swelling, or damage.
      • Check labels for legibility.
      • If possible, gently agitate containers to mix the fuel and stabilizer, especially if they’ve been sitting undisturbed.
    3. Annual Rotation (Every 6-12 Months, depending on stabilizer):

      • Identify the oldest fuel in your stockpile.
      • Use this fuel in your vehicles, lawnmowers, or other daily-use equipment. This is where your bug-out vehicle or daily driver becomes part of your rotation system.
      • As you use the old fuel, refill the empty storage containers with fresh gasoline, immediately adding stabilizer and dating them.
      • Example: If you have 50 gallons stored, use 10-15 gallons every 6 months and replace it with fresh, stabilized fuel. This ensures a constant supply of relatively fresh fuel.
    4. Generator Exercise (Monthly/Quarterly):

      • Run your generator for 30-60 minutes under a light load (e.g., a few lights, a fan). This circulates the stabilized fuel through the engine and keeps seals lubricated.
      • Use fuel from your oldest stored supply for this purpose.

    Signs of Degraded Fuel:

    • Color Change: Fresh gasoline is light yellow/clear. Degraded fuel often turns darker, amber, or even brown.
    • Odor: A sour, varnish-like, or unusually strong chemical smell indicates degradation.
    • Sediment: Visible particles or sludge at the bottom of the container.
    • Engine Performance: Hard starting, rough idling, loss of power, or stalling when using the fuel.

    If fuel shows significant signs of degradation, it should not be used in sensitive engines. It may be possible to filter it for less critical uses or dispose of it properly at a hazardous waste facility.

    Legal Limits: How Much Gasoline Can You Store at Home by Code

    While building a substantial fuel reserve is prudent, it’s crucial to be aware of and adhere to local, state, and federal regulations regarding the storage of flammable liquids. These codes are in place for public safety and vary significantly by jurisdiction.

    General Guidelines and Common Limits:

    • NFPA 30A (National Fire Protection Association): This is a widely adopted standard. For residential properties, NFPA 30A typically limits the storage of Class I flammable liquids (like gasoline) to no more than 25 gallons in approved containers outside of a dwelling. Inside a dwelling, the limit is often 10 gallons, but this is generally discouraged for safety reasons.
    • Local Fire Codes: Your municipal fire department or building code enforcement office will have specific regulations that may be stricter than national guidelines. These often dictate:
      • Maximum total quantity allowed.
      • Maximum container size (e.g., no more than 5-gallon containers).
      • Required distance from ignition sources, property lines, and habitable structures.
      • Ventilation requirements for storage areas.
    • Insurance Policies: Your homeowner’s insurance policy may have clauses regarding the storage of flammable materials. Exceeding these limits could void your coverage in case of an incident.
    • Rural vs. Urban: Rural areas often have more lenient codes than densely populated urban or suburban areas due to lower population density and greater distances between structures.

    Actionable Advice:

    1. Contact Your Local Fire Department: This is the most reliable source for accurate information on local storage limits and requirements. Ask about residential storage of gasoline and any specific container or location restrictions.
    2. Check Your Homeowner’s Insurance: Review your policy or contact your agent to understand any limitations or requirements related to fuel storage.
    3. Err on the Side of Caution: If you’re unsure, store less than the maximum or invest in more robust, fire-rated storage solutions if you need to exceed common limits.

    Exceeding legal limits can result in fines, forced removal of fuel, or, more critically, put you and your property at undue risk. Always prioritize safety and compliance.

    Diesel vs Gasoline vs Kerosene: Which Stores Longest

    When considering prepper fuel storage, it’s important to understand the inherent differences in shelf life between various fuel types. Not all fuels are created equal in terms of their long-term stability.

    Gasoline (Petrol)

    • Composition: A highly refined blend of volatile hydrocarbons, designed for high octane and rapid combustion.
    • Shelf Life (Untreated): Typically 3-6 months.
    • Shelf Life (Treated with Stabilizer): 1-3 years, potentially longer with premium stabilizers and ideal conditions.
    • Degradation Issues: Highly susceptible to oxidation, evaporation of volatile components, and phase separation (especially with ethanol blends). Forms gums, varnishes, and water contamination.
    • Storage Considerations: Requires airtight, approved containers, fuel stabilizer, and cool, dark storage.

    Diesel Fuel

    • Composition: Heavier, less volatile hydrocarbons than gasoline, designed for compression-ignition engines.
    • Shelf Life (Untreated): 6-12 months.
    • Shelf Life (Treated with Stabilizer/Biocide): 2-5 years, potentially longer.
    • Degradation Issues: Less prone to evaporation and oxidation than gasoline, but susceptible to:
      • Microbial Growth: Bacteria, fungi, and algae can grow in diesel, especially with water contamination, forming sludge that clogs filters.
      • Oxidation: Still occurs, forming sediments and darkening the fuel.
      • Waxing: At very low temperatures, paraffin wax in diesel can crystallize, gelling the fuel.
    • Storage Considerations: Requires approved containers, a diesel fuel stabilizer (often includes a biocide), and cool, dark storage. Regular testing for microbial contamination is recommended for very long-term storage.

    Kerosene

    • Composition: A middle distillate fuel, heavier than gasoline but lighter than diesel. Used for heating, lighting, and some jet engines.
    • Shelf Life (Untreated): 5-10 years, potentially longer.
    • Shelf Life (Treated): Can extend shelf life further, though less critical than for gasoline or diesel.
    • Degradation Issues: Very stable. Primarily susceptible to oxidation over many years, leading to darkening and slight gum formation. Microbial growth is less common than in diesel but can occur with significant water contamination.
    • Storage Considerations: Approved containers, cool, dark storage. A general fuel stabilizer can be used, but its impact on shelf life is less dramatic than for other fuels.

    Conclusion on Shelf Life:

    Kerosene generally stores the longest due to its less volatile and more stable chemical composition. Diesel is next, especially when treated with biocides and stabilizers. Gasoline has the shortest natural shelf life and requires the most diligent stabilization and rotation.

    For a diverse preparedness plan, consider storing a mix of fuels if your equipment allows. Kerosene for heating and lighting, diesel for heavy equipment, and gasoline for generators and vehicles.

    Kerosene
    Kerosene: Kerosene.

    Safety Protocols: Ventilation, Grounding, and Fire Suppression

    Storing gasoline, regardless of quantity, introduces inherent risks. Adhering to strict safety protocols is non-negotiable to prevent accidents, fires, and health hazards. Your primary goal is to minimize ignition sources, control vapors, and be prepared for the worst.

    1. Ventilation

    Gasoline vapors are heavier than air and can travel along the ground to an ignition source. They are also highly flammable and explosive in certain concentrations.

    • Outdoor Storage: Ideal. Store containers in a detached shed, garage, or dedicated fuel storage locker. Ensure the area is well-ventilated, preferably with natural cross-ventilation.
    • Indoor Storage (Not Recommended for Large Quantities): If absolutely necessary for small quantities (within legal limits), store in a dedicated, fire-rated cabinet designed for flammables. The area must have active mechanical ventilation that exhausts to the outside, not into other parts of the building.
    • Avoid Basements: Never store gasoline in basements. Vapors can accumulate, creating an extreme fire and explosion hazard.
    • Distance: Store fuel at least 50 feet away from ignition sources (water heaters, furnaces, electrical panels, open flames, pilot lights) and habitable structures.

    2. Grounding and Bonding

    Static electricity is a silent killer when transferring flammable liquids. The friction of fuel flowing can generate a static charge that, if not dissipated, can spark and ignite vapors.

    • Grounding: Connect the storage container (e.g., a 55-gallon drum) to an earth ground (e.g., a metal stake driven into the ground, or a cold-water pipe).
    • Bonding: Connect the two containers involved in the transfer (e.g., the drum and the jerry can being filled) with a bonding wire. This equalizes the electrical potential between them, preventing a spark.
    • Procedure: Always connect grounding and bonding wires BEFORE opening containers or starting the transfer. Disconnect them AFTER the transfer is complete and containers are sealed.
    • No Plastic Funnels: Avoid plastic funnels when transferring fuel, as they can generate static. Use metal funnels that can be bonded.

    3. Fire Suppression

    Despite all precautions, accidents can happen. Being prepared to suppress a fuel fire quickly is vital.

    • Fire Extinguishers: Keep at least one ABC-rated fire extinguisher (suitable for Class B flammable liquid fires) readily accessible near your fuel storage area. Ensure it is regularly inspected and charged. A 10 lb extinguisher is a good minimum for fuel storage.
    • Sand/Dirt: For small spills or contained fires, sand or dirt can be used to smother flames. Keep a bucket of sand nearby.
    • No Water: Never use water on a gasoline fire. Gasoline floats on water, and applying water will only spread the burning fuel, making the fire worse.
    • Spill Kits: Have absorbent pads or granular absorbents on hand to quickly contain and clean up small spills.
    • Emergency Plan: Have an evacuation plan for your family and know how to call emergency services.

    4. Personal Protective Equipment (PPE)

    • Gloves: Chemical-resistant gloves (nitrile or neoprene) to protect skin from fuel exposure.
    • Eye Protection: Safety glasses or goggles to prevent splashes.
    • Respirator: If working in an enclosed space or with significant vapor exposure, a respirator with organic vapor cartridges is recommended.

    5. General Safety Rules

    • No Smoking/Open Flames: Absolutely no smoking, welding, grinding, or any other ignition source near fuel storage or transfer areas.
    • Children and Pets: Keep fuel storage areas locked and inaccessible to children and pets.
    • Spill Management: Clean up spills immediately. Ventilate the area thoroughly.
    • Never Siphon by Mouth: Use a proper fuel pump or siphon.
    • Proper Disposal: Dispose of old, degraded fuel or contaminated absorbents at an approved hazardous waste facility.

    By diligently following these safety protocols, you can significantly mitigate the risks associated with long-term gasoline storage, ensuring your preparedness efforts don’t inadvertently create a new hazard.

    Frequently Asked Questions About Long-Term Gasoline Storage

    Q: Can I store gasoline in my car’s fuel tank long-term?

    A: While your car’s fuel tank is designed for gasoline, it’s not ideal for very long-term storage (beyond 6-12 months without driving). The tank isn’t perfectly sealed, and fuel can still degrade. For vehicles stored for extended periods, it’s best to fill the tank completely (to minimize air space), add a quality fuel stabilizer, and ideally, run the engine for a few minutes to circulate the treated fuel.

    Q: What happens if I use old, unstabilized gasoline?

    A: Using old, unstabilized gasoline can lead to several problems: hard starting, rough idling, reduced engine performance, and potential damage to fuel system components. Degraded fuel can clog fuel filters, carburetors, and injectors with varnish and gum deposits. In severe cases, it can cause engine failure. It’s always best to err on the side of caution and dispose of significantly degraded fuel.

    Q: Is non-ethanol gasoline better for long-term storage?

    A: Yes, absolutely. Non-ethanol gasoline (often labeled E0) is generally superior for long-term storage because it does not suffer from phase separation, which is a major issue with ethanol-blended fuels. Ethanol attracts and absorbs water, and when saturated, it separates from the gasoline, forming a corrosive layer. If you have access to non-ethanol gasoline, it’s the preferred choice for your fuel stockpile, even if you still use a stabilizer.

    Q: How often should I rotate my stored gasoline?

    A: The frequency of rotation depends on the quality of your fuel stabilizer and storage conditions. With a good stabilizer like PRI-G, you might extend rotation to 1-2 years. For standard stabilizers like STA-BIL, an annual rotation is recommended. The ‘First In, First Out’ principle is key: use your oldest fuel first and replace it with fresh, stabilized fuel to maintain a consistently viable supply.

    Q: Can I mix different brands of fuel stabilizers?

    A: It’s generally not recommended to mix different brands or types of fuel stabilizers. Each product has a specific chemical formulation designed to work optimally on its own. Mixing them could potentially lead to unforeseen chemical reactions, reduce their effectiveness, or even create undesirable byproducts. Stick to one trusted brand and follow its instructions for best results.