

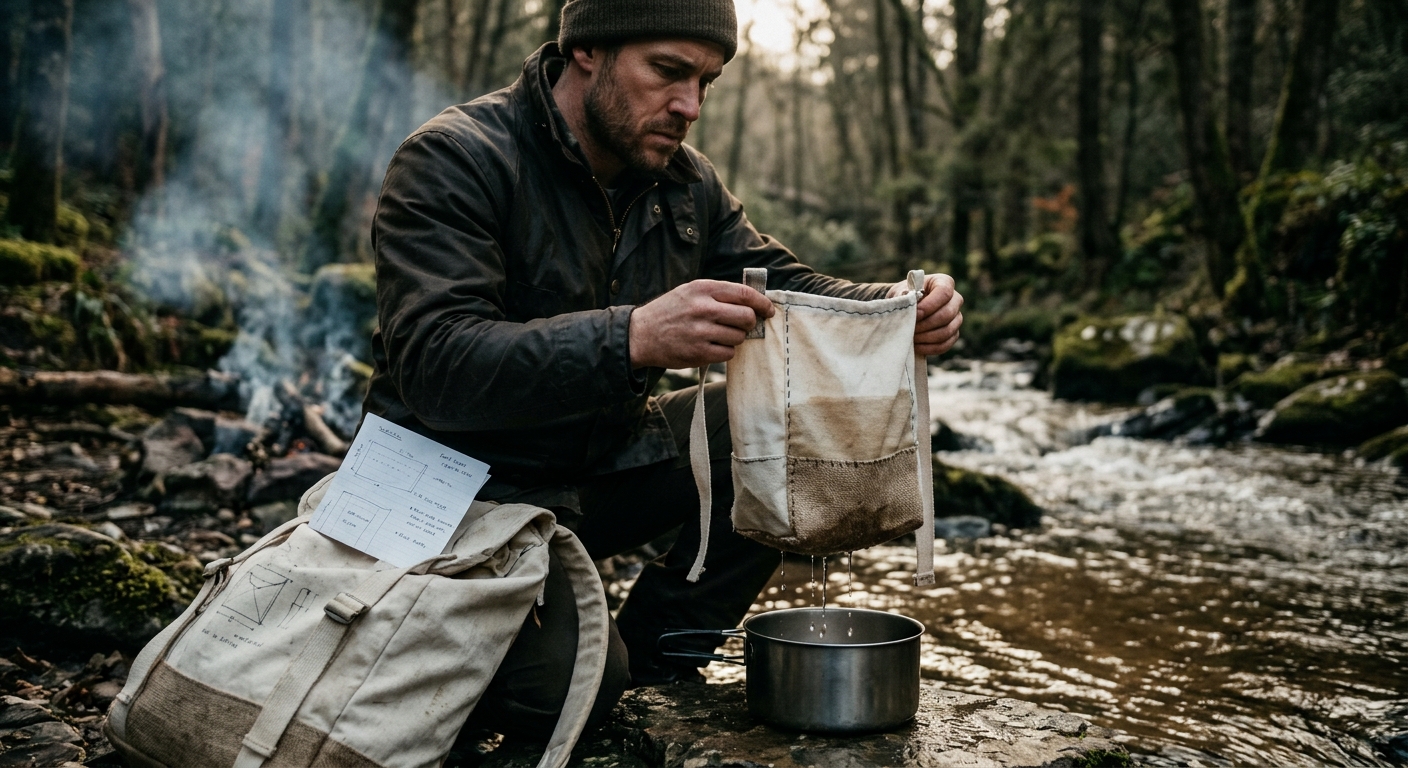
How to Make a DIY Millbank Bag for Wilderness Water Filtration
In a survival scenario, access to clean drinking water is paramount. While modern portable filters are excellent, understanding fundamental, low-tech solutions can be a lifesaver when technology fails or supplies run out. One such robust and time-tested method is the Millbank Bag. This article will guide you through creating your own DIY Millbank Bag, a crucial piece of gear for any serious prepper or bushcrafter looking to master wilderness water filtration.
What Is a Millbank Bag and Why Preppers Should Know About It
The Millbank Bag is a simple yet incredibly effective water pre-filter, originally developed by the British Army. Its design is deceptively straightforward: a cone-shaped canvas bag with a tight weave that allows water to slowly seep through, trapping sediment, silt, and larger particulate matter. It’s not a water purifier – it won’t remove bacteria, viruses, or chemical contaminants – but its role in a multi-stage filtration system is indispensable.
For preppers, the Millbank Bag represents a cornerstone of self-reliance. Its advantages are numerous:
- Simplicity: No moving parts, no cartridges to replace, no batteries. It’s a purely mechanical filter.
- Durability: Made from sturdy canvas, a well-constructed Millbank Bag can last for years with proper care.
- Effectiveness: It excels at removing turbidity, turning murky, silty water into clear water, significantly extending the life of subsequent purification methods like boiling, chemical treatment, or microfilters.
- Low Cost: Materials are inexpensive and readily available.
- Reliability: It works consistently in a wide range of environments, from muddy rivers to stagnant ponds.
Understanding how to make a Millbank Bag and integrate it into your water procurement strategy provides a robust, sustainable solution for obtaining clearer water, which is the first critical step towards making it safe to drink.
Materials and Fabric Selection: Canvas Weight, Weave Density, and Rot-Proofing
The success of your DIY Millbank Bag hinges on selecting the right materials, primarily the canvas itself. Don’t skimp here; quality materials ensure longevity and performance.
Canvas Selection: The Heart of the Filter
- Weight: Aim for a medium-heavy canvas, typically 10-12 oz per square yard. Lighter canvas (e.g., 7-8 oz) might be too permeable and not filter fine enough, while heavier canvas (e.g., 14 oz+) could be too slow or even impede water flow significantly. The 10-12 oz range strikes an excellent balance.
- Weave Density: Look for a tightly woven canvas. A plain weave is common and effective. You want a fabric that feels dense and stiff, not loose or flimsy. The tighter the weave, the finer the particles it can trap.
- Material Type: 100% cotton canvas is traditional and works well. It swells when wet, further tightening the weave and improving filtration. Synthetic blends might not swell as effectively.
- Color: Natural, undyed canvas is preferred to avoid any potential chemical leaching into your water.
Rot-Proofing and Longevity
Canvas, being a natural fiber, is susceptible to mold, mildew, and rot, especially when stored damp. While traditional Millbank Bags were often treated, for a DIY version, the best rot-proofing strategy is diligent maintenance:
- Thorough Drying: Always dry your bag completely after each use before storing it. Hang it in a well-ventilated area, preferably in sunlight.
- Cleaning: Rinse it thoroughly to remove trapped sediment.
- Storage: Store in a dry, breathable bag (like a mesh stuff sack) rather than a sealed plastic bag.
If you wish to pre-treat your canvas, consider natural options like beeswax or a diluted copper naphthenate solution (ensure it’s food-safe or thoroughly rinsed and cured if used for water contact, though many prefer to avoid chemicals entirely for drinking water applications). For most preppers, proper drying is the simplest and safest method.
Other Essential Materials:
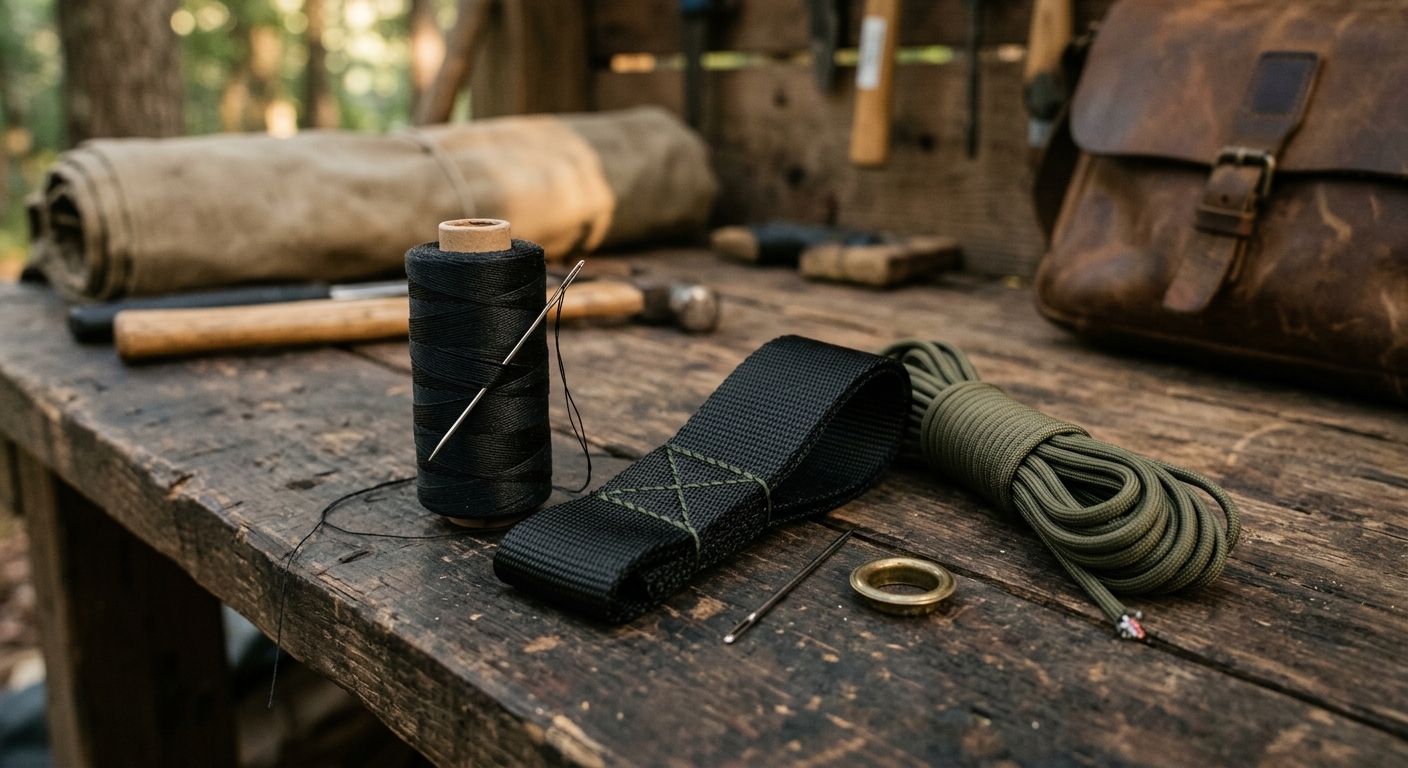
- Thread: Heavy-duty polyester or nylon thread. Cotton thread can rot. Polyester/nylon is strong, rot-resistant, and durable.
- Hanging Loop Material: A sturdy piece of nylon webbing (1-inch wide, about 6-8 inches long) or a length of paracord (550 cord) for hanging the bag.
- Optional: A small brass or stainless steel grommet for the hanging loop attachment point can add durability, though a reinforced stitched loop is also effective. Seam sealant (like McNett Seam Grip) can be applied to exterior seams for extra waterproofing, though the canvas itself will swell to seal.
Practical Tip: Before cutting, wash and dry your canvas once. This pre-shrinks the fabric, preventing significant shrinkage after your bag is made and first used.
Step-by-Step Sewing Instructions With Measurements
Creating your how to make a Millbank Bag doesn’t require advanced sewing skills, but precision and strong seams are vital for its performance and durability. We’ll aim for a finished bag roughly 10-12 inches wide at the top and 18-20 inches deep, tapering to a point.
1. Cut the Fabric
- Start with a rectangular piece of canvas approximately 22 inches wide by 24 inches long. This will give you enough material for seams and the conical shape.
- Fold the canvas in half lengthwise, so you have a piece 11 inches wide by 24 inches long.
- From the folded edge, measure down about 2 inches from the top. Mark this point.
- From the bottom corner of the folded edge, measure in about 1 inch. Mark this point.
- Draw a line from the top mark (2 inches down) to the bottom mark (1 inch in). This will create the taper for the cone.
- Cut along this line. When unfolded, you should have a roughly trapezoidal shape with a wider top and a narrower bottom.
- Alternatively, for a simpler cone, you can cut a large semicircle or a segment of a circle. However, the folded trapezoid method is often easier for beginners and yields a good shape.
2. Hem the Top Edge
- Along the widest edge (the top of your bag), fold over the raw edge by 1/2 inch, press, then fold over another 1 inch and press again.
- Stitch this hem securely using your heavy-duty thread. This creates a strong opening and a channel for a drawstring if you choose to add one later (though not strictly necessary for a Millbank Bag).
3. Sew the Main Seam (Side Seam)
- With the fabric still folded (or fold it in half again, right sides together, if you cut it as a single piece), align the raw edges of the tapered side.
- Using a strong straight stitch, sew a seam 1/2 inch from the edge, from the top hem down to the point. Backstitch at the beginning and end for reinforcement.
- For added durability and to prevent fraying, consider a French seam:
- Sew the seam with wrong sides together, 1/4 inch from the edge. Trim the seam allowance closely.
- Turn the bag inside out (right sides together). Press the seam flat.
- Sew a second seam 3/8 inch from the folded edge, enclosing the raw edges of the first seam. This creates a very strong, clean finish.
4. Form the Point (Bottom Seam)
- The beauty of the Millbank Bag is its conical shape. If you used the trapezoidal method and sewed a single side seam, the bottom will naturally form a point.
- Reinforce this point heavily. Stitch across the very tip multiple times, or create a small, flat bottom by folding the point slightly and stitching across it to create a small, reinforced triangle.
- Safety Tip: Ensure all seams are incredibly strong. Water weight can put significant stress on the fabric and stitching. Double-stitching or using a French seam is highly recommended.
5. Attach the Hanging Loop
- Cut a 6-inch length of 1-inch nylon webbing or a loop of paracord.
- Fold the webbing in half to create a loop.
- Position the raw ends of the loop on the outside of the bag, centered at the top opening, just below the hem.
- Stitch the loop securely to the bag with multiple passes, forming a box stitch or an ‘X’ box stitch for maximum strength. This point will bear the full weight of the water.
- If using a grommet, punch a hole through the top hem and insert the grommet, then thread your paracord loop through it. Reinforce the area around the grommet with extra stitching.
Hand Sewing Tip: If sewing by hand, use a thimble and a strong needle (e.g., a denim needle). Use a backstitch for all seams, ensuring each stitch overlaps the previous one for maximum strength. Waxing your thread can also add durability and reduce tangling.
How to Prime, Use, and Maintain Your DIY Millbank Bag in the Field
Once your DIY Millbank Bag is complete, it’s not quite ready for immediate use. Proper priming and field techniques are essential for optimal performance and longevity.
Priming Your Millbank Bag
Priming is a critical first step that prepares the canvas for filtration:
- Soak: Submerge your new Millbank Bag completely in clean water for at least 12-24 hours. This allows the cotton fibers to fully swell and tighten the weave. You’ll notice the canvas becoming softer and more pliable.
- Rinse: After soaking, rinse the bag thoroughly, inside and out, to remove any loose fibers or manufacturing residues. You might see some discoloration in the initial rinse water; this is normal.
- Initial Filtration Test: Fill the bag with clean water and let it filter through. The flow rate might be slow initially, but it should improve slightly as the fibers settle. This also helps to flush out any remaining fine particles from the canvas itself.
Once primed, your bag is ready for the field.
Using Your Millbank Bag in the Field
- Source Selection: Always choose the clearest water source available. While the Millbank Bag handles turbid water well, starting with clearer water reduces the load on the filter and extends its life.
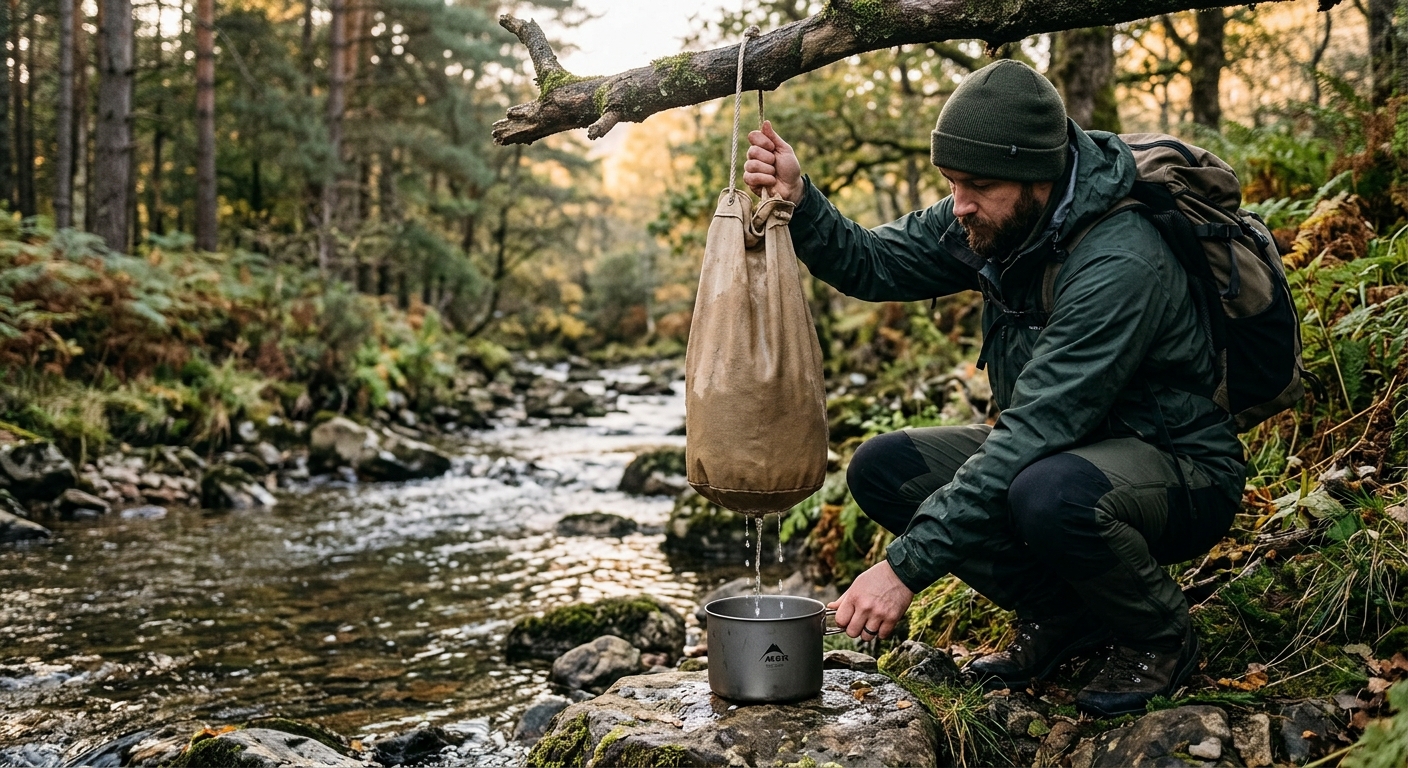
- Setup: Hang your Millbank Bag from a sturdy branch, tripod, or any elevated point. Ensure there’s enough clearance below to place a collection vessel (pot, bottle, another filter) directly underneath the point of the bag.
- Fill Slowly: Gently pour water into the bag. Avoid splashing or disturbing sediment at the bottom of your water source. If the water is extremely silty, you might pre-settle it in a separate container for a few minutes before pouring it into the bag.
- Wait and Collect: The water will slowly seep through the canvas, dripping from the point of the bag. The flow rate will depend on the canvas weave, water turbidity, and how well the bag is primed. Be patient; this is not a fast process.
- Subsequent Purification: CRITICAL SAFETY WARNING: The water collected from a Millbank Bag is *not* safe to drink directly. It is only pre-filtered. You must follow up with a purification method such as boiling (for 1 minute at a rolling boil, 3 minutes at altitudes above 6,500 feet), chemical treatment (iodine, chlorine dioxide), or a certified microfilter to remove bacteria, viruses, and protozoa.
Practical Tip: If the flow rate becomes too slow, gently agitate the water in the bag or lightly scrub the outside of the bag with your hand to dislodge trapped particles from the canvas pores. Never squeeze or wring the bag forcefully, as this can damage the fibers or seams.
Maintenance and Storage
Proper care ensures your Millbank Bag remains a reliable tool for years:
- Rinse After Use: As soon as possible after use, rinse the bag thoroughly with clean water, inside and out, to remove all trapped sediment. You can gently backflush it by pouring clean water into the point and letting it flow upwards and out the top.
- Inspect: Check for any tears, holes, or fraying seams. Repair immediately with heavy-duty thread.
- Dry Completely: This is the most crucial step. Hang the bag in a well-ventilated area, preferably in direct sunlight, until it is bone dry. Even slight dampness can lead to mold and mildew, which will degrade the canvas and impart unpleasant tastes/odors to your water.
- Storage: Store the completely dry bag in a breathable container, such as a mesh bag or cloth sack, in a cool, dry place. Avoid airtight plastic bags, which can trap moisture and promote mildew growth.
By following these steps, your canvas water filter bag will be ready whenever you need it most.
Millbank Bag vs. Commercial Filters: When to Use Each
In the world of wilderness water filtration, both the traditional Millbank Bag and modern commercial filters have their place. Understanding their strengths and weaknesses allows you to build a comprehensive and resilient water procurement strategy.
Strengths of the Millbank Bag:
- Robustness: No moving parts to break, no ceramic elements to crack, no membranes to clog irreversibly. It’s incredibly durable.
- Simplicity: Easy to use, understand, and maintain.
- Cost-Effective: Very low initial cost and no ongoing replacement parts.
- Excellent Pre-Filter: Unmatched at removing heavy sediment, silt, and large particulates from extremely turbid water. This is its primary and most valuable role.
- Repairable: A tear can often be patched or stitched in the field.
- Long-Term Viability: With proper care, it can last indefinitely, making it ideal for long-term survival scenarios or remote living.
Strengths of Commercial Filters:
- Pathogen Removal: Most modern commercial filters (e.g., Sawyer, Katadyn, Lifestraw) are designed to remove bacteria, protozoa, and sometimes viruses (depending on pore size), making water safe to drink directly.
- Speed: Many pump or squeeze filters offer a faster flow rate for clean water.
- Portability: Often compact and lightweight, ideal for backpacking where every ounce counts.
- Convenience: Some integrate directly with water bottles or hydration bladders.
When to Use Each (and How They Work Together):
The key isn’t to choose one over the other, but to understand how they complement each other:
- Use the Millbank Bag for Turbid Water: When your water source is visibly murky, muddy, or full of suspended particles (e.g., a rain-swollen river, a stagnant pond, glacial meltwater), the Millbank Bag should be your first line of defense. It will clarify the water, making it suitable for the next stage.
- Use Commercial Filters for Pathogen Removal: Once the water has been pre-filtered by the Millbank Bag, it’s ready for a commercial filter. Running clear water through your microfilter will drastically extend its lifespan, prevent clogging, and maintain its flow rate. This synergy is incredibly powerful.
- Millbank Bag as a Backup: In a true survival situation, your commercial filter might break, freeze, or clog beyond repair. A Millbank Bag provides a reliable, low-tech backup for obtaining clear water, which can then be boiled or chemically treated.
- When Weight/Space is Critical: For fast-and-light backpacking where water sources are generally clear, a commercial filter might be sufficient on its own. However, always consider the potential for unexpected turbid water.
- Long-Term Preparedness: For a home preparedness kit or a bug-out location, having a bushcraft water filtration system that includes a Millbank Bag ensures you have a sustainable method for handling even the dirtiest water sources.
By integrating a canvas water filter bag into your preparedness strategy, you gain a versatile and resilient capability that enhances the effectiveness and longevity of your other water purification tools. It’s a testament to the power of simple, well-engineered solutions in complex environments.
Frequently Asked Questions About DIY Millbank Bags
Q: Can a Millbank Bag remove viruses or bacteria?
A: No, a Millbank Bag is a pre-filter designed to remove sediment, silt, and larger particulates. Its weave is not fine enough to block microscopic pathogens like bacteria, viruses, or protozoa. Water filtered through a Millbank Bag must always be further purified by boiling, chemical treatment, or a certified microfilter before consumption.
Q: How fast does a Millbank Bag filter water?
A: The filtration rate varies significantly depending on the canvas weave, the turbidity of the water, and how well the bag is primed. It is generally a slow process, often taking several minutes to an hour or more to filter a liter of heavily turbid water. It’s designed for patience and continuous, passive filtration rather than rapid on-demand purification.
Q: What’s the best way to clean a Millbank Bag?
A: After each use, rinse the bag thoroughly with clean water, inside and out, to remove trapped sediment. You can gently backflush it by pouring clean water into the point and letting it flow upwards. Avoid harsh scrubbing or detergents. The most critical step is to ensure it is completely air-dried in a well-ventilated area, preferably in sunlight, before storage to prevent mold and mildew.
Q: Can I use different fabrics for a DIY Millbank Bag?
A: While other natural fabrics like denim or heavy cotton twill might seem plausible, traditional 10-12 oz cotton canvas is highly recommended. Its specific weave and fiber properties (swelling when wet) are optimized for effective pre-filtration. Synthetic fabrics typically do not swell and may not filter as effectively or consistently.
Q: How long will a DIY Millbank Bag last?
A: With proper construction, careful priming, and diligent maintenance (especially thorough drying after each use), a DIY Millbank Bag made from quality canvas can last for many years, providing reliable service as a pre-filter in countless wilderness scenarios.
