

How to Make Pemmican: The Ultimate Survival Food That Lasts for Years
In the realm of survival and preparedness, few foods command as much respect and utility as pemmican. This ancient, nutrient-dense superfood, originally developed by indigenous peoples of North America, is renowned for its incredible shelf life, portability, and sustained energy release. For preppers, homesteaders, and anyone serious about self-reliance, knowing how to make pemmican is an indispensable skill. It’s not just food; it’s a compact, calorie-rich insurance policy against lean times, offering unparalleled sustenance when other options are scarce.
Pemmican is essentially a concentrated mixture of dried, pulverized lean meat and rendered animal fat (tallow). Its genius lies in its simplicity and the synergistic preservation qualities of its components. Unlike jerky, which is merely dried meat, pemmican incorporates fat, making it a complete caloric source that can sustain an individual for extended periods. This article will guide you through every critical step, from selecting the right ingredients to proper storage, ensuring your homemade pemmican is a reliable cornerstone of your survival pantry.
Related TacticalProof reading: How to Preserve Meat Without Refrigeration: 7 Proven Methods for Long-Term Storage
What Is Pemmican and Why Preppers Swear By It
Pemmican, derived from the Cree word ‘pimîhkân’ meaning ‘fat, grease,’ is a traditional food that has fueled explorers, trappers, and indigenous communities for centuries. Its historical significance is matched only by its practical benefits in modern survival scenarios. At its core, pemmican is a blend of dried, powdered lean meat and rendered animal fat, often with the addition of dried berries or other flavorings.
Why is pemmican considered the ultimate survival food?
- Exceptional Shelf Life: When prepared and stored correctly, pemmican can last for decades, even without refrigeration. This makes it ideal for long-term food storage and bug-out bags.
- Nutrient Density: It provides a balanced macronutrient profile of protein and fat, offering sustained energy and satiety. The fat content is crucial for calorie intake and absorption of fat-soluble vitamins.
- Portability and Compactness: A small block of pemmican packs a tremendous caloric punch, making it incredibly efficient for carrying on expeditions or in emergency kits where space and weight are critical.
- Versatility: While often eaten raw, pemmican can be crumbled into stews, fried, or rehydrated, offering flexibility in consumption.
- Energy Sustenance: The combination of protein and fat provides a slow, steady release of energy, preventing the sugar crashes associated with carbohydrate-heavy foods.
For preppers, the appeal of pemmican lies in its resilience. It doesn’t require cooking, is impervious to temperature fluctuations (within reason), and provides essential nutrients without the need for complex preparation or refrigeration. It’s a testament to ancestral wisdom, offering a simple yet profoundly effective solution to the challenge of long-term food security.
Choosing the Right Meat: Beef, Venison, and What to Avoid
The foundation of excellent pemmican begins with the right meat. The goal is lean, high-quality muscle meat, free from excessive fat or connective tissue. The type of animal you choose will influence the flavor and texture of your final product.
Ideal Meat Choices:
- Beef: Lean cuts like round, sirloin, or flank steak are excellent. They are readily available, relatively inexpensive, and dry well. Ensure you trim all visible fat.
- Venison (Deer): A traditional choice, venison is naturally very lean and imparts a robust, gamey flavor. Backstrap and hindquarter cuts are ideal.
- Bison/Buffalo: Another historically accurate and superb choice, bison is lean and offers a rich flavor profile.
- Elk/Moose: Similar to venison, these game meats are lean and provide excellent results.
What to Avoid:
- Pork: While some traditional recipes might include pork, its fat content is generally less stable than beef or game fat, making it more prone to rancidity over long storage periods. For maximum shelf life, it’s best to avoid.
- Poultry (Chicken, Turkey): These meats are too lean and their fat is highly unstable, leading to rapid spoilage. They are unsuitable for pemmican.
- Fatty Cuts of Meat: Even with ideal choices like beef or venison, it is absolutely critical to trim ALL visible fat from the meat before drying. Any residual fat in the meat itself will go rancid long before the tallow, compromising your pemmican’s shelf life.
Preparation for Drying:
Once you’ve selected your lean meat, prepare it for drying:
- Trim Meticulously: Remove every speck of visible fat, gristle, and connective tissue. This is arguably the most important step for long-term storage.
- Slice Thinly: Cut the meat into very thin strips, ideally against the grain, about 1/8 to 1/4 inch thick. Thinner slices dry faster and more thoroughly.
- Optional Marinade (Short-Term Pemmican): For pemmican intended for shorter-term consumption (a few months), a light marinade of salt, pepper, and perhaps a dash of Worcestershire sauce can add flavor. However, for true long-term survival pemmican, it’s best to stick to plain, unseasoned meat to avoid introducing moisture or ingredients that could shorten shelf life.
Safety Tip: Always work with clean hands and sanitized equipment to prevent bacterial contamination, especially when preparing meat for drying.
Step-by-Step Pemmican Recipe With Exact Ratios
This section details the core process of how to make pemmican, focusing on precise steps and ratios for optimal results and longevity. The fundamental ratio for pemmican is typically 1:1 by weight of dried meat to rendered tallow, though some prefer a slightly higher fat content (e.g., 60% fat, 40% meat) for increased caloric density and palatability.
Ingredients:
- 1 pound (approx. 450g) very lean meat (beef, venison, bison), trimmed and sliced thin
- 1 pound (approx. 450g) high-quality rendered beef or deer tallow (see next section for rendering instructions)
- Optional: 1/4 to 1/2 cup dried berries (cranberries, blueberries), unsweetened and thoroughly dry
- Optional: Pinch of sea salt (for flavor, but can attract moisture if too much)
Equipment:
- Dehydrator or oven
- Food processor or mortar and pestle
- Large mixing bowl
- Saucepan or double boiler
- Parchment paper or wax paper
- Molds (loaf pans, silicone molds, or simply form by hand)
Instructions:
-
Step 1: Dry the Meat Thoroughly
This is the most critical step for shelf life. The meat must be bone-dry, brittle, and snap when bent. Any residual moisture will lead to spoilage.
- Dehydrator Method: Arrange thin meat strips on dehydrator trays without overlapping. Set temperature to 145-160°F (63-71°C). Dehydrate for 8-12 hours, or until completely dry and brittle. Rotate trays periodically for even drying.
- Oven Method: Preheat oven to its lowest setting (usually 150-170°F / 65-77°C). Prop the oven door open slightly with a wooden spoon to allow moisture to escape. Arrange meat on wire racks over baking sheets. Dry for 6-12 hours, checking frequently. This method is less efficient and can be harder to control, increasing the risk of cooking the meat instead of drying it.
- Air Drying (Traditional, but Risky): In very dry, low-humidity environments with good airflow, meat can be air-dried. However, this method carries a higher risk of spoilage and is not recommended for beginners or for long-term survival pemmican.
Crucial Check: Once you think it’s dry, let a piece cool completely. It should be hard, stiff, and snap cleanly. If it bends or feels leathery, it needs more drying time.
-
Step 2: Pulverize the Dried Meat
Once the meat is completely dry and cool, it needs to be ground into a fine powder. This increases its surface area for better fat absorption and creates a uniform texture.
- Food Processor: Break the dried meat into smaller pieces and process in a food processor until it resembles a fine powder. Do this in batches to avoid overheating the motor.
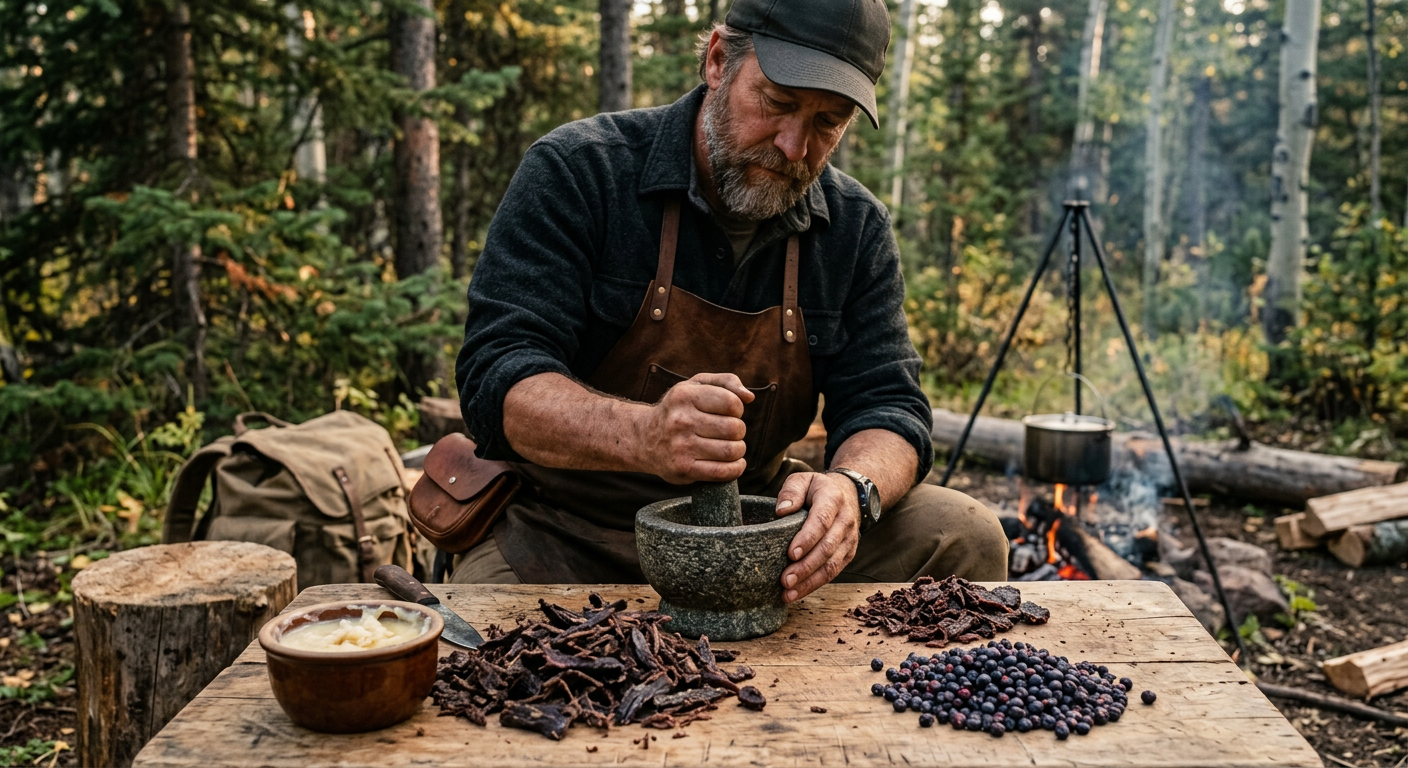
- Mortar and Pestle: For a more traditional approach, or if you lack electricity, a mortar and pestle works effectively, though it requires more effort.
- Coffee Grinder (Dedicated): A clean, dedicated coffee grinder can also work well for small batches.
The finer the powder, the better the pemmican will bind and store.
-
Step 3: Prepare the Tallow
Ensure your rendered tallow is ready. It should be solid at room temperature, pure white or light yellow, and have a mild, clean smell. Gently melt the tallow over low heat in a saucepan or double boiler until it is liquid. Do not let it boil or smoke.
-
Step 4: Combine Meat and Tallow
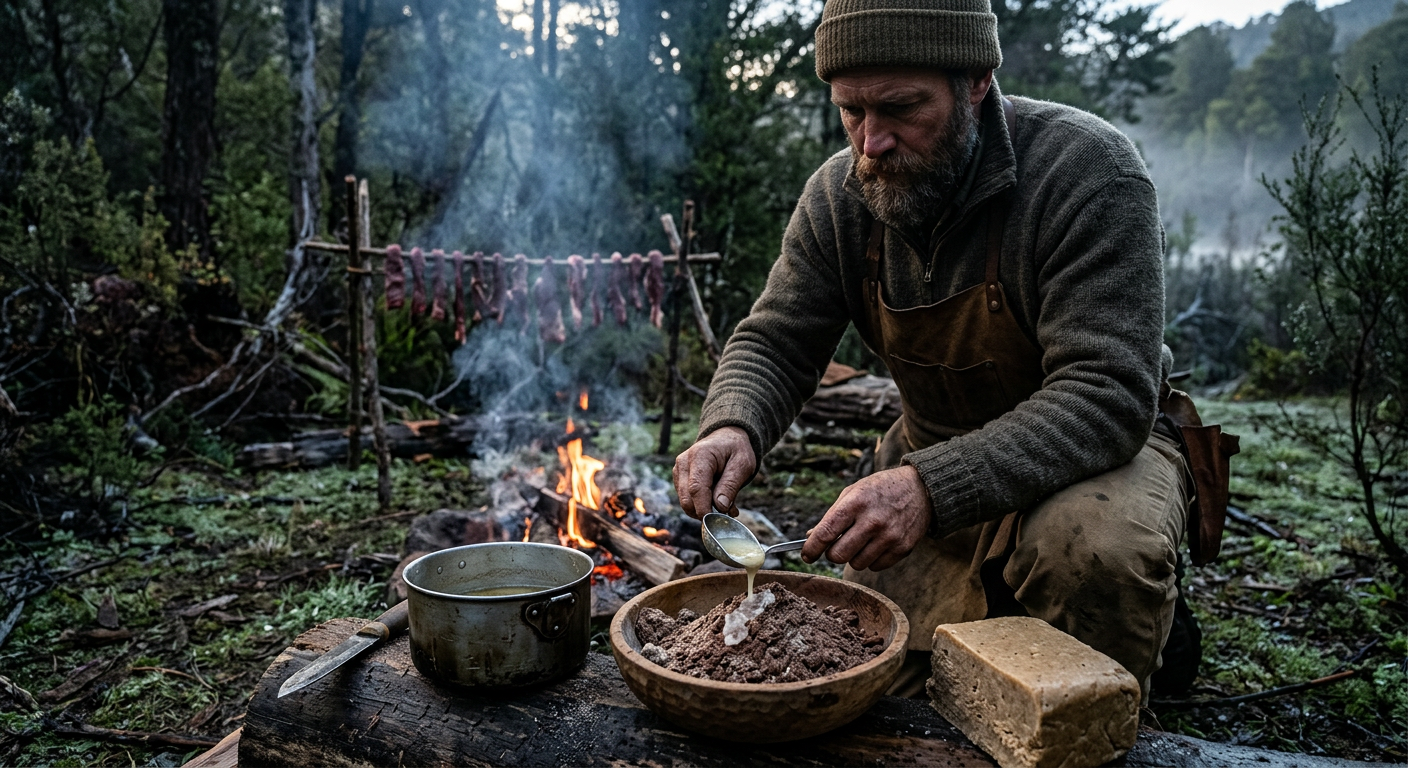
In a large mixing bowl, combine the pulverized meat powder with the melted tallow. Start with a 1:1 ratio by weight (e.g., 1 pound meat powder to 1 pound melted tallow). Mix thoroughly with a sturdy spoon or your hands (wearing gloves) until all the meat powder is fully saturated and a thick, uniform paste forms.
Tip: The mixture should be moist enough to hold together when pressed, but not greasy or soupy. If it’s too dry, add a little more melted tallow, a tablespoon at a time. If it’s too wet, you may need to add a bit more meat powder (if you have it) or accept a slightly softer pemmican.
-
Step 5: Add Optional Ingredients
If adding dried berries, stir them in now. Ensure they are completely dry and unsweetened. A pinch of sea salt can also be added for flavor, but use sparingly for long-term storage.

How to Make Pemmican: The Ultimate Survival Food That Lasts for Years. -
Step 6: Form the Pemmican
Press the mixture firmly into molds (loaf pans lined with parchment paper, silicone molds, or even small containers). The key is to compress it as much as possible to remove air pockets, which can contribute to spoilage. You can also roll it into logs or form it into patties by hand.
-
Step 7: Cool and Harden
Allow the pemmican to cool completely at room temperature until the tallow solidifies and the block is firm. This can take several hours. Do not refrigerate immediately, as rapid cooling can sometimes lead to cracking.
Adding Berries and Variations for Nutrition and Flavor
While traditional pemmican is a simple meat and fat mixture, indigenous peoples often incorporated dried berries to enhance flavor, provide additional nutrients (vitamins, antioxidants), and offer a touch of sweetness. This section explores how to integrate these variations while maintaining the integrity of your survival food.
Ideal Berry Choices:
- Cranberries: Naturally tart, they balance the richness of the fat and are excellent sources of antioxidants. Ensure they are unsweetened and thoroughly dried.
- Blueberries: Offer a milder sweetness and are also rich in antioxidants. Again, unsweetened and dry is key.
- Saskatoon Berries (Serviceberries): A traditional choice in North America, these resemble blueberries and have a unique, slightly almond-like flavor.
- Cherries: Dried, unsweetened tart cherries can also work well.
Considerations for Adding Berries:
- Moisture Content: This is the biggest concern. ANY residual moisture in the berries will significantly reduce the pemmican’s shelf life. Ensure your dried berries are truly desiccated and brittle. You can even re-dry commercially dried berries in your dehydrator for a few hours to be extra safe.
- Sugar Content: While berries add flavor, their natural sugars can potentially attract moisture over very long storage periods. For ultimate, multi-decade survival pemmican, some purists omit berries entirely. For pemmican intended for 5-10 years, properly dried berries are generally fine.
- Ratio: Use berries sparingly, typically no more than 1/4 to 1/2 cup per pound of meat powder. Too many berries can alter the texture and binding properties.
Other Potential Variations (Use with Caution):
- Nuts/Seeds: While adding healthy fats and protein, nuts and seeds contain their own oils which can go rancid faster than tallow. If you add them, ensure they are very dry and consider this for shorter-term pemmican (1-2 years).
- Spices: A pinch of salt, pepper, or other dried spices can enhance flavor. Again, ensure they are completely dry and use sparingly to avoid introducing moisture.
- Honey/Maple Syrup: Some modern pemmican recipes include a small amount of honey or maple syrup for sweetness. While these are natural preservatives, they also introduce moisture and sugars that can ferment or attract moisture over time. Avoid for long-term survival pemmican.
Practical Tip: If you’re making pemmican for the first time, consider making a plain batch for maximum shelf life and a smaller batch with berries to test your preference and drying methods.
Rendering Tallow the Right Way: Stovetop vs Open Fire
The quality of your tallow is paramount to the success and longevity of your pemmican. Tallow is purified animal fat, typically from beef (suet) or deer. Properly rendered tallow is stable, odorless, and has a very high smoke point, making it an excellent preservative.
Source of Fat:
- Beef Suet: This is the fat found around the kidneys and loins of cattle. It’s dense, white, and has the best stability for rendering. Ask your butcher for beef suet.
- Deer Fat: Similar to beef suet, the fat around the kidneys and backstrap of deer is excellent.
- Other Animal Fats: While other fats exist, beef or deer tallow are superior for pemmican due to their saturated fat content and stability. Avoid pork fat (lard) or poultry fat, which are more prone to rancidity.
Rendering Process (Stovetop Method – Recommended):
- Clean and Dice: Thoroughly clean the suet, removing any meat particles, blood, or connective tissue. Dice the fat into small, uniform pieces (about 1/2 to 1 inch cubes). Smaller pieces render faster and more completely.
- Slow Heat: Place the diced fat in a heavy-bottomed pot or Dutch oven. Add about 1/4 cup of water per pound of fat to prevent scorching initially (this is the ‘wet rendering’ method, which helps prevent burning and yields purer tallow).
- Gentle Simmer: Heat over very low heat. The goal is to slowly melt the fat, not fry it. Stir occasionally to prevent sticking. As the fat melts, the water will evaporate.
- Render Until Clear: Continue simmering until all the fat has melted and the cracklings (crispy bits of rendered tissue) sink to the bottom and turn golden brown. The liquid tallow should be clear and golden. This process can take several hours, depending on the amount of fat.
- Strain: Carefully strain the hot liquid tallow through a fine-mesh sieve lined with cheesecloth (several layers) or a coffee filter into a clean, heat-proof container. This removes all impurities and cracklings, which are the primary cause of rancidity.
- Cool and Re-render (Optional, for Purity): For ultimate purity and shelf life, allow the strained tallow to cool and solidify. Once solid, you can gently remelt it and strain it again through fresh cheesecloth. This ‘double rendering’ ensures maximum purity.
- Store: Pour the purified liquid tallow into clean, dry jars. Let it cool completely at room temperature before sealing. Store in a cool, dark place.
Open Fire Method (Traditional, but Challenging):
Rendering tallow over an open fire is possible but requires more skill and constant attention to prevent scorching or burning. The principles are the same: slow, gentle heat to melt the fat and separate it from impurities. Use a heavy cast-iron pot suspended over embers, not direct flame. Stir frequently. This method is generally less precise and harder to control for consistent purity, making the stovetop method preferable for survival pemmican.
Safety Warning: Hot fat can cause severe burns. Always use caution when handling hot pots and liquid tallow. Never leave rendering fat unattended.
How to Store Pemmican for Maximum Shelf Life
The incredible pemmican long term storage capability is one of its most celebrated attributes. When properly prepared, pemmican can last for years, even decades, without refrigeration. The key is to protect it from oxygen, moisture, and heat.
Key Storage Principles:
- Cool and Dark: Store pemmican in a cool, dark, and dry environment. Ideal temperatures are consistently below 60°F (15°C), but it can tolerate higher temperatures for periods. Avoid direct sunlight or fluctuating temperatures.
- Oxygen Exclusion: Oxygen is the enemy of fat, leading to rancidity.
- Moisture Exclusion: Any moisture will promote bacterial growth and spoilage.
Storage Methods:
-
Individual Wrapping:
Once your pemmican blocks or patties are completely cool and firm, wrap them tightly. This prevents air exposure and makes them easy to portion.
- Parchment Paper or Wax Paper: Wrap each piece individually.
- Butcher Paper: A traditional choice, it allows the pemmican to ‘breathe’ slightly while still protecting it.
- Plastic Wrap: Can be used, but ensure it’s food-grade and wrapped very tightly.
-
Vacuum Sealing (Highly Recommended):
For maximum pemmican shelf life, vacuum sealing is the gold standard. Place your wrapped pemmican pieces into vacuum seal bags and seal them according to your machine’s instructions. This removes oxygen, which is the primary cause of fat rancidity.
How to Make Pemmican: The Ultimate Survival Food That Lasts for Years. -
Airtight Containers:
Place your individually wrapped and/or vacuum-sealed pemmican into airtight containers (e.g., Mylar bags with oxygen absorbers, food-grade buckets with gamma seal lids, glass jars with tight-fitting lids). This provides an extra layer of protection against pests, moisture, and light.
-
Root Cellar or Cool Pantry:
The ideal storage location is a root cellar, a cool basement, or a dedicated pantry that maintains a stable, cool temperature. Avoid attics or garages where temperatures can fluctuate wildly.
Signs of Spoilage:
While pemmican is incredibly stable, it can spoil if not prepared or stored correctly. Look for these signs:
- Rancid Odor: The most obvious sign. Tallow should smell mild and clean. A sour, metallic, or ‘crayon-like’ smell indicates rancidity.
- Mold: Any visible mold growth means the pemmican has been exposed to moisture and is unsafe to eat.
- Discoloration: While some natural darkening can occur, significant green, black, or unusual white spots are red flags.
- Slimy or Sticky Texture: Should be firm and dry.
Important Note: If you suspect your pemmican has gone bad, do not risk it. Discard it. The risks of foodborne illness outweigh the benefits.
Common Pemmican Mistakes That Cause Spoilage
Making pemmican is straightforward, but it requires attention to detail. A single oversight can compromise its legendary shelf life. Understanding these common pitfalls will help you create truly enduring survival food.
-
Insufficiently Dried Meat:
This is the number one cause of pemmican spoilage. If the meat retains any moisture, it creates an environment for bacterial growth and mold. The meat must be bone-dry, brittle, and snap when bent. Leathery or pliable meat is not dry enough.
- Correction: Extend drying time. Ensure thin, even slices. Use a dehydrator for consistent results.
-
Poorly Rendered or Rancid Tallow:
Tallow must be pure and free of meat particles, blood, or connective tissue. These impurities will go rancid quickly, spoiling the entire batch. Using old or already rancid fat is also a common mistake.
- Correction: Meticulously trim suet. Render slowly and strain thoroughly, ideally double-straining. Use fresh, high-quality suet.
-
Adding Too Much Moisture (e.g., Undried Berries, Honey):
Any ingredient that introduces moisture will drastically reduce shelf life. This includes insufficiently dried berries, fresh spices, or liquid sweeteners like honey or maple syrup.
- Correction: Ensure all additions are bone-dry. For long-term pemmican, stick to plain meat and fat.
-
Incorrect Meat-to-Tallow Ratio:
While some flexibility exists, a ratio too low in fat can make the pemmican dry, crumbly, and less calorically dense. Too much fat, especially if not fully absorbed, can lead to a greasy product that’s harder to store and more prone to fat separation.
- Correction: Aim for a 1:1 ratio by weight of meat powder to melted tallow as a starting point. Adjust slightly for desired consistency.
-
Improper Storage Conditions:
Exposure to oxygen, light, and heat will accelerate rancidity. Storing pemmican in a warm, humid, or brightly lit area will significantly shorten its life.
- Correction: Vacuum seal, wrap tightly, and store in cool, dark, dry, airtight containers.
-
Not Trimming All Fat from Meat:
Even if you use lean cuts, small bits of fat left on the meat before drying will go rancid. This is different from the tallow you add; it’s the unstable fat within the muscle tissue itself.
- Correction: Be absolutely meticulous in trimming all visible fat from the meat before slicing and drying.
By avoiding these common mistakes, you can ensure your homemade pemmican lives up to its reputation as a truly enduring and reliable survival food. The effort invested in proper preparation will pay dividends in peace of mind and sustained nourishment.
Frequently Asked Questions About Pemmican
Q: How long does homemade pemmican truly last?
A: When prepared correctly with bone-dry meat and pure, rendered tallow, and stored in cool, dark, airtight conditions (ideally vacuum-sealed), pemmican can last for many years, even decades. There are historical accounts of pemmican being consumed after 50 years. However, for practical purposes, a shelf life of 5-10 years is a reasonable expectation for well-made homemade pemmican, with some batches potentially lasting much longer.
Q: Can I use other fats besides beef or deer tallow?
A: While technically possible, it’s not recommended for long-term survival pemmican. Beef or deer tallow (suet) are highly saturated fats, making them very stable and resistant to rancidity. Fats from pork (lard) or poultry are less stable and will go rancid much faster, significantly reducing the pemmican’s shelf life. Stick to beef or deer tallow for best results.
Q: Is pemmican safe to eat raw?
A: Yes, pemmican is designed to be eaten raw. The drying process of the meat and the preservative qualities of the tallow make it safe for direct consumption. It does not require cooking, which is a major advantage in survival situations where fuel might be scarce. Some people prefer to crumble it into hot water or broth, but it’s perfectly edible as is.
Q: Does pemmican taste good?
A: Taste is subjective. Traditional pemmican has a savory, meaty, and fatty flavor. It’s not meant to be gourmet but rather highly functional. Some describe it as tasting like a very dense, rich jerky. The addition of dried berries can add a pleasant tartness or sweetness. It’s an acquired taste for some, but its nutritional value far outweighs any initial taste preferences.
Q: Can I make vegetarian or vegan pemmican?
A: No, by definition, pemmican is made from animal meat and animal fat. While you can create similar energy bars using plant-based ingredients (e.g., nuts, seeds, dried fruits, coconut oil), these would not be considered pemmican and would have different nutritional profiles and shelf life characteristics. The unique stability of animal tallow is central to pemmican’s longevity.
