Bug Out Bag Essentials: A Comprehensive Checklist for Every Prepper
Bug Out Bag Essentials: A Comprehensive Checklist for Every Prepper
When disaster strikes, having a well-prepared bug out bag can be the difference between survival and succumbing to the elements. This comprehensive guide covers the bug out bag essentials you need to create a 72-hour kit that will keep you safe, fed, and protected in an emergency situation. Whether you’re a seasoned prepper or just starting to think about emergency preparedness, this go bag checklist will provide you with the knowledge to assemble a life-saving pack.
Introduction: The Importance of a Well-Stocked Bug Out Bag
A bug out bag, also known as a 72-hour kit or go bag, is a portable survival kit designed to help you evacuate quickly and efficiently in the event of an emergency. Natural disasters, civil unrest, or personal emergencies can all necessitate a rapid departure from your home. A well-stocked bag contains the survival gear needed to sustain you for at least 72 hours, giving you time to reach a safer location or for help to arrive. Investing time and resources into assembling a comprehensive bug out bag is a crucial step in emergency preparedness.
Water: Hydration is Key
Water is arguably the most critical element for survival. You can only survive for a few days without it. Your bug out bag should include multiple methods for obtaining and purifying water.
Water Filtration
A high-quality water filter is non-negotiable. Consider a portable water filter like the Sawyer Squeeze or a LifeStraw. These filters can remove bacteria, protozoa, and microplastics from contaminated water sources, making them safe to drink. Always test a small amount of filtered water before drinking a large quantity.
Water Storage
Carry at least 3 liters of water per person. Options include:
Water Bottles: Durable, reusable water bottles are a good starting point.
Hydration Bladder: A hydration bladder with a drinking tube allows for hands-free hydration while on the move.
Collapsible Water Containers: These save space when empty and can be filled at a water source.
Tip: Include water purification tablets as a backup in case your filter fails. Follow the instructions carefully and allow sufficient time for the tablets to work.
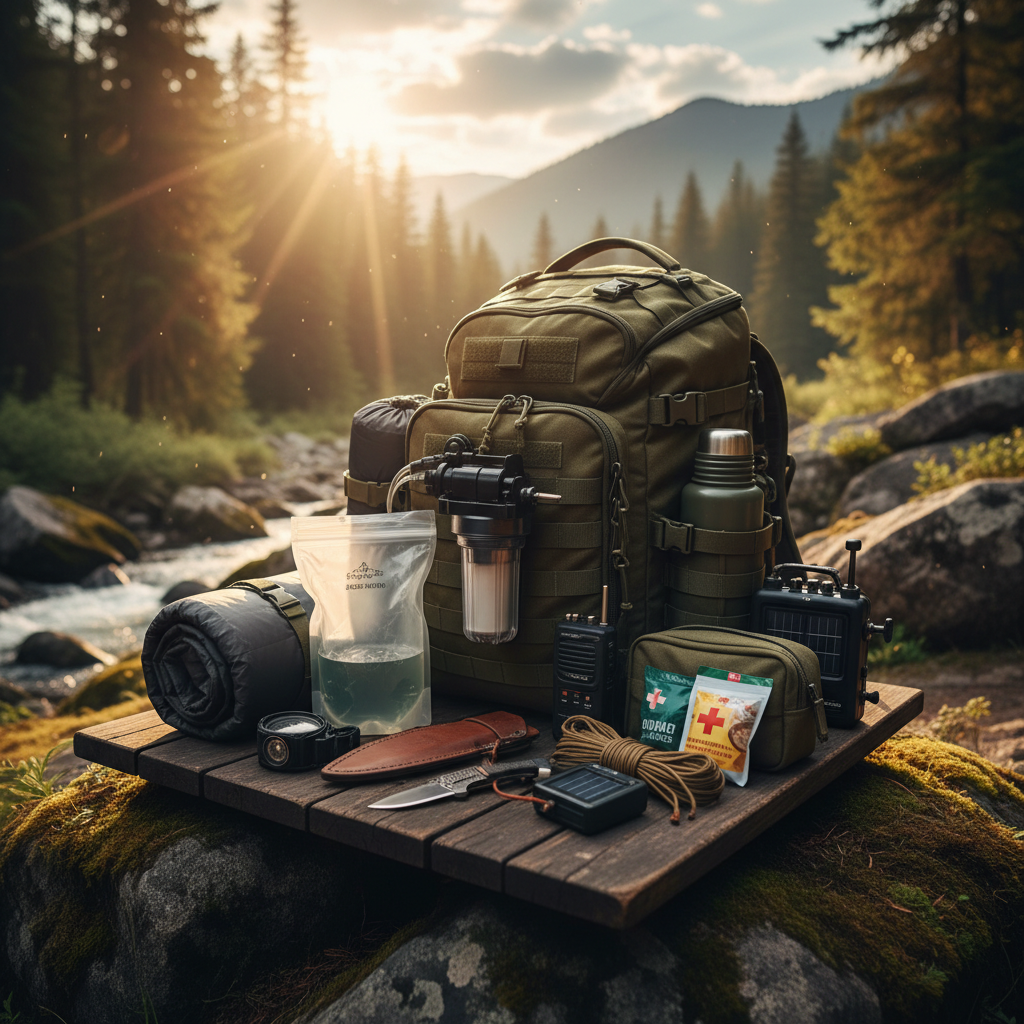
Bug Out Bag Essentials: A Comprehensive Checklist for Every Prepper supporting image
Food: Non-Perishable Options for Sustained Energy
Choose lightweight, non-perishable foods that provide sustained energy. Aim for foods that require minimal preparation.
Recommended Food Items:
Energy Bars: High-calorie energy bars are compact and provide a quick energy boost.
Dried Fruits and Nuts: These are nutrient-dense and have a long shelf life.
Canned Goods: Canned meats, beans, and vegetables provide protein and essential nutrients. Choose cans with pull-top lids to avoid needing a can opener.
Freeze-Dried Meals: These are lightweight and require only hot water to rehydrate.
Hard Candy: Provides a quick sugar rush for energy.
Tip: Consider your dietary needs and preferences when selecting food items. Pack enough food for at least 72 hours, aiming for around 2000 calories per day.
Shelter and Warmth: Protection from the Elements
Exposure to the elements can quickly lead to hypothermia or heatstroke. Your bug out bag should include items to provide shelter and warmth.
Shelter Options:
Emergency Tent: A lightweight, compact emergency tent can provide protection from rain, wind, and sun.
Tarp: A tarp can be used to create a makeshift shelter or as a ground cover.
Bivy Sack: A bivy sack is a waterproof and windproof bag that slips over your sleeping bag for added protection.
Warmth:
Sleeping Bag: Choose a sleeping bag rated for the temperatures you expect to encounter.
Emergency Blanket: A lightweight, reflective emergency blanket can trap body heat and prevent hypothermia.
Warm Clothing: Pack layers of warm clothing, including a hat, gloves, and socks. Wool or synthetic materials are preferable to cotton, as they retain warmth even when wet.
Safety Warning: Never use a gas stove or open flame inside a tent or enclosed space due to the risk of carbon monoxide poisoning.
First Aid: Treating Injuries and Illnesses in the Field
A comprehensive first aid kit is essential for treating injuries and illnesses in the field. Your kit should include:
Essential First Aid Supplies:
Bandages: Assorted sizes of bandages for cuts and scrapes.
Antiseptic Wipes: To clean wounds and prevent infection.
Pain Relievers: Ibuprofen or acetaminophen for pain and fever.
Antihistamines: For allergic reactions.
Antibiotic Ointment: To prevent infection in wounds.
Gauze Pads: For wound dressing.
Medical Tape: To secure bandages.
Tweezers: To remove splinters or debris.
Scissors: To cut bandages or clothing.
CPR Mask: For performing CPR safely.
Latex-Free Gloves: To protect yourself from bodily fluids.
First Aid Manual: A guide to treating common injuries and illnesses.
Tip: Consider taking a first aid and CPR course to learn how to use the supplies in your kit effectively. Don’t forget any prescription medications you require.
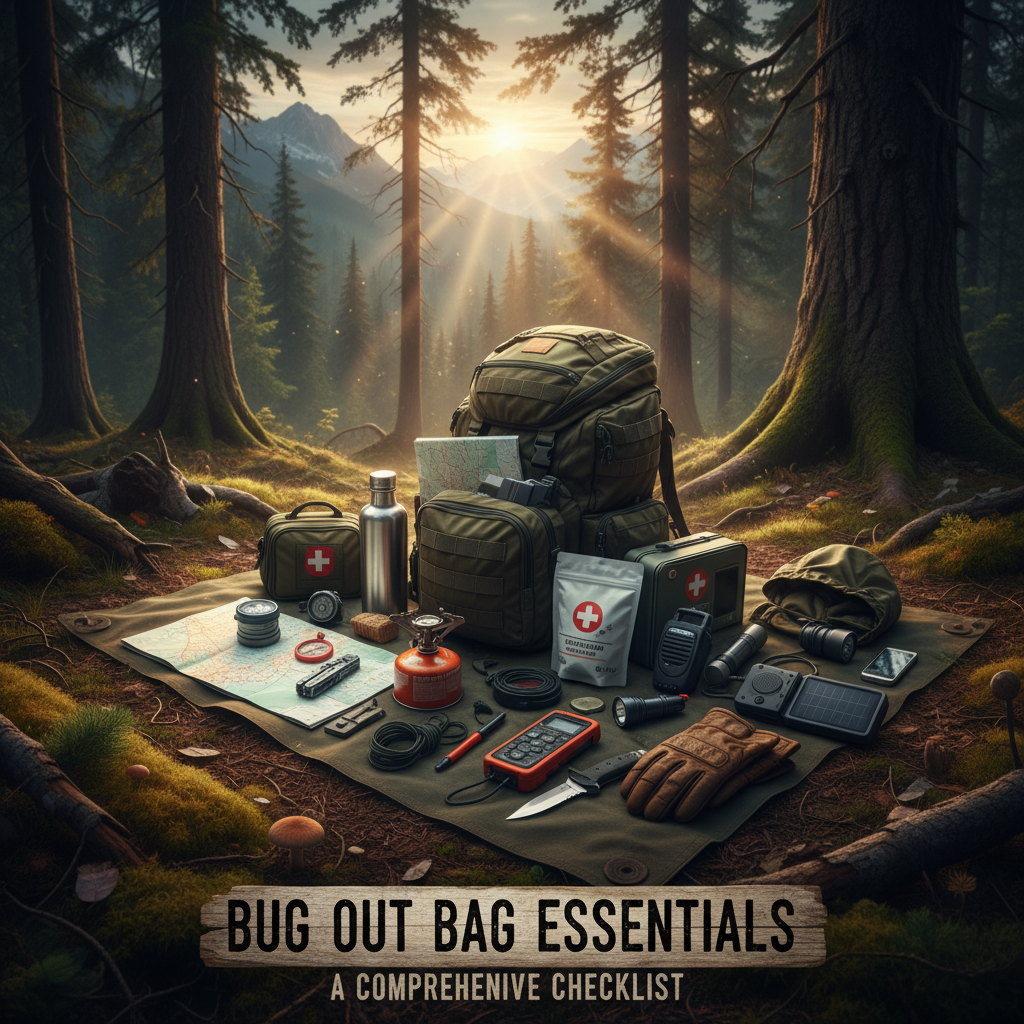
Bug Out Bag Essentials: A Comprehensive Checklist for Every Prepper supporting image
Navigation and Communication: Staying Oriented and Connected
In an emergency, staying oriented and connected to the outside world is crucial.
Navigation Tools:
Map and Compass: Learn how to use a map and compass to navigate in unfamiliar terrain. Practice using them before an emergency.
GPS Device: A GPS device can provide accurate location information, but it relies on battery power.
Communication Devices:
Two-Way Radio: A two-way radio allows you to communicate with others in your group or to contact emergency services.
Emergency Radio: A hand-crank or solar-powered emergency radio can provide weather updates and news.
Whistle: A whistle can be used to signal for help.
Practical Tip: Familiarize yourself with the local area and identify potential evacuation routes. Download offline maps to your phone or GPS device in case you lose cell service.
Tools and Security: Essential Gear for Survival
Having the right tools can make a significant difference in your ability to survive. Also consider self-defense options.
Essential Tools:
Knife: A sturdy knife is an essential tool for cutting, preparing food, and self-defense.
Fire Starter: A fire starter, such as a ferro rod or waterproof matches, is crucial for starting a fire for warmth, cooking, and signaling.
Multi-Tool: A multi-tool combines several useful tools into one compact device.
Duct Tape: Duct tape has countless uses, from repairing gear to creating makeshift shelters.
Rope or Cordage: Rope or cordage can be used for a variety of tasks, such as building shelters, securing gear, and rescuing people.
Headlamp or Flashlight: A headlamp or flashlight is essential for navigating in the dark.
Security:
Self-Defense Tool: Consider a legal self-defense tool like pepper spray or a personal alarm.
Safety Warning: Learn how to use your tools safely and effectively before an emergency. Practice starting a fire in a controlled environment.
Personal Items: Hygiene and Comfort
Maintaining hygiene and comfort can improve morale and prevent illness.
Hygiene Items:
Toilet Paper: Pack a roll of toilet paper in a waterproof bag.
Hand Sanitizer: To clean your hands when soap and water are not available.
Soap: Biodegradable soap for washing your hands and body.
Toothbrush and Toothpaste: To maintain oral hygiene.
Feminine Hygiene Products: If applicable.
Comfort Items:
Medications: Pack any prescription medications you require, as well as over-the-counter medications for common ailments.
Eyeglasses or Contacts: If you wear glasses or contacts, pack an extra pair.
Cash: Carry some cash in small denominations, as electronic payment systems may not be available.
Important Documents: Keep copies of important documents, such as identification, insurance cards, and medical records, in a waterproof bag.
FAQ: Bug Out Bag Essentials
What is the most important item in a bug out bag?
While all items are important, water and a reliable method of water purification are arguably the most critical. You can only survive for a few days without water.
How much should a bug out bag weigh?
A general guideline is that your bug out bag should weigh no more than 20% of your body weight. However, this depends on your fitness level and the terrain you expect to encounter. Prioritize essential items and avoid unnecessary weight.
Where should I store my bug out bag?
Store your bug out bag in a readily accessible location, such as near your front door, in your car, or in a closet. Make sure everyone in your household knows where it is and what it contains.
How often should I check and update my bug out bag?
You should check and update your bug out bag at least twice a year, or more frequently if you live in an area prone to natural disasters. Replace expired food and water, check batteries, and update any medications or personal items.
You can start a fire using car parts like a car battery or a cigarette lighter. For the battery method, connect a strip of aluminum foil to the terminals to generate heat, or use steel wool to create sparks. If your car has a cigarette lighter, ensure it works and prepare dry tinder for ignition. Loose wires can also cause sparks; however, be cautious as this can lead to dangerous short circuits. Always choose a safe spot to avoid hazards. Mastering these techniques can take practice, and there's more to explore about fire safety and maintenance.
Starting a Fire With a Car Battery
When you're in a survival situation, starting a fire with a car battery can be a game changer. Using car battery techniques, you can create heat and ignite tinder, which is essential for warmth and cooking. Here are a couple of effective fire ignition methods you can use.
One method involves aluminum foil. First, smooth out a piece of aluminum foil and cut a thin strip about 1 cm wide, with a narrow section in the middle. Bend this strip slightly. Next, touch the ends of the strip to the battery terminals. The foil will heat up quickly. Now, place the hot foil near your tinder to ignite it. Remember to handle the foil with care, as it can become very hot. Additionally, it's important to prepare your tinder beforehand to enhance the success rate of ignition. Understanding basic fire structure knowledge can also greatly improve your fire building efficiency.
Another approach is to use steel wool. First, loosen the strands of the steel wool. Then, touch both ends of the steel wool to the terminals of the car battery. This creates a short circuit, generating high temperatures. Place the burning steel wool next to your tinder, and watch it catch fire. It's a good idea to have extra tinder ready, just in case.
Both of these methods are straightforward and effective, so you can quickly start a fire when you need it most. Always prioritize safety when handling materials, and ensure you have a safe space to build your fire.
Using a Cigarette Lighter
Using a cigarette lighter is one of the most straightforward methods to ignite a flame from a car. However, keep in mind that many newer cars don't have cigarette lighters, as fewer people smoke and owners often remove them to reduce clutter. Before you attempt to start a fire, gather your tinder and kindling. You'll want dry, properly seasoned materials to ensure ignition. Create a well-ventilated area to contain the fire and minimize wind exposure, which can hinder your lighter's functionality. Once everything is ready, use the lighter to ignite the tinder.
It is important to remember that fire starting skills can significantly enhance your overall outdoor experience and safety. Responsible use of fire is crucial for enjoying the benefits while minimizing risks. Remember to check if your lighter is functional before relying on it. A clean, debris-free lighter is key to optimal performance. In extreme cold, the lighter's effectiveness might drop, so be prepared for that possibility. If your lighter doesn't work, you'll need to consider alternative ignition techniques.
Always handle fire with caution. Evaluate the area for potential dangers, and never leave a fire unattended. Once you're done, ensure the fire is completely extinguished. Following local fire safety regulations is crucial to prevent accidents. By understanding how to use a cigarette lighter effectively, you can start a fire safely when you need it most.
Igniting With Loose Wire
Loose wires in a vehicle can unintentionally create dangerous conditions that lead to fires. When a loose wire makes contact with the car's chassis, it can cause a short circuit. This situation is one of the biggest loose wire hazards you need to watch out for. A short circuit generates a high current path to the ground, which produces enough heat to ignite flammable materials, like insulation and plastics, inside your car.
The starter and its wiring are common culprits behind electrical fires, as they handle high current flow. If wires become faulty or worn out, the risk of short circuits increases significantly. Even if fuses are in place, they might blow too late to prevent a fire. To prevent electrical fires, make sure you regularly inspect and maintain your vehicle's wiring system. Proper insulation and maintenancereduce the risk of electrical failures in vehicles. Building a fire is an essential survival skill that highlights the importance of understanding potential fire hazards in everyday situations.
Using a multimeter or test light can help you identify any short circuits. Check for signs of wear, damage, or improper installation in your wiring. If you find a blown fuse, it's a strong indicator of a potential short circuit. Systematically removing fuses can help you pinpoint the specific circuit causing the issue. Once identified, isolate the faulty wire or component causing the problem.
Preparing the Fire Site
Before you start a fire, it's crucial to prepare the site properly to ensure safety and efficiency. Proper fire site selection is key. Look for an open area, away from trees, buildings, and anything flammable. Clear the ground of organic materials like leaves or moss, and if possible, use rocks to create a fire pit. Always check for overhead wires or obstacles that could pose a risk. Ensuring that the site is free from any potential ignition sources is essential for preventing accidents. Additionally, understanding the importance of fire sustainability will help you maintain a steady and safe flame.
Here's a quick reference table to help you with ground preparation:
Step
Action
Purpose
Choose Location
Find an open space
Reduces fire hazards
Clear Ground
Remove grass, leaves, and debris
Prepares a safe burning area
Create Containment
Use rocks to form a barrier
Keeps fire contained and controlled
Once you've selected the site, clear a circular area to ensure nothing catches fire accidentally. If necessary, dig up the grass. Having large rocks to form a barrier around your fire pit is ideal, and if you can find a manmade fire pit, use that instead. Always keep a bucket of water and a first aid kit nearby for emergencies.
With the ground prepared, you can gather your fire materials. Collect dry twigs, leaves, and other combustible items to ensure your fire starts easily. Remember, a well-prepared site not only enhances efficiency but also keeps you safe while enjoying your fire.
Essential Safety Precautions
When engaging in activities involving car parts, it's vital to prioritize safety precautions to prevent fire hazards. Start by ensuring regular vehicle maintenance. Check for fuel leaks and electrical issues, and fix them promptly. A well-maintained electrical system helps reduce fire risks, so keep an eye on loose or worn parts and maintain proper tire inflation to avoid friction-induced fires. Regular maintenance can significantly mitigate potential fire hazards present in your vehicle. Additionally, remember that over 100,000 car fires are reported annually, emphasizing the importance of vigilance and preparedness.
Emergency preparedness is also crucial. Equip your vehicle with a fire extinguisher rated for Class B and Class C fires. If you're using a commercial vehicle, consider installing an automatic fire suppression system. Make sure you can easily access emergency phone services and conduct regular fire safety drills. Everyone in the vehicle should know the emergency procedures to follow.
Preventing fire hazards is essential, too. Avoid smoking or using open flames near vehicles, especially during refueling. If you need to transport flammable liquids, use approved containers and store these materials outside, away from living spaces. Implement strict safety protocols when handling flammable substances, and educate drivers on safe driving habits to prevent overheating.
Lastly, recognize the warning signs of a possible car fire, like unusual noises, smoke, or burning smells. If you suspect a fire, pull over and turn off the engine. Evacuate the vehicle safely, move to a safe distance, and call emergency services. Remember, proper safety training can make a big difference in fire prevention and response. Stay safe!
Alternative Fire Starting Methods
While traditional fire starting methods often rely on matches or lighters, exploring alternative techniques can enhance your skills and adaptability in various situations. One effective method is the bow drill. You'll need a bow, a spindle, a piece of string, and a hearth board. By attaching the spindle to the bow with the string, you can rotate the spindle against the hearth board to create friction. This friction produces a glowing ember, which you can transfer to your tinder to start a fire. Remember, mastering this technique requires strength, patience, and practice.
Another creative ignition technique is using flint and steel. For this, you'll need a piece of flint and a steel striker. Strike the flint against the steel at an angle to create sparks that can ignite char cloth or other tinder. This method can be a bit tricky in windy or damp conditions, so be prepared for some challenges.
If you have sunny weather, try the plastic or balloon method. You can use a plastic bag or a clear water bottle filled with water to concentrate sunlight onto your tinder. This method requires direct sunlight but can produce enough heat to ignite your tinder.
Lastly, consider using a 9-volt battery with steel wool. Place a small amount of steel wool into your tinder bundle and touch it with the battery terminals. The sparks produced will ignite the steel wool, helping you start a fire. All these methods use unconventional tinder sources and require practice to perfect.
Gathering Necessary Materials
To kick off your fire-starting project using car parts, you'll need to gather a variety of materials. First, look for essential car parts like a battery, steel wool, and electrical wire. The battery can create sparks by connecting both terminals, while steel wool often comes in car emergency kits and is useful for igniting flames. You can also use electrical wire by stripping it for insulation material, which makes excellent tinder.
Next, consider adding some natural fire materials. Dry leaves or grass are crucial for kindling, as are small twigs. These items help catch the spark and sustain initial flames. For a longer-lasting fire, larger logs will be necessary once you've got the blaze going. Don't forget to collect some rocks to build a fire pit that contains the fire safely.
You should also prepare some additional materials, like a knife or sharp tool for shaping your tinder and kindling. Feather sticks, cotton balls coated in Vaseline, or dry shredded wood can all enhance your fire-starting efforts. Consider using dry pine needles or char cloth as well.
Lastly, always prioritize safety by wearing protective gear and ensuring your area is clear of flammable materials. Having a bucket of water nearby is a smart precaution, too. By gathering these materials and fire materials, you'll be well-equipped to start your fire successfully and safely.
Understanding Fire Behavior
Fire behavior plays a crucial role in how flames react to their environment, influenced by factors like fuel, weather, and terrain. Understanding fire dynamics is essential when you're trying to start a fire using car parts. You need to know that fire requires three key elements: fuel, oxygen, and heat. The arrangement and moisture content of your fuel—like car parts—affect how quickly the fire spreads and how intense it becomes.
When you ignite a fire, the combustion chemistry kicks in. This is the process where your fuel reacts with oxygen, producing heat and light. The rate of spread tells you how fast the flames will grow, while flame length can indicate the fireline intensity, or how much energy the fire releases. Longer flames usually mean a hotter fire, which can be crucial when trying to maintain your fire.
Weather conditions, such as wind and humidity, significantly influence fire behavior. For instance, strong winds can carry embers farther, causing the fire to spread rapidly. Likewise, the slope of the terrain plays a role; fires tend to move faster uphill.
Tips for Fire Maintenance
Maintaining a fire requires diligence and awareness to ensure safety and efficiency. To keep your fire safe, follow these maintenance tips. First, always keep flammable materials away from heat sources like space heaters, stoves, or fireplaces. This simple step can prevent accidents. When using space heaters, place them on level, non-flammable surfaces, and never leave them unattended.
Next, focus on electrical safety. Regularly check cords for damage and replace any frayed ones. Store matches and lighters out of children's reach to avoid unwanted fires. It's also smart to schedule regular maintenance for your electrical equipment and inspect exhaust systems for grease buildup.
In the kitchen, consider installing an automatic fire-suppression system. Keep your cooking area clean, and store flammable liquids properly. Make sure everyone knows the evacuation plan in case of a fire.
Finally, train staff to use fire extinguishers correctly. Everyone should understand the PASS method: Pull, Aim, Squeeze, and Sweep. Regularly inspect fire extinguishers and check their pressure gauges. This ensures they're ready when needed.
Responsible Fire Extinguishing Techniques
Knowing how to extinguish a fire responsibly can mean the difference between a small mishap and a full-blown emergency. When you're faced with a fire, quick thinking and proper techniques are essential. Here are some responsible extinguishing techniques you should know:
Identify the fire class: Use the correct fire extinguisher type. For example, Class A is for ordinary combustibles, while Class B is for flammable liquids.
Proper use of extinguishers: Remember the acronym PASS: PULL the pin, AIM the nozzle at the base of the fire, SQUEEZE the handle, and SWEEP from side to side.
Maintain your extinguisher: Regular fire extinguisher maintenance is vital. Check that it's inspected annually and tagged with the inspection date. Replace any extinguishers that aren't in good condition.
Know when to evacuate: If the fire grows rapidly, prioritize your safety. Ensure clear evacuation routes and don't hesitate to call emergency services if needed.
Additionally, consider alternative methods for small fires, like using a fire blanket to smother flames or throwing sand on open flames. Always remember that extinguishers work best on small fires, so don't take unnecessary risks. By understanding these extinguishing techniques and maintaining your fire safety tools, you'll be better prepared to handle emergencies effectively.
Frequently Asked Questions
Can I Use Any Car Battery to Start a Fire?
You can use a car battery safely to start a fire, but follow fire starter tips. Always handle batteries carefully, avoid sparks, and ensure good ventilation to prevent accidents while creating heat and ignition.
What Type of Tinder Is Best for Starting Fires?
When starting a fire, dry leaves are one of the best natural materials you can use as tinder. They ignite easily and help catch the flames, making your fire-building efforts much more effective.
Is It Safe to Start Fires in Rainy Conditions?
Starting fires in rainy conditions can be risky, but with proper fire safety precautions, you can manage it effectively. Always prioritize dry materials, protective setups, and constant monitoring to minimize hazards during wet weather.
How Can I Extinguish a Fire Safely?
To extinguish a fire safely, remember fire safety principles. Use extinguishing techniques like the PASS method, ensure you have the right extinguisher class, and always keep an exit behind you while addressing the fire.
Can I Use Car Parts for Cooking Over a Fire?
Yes, you can use car parts for cooking, but prioritize fire safety. Ensure your engine's clean, manage temperature control, and wrap food properly to avoid contamination. Always be cautious about potential hazards when cooking this way.
Conclusion
In summary, starting a fire using car parts can be done safely and effectively with the right knowledge and materials. Remember to prepare your fire site and follow essential safety precautions to prevent accidents. Always understand fire behavior to maintain control and ensure your fire serves its purpose. Finally, when you're done, make sure to extinguish your fire responsibly. By following these steps, you can create a fire safely and enjoyably.
You should insulate your survival shelter properly to stay warm and safe in harsh conditions. Good insulation traps heat, which helps regulate your body temperature and can prevent hypothermia. It also protects you from rain, snow, and wind, creating a secure environment. Using natural materials like leaves or pine needles enhances insulation effectiveness; aim for at least 24 inches in cold weather. Don't forget ground insulation, as cold earth can draw heat away from you. Keeping an eye on moisture and ventilation will ensure your shelter stays comfortable. There's plenty more to consider for optimizing your survival shelter.
Key Benefits of Insulation
Insulating your survival shelter is crucial for maintaining a safe and comfortable environment in harsh conditions. The key benefits of insulation help you achieve higher thermal efficiency and improved comfort levels. By trapping and holding heat inside the shelter, insulation keeps you warm when the temperature drops. Light, fluffy materials with plenty of air space work best, as smaller air pockets provide better insulation. This helps maintain your body heat, which is essential for survival.
Insulation also protects you from the elements, shielding you from rain, snow, wind, and even sunlight. By keeping your shelter dry, it prevents hypothermia or heatstroke, allowing you to focus on your survival. Using natural materials like leaves and grasses can enhance your insulation while ensuring a comfortable environment. Additionally, proper insulation is vital for the construction of effective survival shelters that withstand harsh weather conditions. Furthermore, a well-insulated shelter significantly increases your chances of survival in emergency situations, as it provides a safe space for rest and recovery.
Moreover, insulation offers psychological comfort and safety. It gives you peace of mind, helping you stay calm during stressful situations. A well-insulated shelter defends against wildlife and keeps pests at bay, making your shelter a secure place. Structural elements, like double-wall construction, further enhance both safety and comfort levels.
Finally, insulation conserves energy by retaining warmth and reducing the need for constant fire maintenance. By keeping cold air from infiltrating your shelter, you can use any external heat sources, like hot rocks, more efficiently. This all contributes to a warm and comfortable environment, allowing you to rest better, which is vital for long-term survival.
Essential Insulation Materials
Choosing the right materials for insulation can significantly impact the effectiveness of your survival shelter. Using natural insulation materials is an excellent way to maintain warmth and comfort. Here are some essential materials you can gather:
Natural Insulation Material
Material Effectiveness
Leaves
Traps air effectively
Pine Needles
Good insulation properties
Grass and Straw
Lightweight and compressible
Leaves are abundant and easy to gather, making them a great choice. Pine needles work similarly, providing excellent insulation while being readily available. Grass and straw are not only lightweight but also compressible, which enhances their insulating properties. Ground insulation is equally important, as it prevents heat loss from below your sleeping area. Additionally, thick layers of insulating materials should be built up to trap air effectively and improve overall heat retention.
Bark can offer additional structural protection while providing insulation, and wood chips serve as a sturdy layer that helps shield you from the elements. However, avoid common mistakes in material selection. Using wet materials can lead to significant heat loss, and underestimating the thickness of insulation may leave you cold. Don't forget to insulate the ground, as heat can escape from below.
When applying these materials, layering is crucial. Build up multiple layers to trap air effectively, and consider using thick insulating materials for bedding. Regularly inspect your shelter for gaps and add insulation as needed.
Effective Structural Techniques
When constructing your survival shelter, effective structural techniques can make a significant difference in insulation performance. One of the best methods is double-wall construction. By creating two walls with an air gap in between, you'll enhance insulation and protect against wind and cold air. While this method requires more materials and is more complex to build, the heat retention it provides is worth the effort. Additionally, when selecting your site, consider choosing a flat, elevated area to further improve insulation and reduce environmental challenges.
Ground insulation is another crucial aspect of your shelter design. Insulating the ground helps prevent heat loss to the cold earth, and it adds comfort. You can use natural materials like leaves, grass, or pine needles for this purpose. Ensure you have a thick layer to maximize effectiveness, and consider creating elevated bedding to minimize contact with the ground. A well-insulated shelter is vital for survival strategies in extreme weather conditions.
If you're choosing an A-frame shelter, make sure to tightly cover it with insulation materials like leaves, ferns, or moss. The sloped design allows snow and rain to slide off, while a sturdy frame is essential for holding everything in place. A-frames are quick to construct, making them ideal for emergencies.
For a lean-to shelter, insulate the framework with foliage, and build a debris wall on the open side for extra protection. An elevated sleeping platform will help keep you warm by reducing ground contact. Always ensure you have at least a foot of insulation for sufficient warmth. By using these effective insulation methods, you'll significantly improve your shelter's performance in harsh conditions.
Common Insulation Mistakes
Many survivalists overlook common insulation mistakes that can jeopardize their shelter's effectiveness. One major error is using ineffective materials. Wet materials can significantly reduce insulation properties, while damp earth can cause heat loss. Non-breathable materials may lead to condensation, which negates your insulation efforts. Always ensure your insulation material is thick enough; insufficient thickness is a common oversight.
Another mistake is neglecting ground insulation. Failing to insulate the ground can result in substantial heat loss and increase the risk of hypothermia. Ground insulation is crucial, so consider using materials like leaves and grass to keep warmth in. Remember, insulating the ground is as important as insulating your walls and roof, especially since cold weather challenges require effective heat retention. Additionally, many animals, like squirrels, instinctively use natural materials to create nests that provide excellent insulation from the cold.
Additionally, inadequate shelter construction can lead to problems. Shelters that are too large or open can leak warmth and are harder to insulate effectively. Don't underestimate the warmth your shelter can provide; inadequate insulation can leave you cold. Ensure your shelter is properly secured to withstand harsh weather and additional loads like snow. Double-wall construction enhances insulation but requires extra time and materials.
Lastly, don't overlook ventilation and maintenance. Poor ventilation can cause condensation to build up, rendering your insulation ineffective. Regular maintenance is necessary to keep your insulation working well. Periodic inspections help you replenish insulation materials when needed. By avoiding these common mistakes, you can improve your shelter's insulation techniques and overall design, ensuring a warmer and more comfortable survival experience.
Quick Insulation Solutions
Improving your shelter's insulation doesn't always require extensive time or resources. You can easily tap into natural insulation materials found around you. Leaves and pine needles are plentiful in forested areas, while grass and straw are lightweight and compressible. Collecting bark and wood chips will provide you with durable and water-resistant insulation. If you're building a lean-to, using dead grass and small branches can enhance warmth. Evergreen bows create a thick layer of bedding, adding comfort.
When gathering these materials, use a shemagh or similar item to collect efficiently. Focus on materials from off the ground or sheltered areas to ensure they're dry. Piling your finds on a tarp helps transport them to your shelter. Aim for at least 24 inches of insulation for freezing temperatures. If it's milder, 16 inches may suffice. Remember, when you pile up leaves, they'll compact down, so you'll need to account for that. Additionally, it's important to choose a dry, flat area for your shelter to enhance insulation effectiveness and comfort.
You can also use insulation techniques like double-wall construction with an air gap to improve insulation and protect against wind. Understanding the importance of insulation for your shelter can significantly impact your ability to maintain body heat in cold climates. Don't forget to insulate the roof of your lean-to, starting from the base and shingling up. Debris huts are great for retaining body heat, while tarps can create fast, lightweight shelters that reflect heat. By employing these quick insulation solutions, you can enhance your survival shelter and ensure a more comfortable experience in the outdoors.
Ground Insulation Importance
Ground insulation is crucial for maintaining warmth and comfort in your survival shelter. When you're out in the wild, the cold ground can sap your body heat fast, leading to uncomfortable nights or even hypothermia. Proper ground insulation prevents heat loss to the cold earth and ensures your shelter remains a warm refuge by trapping your body heat. This improved thermal efficiency makes a significant difference in how cozy your shelter feels.
To achieve effective insulation performance, you'll want to use suitable materials. Dry leaves, pine needles, grass, straw, and cattail leaves are all excellent choices. These materials trap air, which is key for insulation. Collect them from off the ground or sheltered areas to ensure they're dry, and build a thick layer—ideally one to two feet—around your sleeping area. This thickness will maximize your insulation's effectiveness.
It's important to avoid common mistakes. Using wet materials can lead to heat loss, so always check your insulation for moisture. Underestimating how much insulation you need is another error; make sure to add layers if you feel cold during the night. Regularly inspect your shelter for gaps and reinforce the insulation as necessary.
Multi-Purpose Insulation Uses
After ensuring your shelter has proper ground insulation, consider how you can enhance warmth and comfort using multi-purpose insulation materials. You can choose between natural insulators and synthetic options to create a cozy environment. Here are some effective materials you can use:
Natural Fibers: Grasses, leaves, and layers of bark work well to trap air, providing excellent insulation. Cattail leaves and grass stems are particularly effective, as they create pockets of air.
Synthetic Insulators: Plastic sheeting and mylar can help build a warm space quickly. Rigid foam boards are also great for resisting heat flow, making them a popular choice.
Layering Techniques: Insulation should be layered to trap air efficiently. For instance, adding a thick layer of insulating materials inside your mattress can keep your body heat contained.
Reflective Foils: In warmer climates, using reflective foils in radiant barriers can cool your shelter while still offering insulation.
To maximize effectiveness, pile insulating materials thickly over your shelter. This not only provides warmth but also adds waterproofing benefits. Remember, a well-insulated shelter maintains warmth with minimal external heating, allowing you to stay comfortable in various weather conditions. By combining natural and synthetic options, you can create a multi-functional insulation system that enhances your survival experience.
Utilizing Local Resources
When building your survival shelter, tapping into local resources can significantly enhance your insulation efforts. Utilizing local vegetation is key in creating effective insulation. In forested areas, you can gather dry leaves, which trap air and provide excellent insulation. Grass and straw also work well, but make sure they're dry, as damp materials can decompose quickly. Pine needles can create a thick insulating layer, while bark and wood chips add durability and water resistance. Don't overlook dry moss, as it helps protect against moisture.
Effective layering is essential for maximizing warmth. Aim for a double-wall construction with an air gap, enhancing insulation. You'll want to create layers that are 1 to 2 feet thick for optimal heat retention. Ground insulation is just as vital; use a sacrificial layer of leaves or pine needles to prevent heat loss.
Consider your shelter's structure, too. Establish a solid framework using strong branches, and cover it thoroughly with insulating materials. Regularly check for gaps or thin spots, as these can allow cold air to seep in. Choosing a location that offers natural barriers, like trees or hills, can further protect your shelter from harsh winds and cold air.
Emergency Insulation Strategies
While you may find yourself in a survival situation without the luxury of time or resources, knowing emergency insulation strategies can mean the difference between warmth and hypothermia. Here are some effective approaches to ensure your shelter stays warm:
Use Natural Materials: Gather leaves, pine needles, or grass to create thick layers of insulation. Aim for at least one to two feet around your shelter to trap warmth effectively.
Create Ground Insulation: Insulate the ground beneath your shelter using dry vegetation. This step is crucial to prevent heat loss into the cold ground.
Construct a Double Wall: If you have enough materials, consider building a double wall with an air gap in between. This technique enhances insulation and protects against harsh winds.
Choose the Right Shelter Type: Depending on your environment, consider a debris hut for cold conditions or a snow shelter if you're in a snowy area. Each design has unique insulation properties that can keep you safe.
Essential Shelter Components
Understanding essential shelter components is crucial for ensuring your safety and comfort in survival situations. When designing your shelter, focus on waterproofing first. Use natural foliage like leaves and pine boughs to create a waterproof barrier. Tarps can provide an immediate layer of protection, and make sure the ground inside your shelter is covered with dry materials to prevent moisture. Position your shelter on elevated ground to help water drain away.
Next, pay attention to insulation. Utilize dry materials such as leaves, ferns, and grass to trap air effectively. Aim for an insulation thickness of at least two feet for optimal warmth. Pine needles are also great for insulation due to their abundance. Layering different materials can enhance insulation, so don't hesitate to mix and match. Regularly check and maintain your insulation to keep it effective.
Fire considerations are important as well. Keep fires outside your shelter but close enough to benefit from the heat. Design your shelter to capture and retain heat, and ensure proper ventilation to prevent smoke buildup.
Lastly, windproofing is key. Position your shelter against the wind direction and use natural features like trees to block wind. Create thicker walls of debris and make sure your materials are secured to withstand strong winds. By focusing on these essential shelter components, you'll significantly increase your chances of staying safe and warm in survival situations.
Frequently Asked Questions
How Do I Choose the Right Insulation Material for My Climate?
To choose insulation materials, consider the R-value comparison for effectiveness in your climate. Evaluate climate considerations like humidity and temperature, ensuring you select materials that provide optimal protection against heat loss or gain.
Can I Use Synthetic Materials for Insulation in Survival Situations?
Yes, you can use synthetic insulation in survival situations. It's effective in maintaining warmth when wet, easy to maintain, and generally cost-effective, making it a valuable addition to your survival gear in various environments.
How Often Should I Check Insulation for Effectiveness?
You should check your insulation frequently for effectiveness. Regular inspections help you identify gaps, settling, or compression. Adjust your insulation frequency based on environmental changes to ensure optimal performance and comfort inside your shelter.
What Are the Signs of Inadequate Insulation in My Shelter?
You'll notice signs of inadequate insulation if you feel drafty walls and experience temperature fluctuations. If your shelter's too cold or hot, it's time to reassess your insulation materials and sealing methods.
How Can I Improve Insulation if I Have Limited Resources?
If you've limited resources, use natural materials like leaves or straw for insulation. Consider improvised solutions like double-wall construction with air gaps, and ensure ground insulation with moss to retain warmth effectively.
Conclusion
In conclusion, insulating your survival shelter properly is crucial for maintaining a comfortable and safe environment. It helps regulate temperature, protects against moisture, and increases the overall efficiency of your shelter. By choosing the right materials and techniques, you can avoid common mistakes and ensure your shelter remains functional in emergencies. Remember, even simple insulation solutions can make a big difference. Prioritize insulation to enhance your shelter's effectiveness and keep yourself protected in challenging situations.
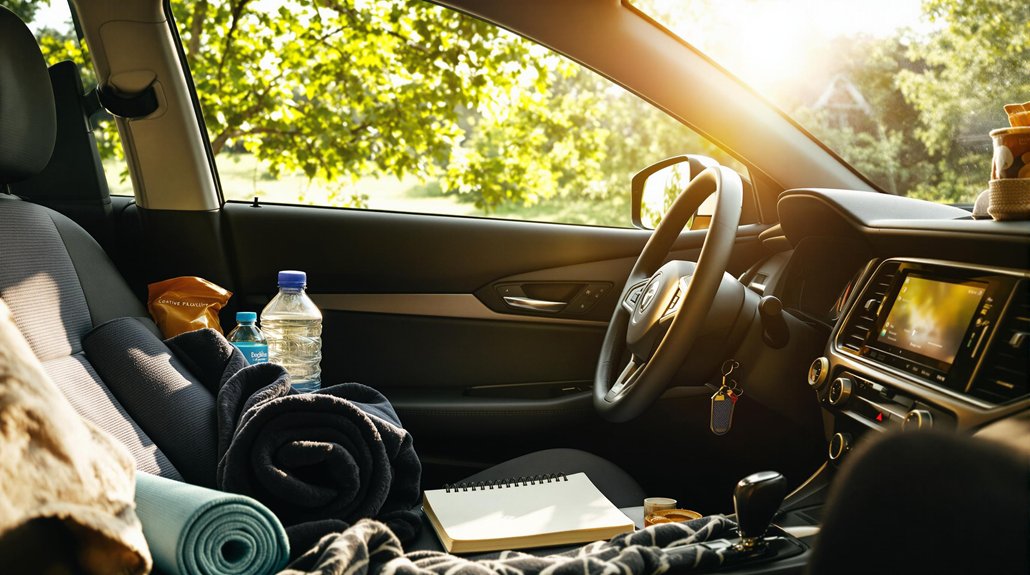
To survive in your car for an extended time, start by preparing your vehicle with regular maintenance and an emergency kit. Pack essential supplies like non-perishable food, water, blankets, and a first aid kit. Keep your car clean and maintain hygiene with items like hand sanitizer and baby wipes. Stay visible by using hazard lights and reflective materials, and communicate clearly with others to signal for help. Focus on your mental well-being with positive thoughts and mindfulness. By being proactive and staying informed about your surroundings, you'll enhance your chances of staying safe and comfortable during challenging situations.
Preparing Your Vehicle
To ensure you're ready for an extended stay in your car, start with thorough vehicle preparation. First, focus on vehicle maintenance. Check your oil and fluid levels, making sure they're fresh and at the correct levels. Don't forget to inspect your tire pressure; underinflated tires can affect handling and safety on the road. Also, examine the battery condition. If your car will be stationary for a long time, consider using a trickle charger to keep the battery healthy. Additionally, it's important to regularly check oil and fluid levels to maintain vehicle performance and avoid potential breakdowns. Regular braking will also remove rust from brake rotors, ensuring they function effectively when needed.
Next, think about storage solutions for your vehicle. Store it in a clean, dry place to prevent rust. Filling the gas tank completely will also help avoid rust caused by condensation. Before you park, change the oil and lubricate exposed metal surfaces. This protects against rust and wear. If you plan to leave your vehicle for an extended period, place it on jack stands to relieve pressure from the tires.
Lastly, stay organized. Keep a list of emergency contacts and roadside assistance numbers in your car. Ensure you have all the necessary navigation tools, like an updated GPS or maps, and a car charger for your smartphone. Regular checks and adherence to your vehicle's service schedule will help keep everything in good shape. By taking these steps, you'll ensure your car is well-prepared for an extended stay, allowing you to focus on what really matters when the time comes.
Essential Survival Kit Items
A well-prepared survival kit can be a lifesaver during an unexpected car stay. You never know when you might find yourself stranded, so having the right emergency gear is crucial. Here are some essential survival items to keep in your car.
Emergency Food and Water: Store water in plastic or collapsible bottles. Include non-perishable food items like energy bars, ensuring you have enough for everyone, including pets. These foods can withstand different temperatures without spoiling. Additionally, having sufficient water supply is vital to prevent dehydration during extended roadside emergencies.
First Aid Kit: A well-stocked first aid kit is a must. Include bandages, antiseptic wipes, hand sanitizer, and pain relief medications. Don't forget antibiotic ointment and a bleeding control kit for serious injuries. Consider adding vehicle first aid kits that are specifically designed for emergencies while traveling.
Shelter and Comfort: Pack blankets, gloves, and heat packs for cold weather. If it's hot, consider adding portable fans. An emergency bivvy sack or sleeping bag will help keep you warm and comfortable.
Navigation and Tools: Include a handheld GPS unit and physical maps in case your phone dies. A multi-tool with various functions can be invaluable, along with jumper cables, a flashlight, and a spare tire.
Maintaining Safety and Visibility
Even with a well-prepared survival kit, knowing how to maintain safety and visibility is vital when you're stranded in your car. Start by ensuring your car maintenance is up to date before winter, checking the brakes, lights, battery, and other essential systems. Keeping your gas tank at least half full is crucial, too. If you find yourself stuck during a heavy snowstorm, stay inside your vehicle, making sure to keep the radiator and exhaust pipe clear of snow. Additionally, having a first aid kit on hand can provide peace of mind and essential supplies in case of minor injuries.
To enhance your visibility and attract attention, use your hazard lights. At night, keep your interior lights on to make your car more noticeable. You can also apply reflective tape to your bumpers or tie a bright-colored cloth to the radio antenna to signal for help during the day. During nighttime, frequently use dome lights or flashlights to increase visibility.
If you need to signal for help, use three loud horn blasts, three flashes of light, or three waves of your arms. Carrying a whistle is a smart idea, as it can be heard from farther away than your voice. Utilizing hazard lights can significantly increase your visibility to rescuers, particularly in low-light conditions. If conditions permit, create a signal fire, as its smoke can help rescuers locate you. Lastly, always ensure at least one window is slightly open for ventilation to prevent carbon monoxide buildup. By following these tips, you'll maximize your safety and visibility while stranded.
Effective Communication Strategies
Effective communication strategies on the road can make a significant difference in ensuring both your safety and that of others. Understanding the indicator importance and practicing courteous behaviors can help create a smoother driving experience. Here are some key strategies to enhance communication:
Use Indicators: Always signal your intentions by using indicators when turning or changing lanes. This alerts other drivers and helps prevent accidents. Indicators are a critical safe driving practice that reinforces the importance of signaling.
Maintain Eye Contact: When at intersections or crosswalks, make eye contact with pedestrians or drivers. This simple act confirms that you see each other and can help avoid misunderstandings. Active listening during these interactions can further enhance clarity and safety.
Utilize Horns Sparingly: Your horn should only be used to alert others of immediate danger. Overusing it can create tension and confusion on the road.
Practice Courtesy: Allow other drivers to merge or change lanes when safe. Polite actions like these reduce road tension and promote harmony among drivers.
Incorporating these strategies into your driving habits not only improves safety but also fosters a more pleasant environment for everyone on the road. Remember, effective communication isn't just about the words or signals you use; it's also about being aware of others and practicing patience. By combining clear signaling with courteous behaviors, you can contribute to a safer driving experience for yourself and others.
Navigating in Emergencies
When emergencies arise on the road, quick and informed decision-making is vital for your safety. First, make sure you stay visible. Turn on your hazard lights to alert other drivers, and if you can, move your vehicle out of traffic. Place emergency reflective triangles around your car or tie a bright cloth to your antenna. This helps signal your presence to others.
If you find yourself in flooded areas, avoid driving through water covering the road, as it can cause hydroplaning. If you must navigate through water, drive slowly and ease off the gas if you start to lose traction. Open windows or sunroofs if doors become stuck due to water pressure, and be prepared to break glass if necessary for escape. OnStar can trigger Automatic Crash Response for immediate help if you find yourself in a dangerous situation. Additionally, modern autonomous vehicles are being developed to assist in emergencies by navigating to safe roadside locations if a driver is unable to do so.
Handling skidding is also crucial. Avoid sudden acceleration or braking, as this can lead to spinning. Instead, slowly release the gas pedal and steer in the direction of the spin to regain control. If your vehicle stops upside down, turn off the ignition and evacuate.
In case of an emergency brake failure, use gentle braking to slow down. Pump the brake pedal to build pressure, or apply the parking brake slowly if needed. Always steer toward a safe location to stop, like an open area or uphill. Keep emergency supplies handy, and don't hesitate to call for roadside assistance if you need help navigating through these situations.
Health and Hygiene Practices
Maintaining health and hygiene in your car is essential for overall well-being, especially during extended trips or emergencies. By keeping your car clean and stocked with necessary sanitation supplies, you can help prevent infections and ensure comfort. Here are some key practices to follow:
Regularly clean the interior: Wipe down surfaces like the dashboard and seats to remove dirt and germs. This ensures car cleanliness and a healthier environment.
Store trash properly: Use sealed bags for trash to minimize odors and maintain hygiene. Regularly dispose of these bags outside the car to prevent clutter and mess.
Pack essential hygiene items: Include items like hand sanitizer, baby wipes, and toilet paper. These will help you stay clean and comfortable during long periods in your vehicle.
Keep a first aid kit handy: A comprehensive kit should include bandages, antiseptic wipes, and personal medications. This ensures you're prepared for any minor injuries or health issues.
Additionally, make sure to ventilate your car periodically to prevent moisture buildup, and avoid eating inside to reduce food waste. With these health and hygiene practices in place, you'll be better equipped to handle extended time in your car, keeping both you and your environment as clean and safe as possible.
Insulating Your Car for Warmth
Staying warm in your car during cold weather is just as important as keeping it clean. To create a cozy environment, focus on effective window insulation and thermal barriers. Start by applying reflective insulation materials to your windows. These materials reflect heat back inside, helping maintain warmth. Don't forget to cover your windshield with a snow cover; this simple step prevents cold air from sneaking in and preserves heat.
For enhanced protection, consider using reflective films on the inside of your windows. This blocks out solar radiation and reduces heat loss. Make sure to insulate both your front and back windshields. You can also use thermal mats or heat shields to further reflect warmth. Quality heat shields can stop over 90% of heat transfer, so invest in high R-value insulation materials.
When it comes to vehicle preparation, preheating your car is key. Use the HVAC system to warm up the interior before you settle in for the night. You can also run the engine briefly to create a warm cabin environment. Insulating the floorboard and applying underhood insulation will help keep the warmth inside while preventing cold air from creeping in.
Lastly, always ensure proper ventilation to avoid carbon monoxide buildup. With these insulation techniques, you'll create a snug, warm space in your car during those chilly nights, making your situation much more bearable.
Rationing Food and Water
Survival in your car hinges on effective rationing of food and water, especially during extended periods of confinement. Proper management will help you stay nourished and hydrated. Here are some food rationing strategies and water conservation techniques to consider:
Daily Water Needs: Aim for at least two quarts of water each day. Always drink what you need today, and try to find more for tomorrow.
Food Selection: Choose foods high in liquid content. Canned fruits and vegetables are good options. Avoid salty snacks, as they increase your thirst.
Emergency Water Sources: Identify nearby rivers or lakes. If you're in a safe area, these can provide additional water, but remember to purify it before drinking.
Storage Recommendations: Store at least one gallon of water per person, per day, in food-grade containers. Regularly check and rotate your supplies to keep them fresh.
While healthy adults can survive on half their usual food intake for a while, children and pregnant women shouldn't ration food. Instead, keep an emergency supply of non-perishable, high-calorie foods, like canned goods, which are easy to prepare. Use airtight plastic bags for storage and replace items every six months to maintain quality.
Managing Physical and Mental Well-being
When you're confined in your car for an extended period, managing your physical and mental well-being becomes crucial. Start with hydration strategies. Aim for at least 1.5 to 2 liters of water daily, adjusting for your age, size, and activity level. Regularly sipping water helps you stay alert and energized.
Next, incorporate exercise routines. Even in a limited space, simple movements can keep your joints flexible. Aim for at least 150 minutes of moderate activity each week. This could include stretching, seated exercises, or even short walks if it's safe outside.
To help you stay organized, here's a table outlining some essential practices:
'''markdown
Aspect
Tips
Frequency
Hydration
Drink water regularly
Daily
Exercise
Stretch and move around
3-5 times a week
Sleep
Aim for 7+ hours
Nightly
Mindful Activities
Read or play games
Daily
Stress Management
Deep breathing exercises
As needed
'''
Apart from these, make sure you have a first aid kit and emergency supplies on hand. Keeping your mental health in check is just as important. Engage in mindful activities, stay connected with loved ones, and monitor your feelings. Entertainment, like books or puzzles, can also help keep your mind active. Taking care of both your physical and mental well-being will make your time in the car more manageable.
Signaling for Help
If you find yourself in a situation where you need help while stuck in your car, signaling effectively is essential. Using the right signaling techniques can increase your chances of getting rescued. Here are four effective distress signals you can use:
Hazard Lights: Turn on your hazard lights to alert other drivers that you're in trouble. This is one of the most recognized signals for roadside assistance.
Raising the Hood: Popping your hood is a clear indication to others that your car has a mechanical issue. It might encourage passing drivers to stop and help or call for assistance.
Distress Flags: If you have a red cloth or flag, attach it to your antenna or wave it out of the window. This is a universal signal of distress that can attract attention.
Horn Blasts: Use your car horn to send three loud blasts. This is an internationally recognized distress signal and can alert nearby people to your situation.
Dealing With Severe Weather
Dealing with severe weather while stuck in your car can be daunting, yet being prepared can significantly enhance your chances of staying safe. First, make sure your vehicle is equipped with an emergency kit. This should include a first aid kit, flashlight with extra batteries, jumper cables, blankets, and tools like an ice scraper. These emergency supplies are crucial for weather preparedness.
Next, manage your food and water resources wisely. Always keep bottled water and non-perishable, high-calorie food in your car. In extreme situations, you can melt snow for drinking water. Also, pack tools for food preparation, including utensils.
It's essential to consider weather-specific safety measures. If you're in a winter storm, tire chains are vital for traction. Carry sand or cat litter to help if you get stuck. A battery-powered or portable radio will keep you informed about weather updates. Hand warmers are a smart addition to your emergency supplies, ensuring you stay warm.
Finally, plan for long-term survival. Bring extra clothing, including gloves, hats, and scarves to stay warm. Carry basic repair tools and fire-starting tools like matches or candles. Methods to signal for rescue, such as emergency whistles, can also be life-saving. By following these steps for weather preparedness, you can greatly increase your chances of enduring severe weather while stuck in your car.
Keeping a Positive Mindset
Surviving challenging situations in your car isn't just about physical preparedness; your mindset plays a vital role too. Keeping a positive mindset helps manage stress and can make a tough situation feel more bearable. Here are some practical tips to stay positive while you're confined in your vehicle:
Practice positive affirmations: Repeat uplifting phrases like "I am safe" or "This too shall pass" to boost your morale.
Utilize deep breathing: When you feel anxious, take deep breaths. Inhale slowly, hold for a moment, and exhale. This simple exercise helps calm your nerves.
Maintain a reflection journal: Jot down your thoughts and things you're grateful for. This can shift your focus from negative feelings to the good around you.
Create a positivity playlist: Compile your favorite upbeat songs. Listening to music can elevate your mood and distract you from stress.
Sharing Responsibilities With Others
Sharing responsibilities with others can significantly enhance your ability to manage challenges while in your car. When you're sharing a vehicle, it's essential to establish clear sharing agreements. These agreements outline how you'll split costs, such as insurance, registration, and repairs. It's important to keep track of receipts and reconcile expenses regularly so everyone knows their share.
You should also agree on a schedule for vehicle use. Consider how long each person will need the car and discuss what to do for long trips or if someone needs to rent a vehicle. Make sure everyone understands restrictions, like not lending the vehicle to unlicensed drivers or using it for smoking, to avoid conflicts later.
Conflict resolution is crucial in any shared arrangement. If disagreements arise, use methods outlined in your sharing agreement, such as mediation, to resolve issues. Specify how to end the agreement if needed, as well as procedures for selling the vehicle and splitting any proceeds.
Lastly, review the agreement with an attorney to ensure it covers all necessary details, like maintenance responsibilities and indemnification clauses for accidents. By sharing responsibilities and being organized, you can make your time in the car more manageable and enjoyable, minimizing the stress that can come from conflicts or misunderstandings.
Understanding Local Regulations
Understanding local regulations is crucial for anyone spending extended periods in their car. Knowing local laws and emergency protocols can make a significant difference in your survival and safety. Here are a few things you should keep in mind:
Emergency Kits: Check local recommendations for roadside emergency kits. Items like jumper cables, flashlights, and first aid kits can be lifesavers.
Vehicle Use in Emergencies: Understand how to use your vehicle as shelter. Even if the engine is damaged, battery power can help with lighting or communication.
Visibility: Keep reflective safety vests and signs in your vehicle. These are essential for being seen, especially at night or during poor weather conditions.
Maintenance Laws: Regular vehicle maintenance isn't just good practice; it's often legally required. Make sure your car is in safe working order before any long trip.
Familiarizing yourself with these aspects of local regulations can help you navigate difficult situations more effectively. Always prepare in advance, and make sure your emergency kit is updated regularly. By understanding these local laws and emergency protocols, you can stay safer and more comfortable while in your car. Remember, knowledge is power, especially in unexpected circumstances.
Seeking Assistance When Possible
When you're in a tough situation with your car, knowing how to seek assistance can make all the difference. First, ensure you've prepared for emergencies by keeping key items in your car, such as water, non-perishable snacks, a flashlight with extra batteries, a first-aid kit, warm clothing, and a fully charged phone with a charger. These essentials can help you stay comfortable while waiting for help.
If your car breaks down, don't hesitate to call for roadside assistance. If you have a roadside protection membership or insurance coverage for this service, use it. You can either call directly or use a mobile app for faster service. When you call, provide clear details about your location and the nature of the problem. Staying calm during the call helps ensure you communicate effectively.
If you find yourself on a busy road, keep your doors locked and use your hazard lights to make your vehicle visible. Set up warning triangles or flares if you have them. Avoid accepting help from strangers, and wait for professional assistance to arrive. It's also a good idea to have a list of emergency contacts saved in your phone, so you can reach out to family or friends if necessary.
Frequently Asked Questions
How Can I Stay Entertained While Stranded in My Car?
To stay entertained while stranded, dive into reading materials you love or explore mobile games on your device. You'll keep your mind engaged and pass the time more easily while waiting for help.
What Should I Do if My Car Runs Out of Gas?
If your car runs out of gas, use emergency supplies to stay safe. Consider fuel alternatives like contacting roadside assistance or a friend. Stay with your car until help arrives, conserving energy and resources.
How Can I Safely Cook Food Inside My Car?
To safely cook food inside your car, use portable stoves instead of the engine. Prioritize food safety by keeping raw meats cold, avoiding contamination, and ensuring you monitor cooking temperatures closely for safe consumption.
What Are the Signs of Hypothermia to Watch For?
To recognize hypothermia symptoms, watch for shivering, numbness, and sluggishness. As body temperature drops, you might notice garbled speech and decreased consciousness. Stay alert to these signs to prevent severe complications.
How Can I Maintain Morale in a Survival Situation?
To maintain morale, you can use positive affirmations to uplift your spirits and practice creative journaling to express emotions. These activities foster a sense of control, helping you cope with challenges and build resilience.
Conclusion
In conclusion, being prepared can make a big difference if you find yourself stuck in your car for a long time. Keep your vehicle in good shape, pack essential supplies, and stay aware of your surroundings. Communicate effectively with others and know how to navigate challenges. Staying positive and sharing responsibilities can help you cope better. Remember, understanding local laws and seeking help when needed are important steps. With these tips, you can increase your chances of staying safe and comfortable.
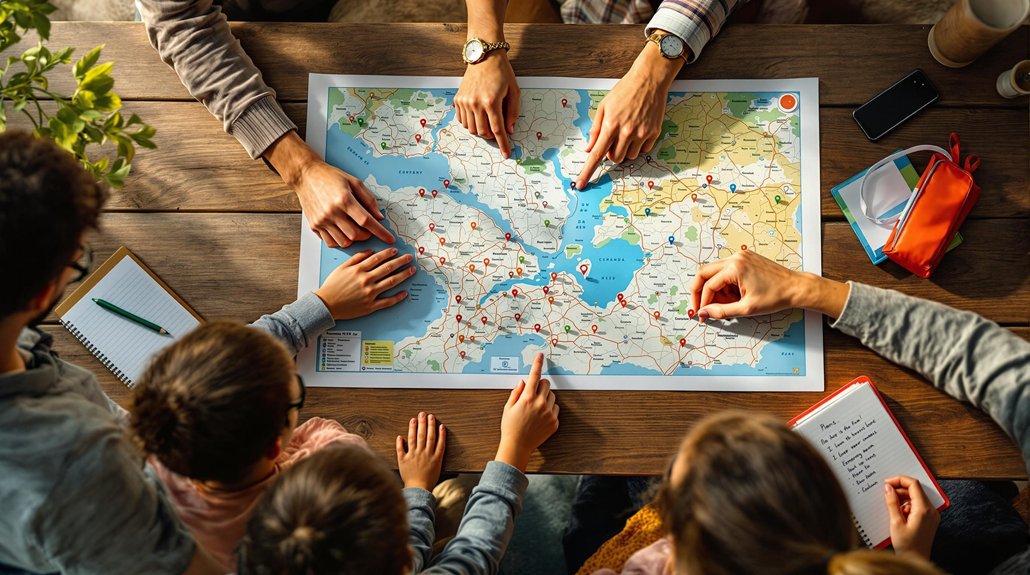
To create a bug-out plan for you and your family, start by identifying potential disasters specific to your area. Scout safe, accessible bug-out sites, and evaluate multiple routes for evacuation. It's crucial to prepare bug-out bags stocked with essentials like water, non-perishable food, first aid supplies, and shelter items. Hold regular family meetings to establish emergency contacts and practice drills, refining your plan as needed. Don't forget to maintain your bug-out bags and keep your family informed about local resources. There's much more to explore that can enhance your preparedness and response strategies.
Identifying Potential Disasters
When preparing your bugout plan, identifying potential disasters is crucial for effective decision-making. Start by conducting hazard identification specific to your region. Research local emergency management office data to pinpoint natural disasters prevalent in your community, such as hurricanes, tornadoes, earthquakes, floods, and wildfires. Understanding these hazards allows you to assess the risks they pose to your family.
Next, familiarize yourself with local disaster histories and community disaster plans. Review evacuation routes and learn about warning systems and signals. Utilize online resources, like NOAA and the American Red Cross, to gather comprehensive disaster information. This research forms the foundation of your risk assessment, enabling you to prioritize which disasters to prepare for based on their likelihood and potential impact. Additionally, recognize that seasonal disasters are increasing in frequency, which further underscores the importance of your preparedness efforts.
Once you've identified the hazards, establish clear conditions that necessitate evacuation for each disaster type. Set actionable thresholds, such as evacuating if a Type III hurricane is forecasted within 12 hours. Consider any special needs of family members that might impact these decisions.
Finally, develop a comprehensive evacuation plan, including alternative routes and shelter locations. Regularly review and update your decision criteria as new information emerges or circumstances change. By meticulously identifying potential disasters and assessing associated risks, you'll create a robust bugout plan that keeps your family safe and prepared for any emergency. Additionally, remember that preparedness enhances safety and mitigates disaster impact, so be proactive in your planning.
Selecting Bug-Out Sites
Selecting the right bug-out site is a critical component of your emergency preparedness strategy. To ensure you choose a suitable location, start with thorough location scouting. Aim for a site that balances safety and accessibility; ideally, it should be far from high-density population areas to reduce risks associated with social unrest and resource shortages. Consider the distance from your current residence, keeping in mind potential obstacles like roadblocks or adverse weather conditions.
Conduct a comprehensive resource assessment for your chosen site. Water is essential; prioritize locations near natural springs for continuous, fresh water. While rivers and streams can be viable, plan for purification methods, and if you consider wells, remember they require regular maintenance and testing. Legal access to these water sources is crucial. Additionally, having multiple water sources can offer redundancy and enhance long-term sustainability during crises. Moreover, consider historical disasters in the area to further assess potential risks associated with your site.
Evaluate the terrain and environmental factors as well. Your site should support self-sustainability, allowing for activities like gardening and raising livestock if necessary. Ensure the land is suitable for rainwater collection and has natural resources for long-term viability.
Finally, think about financial and legal considerations. Investigate the cost of living, property taxes, and maintenance expenses to avoid financial strain during emergencies. Familiarize yourself with zoning ordinances to understand what activities are permitted on the property.
Determining Bug-Out Routes
Determining effective bug-out routes is crucial for ensuring a safe and efficient evacuation during emergencies. By planning ahead, you can avoid panic and hesitation when the time comes. Here are four key steps to consider when determining your routes:
Identify Multiple Routes: Don't rely on a single path. Plan several routes to your bug-out location to maintain flexibility in case of obstructions.
Evaluate Route Safety: Assess the condition and reliability of roads, taking into account seasonal weather conditions that may affect accessibility. Additionally, consider the importance of conducting perimeter checks to ensure safety along your chosen routes. Proximity to water sources is also a key factor in evaluating your route, as it can provide essential resources during emergencies.
Utilize Navigation Tools: Use a combination of GPS and physical maps. While GPS is convenient, it can fail during emergencies, so ensure you have reliable maps as backup.
Practice and Review: Familiarize yourself with these routes by practicing trips in advance. Review maps for key landmarks and potential hazards, and identify safe zones or emergency shelters along the way.
Preparing Bug-Out Bags
After establishing reliable bug-out routes, the next step is preparing your bug-out bags, which play a vital role in your emergency preparedness. Start by ensuring you have effective water filtration systems. Include reusable or collapsible water bottles, portable purification devices like the LifeStraw, and water filters such as the Katadyn BeFree. Don't forget water purification tablets like Aquatabs, as they'll ensure you have access to safe drinking water for at least 1-3 days. Carrying all water is impractical, so having purification methods is essential for long-term hydration.
Next, focus on first aid and hygiene essentials. A compact, well-organized first aid kit should contain basic medical supplies like bandages and painkillers, along with personal hygiene items such as soap, toothbrushes, and wipes. Be sure to include any prescription medications or necessary medical equipment. Regularly checking expiration dates on supplies will ensure that your first aid items remain effective when needed.
When it comes to food, prioritize non-perishable food storage solutions. Stock up on high-calorie items like energy bars, MREs (Meals Ready to Eat), and canned goods. Include food preparation equipment, such as a camping stove and cooking pot, along with utensils like a spork and plates. This will ensure you can sustain yourself and your family during an emergency.
Finally, pack shelter and warmth supplies. A tent or emergency tarps, sleeping bags, and fire-starting equipment are essential. Don't forget clothing suitable for varying weather conditions, as well as personal protective equipment. By preparing these components, you'll be ready to face unexpected challenges with confidence.
Conducting Practice Drills
How prepared are you for a sudden evacuation? Conducting practice drills is essential to ensure your family knows what to do during an emergency. By regularly practicing these drills, you can identify any weaknesses in your plan and improve your overall readiness. Here are four key drills to include in your routine:
Evacuation Route Testing: Identify and practice your evacuation routes during non-emergency times.
Bug-Out Bag Loading: Ensure everyone knows how to quickly load and transport their bug-out bags.
Situational Awareness Exercises: Conduct drills at home and in public to enhance situational awareness.
When planning your drills, consider drill frequency. Regularly scheduled practice can help reinforce your family's skills and boost confidence. Aim for a mix of drills, varying in complexity and timing to simulate real-life conditions.
After each drill, conduct a thorough drill evaluation. Discuss what went well and what needs improvement. Encourage open communication, especially with children, to help them express any concerns or confusion about the procedures.
Maintaining the Bug-Out Plan
Maintaining your bug-out plan requires a proactive approach to ensure its effectiveness in an emergency. Start with yearly reviews of your plan, assessing its relevance based on any changes in your environment or personal circumstances. Update your emergency contact list, ensuring that phone numbers and addresses are current. Check the contents of your bug-out bag regularly for expired food, medications, and batteries, swapping out anything that's no longer viable.
Additionally, conduct equipment maintenance by testing your gear to confirm it's in working order. Make sure your bug-out vehicle is well-maintained and stocked with necessary supplies. This includes keeping maps updated with marked evacuation routes and safe locations.
Stay informed about potential threats; monitoring local news and reliable sources can provide crucial insights into changing conditions. Regularly review lessons learned from drills to pinpoint any weaknesses in your plan, and incorporate new skills and knowledge as you acquire them.
Lastly, ensure your plan is adaptable to various disaster scenarios. Flexibility is key—be prepared to adjust your strategy as situations evolve. By committing to these practices, you'll create a robust bug-out plan that remains effective when you need it most, ensuring you and your family are ready for any emergency.
Family Communication Strategies
A robust bug-out plan isn't just about having supplies and routes; effective family communication strategies are vital to ensuring everyone knows what to do in an emergency. To enhance your family's preparedness, consider these key strategies:
Hold regular family meetings: Discuss your emergency plan and communication methods to ensure everyone understands their roles.
Establish emergency contacts: Save important emergency numbers in your phones and keep a list near home phones for quick access.
Designate an out-of-town contact: Choose someone outside your local area who family members can reach if separated.
Utilize multiple communication methods: Plan to use at least three ways to communicate, like texting, social media, and email, particularly during network congestion.
During an emergency, text messages are often more effective than calls, reducing strain on networks. Make sure everyone knows how to send texts and understand when to dial 911. It's also crucial to create contact cards that include all necessary information, like emergency contacts, out-of-town details, and meeting places.
Review your communication plan annually and conduct practice drills to reinforce these strategies. Teach children how to respond in emergencies, ensuring they know how to reach out for help. Staying informed through local alert systems can also provide crucial updates during a disaster. By prioritizing these communication strategies, you'll enhance your family's readiness and ensure everyone knows how to stay connected when it matters most.
Emergency Supply Checklist
When disaster strikes, having a well-prepared emergency supply checklist can make all the difference in your family's safety and survival. The checklist importance lies in ensuring that you gather essential items before a crisis hits. Start by stocking up on water—plan for one gallon per person per day for at least three days. Next, include non-perishable food that can sustain your family during an emergency.
A first aid kit is crucial, containing bandages, antiseptic wipes, pain relievers, and any necessary prescription medications. For lighting, add a flashlight and extra batteries or a rechargeable light source. If you may need to shelter in place, gather materials like plastic sheeting, scissors, and duct tape.
Don't overlook personal and health-related items. Include sanitation supplies, personal hygiene products, and infant necessities if applicable. If you have pets, pack food, water, and medications for them as well.
Safety and security items are also vital. Ensure you have a battery-powered radio, a whistle for signaling, and basic protection gear like dust masks and goggles. Fire-starting tools and navigational aids like maps and compasses round out your supplies.
Lastly, think about additional items such as clothing, bedding, essential tools, personal documents, cash, and recreational items to keep spirits high. This emergency supply checklist will not only prepare you for the unexpected but also provide peace of mind knowing you've taken proactive steps for your family's well-being.
Community Resources and Support
While having an emergency supply checklist is vital for individual preparedness, understanding the community resources and support available can significantly enhance your safety during a crisis. By leveraging community services, you can ensure a more efficient and safer evacuation process. Here are four key resources to consider:
Evacuation Centers: Identify the official evacuation centers in your area. Know their locations, capacities, and the services they provide, including food, shelter, and medical care. Keep their contact information handy and familiarize your family with evacuation routes.
Communication Networks: Establish a reliable communication plan. Designate a contact point for your family members and ensure you have at least two methods of communication, like cell phones and two-way radios. Identify a meeting point in case you get separated.
Local Emergency Services: Familiarize yourself with local emergency services, such as fire, police, and ambulance. Know how to access these services during emergencies and keep essential contact numbers readily available.
Community Drills: Participate in community drills and simulations. These preparatory measures can help you and your family understand emergency protocols and improve your response during actual crises. Regularly update your emergency plans based on new information from these drills.
Frequently Asked Questions
How Can We Involve Children in the Bug-Out Planning Process?
Involving children in bug-out planning makes it engaging. Include fun activities like selecting comfort items and assigning age-appropriate tasks, ensuring they understand their responsibilities. This fosters confidence and prepares them for emergencies effectively.
What Should We Do With Pets During an Evacuation?
During an evacuation, ensure your pet's safety by preparing a pet evacuation kit with emergency supplies like food, water, and a first aid kit. Secure pet-friendly accommodations and keep essential contact information readily available.
How Do We Handle Financial Resources During a Bug-Out Situation?
During a bug-out situation, prioritize budget allocation for emergency funds. Ensure you've set aside at least one month's income for immediate needs. This preparation minimizes financial stress and helps you manage unforeseen expenses effectively.
What Legal Documents Should Be Included in Our Bug-Out Bags?
Include essential identification documents like your driver's license and passport, along with emergency contacts. Having these legal documents organized ensures you can access critical information quickly during a crisis, enhancing your preparedness and safety.
How Can We Stay Informed About Emergencies While on the Road?
To stay informed about emergencies while on the road, use mobile apps for emergency alerts and real-time updates. Enable notifications, subscribe to local news, and leverage social media for timely information and connections.
Conclusion
Creating a bug-out plan is essential for ensuring your family's safety in emergencies. By identifying potential disasters, selecting reliable bug-out sites, and preparing well-stocked bags, you'll be ready when it counts. Regular practice drills will help reinforce your plan, while effective communication strategies ensure everyone's on the same page. Don't forget to leverage community resources for additional support. Stay proactive, keep your plan updated, and you'll navigate unforeseen challenges with confidence and clarity.
To prepare a solid first aid kit, include a variety of bandages in different sizes, antiseptic wipes, and sterile gauze pads. Don't forget non-latex gloves and scissors for safe treatment. Stock pain relievers like acetaminophen and ibuprofen, plus antihistamines for allergies. Consider adding a CPR mask, emergency blanket, and hemostatic agents for severe bleeding. For personal safety, include items like pepper spray and personal alarms. Regularly check your kit and update expired supplies to stay ready. There's a lot more you can include for specific situations, so keep an eye out for additional tips on enhancing your kit.
Basic First Aid Supplies
When it comes to assembling your prepper first aid kit, having the right basic supplies is essential. These supplies form the backbone of effective emergency preparedness, ensuring you're ready for a range of situations. Start with an assortment of bandages in various sizes, including triangular bandages and elastic wraps for support. Non-latex, medical-grade gloves in various sizes are crucial for maintaining hygiene during treatment.
Next, include permeable adhesive tape like Micropore, which helps secure dressings. Scissors are a must-have; they'll allow you to cut bandages or clothing as needed. Tweezers are also important for removing splinters or debris from wounds.
In addition to these essentials, consider blister and burn care items. Burn relief gel and aloe vera lotion can soothe minor burns, while alcohol prep pads are vital for disinfecting areas before treatment. Instant cold packs can help alleviate pain from sprains or strains. Given that over 52 million injuries required medical consultation in 2021, it's critical to have a well-stocked kit.
Don't overlook medications and treatments. Keep antibiotic ointment on hand to prevent infection in minor cuts. Over-the-counter pain relievers, antihistamines for allergic reactions, and antacids for digestive issues are all good additions. Regularly checking and replenishing your supplies is vital to maintain emergency preparedness.
Lastly, ensure you have a first aid manual for quick reference in emergencies. This guide can provide critical information when you need it most. By gathering these basic supplies, you'll significantly enhance your first aid kit and boost your emergency preparedness.
Wound Care Essentials
Building on the basic first aid supplies you've gathered, it's important to focus on wound care essentials that can effectively address injuries when they occur. First, effective wound cleaning is crucial. Include an antiseptic solution like 10% Povidone-iodine for minor cuts, burns, and skin wounds. Alcohol pads are handy for sterilizing wounds, while sterile saline solutions (30ml) can help rinse out debris. A mild soap or specific wound wash offers another option for cleaning.
Once the wound is clean, you need proper dressing techniques. Stock up on gauze pads made from a polyester-rayon blend to cover and protect the wound. Cotton gauze wraps help maintain moisture, which is vital for healing. Non-adherent wound dressings come in various sizes, ensuring you can address any wound type. For larger injuries, consider a sterile combine dressing, measuring 10cm x 20cm. Additionally, having a blood clot powder can be beneficial for quick bleeding control.
To prevent infection, keep antibiotic ointments with bacitracin zinc, neomycin sulfate, and polymyxin B handy. Adhesive bandages in different shapes and sizes cater to various wounds, while hydrocellular foam dressings can be useful for wounds with mild to moderate weeping. Additionally, having an instant cold compress can provide immediate pain relief and help reduce swelling.
Finally, equip yourself with additional tools like instant cold compresses for swelling, swab sticks for applying ointments, and bandage shears for easy cutting. Tweezers and sterile splinter probes will help you remove debris and splinters effectively. Having these wound care essentials will prepare you for unexpected injuries.
Medications to Include
Stock your prepper first aid kit with essential medications to ensure you're ready for a variety of health issues. Start with over the counter medications like acetaminophen, ibuprofen, or aspirin. These are crucial for managing pain, reducing fever, and treating simple sprains or strains. Antihistamines, such as Benadryl, are important for allergy relief, while loperamide (Imodium) is effective for diarrhea. Don't forget to include antacids for upset stomachs.
For more serious conditions, consider adding prescription medications. An Epi-pen is vital for severe allergic reactions, and antibiotics like amoxicillin can treat infections but should only be included under medical guidance. If you suffer from sinus issues, pseudoephedrine (Sudafed) can help relieve congestion. Cough suppressants like benzonatate are also handy for upper respiratory infections. Regularly check your kit for expired items and replace them as needed. Having a versatile and functional kit is essential for dealing with various trail-related health challenges.
If you travel frequently, anti-nausea or motion sickness medications are a must. Additionally, if you're heading to high altitudes, pack medications for altitude sickness.
Remember to include any personal medications you take regularly, clearly labeled with dosing instructions. Regularly check your kit for expired items and replace them as needed. Keep emergency contact numbers handy, as well as medical alert information for chronic conditions. By maintaining a well-stocked kit with these medications, you'll be better prepared for any health challenges that come your way.
Personal Protection Items
Having a well-equipped first aid kit is only part of being prepared; personal protection items are equally important for your safety and security. These tools can help you stay safe in various situations and enhance your self-defense techniques.
Start with pepper spray, a compact yet powerful option that allows you to deter assailants from a distance. Stun guns are also effective for close-range defense, providing a strong jolt to incapacitate an attacker. If you prefer something more discreet, consider key knives or cat ear defense keychains, which combine everyday utility with personal safety gadgets. It's worth noting that our selection includes 11 products in stock that can cater to various personal safety needs.
In emergency situations, personal alarms and emergency whistles can draw attention and summon help when you need it most. Don't underestimate the value of a kubaton, a handheld weapon designed for defensive strikes. For maintaining distance during potential threats, touchless tools are excellent choices. Additionally, having a compact first aid kit on hand ensures that you can address minor injuries while focusing on your personal safety.
Flashlights serve dual purposes: they illuminate dark areas and can intimidate would-be attackers. Additionally, safety capsules can securely store your valuables, keeping them protected while you focus on your safety.
For a more comprehensive approach, think about assembling a personal defense set that includes a variety of tools, like stun guns and pepper spray. You might also want an emergency escape hammer for vehicle incidents. Remember, being prepared means not only having first aid supplies but also the right personal protection items to ensure your safety in any situation.
Outdoor Survival Supplies
When you're venturing into the great outdoors, having the right survival supplies can make all the difference in ensuring your safety and well-being. Preparing for unexpected emergencies means you're ready to handle various situations with effective first aid techniques. Here are three essential supplies you should include in your outdoor survival kit:
Basic First Aid Supplies: Pack antiseptic wipes, assorted adhesive bandages, and antibacterial ointment. These items will help you manage minor injuries and prevent infections in outdoor environments. Consider also including a Wilderness First Aid Kit, which contains essential items for outdoor adventures.
Medications and Treatments: Bring along aspirin or NSAIDs for pain relief, antihistamines for allergic reactions, and anti-diarrheal medications. These can be lifesavers in emergency scenarios where discomfort can escalate quickly. Additionally, consider the importance of carrying personal medications to address specific health needs during your trip.
Wound Management and Splinting: Include butterfly bandages, elastic wraps, and a SAM splint. These supplies will assist you in stabilizing injuries and ensuring proper wound care, which is crucial when medical help isn't immediately available.
Having these outdoor survival supplies ensures you're equipped to handle unexpected health issues. The right supplies paired with your knowledge of first aid techniques will empower you to stay calm and effective during emergencies. Always remember, preparation is key to enjoying your outdoor adventures safely!
Essential Tools and Equipment
A well-equipped first aid kit is essential for anyone serious about outdoor safety and preparedness. Whether you're hiking, camping, or prepping for emergencies, having the right tools and equipment can make a significant difference in your emergency response. To optimize your first aid kit, ensure you include the following essentials:
Essential Item
Purpose
Bandages
Cover and protect wounds
Nitrile Gloves
Prevent infection during treatment
Antiseptic Wipes
Clean wounds to avoid infection
SAM Splints
Stabilize broken bones or sprains
CPR Mask
Safe resuscitation in emergencies
Wound care is crucial, so stock up on gauze rolls, sterile cotton applicators, and hemostatic agents. These supplies help you manage bleeding effectively. Pair them with scissors for cutting bandages and a thermometer for monitoring vital signs.
Don't forget supplemental supplies like a first aid manual for quick reference, hand sanitizer for hygiene, and an emergency blanket for warmth. All these tools enhance your first aid training by preparing you to handle various medical situations confidently.
Specialized Medical Resources
Specialized medical resources are vital for enhancing your prepper first aid kit, especially in emergencies where serious injuries or specific medical needs arise. Having the right supplies can make all the difference in those critical moments. Here are three categories to consider:
1. Medical Supplies for Serious Injuries
Equip your kit with items like tourniquets, Israeli combat bandages, and surgical superglue for wound closure. Waterproof bandages and sterile gauze pads are also essential for effective wound dressing.
2. Medications for Emergency Situations
Stock up on medications like epinephrine auto-injectors for severe allergic reactions and anti-diarrheals for gastrointestinal issues. Anti-inflammatories and decongestants can help manage pain and respiratory problems, while narcotic reversal medications, such as naloxone, are crucial for opioid overdoses.
3. Advanced Medical Devices
Incorporate advanced tools like Bag-Valve-Mask (BVM) resuscitators for respiratory emergencies and pulse oximeters to monitor oxygen saturation. A stethoscope and sphygmomanometer for blood pressure checks are highly recommended, alongside a defibrillator and emergency oxygen for severe situations.
Familiarize yourself with emergency protocols and undergo medical training to ensure you know how to use these specialized resources effectively. This preparation will empower you to respond confidently, potentially saving lives when every second counts.
Frequently Asked Questions
How Often Should I Check and Replenish My First Aid Kit?
You should check and replenish your first aid kit every six months. Create a first aid schedule to ensure you replace expired items and restock used supplies, maintaining optimal kit maintenance for emergencies.
Are There Any First Aid Supplies That Expire?
Yes, some first aid supplies expire, like alcohol wipes and antibiotic ointments. Regularly check for expired supplies, and remember to practice proper disposal methods to ensure your kit remains effective and safe for use.
How Do I Organize My First Aid Kit Efficiently?
To ensure efficient storage, organize your kit by categorizing supplies—bandages, disinfectants, and tools. Use clear containers for visibility, label sections, and keep frequently used items accessible. Regularly check for expired products to maintain effectiveness.
Can I Include Natural Remedies in My First Aid Kit?
Absolutely, you can include natural remedies in your first aid kit. Their benefits include effective wound care and pain relief. Consider herbal medicine options like aloe vera gel, yarrow powder, or arnica for various ailments.
What Personal Medications Should I Specifically Include for My Family?
For your family, include personal medications for chronic conditions and allergies. Pack antihistamines for family allergies, pain relievers for discomfort, and any prescription meds. Regularly check expiration dates to ensure effectiveness when needed.
Conclusion
In summary, a well-equipped prepper first aid kit is crucial for any emergency situation. By including basic supplies, wound care items, essential medications, personal protection gear, outdoor survival tools, and specialized resources, you'll be better prepared to handle injuries and illnesses. Regularly check and refresh your kit to ensure everything's up-to-date. With the right preparation, you can confidently face unexpected challenges and keep yourself and your loved ones safe. Stay ready, stay safe!