Category: Bushcraft

  • How to Sharpen a Knife Without a Sharpener: 9 Wilderness and Household Methods

    How to Sharpen a Knife Without a Sharpener: 9 Wilderness and Household Methods

    How to Sharpen a Knife Without a Sharpener: 9 Wilderness and Household Methods

    A sharp knife isn’t just a convenience; it’s a critical tool for efficiency, safety, and survival. Whether you’re deep in the wilderness, facing an unexpected power outage, or simply can’t find your dedicated sharpening kit, knowing how to sharpen a knife without a sharpener is an invaluable skill. This comprehensive guide will equip you with nine practical methods, utilizing common natural materials and household items, to restore a keen edge to your blade when traditional tools are out of reach.

    Related TacticalProof reading: How to Build a Primitive Fish Trap: Weir, Funnel, and Bottle Designs for Survival Fishing | The 10-Item Minimalist Bushcraft Kit: What to Carry When You Want to Carry Almost Nothing | How to Brain Tan a Deer Hide Into Buckskin: The Complete Bushcraft Guide

    Why Knife Sharpening Is a Non-Negotiable Survival Skill

    In any survival scenario, your knife is often your most important tool. A dull knife, however, is not just inefficient; it’s dangerous. Here’s why maintaining a sharp edge is paramount:

    • Safety: A dull blade requires more force to cut, increasing the likelihood of slippage and serious injury. A sharp knife glides through material with less effort, offering greater control.
    • Efficiency: From preparing food and processing firewood to building shelter or administering first aid, a sharp knife performs tasks quickly and effectively, conserving your precious energy.
    • Versatility: A truly sharp edge can perform delicate tasks like feathersticking for fire starting, precise cuts for cordage, or even field dressing game, whereas a dull blade struggles with basic cutting.
    • Resourcefulness: Knowing how to improvise a sharpener demonstrates a high level of preparedness and adaptability, crucial traits for any survivalist.

    Understanding Edge Geometry: Angles, Bevels, and What You’re Actually Doing

    Before you start grinding away, it’s vital to understand the basic principles of knife sharpening. You’re not just making the edge thinner; you’re creating two precise bevels that meet at a microscopic point, forming the cutting edge.

    • The Bevel: This is the angled surface that tapers down to the edge. Most knives have two bevels, one on each side, forming a V-shape.
    • The Angle: The angle at which these bevels meet is critical. Common angles for survival and utility knives range from 20 to 25 degrees per side (40-50 degrees inclusive). Kitchen knives might be finer (15-20 degrees per side). Consistency is key.
    • The Burr: As you sharpen one side of the blade, tiny metal particles will push over to the opposite side, forming a microscopic curl of metal known as a burr. This is a sign you’ve reached the edge. You then switch sides to remove this burr, creating a clean, sharp apex.

    The goal is to abrade metal from the blade’s bevels until they meet cleanly at the desired angle, then to refine that edge to remove any remaining burr or micro-serrations.

    General Sharpening Principles for All Methods:

    1. Find a Stable Surface: Secure your sharpening medium so it doesn’t move during the process.
    2. Maintain a Consistent Angle: This is the hardest part of freehand sharpening. Practice makes perfect. Imagine you’re trying to slice off a thin layer from the sharpening surface.
    3. Use Light Pressure: Especially with finer grits. Let the abrasive do the work.
    4. Work Both Sides: Alternate strokes on each side of the blade to create an even edge and remove the burr.
    5. Clean Your Blade: Remove metal dust and debris frequently.

    Method 1-3: Natural Materials (Wilderness Sharpening)

    When you’re out in the wild, nature often provides the tools you need. Learning to sharpen a knife in the wild using natural stones is a fundamental survival skill.

    Method 1: River Stones / Smooth Rocks

    What to look for: The ideal river stone for sharpening will be fine-grained, dense, and relatively flat. Avoid porous, crumbly, or very coarse-grained rocks like granite or lava rock, which will scratch your blade more than sharpen it. Look for smooth, dark, non-sparkling stones, often found in riverbeds or dry washes. Basalt, slate, or very fine-grained sandstone can work well.

    How to do it:

    1. Select Your Stone: Find a stone with at least one flat, smooth surface. The larger and flatter, the better.
    2. Lubricate (Optional but Recommended): Wet the stone with water. This helps carry away metal particles (swarf) and prevents the blade from overheating, acting like a lubricant.
    3. Establish Your Angle: Hold your knife at your desired sharpening angle (typically 20-25 degrees per side) against the stone.
    4. Sharpening Strokes: Using light to moderate pressure, push the blade across the stone as if you’re trying to slice a thin layer off the stone. Start from the heel of the blade and move towards the tip in a single, fluid motion. Repeat this 10-20 times on one side.
    5. Check for a Burr: Carefully feel the opposite side of the edge (away from the stone) with your thumb or fingertip. If you feel a slight roughness or curl, you’ve created a burr.
    6. Switch Sides: Flip the knife over and repeat the process on the other side, aiming to remove the burr you just created and form a new one on the first side. Alternate sides, reducing pressure with each set of strokes, until the burr is minimized or gone.
    7. Refine: For a finer edge, find an even smoother stone if possible, or use very light, alternating strokes on your primary stone.

    Safety Warning: Always sharpen away from your body. Be extremely careful when checking for a burr; it’s incredibly sharp.

    How to Sharpen a Knife Without a Sharpener: 9 Wilderness and Household Methods
    How to Sharpen a Knife Without a Sharpener: 9 Wilderness and Household Methods.

    Method 2: Sandstone

    What to look for: Sandstone is naturally abrasive due to its quartz content. Look for finer-grained sandstone, as very coarse varieties can remove too much material too quickly and leave a rough edge. It should feel gritty but not excessively crumbly.

    How to do it: The process is very similar to using river stones. Sandstone often benefits greatly from being wet, as the water helps suspend the abrasive particles and keeps the stone from loading up with metal.

    • Find a flat piece of sandstone.
    • Wet the surface thoroughly.
    • Apply the blade at your chosen angle and use consistent, sweeping strokes, alternating sides once a burr is formed.
    • Reduce pressure as the edge refines.

    Tip for sharpen knife with rock: If you can find multiple stones of varying grit (from coarser to finer), you can create a progressively sharper edge, much like a traditional sharpening stone set.

    Method 3: Slate

    What to look for: Slate is a metamorphic rock known for its fine grain and ability to split into flat sheets. It often has a much finer abrasive quality than many sandstones or river rocks, making it excellent for refining an edge after initial sharpening.

    How to do it: Treat slate like a very fine grit sharpening stone. It’s best used wet. The technique remains the same: consistent angle, alternating strokes, and light pressure. Slate is particularly good for removing the burr and polishing the edge to a razor-sharp finish.

    Method 4-6: Household Items (Emergency Sharpening)

    Stuck at home with a dull blade and no sharpener? These common household items can provide effective emergency knife sharpening solutions.

    Method 4: Ceramic Mug or Plate

    What to look for: The unglazed, rough foot ring on the bottom of most ceramic mugs, plates, or bowls is an excellent improvised sharpening surface. The ceramic material is harder than most knife steels and has a fine abrasive quality.

    How to do it:

    1. Identify the Abrasive Surface: Turn a ceramic mug or plate upside down. You’ll see a rough, unglazed ring on the bottom. This is your sharpening surface.
    2. Stabilize: Place the mug/plate on a stable surface (e.g., a cutting board with a damp cloth underneath to prevent slipping).
    3. Lubricate (Optional): A few drops of water can help, but it’s not strictly necessary.
    4. Sharpening Strokes: Hold your knife at the desired angle (again, 20-25 degrees per side) against the rough ceramic ring. Use light to moderate pressure and draw the blade across the ring, moving from heel to tip.
    5. Alternate Sides: After 10-15 strokes on one side, flip the knife and repeat on the other side. Continue alternating, reducing pressure as you go, until you feel a burr and then remove it.

    Tip for sharpen knife with ceramic mug: The rim of an inverted ceramic bowl can also work if it’s unglazed and rough. Always ensure the surface is stable and won’t chip easily.

    Method 5: Sandpaper

    What to look for: Various grits of sandpaper (e.g., 220, 400, 600, 1000 grit) are ideal. The coarser grits remove material, while finer grits refine the edge. Wet/dry sandpaper is preferable if you plan to use water.

    How to do it:

    1. Secure the Sandpaper: This is crucial. Tape or glue the sandpaper to a perfectly flat, rigid surface like a piece of glass, a thick tile, or a very flat piece of wood. This prevents the sandpaper from flexing and rounding your edge.
    2. Start with Coarse Grit: Begin with a coarser grit (e.g., 220 or 400) if your knife is very dull.
    3. Lubricate (Optional): If using wet/dry sandpaper, a little water can help.
    4. Sharpening Strokes: Hold the knife at your chosen angle and draw the blade across the sandpaper, moving from heel to tip. Focus on maintaining that consistent angle.
    5. Progress to Finer Grits: Once you’ve established a burr on both sides with the coarse grit, move to the next finer grit (e.g., 600, then 1000). Repeat the process, reducing pressure with each finer grit. The goal is to remove the scratches from the previous grit.

    Safety Warning: Ensure the sandpaper is firmly secured. A slipping piece of sandpaper can lead to injury.

    Method 6: Nail File (Limited Use)

    What to look for: A metal nail file, particularly one with a coarser side. Emery boards are generally too soft and won’t abrade most knife steels effectively.

    How to do it: This method is best for very small knives (like pocketknife blades) or for quick touch-ups rather than full sharpening. The small surface area makes it challenging to maintain a consistent angle.

    1. Stabilize: Hold the nail file firmly in one hand.
    2. Sharpening Strokes: Carefully draw the blade across the file at your desired angle, using short, controlled strokes.
    3. Alternate: Work one side until a burr forms, then switch to the other side to remove it.

    Limitation: Due to the small size and often inconsistent abrasive quality, a nail file is a last resort for minor edge repair, not for truly dull blades.

    Method 7-9: Field Improvisation (Extreme Measures)

    These methods fall under the category of field knife sharpening or extreme emergency knife sharpening. They are generally coarser and can remove a lot of material quickly, so use them with caution and only when necessary.

    Method 7: Car Window Edge

    What to look for: The very top edge of a rolled-up car window is made of tempered glass, which is surprisingly hard and can act as a very fine abrasive.

    How to do it:

    1. Roll Down Slightly: Roll the car window down just enough so you can access the very top edge.
    2. Stabilize: Hold the knife firmly.
    3. Sharpening Strokes: Place the blade flat against the window, then lift the spine slightly to achieve your sharpening angle (around 20-25 degrees). Draw the blade across the glass edge, moving from heel to tip.
    4. Alternate: Perform a few strokes on one side, then flip the knife and do the same on the other. This method is best for refining an already somewhat sharp edge or for a quick touch-up. It won’t bring a truly dull blade back to life quickly.

    Safety Warning: Be extremely careful not to cut yourself or damage the window. The glass edge is very thin and can be unforgiving.

    Method 8: Concrete / Pavement

    What to look for: A smooth, flat section of concrete or pavement. Avoid very rough, pebbly areas, which will chip your blade. Look for a section that feels relatively fine-grained to the touch.

    How to do it: This is a very aggressive method suitable only for extremely dull or damaged blades where material needs to be removed quickly. It will leave a very coarse edge.

    1. Find a Smooth Spot: Locate the smoothest, flattest section of concrete you can find.
    2. Wet the Surface: Water can help reduce friction and carry away swarf.
    3. Sharpening Strokes: Hold the knife at a slightly steeper angle than usual (e.g., 25-30 degrees per side) to avoid chipping the edge. Use light to moderate pressure and draw the blade across the concrete, heel to tip.
    4. Alternate: Work one side until a significant burr forms, then switch to the other side.
    5. Refine (Crucial): Because concrete leaves such a coarse edge, it’s absolutely essential to follow this up with a finer abrasive if possible (e.g., a finer rock, ceramic mug, or even the car window edge) to refine the edge and make it truly usable.

    Safety Warning: Concrete is very abrasive and can quickly remove a lot of metal. Use minimal pressure and be prepared for a very rough edge. Always sharpen away from your body.

    How to Sharpen a Knife Without a Sharpener: 9 Wilderness and Household Methods
    How to Sharpen a Knife Without a Sharpener: 9 Wilderness and Household Methods.

    Method 9: Leather Strop (Belt, Jeans, Cardboard)

    What to look for: A leather belt (the smooth, flesh side is often better), a piece of denim (jeans), or even a thick piece of cardboard. These aren’t for sharpening in the traditional sense but for honing and polishing an already somewhat sharp edge.

    How to do it: Stropping removes the microscopic burr left by sharpening and polishes the edge, making it incredibly keen.

    1. Secure the Strop: Hold the belt taut, or lay the denim/cardboard flat on a stable surface.
    2. Angle: Lay the blade almost flat against the strop, lifting the spine just a hair (1-2 degrees more than your sharpening angle).
    3. Stroking Motion: Unlike sharpening, you *pull* the blade across the strop, spine leading, edge trailing. Never push the edge into the strop, or it will dig in and cut the material.
    4. Alternate: Perform 10-20 strokes on one side, then flip the blade and do the same on the other. Reduce pressure with each pass.

    Benefit: Stropping can make a good edge great and can refresh a slightly dull edge without removing much material.

    How to Test Your Edge: Paper, Hair, and Thumbnail Methods

    Once you’ve put in the effort, how do you know if your knife is truly sharp? Here are a few common tests:

    • The Paper Test: Hold a piece of paper (like a receipt or newspaper) by one edge. A truly sharp knife should be able to slice through the paper cleanly and smoothly with minimal effort, without tearing or catching.
    • The Hair Shaving Test: Carefully try to shave hair off your arm. A razor-sharp edge will effortlessly shave hair without pulling.
    • The Thumbnail Test: Gently place the edge of the blade on your thumbnail at a slight angle. A sharp edge will bite into the nail slightly and hold its position without slipping. A dull edge will slide across.

    Maintaining Your Edge: Prevention Tips to Sharpen Less Often

    The best way to deal with a dull knife is to prevent it from getting dull in the first place. Regular maintenance extends the life of your edge and reduces the frequency of intensive sharpening.

    • Hone Regularly: Use a ceramic or steel honing rod frequently (before or after each use) to realign the microscopic edge without removing significant material.
    • Use a Cutting Board: Always cut on a soft surface like wood or plastic. Cutting on hard surfaces like glass, ceramic, or metal will rapidly dull your blade.
    • Clean Your Knife: After use, clean and dry your knife to prevent corrosion, which can damage the edge.
    • Proper Storage: Store your knife in a sheath, knife block, or magnetic strip to protect the edge from bumping against other objects.
    • Avoid Prying or Twisting: Knives are designed for cutting, not prying. Twisting the blade while cutting can damage or chip the edge.
    • Choose the Right Tool: Don’t use your good knife for tasks better suited for a saw, axe, or screwdriver.

    FAQ: Sharpening Without a Sharpener

    Q: What is the ideal angle for sharpening a survival knife?
    A: For most survival and utility knives, an angle of 20-25 degrees per side (40-50 degrees inclusive) offers a good balance of sharpness and durability. Finer angles (15-20 degrees) are sharper but less robust, while coarser angles (25-30 degrees) are more durable but less keen.
    Q: Can I use any rock to sharpen a knife?
    A: No. You need a rock that is harder than your knife’s steel and has a fine, consistent grain. Avoid porous, crumbly, or very coarse rocks like granite or lava rock. Look for smooth river stones, sandstone, or slate.
    Q: How do I know if I’ve created a burr?
    A: Carefully run your thumb or fingertip across the side of the blade opposite the one you’re sharpening, moving from the spine towards the edge (never along the edge!). If you feel a slight, almost invisible curl or roughness, that’s the burr. It indicates you’ve abraded enough metal to reach the apex of the edge.
    Q: Is it safe to sharpen a knife on concrete?
    A: Concrete is a very coarse abrasive and should be used with extreme caution, only for very dull or damaged blades, and as a last resort. It will remove a lot of material quickly and leave a very rough edge that will require further refinement with a finer abrasive. Always use light pressure and sharpen away from your body.
    Q: How often should I sharpen my knife using these improvised methods?
    A: These improvised methods are generally more aggressive and less precise than dedicated sharpeners. Use them only when necessary to restore a working edge. For regular maintenance, honing is preferred. The goal is to sharpen as infrequently as possible by maintaining your edge well.
  • How to Build a Bow Drill From Scratch: Wood Selection, Carving, and Your First Ember

    How to Build a Bow Drill From Scratch: Wood Selection, Carving, and Your First Ember

    How to Build a Bow Drill From Scratch: Wood Selection, Carving, and Your First Ember

    Mastering primitive fire starting is a cornerstone of true survival preparedness. Among the various friction fire methods, the bow drill stands out as one of the most reliable and efficient once its technique is understood and practiced. This comprehensive guide will teach you how to make a bow drill from scratch, covering everything from selecting the right materials in the wild to carving each component, mastering the technique, and ultimately, coaxing your first life-saving ember. This isn’t just about making fire; it’s about forging a deeper connection with the wilderness and cultivating an invaluable self-reliance skill.

    Related TacticalProof reading: How to Build a DIY Solar Still for Emergency Water Purification: Ground, Box, and Pit Designs | How to Build a Root Cellar on a Budget: 5 DIY Designs Under $500 | How Can You Start a Fire Using Just Car Parts?

    What Is a Bow Drill and Why Every Survivalist Should Learn It

    The bow drill is an ancient friction fire method that utilizes a simple mechanical advantage to generate intense heat. It consists of four primary components: a bow, a spindle (or drill), a fireboard (or hearth board), and a handhold (or socket). The bow is used to spin the spindle rapidly against the fireboard, creating friction. This friction grinds wood dust from the fireboard and spindle, heating it until it ignites into a glowing coal, or ember.

    For any serious survivalist, learning the bow drill is more than just a party trick; it’s a critical skill for several compelling reasons:

    • Reliability: Unlike lighters that can run out of fuel or get wet, or matches that can be exhausted, a bow drill can be constructed from natural materials found almost anywhere, offering an infinite source of fire-starting capability.
    • Self-Sufficiency: It fosters a deep sense of self-reliance. Knowing you can create fire from the raw materials around you, even in adverse conditions, is a powerful psychological boost in a survival scenario.
    • Versatility: Once mastered, the bow drill can be used in a variety of environments, provided suitable wood is available. It’s less susceptible to wind than some other friction methods.
    • Skill Development: The process of building and using a bow drill hones crucial outdoor skills, including wood identification, carving, knot tying, and understanding the principles of friction and combustion.
    • Emergency Preparedness: In a true emergency, fire provides warmth, purifies water, cooks food, signals for help, and offers psychological comfort. The ability to reliably start a fire can be the difference between survival and succumbing to the elements.

    While modern tools like ferro rods are excellent, understanding primitive fire starting techniques like the bow drill ensures you’re never truly without options. It’s a fundamental skill that connects us to our ancestors and the timeless challenges of the wild.

    Choosing the Right Wood: Best Species for Fireboard, Spindle, and Bow

    The success of your bow drill fire starting hinges almost entirely on proper wood selection. The principle is simple: you need a soft, non-resinous wood for the fireboard and spindle, and a strong, flexible wood for the bow. All wood must be thoroughly dry. Even slightly damp wood will absorb heat and prevent an ember from forming.

    Fireboard (Hearth Board) and Spindle (Drill)

    These two components are the heart of your friction fire system. They should ideally be made from the same type of wood, or at least woods with very similar densities and properties. This ensures consistent friction and dust production. Look for wood that is:

    • Soft: Softer woods generate more dust and heat faster.
    • Non-Resinous: Resins (like those in pine or spruce) gum up the works, preventing smooth friction and ember formation.
    • Consistent Density: Avoid knots or areas of varying hardness.
    • Thoroughly Dry: This is paramount. Snap a small piece; if it breaks cleanly with a dry sound, it’s likely good. If it bends or feels spongy, it’s too wet.

    Recommended Wood Species:

    • Yucca: Often considered the ‘king’ of bow drill woods. Its stalk is perfect for both spindle and fireboard.
    • Cottonwood: Excellent choice, widely available in many regions.
    • Aspen: Similar to cottonwood, very effective.
    • Willow: Good, but ensure it’s very dry.
    • Cedar (Eastern Red Cedar, Western Red Cedar): The inner heartwood is often soft and dry.
    • Basswood (Linden): A superb choice, very soft and consistent.
    • Poplar (Tulip Poplar, Yellow Poplar): Another reliable option.
    • Sycamore: Can work well if dry.
    • Elderberry: The pithy core makes it easy to work with.

    Tip: When testing wood, try to make an indentation with your thumbnail. If it leaves a mark easily, it’s likely soft enough. Always test a small piece before committing to carving.

    Bow

    The bow needs to be strong enough to maintain tension on the cordage and flexible enough to have a slight curve. Its primary function is to provide the mechanical advantage to spin the spindle.

    • Length: Approximately arm’s length (from armpit to fingertips) is ideal. This allows for long, smooth strokes.
    • Strength & Flexibility: It needs to withstand the tension of the cordage without breaking.
    • Curve: A natural curve is beneficial, but not strictly necessary. A straight stick can work if strong enough.

    Recommended Wood Species:

    • Ash: Strong and flexible.
    • Oak: Durable, but can be heavy.
    • Hickory: Excellent strength and flexibility.
    • Maple: Good, sturdy wood.
    • Willow: If thick enough, its flexibility is a plus.
    • Hazel: Often found with natural curves.
    • Any sturdy, slightly flexible branch: Look for deadfall that is still sound.

    Handhold (Socket)

    The handhold provides the downward pressure on the spindle while allowing it to spin freely. It needs to be hard and smooth to minimize friction at this point.

    • Material: A piece of very hard wood (e.g., oak knot, mesquite), a smooth stone, a piece of bone, or antler.
    • Socket: Create a smooth, deep indentation for the spindle to spin in.
    • Lubrication: A small amount of natural grease (e.g., earwax, animal fat, sap from a non-resinous plant) or even a fresh green leaf can be placed in the socket to reduce friction and prevent the handhold from burning.

    Cordage

    The bow string needs to be strong, non-stretching, and durable enough to withstand the friction of the spinning spindle.

    • Preferred: Paracord, leather thong, rawhide.
    • Natural Options: Twisted inner bark fibers (cedar, basswood, elm), yucca fibers, dogbane, nettle, or even a strong shoelace.

    Safety Warning: Always ensure your chosen wood is dead and dry. Never cut live wood for a bow drill unless it’s an absolute emergency and no other options are available, as live wood is typically too wet to work effectively and harms the environment.

    Carving Each Component: Step-by-Step With Measurements and Photos

    With your materials gathered, it’s time to transform them into a functional bow drill set. A good fixed-blade knife is your primary tool, but a sharp stone or even another piece of wood can be used in a pinch for more primitive carving.

    1. The Fireboard (Hearth Board)

    1. Selection: Choose a piece of soft, dry wood, roughly 1 inch (2.5 cm) thick, 2-3 inches (5-7.5 cm) wide, and 12-18 inches (30-45 cm) long. Ensure one side is relatively flat.
    2. Flattening: Use your knife to create a flat, smooth surface on one side of the board. This is where the spindle will spin.
    3. Starter Divot: Near one edge, about 1/2 to 3/4 inch (1.2-2 cm) in, carve a small, shallow indentation. This is your starter divot. You can use the tip of your knife or even the spindle itself to bore a small pilot hole.
    4. Burn-In (Optional but Recommended): Before cutting the V-notch, use your spindle and bow to ‘burn in’ the divot. This creates a perfectly matched socket for your spindle, ensuring maximum contact and friction. Spin the spindle in the divot until it creates a dark, perfectly round depression.
    5. The V-Notch: From the edge of the fireboard, cut a V-shaped notch that extends into the burn-in divot. The notch should be about 1/8th to 1/4th of the way into the divot’s circumference. This notch is crucial; it allows the superheated wood dust (punk) to collect and breathe, forming the ember. The bottom of the V-notch should be directly under the center of the divot.

    2. The Spindle (Drill)

    1. Selection: Find a straight, round piece of the same soft, dry wood as your fireboard. It should be about 6-8 inches (15-20 cm) long and 1/2 to 3/4 inch (1.2-2 cm) in diameter.
    2. Shaping: Carve the spindle to be as round and straight as possible. The more uniform it is, the better it will spin.
    3. Ends:
      • Fireboard End: Carve this end into a slightly blunted cone or a rounded point. This helps it seat properly in the fireboard’s divot and allows for efficient dust production.
      • Handhold End: Carve this end into a sharper, smoother point. This reduces friction against the handhold, allowing the spindle to spin freely.

    3. The Bow

    1. Selection: Choose a strong, slightly curved branch about arm’s length (18-24 inches / 45-60 cm). It should be sturdy enough not to flex excessively when tensioned.
    2. Cordage Attachment: Secure your chosen cordage to both ends of the bow. A simple clove hitch or a series of half hitches works well. Ensure the cordage is tight enough that when the spindle is wrapped around it, there’s enough tension to grip the spindle firmly without slipping, but not so tight that it bows the stick excessively. You should be able to wrap the spindle around the string 1-2 times.

    4. The Handhold (Socket)

    1. Selection: Find a piece of very hard wood, stone, bone, or antler. It should fit comfortably in your hand.
    2. Creating the Socket: Carve or grind a smooth, deep indentation into the handhold. This socket will hold the top of the spindle. The smoother and deeper it is, the less friction it will create, allowing more energy to be transferred to the fireboard.
    3. Lubrication: Before use, apply a small amount of lubricant (earwax, animal fat, or a green leaf) into the handhold socket to further reduce friction.

    How to Build a Bow Drill From Scratch: Wood Selection, Carving, and Your First Ember
    How to Build a Bow Drill From Scratch: Wood Selection, Carving, and Your First Ember.

    Safety Tip: Always carve away from your body. Use a stable surface and maintain a firm grip on your knife and the wood. A sharp knife is safer than a dull one, as it requires less force and is less likely to slip.

    The Technique: Body Position, Pressure, Speed, and Common Mistakes

    Building the components is only half the battle; mastering the technique of using your bow drill is where the real skill lies. It requires coordination, rhythm, and consistent effort.

    1. Body Position

    • Stabilize the Fireboard: Kneel on your right knee (if right-handed) and place your left foot firmly on the fireboard to hold it steady. The V-notch should be pointing away from your body.
    • Bow Hand: Hold the bow in your right hand, with your elbow tucked into your side or resting on your knee for stability.
    • Handhold Hand: Hold the handhold in your left hand, pressing down on the top of the spindle. Your left wrist should be braced against your shin or knee for maximum stability and downward pressure.
    • Spindle Placement: Wrap the bow string around the spindle once (or twice if the string is long and loose) so that it grips firmly. Place the bottom of the spindle into the burn-in divot on the fireboard and the top into the handhold socket.

    2. Pressure and Speed

    This is the critical balance. You need enough downward pressure on the spindle to create significant friction, combined with enough speed from the bow to generate heat. Think of it as a three-stage process:

    1. Initial Burn-In: Start with moderate downward pressure and slow to moderate bow strokes. The goal here is to deepen the divot and create a small pile of fine, dark wood dust in the V-notch. You’ll see white smoke initially, which is mostly moisture burning off.
    2. Building Heat and Dust: Once you have a good pile of dust, increase both your downward pressure and the speed of your bow strokes. The smoke will become thicker, darker, and more acrid-smelling. This is the superheated wood dust. Maintain a consistent, full stroke with the bow, using your entire arm. The goal is to create a substantial pile of black dust that is actively smoking.
    3. The Push for the Ember: As the smoke becomes very thick and dark, indicating the dust is nearing ignition temperature, maintain maximum consistent pressure and speed for another 10-20 seconds. You are essentially ‘cooking’ the dust until it ignites. Do not stop until you see a small, glowing coal forming in the V-notch.

    Key Principle: Consistent, sustained effort is more important than bursts of intense speed. Find a rhythm and stick with it.

    Common Mistakes and How to Avoid Them:

    • Insufficient Downward Pressure: This is perhaps the most common mistake. Without enough pressure, you won’t generate enough friction or dust. Lean into the handhold with your body weight.
    • Inconsistent Speed/Pressure: Stopping and starting, or varying your pressure, cools down the dust and makes ember formation difficult. Maintain a steady rhythm.
    • Wrong Wood Selection: Using wet wood, resinous wood, or wood that’s too hard will prevent an ember from forming. Re-evaluate your materials.
    • Spindle Slipping on Bow String: If the spindle isn’t gripping the string, it won’t spin effectively. Ensure the string is tight enough and wrapped correctly. You can roughen the spindle slightly where the string contacts it.
    • V-Notch Issues: If the V-notch is too small, dust won’t accumulate. If it’s too wide, the dust will fall out too quickly or won’t get enough concentrated heat. Adjust as needed.
    • Handhold Friction: If your handhold is burning or creating too much friction, it’s stealing energy from the fireboard. Lubricate it or choose a harder material.
    • Stopping Too Soon: Many beginners stop when they see a lot of smoke, but before an ember has actually formed. Keep going for those extra crucial seconds after the smoke gets thick and dark.


    Safety Warning: Be mindful of your surroundings. Ensure there are no flammable materials near your fireboard other than your tinder bundle. Keep water or sand nearby if possible.

    From Ember to Flame: Building Your Tinder Bundle and Transferring the Coal

    Generating an ember is a huge accomplishment, but it’s only the first step. The real goal is a sustainable flame. This requires a well-prepared tinder bundle and careful transfer of your precious coal.

    1. Building Your Tinder Bundle

    A tinder bundle acts as a ‘bird’s nest’ for your ember, providing it with fine, easily ignitable material and plenty of airflow to grow into a flame.

    • Material Selection: Look for extremely fine, dry, fibrous materials that catch a spark or ember easily. Think ‘fluffy’ and ‘airy’.
    • Excellent Tinder Materials:
      • Inner Bark: Shredded inner bark of cedar, juniper, basswood, or poplar.
      • Cattail Fluff: The fluffy seeds from dried cattail heads.
      • Dry Grasses: Very fine, dry, dead grass, shredded.
      • Bird’s Nest Fungus (Fomes fomentarius): The inner layer (amadou) is highly prized.
      • Punk Wood: Very rotten, powdery wood.
      • Fine Wood Shavings: From very dry, soft wood.
      • Milkweed or Thistle Down: Very fine and fluffy.
    • Preparation: Gather a generous amount (about the size of a bird’s nest or a small football). Tease it apart thoroughly to maximize surface area and create air pockets. Form it into a loose, cup-shaped nest with a small depression in the center where you’ll place the ember. Keep it absolutely dry.

    2. Transferring the Coal

    This is a delicate moment. Your ember is fragile and can easily be extinguished by wind or rough handling.

    1. Prepare for Transfer: Once you see a clear, glowing coal in your V-notch, carefully lift the fireboard. The ember should be sitting in the dust pile.
    2. Gentle Tap: Gently tap the fireboard to dislodge the ember into your waiting tinder bundle. Position the tinder bundle directly underneath the V-notch before lifting the fireboard to minimize the distance the ember has to fall.
    3. Protect the Ember: Immediately cup the tinder bundle in your hands, protecting it from any wind.

    3. Blowing the Ember to Flame

    Now, you need to provide the ember with oxygen to grow.

    1. Gentle Blowing: Bring the tinder bundle close to your face and begin to blow gently and consistently onto the glowing ember. Do not blow too hard initially, as this can extinguish it.
    2. Increase Airflow: As the ember grows brighter and you see more smoke, gradually increase the intensity of your breath. You’ll feel the heat increasing.
    3. Watch for Flame: Continue blowing, rotating the bundle slightly to ensure even oxygen distribution, until you see a small flame erupt.
    4. Transfer to Kindling: Once you have a sustained flame, carefully place the entire tinder bundle into your pre-prepared fire lay (a small teepee or log cabin structure of fine kindling, followed by progressively larger fuel).

    How to Build a Bow Drill From Scratch: Wood Selection, Carving, and Your First Ember
    How to Build a Bow Drill From Scratch: Wood Selection, Carving, and Your First Ember.

    Crucial Tip: Have your tinder bundle and fire lay completely ready before you even start spinning the bow drill. Every second counts once you have an ember.

    Troubleshooting: Why Your Bow Drill Isn’t Working and How to Fix It

    It’s rare for a beginner to get an ember on their first try. The bow drill requires practice, patience, and the ability to diagnose problems. Here are common issues and their solutions:

    1. No Smoke or Only White Smoke

    • Problem: Insufficient friction or heat.
    • Fixes:
      • Wood is Wet: This is the most common culprit. Find drier wood. Even seemingly dry wood can have internal moisture.
      • Not Enough Downward Pressure: Lean into the handhold with more body weight.
      • Inconsistent Speed: Maintain a steady, fast rhythm with the bow.
      • Wrong Wood Combination: The fireboard and spindle might be too hard, too soft, or too dissimilar. Re-evaluate your wood choices.
      • Spindle Slipping: Ensure the bow string is wrapped tightly and gripping the spindle. Roughen the spindle if needed.

    2. Lots of Smoke, But No Ember

    • Problem: Dust is being produced and heated, but not reaching ignition temperature or not accumulating properly.
    • Fixes:
      • V-Notch Issues:
        • Too Small: Dust can’t accumulate or breathe. Widen the notch slightly.
        • Too Large: Dust falls out too quickly. Make sure the notch is only about 1/8th to 1/4th into the divot.
        • Not Deep Enough: The bottom of the notch should be directly under the center of the divot.
      • Stopping Too Soon: You need to maintain maximum pressure and speed for a sustained period (10-20 seconds) after the smoke turns thick and dark. Don’t quit prematurely.
      • Wood Too Hard: Even if it smokes, if the wood is too hard, the dust might not ignite. Try softer wood.
      • Wind: Even a slight breeze can cool the dust. Shield your fireboard from wind.

    3. Spindle Jams or Slips Constantly

    • Problem: Lack of smooth operation.
    • Fixes:
      • Bow String Too Loose: Tighten the string on your bow.
      • Spindle Not Round/Straight: Re-carve the spindle to be as uniform as possible.
      • Handhold Friction: Lubricate the handhold socket. Ensure the handhold end of the spindle is smooth and pointed.
      • Bow Strokes Too Short/Choppy: Use long, smooth, full strokes with the bow.

    4. Handhold Burns or Gets Too Hot

    • Problem: Excessive friction at the handhold.
    • Fixes:
      • Lubricate: Apply more lubricant (earwax, grease, green leaf) to the handhold socket.
      • Handhold Material Too Soft: Use a harder material for your handhold (stone, bone, very hard wood knot).
      • Spindle End Not Smooth: Re-carve the top of the spindle to be smoother and more pointed.

    5. Physical Fatigue

    • Problem: The bow drill is physically demanding.
    • Fixes:
      • Practice: As your muscles adapt, it will become easier.
      • Proper Form: Ensure your body position is stable and efficient, allowing you to use your body weight rather than just arm strength. Brace your handhold arm against your shin or knee.
      • Take Breaks: If you’re getting tired, take a short break, but try to get back to it quickly before the dust cools too much.

    Remember, the bow drill is a skill that improves with practice. Don’t get discouraged by initial failures. Analyze what went wrong, make adjustments, and try again. Each attempt teaches you something new about friction, wood, and your own technique. With persistence, you will master this ancient and vital survival skill.

    Frequently Asked Questions About the Bow Drill

    Q: What are the absolute best woods for a bow drill, especially for beginners?

    A: For beginners, Yucca stalk is often considered the easiest to work with due to its consistent softness and low resin content. Other excellent choices include Cottonwood, Aspen, Basswood, and Willow. The key is to ensure both the fireboard and spindle are made from the same, thoroughly dry, non-resinous, soft wood.

    Q: How long does it typically take to get an ember with a bow drill?

    A: With practice and optimal materials, an experienced user can get an ember in 30 seconds to 2 minutes of continuous spinning. For beginners, it can take much longer, often 5-10 minutes of sustained effort, or several attempts over a longer period. The time varies greatly depending on wood quality, technique, and environmental factors like humidity.

    Q: Can I use any string for the bow, like a shoelace?

    A: While a strong shoelace can work in a pinch, it’s not ideal. The best cordage is strong, non-stretching, and durable, such as paracord, leather, or rawhide. Natural fibers like twisted inner bark (cedar, basswood) or yucca fibers can also be used. Avoid stretchy materials, as they absorb energy and can make the spindle slip.

    Q: What’s the most common mistake beginners make when trying to use a bow drill?

    A: The most common mistake is insufficient and/or inconsistent downward pressure on the handhold. Many beginners focus too much on speed and not enough on pressing down firmly and consistently. Without enough pressure, you won’t generate the necessary friction and heat to create an ember, even if you’re spinning quickly.

    Q: How do I keep my handhold from burning or creating too much friction?

    A: To prevent the handhold from burning, ensure you’re using a hard, smooth material (like a hardwood knot, stone, bone, or antler) for the handhold itself. Crucially, lubricate the socket with a small amount of natural grease (earwax, animal fat) or even a fresh green leaf. This significantly reduces friction at the handhold, allowing more energy to be directed to the fireboard.

  • How to Build a Bushcraft Meat Smoker in the Wild: Pit, Tripod, and Teepee Designs

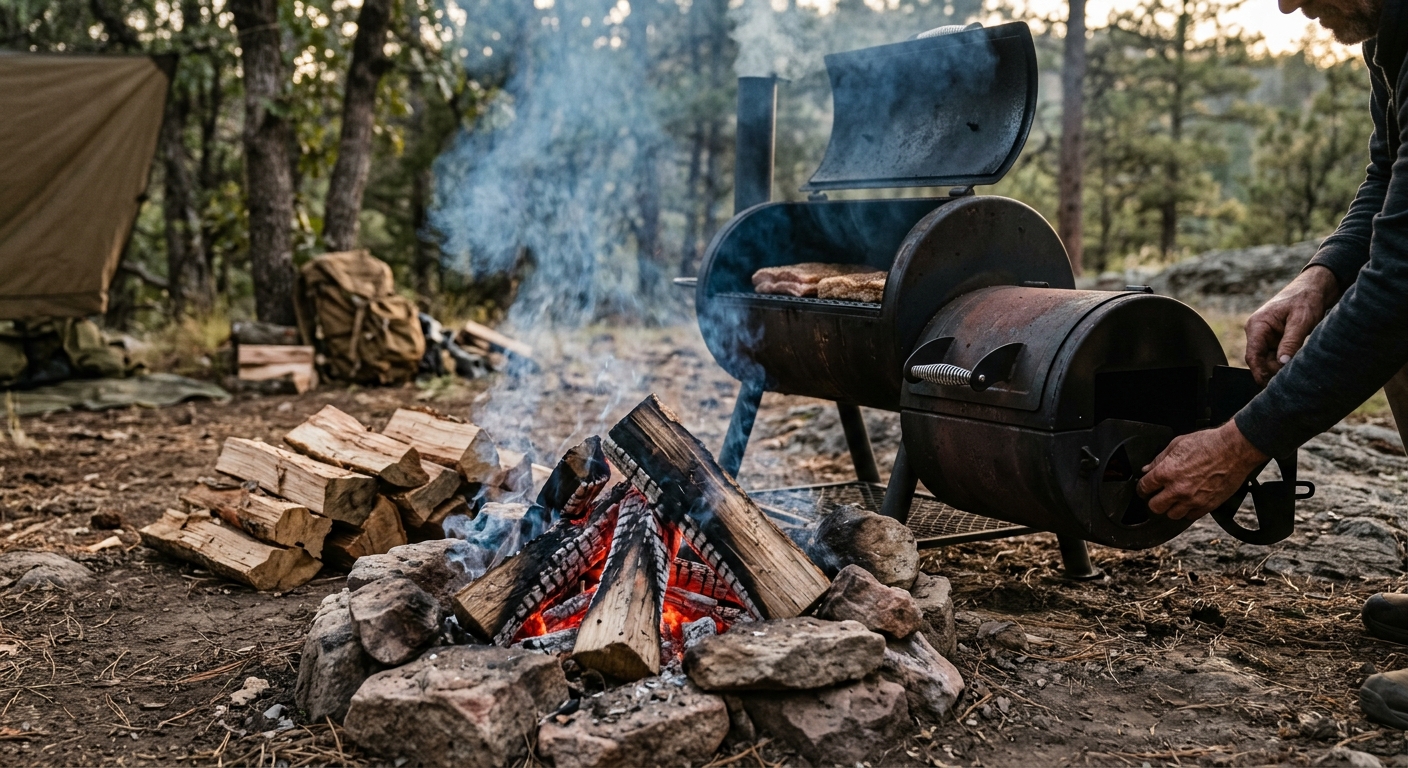
    How to Build a Bushcraft Meat Smoker in the Wild: Pit, Tripod, and Teepee Designs

    How to Build a Bushcraft Meat Smoker in the Wild: Pit, Tripod, and Teepee Designs

    In a survival scenario, securing food is paramount, but preserving it is often overlooked until it’s too late. When you’ve successfully hunted or fished, you’re faced with a perishable resource that demands immediate attention. Learning how to smoke meat in the wild is one of the most effective and ancient methods for extending the shelf life of your protein, transforming a temporary bounty into a sustainable food source. This guide will walk you through three distinct bushcraft smoker designs – the Dakota Pit, the Tripod, and the Teepee – equipping you with the knowledge to preserve your harvest, whether for a few days or several weeks.

    Related TacticalProof reading: How to Brain Tan a Deer Hide Into Buckskin: The Complete Bushcraft Guide | How to Make Pemmican: The Ultimate Survival Food That Lasts for Years

    Why Smoking Is the Best Field Preservation Method

    Meat spoilage is primarily caused by microbial growth (bacteria, mold, yeast) and oxidation. In a wilderness setting, refrigeration is non-existent, and time is always against you. While methods like drying (jerky) or salting are effective, smoking offers a unique combination of benefits:

    • Dehydration: Smoke carries heat, which helps to dry the surface of the meat, reducing its moisture content. Lower moisture inhibits bacterial growth.
    • Antimicrobial Properties: Smoke contains phenolic compounds, acids, and other chemicals that are natural antimicrobials. These compounds deposit on the meat’s surface, creating a hostile environment for spoilage organisms.
    • Antioxidant Effects: Some smoke compounds act as antioxidants, slowing down the rancidification of fats.
    • Flavor Enhancement: Beyond preservation, smoking imparts a distinct, desirable flavor to the meat, making it more palatable.
    • Pest Deterrent: The smoke itself can deter insects and other small scavengers from the meat during the process.

    Compared to simple air drying, smoking provides an extra layer of protection, making it a superior choice for primitive meat smoking when long-term preservation is critical.

    Hot Smoking vs Cold Smoking: When to Use Each

    Before you build, understand the two primary types of smoking, as they dictate your design and purpose:

    Hot Smoking

    • Temperature Range: Typically 180°F to 275°F (82°C to 135°C).
    • Process: The meat is cooked and smoked simultaneously. The high temperature cooks the meat to a safe internal temperature, while the smoke imparts flavor and some preservation.
    • Purpose: Primarily for cooking and immediate consumption, or short-term preservation (a few days, similar to cooked meat). It’s faster than cold smoking.
    • Safety: Because the meat reaches safe cooking temperatures, the risk of foodborne illness is significantly reduced, provided proper internal temperatures are met.

    Cold Smoking

    • Temperature Range: Below 80°F (27°C), ideally 60-70°F (15-21°C). The critical point is that the meat remains uncooked.
    • Process: The meat is exposed to smoke for an extended period (hours to days) at low temperatures. The goal is not to cook but to infuse smoke flavor, dehydrate, and deposit antimicrobial compounds.
    • Purpose: Long-term preservation. Cold smoked meat is often further dried or cured to maximize shelf life. This is the method you’d use for true survival meat preservation.
    • Safety: This is the more challenging and potentially risky method. Since the meat doesn’t reach bacterial kill temperatures, proper curing (salting/brining) beforehand is crucial. The smoke itself provides some protection, but it’s not a substitute for proper curing and careful temperature management to prevent bacterial growth. Always ensure good airflow and low humidity.

    For true survival preservation, you’ll lean towards cold smoking, but hot smoking can be useful for preparing a meal that needs to last a day or two longer than fresh meat.

    Design 1: The Dakota Pit Smoker

    The Dakota Pit Smoker is a versatile design, often used for hot smoking, but adaptable for warm smoking if you manage your fire carefully. It’s essentially an underground oven that channels smoke. This design is excellent for discreet operation and efficient heat retention.

    Materials Needed:

    • Shovel or digging tool
    • Rocks (for fire pit and heat retention)
    • Green wood branches (for grate/rack)
    • Large flat rock or piece of bark (for lid)
    • Meat to be smoked

    Construction Steps:

    1. Dig the Fire Pit: Start by digging a small, deep fire pit, about 12-18 inches (30-45 cm) in diameter and 18-24 inches (45-60 cm) deep. This will be your primary heat and smoke source. Line the bottom and sides with rocks to retain heat and create a more durable pit.
    2. Dig the Smoke Channel: From the bottom of the fire pit, dig a horizontal tunnel (the smoke channel) approximately 3-4 feet (90-120 cm) long, sloping slightly upwards. The diameter should be about 6-8 inches (15-20 cm). This channel will direct smoke and some heat to your smoking chamber.
    3. Dig the Smoking Chamber: At the end of the smoke channel, dig a larger, shallower pit. This will be your smoking chamber. It should be wide enough to accommodate your meat, perhaps 2-3 feet (60-90 cm) in diameter and 12-18 inches (30-45 cm) deep.
    4. Create the Grate/Rack: Find several sturdy, green wood branches (e.g., oak, maple, hickory – avoid resinous woods). Lay them across the top of the smoking chamber to form a grate. Ensure they are strong enough to hold your meat without collapsing. Green wood is crucial here to prevent them from burning through quickly.
    5. Seal the Chamber: Once the meat is placed on the grate, cover the smoking chamber with a large flat rock, a piece of bark, or even a layer of sod and dirt. Leave a small gap for ventilation and smoke to escape, or create a small vent hole on the opposite side of the smoke channel.
    6. Build the Air Intake: For the fire pit, you’ll need an air intake. Dig a small, shallow trench from the surface down to the bottom of the fire pit. This provides oxygen for your fire.

    Operation:

    Build a small, smoldering fire in the fire pit using hardwoods. The goal is smoke, not roaring flames. Adjust the air intake and the lid of the smoking chamber to control temperature and smoke flow. For hot smoking, you’ll want a more active fire. For warmer smoking, a smaller, more controlled fire is better. Monitor the meat and replenish wood as needed.

    Operation:
    Operation:: Operation:.

    Design 2: The Tripod Smoker With Green-Wood Rack

    This is perhaps the simplest and most common above-ground bushcraft smoker, ideal for hot or warm smoking. It’s quick to set up and requires minimal digging.

    Materials Needed:

    • Three sturdy, straight green wood poles (6-8 feet / 1.8-2.4 m long) for the tripod frame
    • Smaller green wood branches for the rack/grate
    • Cordage or natural lashing material (vines, inner bark)
    • Meat to be smoked

    Construction Steps:

    1. Form the Tripod: Lash the three long poles together at one end, about 1-2 feet (30-60 cm) from the top. Spread the unlashed ends to form a stable tripod. The height should allow your meat to hang well above the fire, typically 3-4 feet (90-120 cm) off the ground.
    2. Build the Hanging Rack: Find several smaller, straight green wood branches. These will form your rack. You can either:
      • Cross-members: Lash two or three branches horizontally between the tripod legs, creating a platform.
      • Hanging Sticks: Use individual sticks to pierce and hang smaller pieces of meat directly from the tripod apex or cross-members.

      Ensure the rack is sturdy and can support the weight of your meat.

    3. Prepare the Fire Pit: Clear a small area directly beneath the center of the tripod. This will be your fire pit. Line it with a few rocks if available, but it’s not strictly necessary for this design.
    4. Add a Cover (Optional but Recommended): For better smoke retention and temperature control, you can drape a large piece of bark, a tarp, or even large leaves over the top of the tripod, leaving gaps for smoke to escape. This creates a more enclosed smoking environment.

    Operation:

    Hang or place your meat on the green wood rack. Build a small, smoldering fire directly beneath the meat. The key is to keep the fire small and smoky, not flaming. You want to generate a consistent stream of smoke and gentle heat. Adjust the fire size and distance of the meat from the fire to control the temperature. This design is excellent for hot smoking fish or smaller cuts of meat.

    Practical Tip: To prevent the meat from falling into the fire, ensure your hanging sticks are robust and the meat is securely attached. For larger cuts, consider tying them with natural cordage before hanging.

    Design 3: The Teepee Cold Smoker for Long-Term Preservation

    This design is specifically geared towards cold smoking meat outdoors for extended preservation. It requires more effort but yields the best results for long-term storage. The critical element is separating the smoke source from the smoking chamber to ensure the smoke cools before reaching the meat.

    Materials Needed:

    • Several long, sturdy poles (8-12 feet / 2.4-3.6 m) for the teepee frame
    • Smaller green wood branches for internal racks/hangers
    • Cordage or natural lashing material
    • Shovel or digging tool
    • Rocks (optional, for fire pit)
    • Large leaves, bark, sod, or a tarp for covering the teepee
    • Meat to be smoked (often pre-cured)

    Construction Steps:

    1. Dig the Fire Pit: Choose a location for your fire pit. Dig a small pit, similar to the Dakota Pit, about 12-18 inches (30-45 cm) deep. This will be your smoke generator.
    2. Dig the Smoke Channel: From the fire pit, dig a long, shallow trench (the smoke channel) leading to where your teepee will stand. This channel should be at least 6-10 feet (1.8-3 m) long, and ideally longer, to allow the smoke to cool significantly as it travels. The channel should be about 6-8 inches (15-20 cm) wide and deep.
    3. Construct the Teepee Frame: At the end of the smoke channel (opposite the fire pit), erect a teepee-style frame using your long poles. Lash them together at the top and spread the bases to create a stable, conical structure. The base diameter should be large enough to comfortably hold your meat, perhaps 4-6 feet (1.2-1.8 m).
    4. Build Internal Racks/Hangers: Inside the teepee, lash smaller green wood branches horizontally at various heights to create racks or hanging points for your meat. Ensure good airflow around each piece of meat.
    5. Cover the Teepee: Drape large leaves, bark, sod, or a tarp over the teepee frame. Leave a small opening at the very top for smoke to vent, and ensure the bottom edges are sealed to the ground to prevent smoke from escaping prematurely. The goal is to create an enclosed chamber where cool smoke can circulate.
    6. Cover the Smoke Channel: Cover the entire smoke channel with flat rocks, bark, or sod to force the smoke to travel through the channel and cool down before entering the teepee.

    Operation:

    Build a very small, smoldering fire in the fire pit. Use damp wood or green wood to generate maximum smoke with minimal heat. The smoke will travel through the channel, cooling as it goes, and then fill the teepee. Hang your pre-cured meat inside. This process can take days, even weeks, depending on the size of the meat and desired preservation level. Monitor the temperature inside the teepee – it should remain cool to the touch. Replenish the smoldering wood regularly.

    Safety Warning: Cold smoking operates at temperatures below the danger zone for bacterial growth. Therefore, proper pre-curing (e.g., salting, brining) of the meat is absolutely essential before cold smoking for long-term preservation. Without it, you risk serious foodborne illness. Ensure excellent airflow within the teepee to prevent condensation, which can promote mold growth.

    Wood Selection Guide: What to Burn and What to Avoid

    The type of wood you use dramatically impacts the flavor of your smoked meat and, critically, its safety. Always use natural, untreated wood.

    Good Smoking Woods (Hardwoods):

    • Hickory: Strong, smoky, bacon-like flavor. Excellent for pork, beef, and game.
    • Oak: Medium to strong flavor, versatile. Good for beef, lamb, pork, and heavy game.
    • Maple: Mild, sweet flavor. Good for pork, poultry, and fish.
    • Apple/Cherry/Peach (Fruitwoods): Mild, sweet, fruity flavor. Excellent for poultry, pork, fish, and lighter meats.
    • Alder: Very mild, delicate flavor. Ideal for fish and poultry.
    • Mesquite: Very strong, earthy, distinctive flavor. Best used sparingly, primarily for beef and some game.
    • Pecan: Milder than hickory, with a nutty, sweet flavor. Good for poultry, pork, and beef.

    Practical Tip: For generating smoke, use wood that is slightly damp or green (not soaking wet, which produces bitter smoke). This helps it smolder rather than burn with a flame. Avoid bark, as it can impart a bitter taste.

    Woods to Avoid (Softwoods and Others):

    • Pine, Fir, Spruce, Cedar (Conifers/Resinous Woods): These woods contain high levels of resin and sap. Burning them produces acrid, bitter smoke that will ruin your meat and can deposit harmful compounds. Never use them for smoking.
    • Eucalyptus: Contains strong oils that can make meat taste medicinal.
    • Sycamore: Can impart an unpleasant flavor.
    • Poisonous Woods: Avoid any wood you cannot positively identify as safe, especially those known to be poisonous (e.g., oleander, yew, laburnum).
    • Treated or Painted Wood: Absolutely never use wood that has been painted, stained, pressure-treated, or otherwise chemically altered. These release toxic fumes when burned.
    • Moldy or Rotten Wood: Can impart off-flavors and potentially harmful spores.

    When in doubt, stick to common fruitwoods or hardwoods like oak and maple. Always aim for clean, dry (but not bone-dry for smoke generation) wood from known safe species.

    Woods to Avoid (Softwoods and Others):
    Woods to Avoid (Softwoods and Others):: Woods to Avoid (Softwoods and Others):.

    Meat Prep, Smoking Times, and How Long Smoked Meat Actually Lasts

    Proper preparation and understanding the limits of preservation are crucial for success and safety.

    Meat Preparation:

    1. Clean and Butcher: Remove any undesirable parts, excess fat (which can go rancid), and thoroughly clean the meat. Cut meat into manageable pieces. Smaller, thinner pieces will smoke and dry faster.
    2. Salting/Brining (Essential for Cold Smoking): For long-term preservation, especially with cold smoking, meat must be cured. Rubbing meat generously with salt (dry cure) or soaking it in a strong saltwater solution (brine) draws out moisture and inhibits bacterial growth. A common dry cure ratio is 1 tablespoon of salt per pound of meat, rubbed thoroughly and allowed to sit for 12-24 hours per inch of thickness, then rinsed.
    3. Drying/Pellicle Formation: After curing (if applicable) and before smoking, pat the meat dry and allow it to air dry for several hours until a tacky, slightly shiny surface (pellicle) forms. This pellicle helps smoke adhere to the meat and prevents moisture from condensing on the surface, which can lead to mold.
    4. Hanging/Racking: Ensure meat pieces are hung or placed on racks so that smoke can circulate freely around all surfaces. Avoid overcrowding.

    Smoking Times:

    • Hot Smoking: This is more akin to cooking. Times vary greatly by meat type, thickness, and desired doneness. Poultry might take 2-4 hours, larger cuts of beef or pork 4-8+ hours, until internal temperatures reach safe levels (e.g., 165°F for poultry, 145-160°F for pork/beef).
    • Warm Smoking: Similar to hot smoking but at lower temperatures (120-180°F / 49-82°C). This extends cooking time but allows for more smoke penetration. Still aims for safe internal temperatures.
    • Cold Smoking: This is a much longer process, focused on preservation. It can range from 12 hours for small fish fillets to several days or even weeks for larger cuts of meat, depending on the desired dryness and smoke intensity. The goal is significant dehydration and smoke infusion, not cooking.

    How Long Smoked Meat Actually Lasts:

    This is highly dependent on the smoking method, initial preparation, and storage conditions.

    • Hot Smoked Meat: Similar to any cooked meat. In cool, dry conditions, it might last 2-4 days. Refrigeration (if available) extends this. Without refrigeration, consume quickly.
    • Warm Smoked Meat: Slightly better than hot smoked due to more dehydration and smoke penetration. Perhaps 3-5 days in cool, dry conditions.
    • Cold Smoked Meat (Properly Cured and Dried): This is where the true preservation lies.
      • Short-term (1-2 weeks): If well-smoked and dried, in a cool, dry, airy environment.
      • Medium-term (1-3 months): With extensive cold smoking, significant dehydration, and proper storage (e.g., wrapped in breathable cloth, hung in a cool, dark, dry place with good airflow).
      • Long-term (3+ months): Requires very aggressive cold smoking, near-complete dehydration (like jerky), and ideal storage conditions. This is challenging to achieve reliably in primitive settings without further processing (e.g., vacuum sealing, which isn’t primitive).

    Crucial Consideration: In a true survival situation, always err on the side of caution. If meat smells off, feels slimy, or shows any signs of mold (beyond the desired smoke pellicle), do not consume it. The goal is survival, not food poisoning. The drier and saltier the meat, the longer it will last. Always store smoked meat in a cool, dry, well-ventilated area, protected from pests.

    Frequently Asked Questions About Primitive Meat Smoking

    Q: Is cold smoked meat safe to eat without further cooking?

    A: Yes, if it has been properly cured (salted/brined) beforehand and smoked for a sufficient duration to achieve significant dehydration and smoke penetration. The curing process inhibits bacterial growth, and the smoke adds further antimicrobial protection. However, if not properly cured, cold smoked meat can be dangerous as it doesn’t reach temperatures that kill bacteria.

    Q: How do I control the temperature in a primitive smoker?

    A: Temperature control is primarily achieved by managing your fire. For hot smoking, use a small, consistent fire with dry wood. For cold smoking, use a very small, smoldering fire with slightly damp or green wood to produce more smoke and less heat. Adjust the distance of the meat from the fire (tripod), the size of the fire pit and air intake (Dakota pit), or the length of the smoke channel (teepee) to regulate heat. More airflow generally means a hotter fire; restricting airflow (without suffocating the fire) can lead to more smoke and less heat.

    Q: What if I don’t have ideal smoking wood?

    A: If you lack traditional hardwoods, prioritize safety. Avoid all resinous softwoods (pine, fir, spruce) and treated woods. If you can’t identify safe hardwoods, look for fruit-bearing trees (apple, cherry, pear) or nut-bearing trees (oak, maple, pecan) that are generally safe. In a dire situation, any non-toxic, non-resinous wood that produces a tolerable smoke might be used, but be prepared for potentially less desirable flavors. Always test a small piece first.

    Q: Can I smoke fish using these methods?

    A: Absolutely! Fish is an excellent candidate for both hot and cold smoking. Smaller fish or fillets are ideal for the Tripod Smoker (hot smoke) or the Teepee Smoker (cold smoke). For cold smoking fish, a strong brine or salt cure is even more critical due to fish’s delicate nature and higher moisture content. Ensure fish is gutted and cleaned thoroughly before smoking.

    Q: How long does it take to cold smoke meat for preservation?

    A: The duration varies significantly based on the meat’s thickness, fat content, ambient humidity, and desired preservation level. Small cuts or fish fillets might take 12-24 hours. Larger cuts of meat can require several days, or even weeks, of continuous or intermittent smoking. The goal is to achieve significant dehydration and a deep smoke penetration, not just surface flavor. You’ll know it’s ready when the meat is firm, dry to the touch, and has a rich, smoky aroma and color.

  • The 10-Item Minimalist Bushcraft Kit: What to Carry When You Want to Carry Almost Nothing

    The 10-Item Minimalist Bushcraft Kit: What to Carry When You Want to Carry Almost Nothing

    The 10-Item Minimalist Bushcraft Kit: What to Carry When You Want to Carry Almost Nothing

    In a world often obsessed with accumulating more gear, the philosophy of minimalist bushcraft offers a refreshing counter-narrative. It’s about stripping away the non-essentials, relying instead on skill, knowledge, and a carefully curated selection of multi-functional tools. This article will guide you through building a truly effective minimalist bushcraft kit, focusing on just ten core items that will empower you to thrive in the wilderness with an ultralight bushcraft essentials loadout.

    Forget the heavy packs and endless gadgets. Our goal is to demonstrate how a well-chosen, lightweight bushcraft gear list, combined with honed skills, can provide everything you need for shelter, fire, water, and food procurement. This isn’t just about saving weight; it’s about fostering a deeper connection with nature, enhancing your self-reliance, and proving that less truly can be more when it comes to your bushcraft loadout.

    The Philosophy of Minimalist Bushcraft: Skill Replaces Gear

    Minimalist bushcraft is not about deprivation; it’s about liberation. It’s a deliberate choice to prioritize knowledge and capability over material possessions. The core tenet is simple: every item you carry should serve multiple purposes, and every skill you possess should reduce the need for specialized equipment.

    Imagine moving through the forest unburdened, your senses heightened, your mind focused on the environment rather than the weight on your back. This is the promise of a minimalist approach. It forces you to learn, to adapt, and to truly understand the natural world around you. Instead of pulling out a dedicated tool for every task, you learn to improvise, to use natural resources, and to leverage the inherent versatility of your few chosen items.

    This philosophy cultivates resilience. When you know how to build a debris hut with nothing but your hands and a knife, you’re not dependent on a tent. When you can start a fire with a ferro rod and natural tinder, you’re not reliant on a lighter that might run out of fuel. This shift in mindset transforms potential survival scenarios from daunting challenges into opportunities to apply your hard-earned skills.

    Benefits of a Minimalist Bushcraft Kit:

    • Reduced Weight: Lighter pack means less fatigue, faster travel, and greater agility.
    • Enhanced Skill Development: Forces you to learn and practice core bushcraft skills more thoroughly.
    • Deeper Connection to Nature: Less gear means more interaction with the environment and its resources.
    • Increased Self-Reliance: Builds confidence in your ability to handle unexpected situations.
    • Cost-Effective: Investing in a few high-quality, multi-functional items is often cheaper than a vast array of specialized gear.

    Safety Warning: While the goal is minimalism, never compromise on safety. Always ensure you have the fundamental skills to back up your limited gear. Practice in controlled environments before venturing into remote areas. Know your limits and understand the specific risks of your chosen environment.

    The Core 10 Items and Why Each Earns Its Place

    Every item on this minimalist bushcraft gear list has been selected for its versatility, durability, and essential function. They are the bedrock upon which your wilderness capabilities are built. Here are the ten items that form the ultimate ultralight bushcraft essentials kit:

    1. Fixed Blade Knife: The most fundamental tool.
    2. Folding Saw: Efficient wood processing.
    3. Ferro Rod: Reliable fire starter.
    4. Prepared Tinder (Char Cloth/Fatwood): Ensures quick fire ignition.
    5. Tarp (8×10 ft or similar): Versatile shelter.
    6. 50 Feet of 550 Paracord: Essential cordage for countless tasks.
    7. Metal Water Bottle (Stainless Steel/Titanium): For hydration and boiling.
    8. Headlamp with Spare Batteries: Hands-free illumination.
    9. Map and Compass: Non-electronic navigation.
    10. Small First-Aid/Repair Kit: Essential for minor injuries and gear fixes.

    Each of these items is a workhorse, capable of performing multiple roles, making them indispensable components of any effective bushcraft loadout.

    Cutting Tools: Fixed Blade Knife and Folding Saw Selection

    Your cutting tools are arguably the most critical part of your minimalist bushcraft kit. They enable you to process wood for fire and shelter, prepare food, and perform countless other tasks.

    Fixed Blade Knife: The Heart of Your Kit

    A good fixed blade knife is the single most important tool in your bushcraft loadout. It’s an extension of your hand, capable of everything from fine carving to batoning firewood.

    • Full Tang Construction: This is non-negotiable. The blade steel should extend through the entire handle, providing maximum strength and preventing breakage during heavy use (e.g., batoning).
    • Blade Steel:
      • High Carbon Steel (e.g., 1095, O1): Excellent edge retention, easy to sharpen in the field, very tough. However, it rusts easily if not maintained. Ideal for serious bushcraft.
      • Stainless Steel (e.g., 440C, S30V): More corrosion resistant, requires less maintenance. Can be harder to sharpen in the field but holds an edge well. Good for wet environments.

      For a minimalist kit, many prefer high carbon steel for its ease of field sharpening and robustness, provided you commit to proper care.

    • Grind Type:
      • Scandi Grind: A very popular choice for bushcraft. It has a single, large bevel that makes it excellent for carving, feather sticking, and woodworking. Easy to sharpen consistently.
      • Flat Grind: A good all-around grind, strong and good for slicing.
      • Convex Grind: Very strong edge, good for chopping and heavy work, but harder to sharpen without specialized equipment.

      A Scandi grind is often recommended for its bushcraft-specific performance.

    • Blade Length: A blade between 4 to 6 inches is ideal. Shorter blades lack leverage for batoning, while longer blades can be cumbersome for fine work and add unnecessary weight.
    • Handle Material and Ergonomics: Choose a handle that feels secure and comfortable in your hand, even when wet or cold. Materials like Micarta, G10, or even quality wood are durable. Avoid slick plastics.
    • Maintenance: Keep your knife clean, dry, and sharp. Learn to use a sharpening stone or ceramic rod effectively. A light coating of oil (mineral oil for food prep, or gun oil for general use) will protect carbon steel.
    • Safety: Always cut away from your body. Use a sturdy sheath that protects the blade and secures the knife. Never throw your knife.

    Concrete Example: Knives from Mora (e.g., Garberg), ESEE (e.g., 4 or 5), or Benchmade (e.g., Bushcrafter) are excellent, proven choices for a durable, reliable bushcraft knife.

    Folding Saw: Efficient Wood Processing

    While an axe is a traditional bushcraft tool, a folding saw is a far more efficient and safer option for processing smaller to medium-sized wood in a minimalist kit. It’s lighter, quieter, and requires less skill to use effectively than an axe.

    • Blade Length: A blade between 7 to 10 inches offers a good balance of cutting efficiency and packability.
    • Tooth Geometry: Look for aggressive, sharp teeth designed for green or dry wood. Many saws are optimized for one or the other; a general-purpose saw is best for a minimalist kit.
    • Locking Mechanism: Ensure the blade locks securely in both the open and closed positions to prevent accidental injury.
    • Handle: A comfortable, non-slip handle is crucial for sustained use.
    • Safety: Always use two hands when possible. Keep fingers clear of the blade. Store it folded and locked.

    Concrete Example: Silky Gomboy or Bahco Laplander are highly regarded folding saws that are lightweight, durable, and exceptionally effective.

    Folding Saw: Efficient Wood Processing
    Folding Saw: Efficient Wood Processing: Folding Saw: Efficient Wood Processing.

    Fire Kit: Ferro Rod, Char Cloth, and Redundancy Without Bulk

    The ability to make fire is paramount for warmth, cooking, water purification, signaling, and morale. Your minimalist bushcraft kit‘s fire-starting components must be reliable and compact.

    Ferro Rod: The Indestructible Spark

    A ferrocerium rod (ferro rod) is superior to matches or lighters for long-term wilderness use. It works when wet, lasts for thousands of strikes, and requires no fuel.

    • Size: A rod of at least 3/8 inch diameter and 4-6 inches long is ideal for ease of use and longevity.
    • Striker: While the back of your knife spine can work, a dedicated striker often produces more consistent sparks. Ensure your knife spine has a sharp, 90-degree edge for optimal performance.
    • Technique: Practice striking the rod firmly and consistently to direct a shower of sparks onto your tinder bundle. Learn to create feather sticks from dry wood to aid ignition.
    • Safety: Always strike away from your body and ensure sparks are directed safely towards your tinder, away from flammable materials you don’t intend to ignite.

    Prepared Tinder: Char Cloth and Beyond

    Even the best ferro rod is useless without good tinder. Prepared tinder ensures you can get a fire going quickly, even in damp conditions. This is where skill and preparation truly shine in a minimalist bushcraft kit.

    • Char Cloth: Easily made from cotton fabric (old jeans, t-shirts) by heating it in a sealed tin. It ignites instantly from a single spark and glows, allowing you to transfer the ember to a larger tinder bundle. Carry a small, waterproof tin filled with char cloth.
    • Fatwood: Resinous pine wood, often found in stumps or dead branches. It’s naturally waterproof and burns hot and long. Shave fine curls or dust from a piece of fatwood to catch a spark.
    • Natural Tinder: Develop skills in identifying and processing natural tinder: birch bark (especially the papery outer layers), cattail fluff, cedar bark fibers, dried grasses, and fine wood shavings.
    • Waterproof Container: Keep your prepared tinder dry in a small, sealed bag or tin.

    Redundancy: While the ferro rod and prepared tinder are your primary fire starters, consider carrying a small, disposable lighter or waterproof matches as a secondary backup, especially in very wet or cold conditions. This is a small concession for significant safety.

    Shelter and Cordage: One Tarp and 50 Feet of Paracord

    Shelter from the elements is a primary survival need. In a minimalist bushcraft kit, a single tarp, combined with your cordage and knowledge, provides versatile protection.

    Tarp: Your Flexible Home

    A lightweight tarp offers more versatility than a tent in many bushcraft scenarios. It can be pitched in numerous configurations to adapt to different weather conditions and environments.

    • Material:
      • Silnylon (silicone-impregnated nylon): Excellent strength-to-weight ratio, very waterproof, compacts well.
      • Silpoly (silicone-impregnated polyester): Similar to silnylon but absorbs less water and stretches less when wet.
      • Cuben Fiber (DCF): Extremely lightweight and strong, but very expensive and less durable against abrasion.

      For a balance of durability, weight, and cost, silnylon or silpoly are excellent choices.

    • Size: An 8×10 foot or 10×10 foot tarp is a good general-purpose size, offering enough coverage for one person and gear, with room for various pitches.
    • Tie-Outs: Ensure the tarp has reinforced grommets or webbing loops at the corners and along the edges for secure pitching.
    • Versatility: Learn various tarp pitches: A-frame, lean-to, plow point, half-pyramid, C-frame. Each offers different levels of protection from wind, rain, or sun.
    • Site Selection: Choose a pitching location that is relatively flat, free of deadfall, and offers natural windbreaks if possible. Consider drainage.
    • Safety: Ensure adequate ventilation to prevent condensation and carbon monoxide buildup if using a fire nearby.

    50 Feet of 550 Paracord: The Multi-Tool of Cordage

    Paracord (specifically 550 type) is incredibly strong for its weight and has a multitude of uses, making it an essential part of your ultralight bushcraft essentials.

    • Strength and Versatility: 550 paracord has a minimum breaking strength of 550 pounds. Its seven inner strands can be pulled out and used for finer tasks like fishing line, snare wire (ethically and legally), sewing thread, or dental floss.
    • Uses:
      • Tarp Pitching: Main ridgeline, guy lines.
      • Lashing: Building shelters, tripods, drying racks.
      • Repairs: Mending gear, shoelaces.
      • Trapping/Snaring: (Use with caution and only if legally permitted and ethically justified for survival).
      • First Aid: Tourniquet (as a last resort), sling.
      • Navigation: Measuring distances, creating markers.
    • Knots: Master a few essential knots: the Bowline (for creating a non-slip loop), the Taut-Line Hitch (for adjustable tension on guy lines), and the Trucker’s Hitch (for creating mechanical advantage).

    Water and Cook Kit: Metal Bottle That Doubles as a Pot

    Access to safe drinking water is non-negotiable. Your minimalist bushcraft kit addresses this with a single, multi-functional item.

    Metal Water Bottle/Pot: Hydration and Cooking

    A single-wall metal water bottle is a cornerstone of minimalist bushcraft. Unlike plastic bottles, it can be placed directly into a fire to boil water, making it your primary water purification and cooking vessel.

    • Material:
      • Stainless Steel: Durable, affordable, and excellent for direct fire use. Heavier than titanium.
      • Titanium: Extremely lightweight, strong, and heats up quickly. More expensive than stainless steel.

      For a minimalist kit, stainless steel offers a great balance of cost, durability, and performance.

    • Capacity: A 32-40 oz (1-1.2 liter) bottle is a good size, providing enough water for immediate hydration and boiling.
    • Single-Wall Construction: Crucial for direct fire use. Double-wall (insulated) bottles will explode if heated.
    • Nesting: Some metal bottles are designed to nest with a cup or even a small stove, further enhancing their multi-functionality.
    • Water Purification: Boiling is the most reliable method for killing pathogens. Bring water to a rolling boil for at least one minute (longer at higher altitudes).
    • Cooking: Use your bottle to boil water for rehydrating freeze-dried meals, making tea/coffee, or even cooking simple foraged foods.
    • Safety: Always use a stick or a piece of cordage to handle a hot bottle. Allow it to cool before drinking directly. Source water from flowing streams or springs whenever possible, avoiding stagnant water.

    Tip: While boiling is your primary method, consider carrying a small pack of water purification tablets (e.g., iodine or chlorine dioxide) as a lightweight backup for situations where boiling isn’t feasible or time is critical. These don’t count as a core item but are a smart addition if space allows.

    What NOT to Carry: Common Gear That Skill Makes Redundant

    A crucial aspect of building a minimalist bushcraft kit is understanding what you can leave behind. This isn’t about being unprepared; it’s about replacing gear with knowledge and skill. Every item you omit reduces weight and encourages deeper learning.

    • Heavy Axe: While an axe is a classic bushcraft tool, for a truly minimalist loadout, your fixed blade knife and folding saw can handle almost all wood processing tasks. The saw is more efficient for cutting, and the knife can baton smaller logs and perform fine carving. Learning proper wood processing techniques with these two tools makes an axe redundant for many scenarios.
    • Large, Dedicated Sleeping Bag: In many environments, a tarp, combined with natural insulation (leaves, pine needles, moss) and a well-constructed debris hut or insulated bed, can provide adequate warmth. Layered clothing is also key. For colder climates, a lightweight emergency bivy or quilt might be a minimalist compromise, but the goal is to rely on natural shelter building skills.
    • Multiple Cooking Pots/Utensils: Your metal water bottle serves as your pot. A sturdy stick can be carved into a spoon or stirring implement. You don’t need a separate frying pan or a full mess kit.
    • Extensive First-Aid Kit: While a basic first-aid/repair kit is on our list, a large, comprehensive kit is often unnecessary for short trips. Focus on trauma care (bandages, antiseptic wipes, pain relievers, blister treatment) and learn basic field first aid. Knowledge of medicinal plants can also reduce reliance on pharmaceuticals, though this requires significant study and caution.
    • GPS Device/Power Bank: For true self-reliance, master map and compass navigation. A GPS is a convenience, but batteries die. Your phone can serve as an emergency communication device, but should not be your primary navigation tool. Conserve its battery for critical situations.
    • Camp Chair/Luxury Items: Any item whose primary purpose is comfort rather than survival or essential function should be left behind. Sit on a log, a rock, or your pack.
    • Multiple Fire Starters (beyond redundancy): One ferro rod and prepared tinder are sufficient. You don’t need three lighters, waterproof matches, and a magnifying glass. Focus on mastering one reliable method.

    The key takeaway here is that every piece of gear you leave behind must be replaced by a corresponding skill. This is the essence of the minimalist bushcraft philosophy.

    Sample Loadouts by Season and Environment

    While the 10 core items form the foundation of your minimalist bushcraft kit, your clothing and food choices, along with minor additions, will adapt to the specific season and environment. This is where your knowledge of local conditions becomes critical.

    General Considerations for All Loadouts:

    • Layered Clothing: Always dress in layers (base, mid, outer shell) to regulate temperature effectively. Avoid cotton for anything close to your skin, as it loses insulating properties when wet. Opt for wool or synthetics.
    • Food: Focus on high-calorie, lightweight, non-perishable foods. Dehydrated meals, nuts, dried fruit, and energy bars are excellent choices.
    • Footwear: Sturdy, broken-in hiking boots or trail shoes appropriate for the terrain and weather.
    • Navigation: Always carry a physical map of the area and a reliable compass. Know how to use them.

    1. Temperate Forest (Spring/Fall) – The Baseline Bushcraft Loadout

    This is the most common scenario for practicing your lightweight bushcraft gear skills. Temperatures can vary, and rain is always a possibility.

    • Core 10 Items: All included.
    • Clothing:
      • Base Layer: Merino wool or synthetic long-sleeve shirt and bottoms.
      • Mid Layer: Fleece jacket or lightweight puffy.
      • Outer Layer: Waterproof/breathable shell jacket and pants.
      • Headwear: Beanie or wool hat for warmth, baseball cap for sun/rain.
      • Gloves: Lightweight work gloves or fleece gloves.
    • Food: 1-2 days of high-calorie trail food.
    • Additional Considerations:
      • Insect Repellent: Essential during warmer months.
      • Sunscreen: Even on cloudy days.
      • Small trowel: For Leave No Trace hygiene.
    • Specific Tips: Focus on managing moisture (from rain and sweat). Practice different tarp pitches to maximize ventilation while providing protection.
    1
    1. Temperate Forest (Spring/Fall) – The Baseline Bushcraft Loadout: 1.

    2. Winter/Cold Environment – Enhanced Insulation and Fire Focus

    Cold weather significantly increases the stakes. Your ultralight bushcraft essentials need to be augmented with serious insulation, and fire becomes even more critical.

    • Core 10 Items: All included, with emphasis on fire kit readiness.
    • Clothing:
      • Base Layer: Heavier merino wool or synthetic.
      • Mid Layers: Multiple fleece or down/synthetic puffy layers.
      • Outer Layer: Robust waterproof/windproof shell jacket and insulated pants.
      • Headwear: Heavy wool or fleece beanie, balaclava.
      • Gloves/Mittens: Insulated, waterproof gloves or mittens, with a thin liner glove.
      • Socks: Multiple pairs of thick wool socks.
    • Food: Higher calorie intake required. Consider foods with higher fat content.
    • Additional Considerations:
      • Snowshoes/Microspikes: Depending on snow depth and ice.
      • Goggles: For wind and snow protection.
      • Fire Starters: Ensure your ferro rod is easily accessible, and your tinder is absolutely waterproof. Consider a small amount of petroleum jelly-soaked cotton balls as an emergency fire accelerant.
    • Specific Tips: Prioritize building a substantial fire for warmth and melting snow for water. Learn to build snow shelters (quinzhee, snow cave) or enhance your tarp pitch with snow walls for insulation. Hypothermia is a constant threat; stay dry and avoid overexertion.

    3. Arid/Desert Environment – Water is King

    The desert presents unique challenges, primarily centered around water scarcity and extreme temperatures. Your bushcraft loadout must reflect this.

    • Core 10 Items: All included, with extreme emphasis on the metal water bottle and water procurement skills.
    • Clothing:
      • Base Layer: Loose-fitting, light-colored, breathable long-sleeve shirt and pants for sun protection.
      • Mid Layer: Lightweight fleece for cool desert nights.
      • Headwear: Wide-brimmed hat or shemagh for sun protection for head and neck.
      • Gloves: Lightweight sun gloves.
    • Food: Focus on non-dehydrating foods.
    • Additional Considerations:
      • Extra Water Capacity: While the metal bottle is core, consider a collapsible water bladder for carrying additional water if known sources are far apart. This might push beyond strict 10-item, but water is life in the desert.
      • Sun Protection: Lip balm with SPF, sunglasses.
      • Emergency Signal Mirror: For long-distance signaling.
    • Specific Tips: Master water procurement techniques like solar stills (though often low yield). Conserve water diligently. Use your tarp for shade during the day and as a windbreak at night. Be aware of venomous creatures and extreme temperature swings.

    FAQ: Minimalist Bushcraft Kit

    Q1: Is a 10-item minimalist bushcraft kit truly enough for survival?

    A: Yes, for someone with well-developed bushcraft skills, a 10-item kit can be sufficient for short to medium-term survival. The philosophy is that skill replaces gear. Your ability to improvise, build natural shelters, find and purify water, and start a fire with minimal tools is what makes this kit effective. It’s not about the number of items, but the mastery of their use and the skills they enable.

    Q2: What about a dedicated first-aid kit? You only listed a “small first-aid/repair kit.”

    A: For a minimalist approach, the emphasis is on a compact, essential first-aid kit focused on immediate trauma and common minor issues (cuts, blisters, pain relief). This includes items like bandages, antiseptic wipes, medical tape, and pain relievers. For longer trips or more remote areas, a more comprehensive kit might be warranted, but for a true minimalist loadout, the focus is on treating the most likely injuries and knowing how to improvise with natural materials or your repair items (e.g., paracord for a sling).

    Q3: How do I practice these minimalist bushcraft skills safely?

    A: Start in a controlled environment, like a local park or your backyard. Practice fire starting with a bucket of water nearby. Build tarp shelters in your yard. Learn knife skills with proper safety techniques. Gradually increase the challenge by moving to local wilderness areas for day trips, always informing someone of your plans. Never attempt advanced skills or remote trips without first mastering the basics and understanding the risks.

    Q4: Can I adapt this minimalist bushcraft gear list for different climates?

    A: Absolutely. The 10 core items are foundational. Adaptation primarily comes through your clothing system, food choices, and specific environmental knowledge. As detailed in the ‘Sample Loadouts’ section, you’d add more insulating layers for cold weather, focus heavily on water for arid environments, and adjust your shelter strategy accordingly. The core tools remain the same, but your personal preparedness around them changes.

    Q5: What’s the single most important item in this minimalist bushcraft kit?

    A: While all items are crucial, the fixed blade knife is arguably the most important. It is the primary tool for processing wood, preparing food, making other tools, and countless other tasks. Without a reliable knife, many other bushcraft skills become significantly harder or impossible to execute. However, it’s important to remember that even the best knife is useless without the skills to wield it effectively.

  • How to Brain Tan a Deer Hide Into Buckskin: The Complete Bushcraft Guide

    How to Brain Tan a Deer Hide Into Buckskin: The Complete Bushcraft Guide

    How to Brain Tan a Deer Hide Into Buckskin: The Complete Bushcraft Guide

    The art of brain tanning a deer hide is one of the most ancient and rewarding bushcraft skills you can master. Transforming a raw animal skin into soft, supple buckskin using only natural materials is a profound connection to our ancestors and a testament to self-sufficiency. This comprehensive guide will walk you through every step of how to brain tan a deer hide, from fleshing to smoking, ensuring you produce a high-quality, durable piece of buckskin without relying on harsh chemicals.

    Why Brain Tanning Is the Ultimate Bushcraft Skill

    In an age dominated by synthetic materials and industrial processes, the ability to brain tan stands out as a truly primitive and sustainable skill. It’s more than just making leather; it’s about understanding natural processes, respecting the animal, and creating a material that is uniquely breathable, soft, and durable. Here’s why it’s a cornerstone of bushcraft:

    • Self-Sufficiency: You can create a vital material for clothing, bags, and tools using resources found in nature, completely independent of modern supply chains.
    • Historical Connection: This method has been used by indigenous cultures worldwide for thousands of years. Learning it connects you directly to human history and traditional knowledge.
    • Superior Material: Brain-tanned buckskin is renowned for its incredible softness, breathability, and strength. Unlike chrome-tanned leather, it remains supple even after getting wet and drying, provided it’s properly softened again.
    • No Chemicals: The entire process uses natural ingredients – water, animal brains (or alternatives), and smoke – making it environmentally friendly and safe for the user.
    • Deep Satisfaction: The transformation from a stiff, raw hide to a luxurious piece of buckskin through your own labor is immensely gratifying.

    Tools and Materials You Need Before You Start

    While brain tanning is a primitive skill, having the right tools can make the process significantly easier and more efficient. Gather these items before you begin your journey:

    Essential Tools:

    • Fleshing Beam: A sturdy log or plank, typically 6-8 feet long and 8-12 inches wide, with one end propped up to create an angled working surface. It should be smooth to avoid damaging the hide.
    • Fleshing Tool (Scraper): This is crucial for removing flesh and membrane. Options include:
      • Dedicated Fleshing Tool: Often a two-handled scraper with a dull, rounded edge.
      • Dull Drawknife: A drawknife with its edge intentionally dulled and rounded.
      • Dull Axe or Hoe: The back of a dull axe head or a garden hoe can work in a pinch.
      • Bone Scraper: A traditional tool made from a large animal bone, sharpened to a blunt edge.
    • Large Buckets or Tubs: Several 5-gallon buckets or a large plastic tub for soaking and washing the hide.
    • Rope or Cordage: For hanging, stretching, and softening the hide.
    • Stretching Frame (Optional but Recommended): A sturdy wooden frame (e.g., 2x4s) to stretch the hide taut during the drying and softening phases.
    • Gloves: Heavy-duty rubber gloves for handling the raw hide and brain solution.
    • Eye Protection: Safety glasses are always a good idea when scraping.
    • Knife: A sharp utility knife for trimming the hide.
    • Wood Stove or Fire Pit: For boiling brains and for the smoking process.
    • Smoking Structure: A small teepee-like structure, a barrel, or a box to contain smoke for the final step.

    Materials:

    • Raw Deer Hide: Freshly skinned is best. If it’s dried, you’ll need to rehydrate it thoroughly.
    • Deer Brains: One brain per average-sized deer hide is usually sufficient. If you don’t have access to the deer’s own brain, you can use brains from other animals (e.g., pig, cow) or alternatives.
    • Water: Plenty of clean water for soaking, washing, and diluting the brain solution.
    • Mild Soap (Optional): For an initial wash if the hide is particularly dirty.
    • Hardwood for Smoking: Non-resinous hardwoods like oak, hickory, maple, or fruitwoods are ideal. Avoid pine or other softwoods as they can deposit tar and an unpleasant smell.
    • Lecithin Powder or Egg Yolks (Alternative to Brains): If CWD is a concern or brains are unavailable, these can be used as a substitute.

    Safety Note: Always wear gloves when handling raw hides to prevent exposure to bacteria. If you’re using a hide from an animal you didn’t harvest, inquire about its health and origin.

    Step 1: Fleshing and Scraping the Raw Hide

    This is arguably the most critical and labor-intensive step. Proper fleshing ensures the hide can absorb the tanning solution and prevents spoilage. If your hide is fresh, begin immediately. If it’s dried, you’ll need to rehydrate it first.

    Rehydrating a Dried Hide (Skip if Fresh):

    1. Place the dried hide in a large tub or bucket.
    2. Cover it completely with clean water. Add a handful of salt to help prevent bacterial growth during rehydration.
    3. Let it soak for 24-48 hours, or until it’s completely soft and pliable. Change the water daily, especially in warm weather.
    4. Once soft, rinse it thoroughly to remove any dirt or salt.

    The Fleshing Process:

    The goal is to remove all flesh, fat, and membrane from the inside (flesh side) of the hide. This exposes the dermis layer, allowing it to accept the brain solution.

    1. Set Up Your Fleshing Beam: Position your fleshing beam at a comfortable working height. The angle should allow you to apply downward pressure with your tool.
    2. Position the Hide: Lay a section of the hide, flesh side up, over the beam. Keep it taut but not overly stretched.
    3. Scrape Methodically: Using your fleshing tool, apply firm, even pressure and scrape away from yourself, pushing the flesh and membrane off the hide. Work in small sections, overlapping your strokes.
    4. Identify Layers: You’ll typically encounter a layer of fat (if present), followed by a thin, translucent membrane. Both must be removed. The goal is to get down to the white, clean dermis layer.
    5. Be Thorough: Pay special attention to areas like the neck, edges, and around the legs, where flesh and membrane can be thicker or harder to remove. These are common areas for stiff spots later if not cleaned properly.
    6. Avoid Gouging: Use a dull, rounded tool to prevent cutting or tearing the hide. If you do make a small cut, don’t panic, but try to be more careful.
    7. Hair Removal (for Buckskin): For buckskin, you’ll also need to remove the hair. This is usually done after the initial fleshing, or sometimes concurrently. If the hide is fresh, the hair will be firmly attached. To remove hair, you’ll need to ‘rot’ it off slightly. This involves soaking the hide in water for several days (often with some wood ash or lye to speed it up) until the hair slips easily. Once the hair slips, you can scrape it off with your fleshing tool. For a detailed guide on hair removal, research ‘liming’ or ‘bucking’ a hide.
    8. Rinse and Inspect: Once you believe you’ve removed everything, rinse the hide thoroughly. Lay it out and inspect it closely for any missed spots. Hold it up to the light; any remaining membrane will appear opaque. Re-scrape any areas that aren’t perfectly clean.
    9. Initial Drying/Stretching: After fleshing, wring out as much water as possible. You can then stretch the hide on a frame or hang it to dry slightly. It should be damp, not dripping wet, before applying the brain solution.

    How to Brain Tan a Deer Hide Into Buckskin: The Complete Bushcraft Guide
    How to Brain Tan a Deer Hide Into Buckskin: The Complete Bushcraft Guide.

    Practical Tip: If the hide starts to dry out during fleshing, mist it with water to keep it pliable. A dry hide is much harder to scrape and more prone to tearing.

    Step 2: Making and Applying the Brain Solution

    The magic of brain tanning lies in the emulsifying fats and lecithin present in animal brains. These compounds penetrate the hide fibers, lubricating them and preventing them from sticking together when dry, which is what causes stiffness.

    Preparing the Brain Solution:

    1. Harvest the Brain: If you have the deer’s own brain, carefully remove it from the skull. Ensure it’s clean of bone fragments.
    2. Boil the Brain: Place the brain in a pot with about 1-2 cups of water. Bring it to a gentle boil and simmer for 10-15 minutes, or until it’s cooked through and easily mashed. This breaks down the brain tissue and releases the fats.
    3. Mash and Dilute: Remove the pot from heat. Using a potato masher or a stick, thoroughly mash the brain into a smooth, creamy consistency. Add more warm water as needed to create a thin, milky solution. For an average deer hide, you’ll want about 1-2 gallons of solution. The consistency should be like thin pancake batter or cream soup.
    4. Strain (Optional but Recommended): For a smoother solution, you can strain it through a fine-mesh sieve or cheesecloth to remove any larger chunks that might prevent even penetration.

    Applying the Brain Solution:

    The goal is to saturate every fiber of the hide with the brain solution.

    1. Soak the Hide: Place the fleshed and de-haired hide into a large bucket or tub. Pour the warm brain solution over the hide, ensuring it’s completely submerged. Add more warm water if necessary to cover the hide.
    2. Work It In: Knead, stomp, and agitate the hide in the solution for at least 30 minutes to an hour. This helps the solution penetrate deeply into the fibers. You should feel the hide becoming slick and saturated.
    3. Let It Soak: Allow the hide to soak in the brain solution for several hours, or even overnight (8-12 hours). In colder temperatures, a longer soak might be beneficial.
    4. Wring It Out: Once thoroughly soaked, remove the hide from the solution. Wring out as much excess liquid as possible. You can do this by hand, twisting the hide, or by running it through a wringer if you have one. The hide should be damp but not dripping.

    Practical Tip: If you’re using egg yolks as an alternative, use about 1 dozen egg yolks per deer hide. Mix them with warm water (about 1-2 gallons) and a tablespoon of mild soap to help emulsify the fats. Lecithin powder can be mixed with warm water to a similar consistency.

    Step 3: Softening – The Labor-Intensive Key to Supple Buckskin

    This is where the magic truly happens, transforming the brained hide from a stiff piece of leather into soft, pliable buckskin. Softening is a continuous process that must be done as the hide dries. If the hide dries completely before it’s soft, it will be stiff, and you’ll have to re-brain it.


    Softening Techniques:

    The principle is to stretch and work the hide in every direction as it dries, breaking apart the fibers and preventing them from bonding together. This requires constant motion and effort.

    1. Initial Wringing and Stretching: After wringing out the brain solution, immediately begin stretching the hide. Pull it taut in all directions, focusing on the edges and thicker areas.
    2. Rope Stretching: Find a sturdy rope or cable strung between two points. Drape the hide over the rope and pull it back and forth, working sections of the hide over the rope’s edge. This creates friction and stretches the fibers.
    3. Stake or Post Stretching: Find a smooth, rounded stake or post. Pull sections of the hide over the stake, applying pressure and stretching it. This is excellent for working out stiff spots.
    4. Hand Working: Continuously pull, stretch, and knead the hide with your hands. Focus on areas that feel stiff. You can also rub the hide against itself.
    5. Frame Stretching (Recommended): If you have a stretching frame, lace the hide onto it while it’s still damp. As it dries, continuously tighten the lacing and work the hide with your hands, a dull scraper, or a smooth stick. This method provides consistent tension and makes it easier to work the entire hide.
    6. Breaking the Hide: As the hide dries, it will start to feel stiff. This is normal. You must continue to work it. The goal is to keep working it until it is completely dry and soft. If you stop too soon, it will dry stiff.
    7. Focus on Problem Areas: The neck, spine, and leg areas are often the thickest and most prone to stiffness. Give these areas extra attention.
    8. Listen to the Hide: As you work, you’ll hear a distinct crackling sound as the fibers break apart. This is a good sign that you’re making progress.
    9. Don’t Let It Dry Stiff: If a section dries stiff, you’ll need to re-wet it with the brain solution (or just water if it’s only a small spot) and start the softening process for that area again. It’s much easier to keep working it than to re-wet and re-soften.

    Practical Tip: This step can take many hours, often 4-8 hours of continuous work for a single deer hide, depending on its size and thickness. It’s a great workout! Don’t rush it; patience and persistence are key here.

    Step 4: Smoking the Hide to Lock In the Tanning

    Smoking is the final, crucial step in brain tanning. It serves several purposes: it permanently sets the tan, making the buckskin resistant to hardening if it gets wet, adds a beautiful golden-brown color, and imparts a pleasant, natural scent. Without smoking, your buckskin will revert to rawhide if it gets thoroughly soaked.

    Setting Up for Smoking:

    1. Prepare Your Smoke Source: You need a small, smoldering fire, not a flaming one. Use non-resinous hardwoods like oak, hickory, maple, or fruitwoods. Avoid pine, fir, or other softwoods as they produce creosote and an unpleasant odor. Gather small pieces of wood, sawdust, or wood chips.
    2. Construct a Smoke Tent/Teepee:
      • Method 1 (Teepee): Dig a small pit for your fire. Create a tripod or small frame over the pit. Drape the buckskin over the frame, forming a cone or teepee shape, ensuring the edges are sealed to contain the smoke. The hide should not touch the fire.
      • Method 2 (Barrel/Box): Use a large metal barrel or a sturdy cardboard box. Cut a hole in the bottom for the smoke to enter. Suspend the hide inside the barrel/box, again ensuring it doesn’t touch the heat source.
    3. Prepare the Hide: The hide should be completely dry and soft before smoking. If it’s not, finish softening it. You’ll need to sew the hide into a tube or bag shape to ensure smoke penetrates both sides evenly. Use a strong needle and sinew or heavy thread. Leave one end open for the smoke to enter.

    The Smoking Process:

    1. Start a Small, Smoldering Fire: Ignite your hardwood in the pit or container. Once it’s burning, smother it slightly with more wood chips or sawdust to create a thick, cool smoke. You want smoke, not flames or intense heat.
    2. Position the Hide: Carefully place the sewn-up hide tube over the smoke source. The open end of the hide tube should be positioned directly over the smoldering fire, allowing smoke to fill the inside of the hide.
    3. Monitor Temperature and Smoke: Keep a close eye on the fire. The smoke should be cool enough that you can comfortably hold your hand in it. If it’s too hot, you risk cooking or shrinking the hide. Adjust the fuel and airflow to maintain a steady, cool smoke.
    4. Smoke Both Sides: Smoke one side of the hide (e.g., the grain side) until it reaches your desired color – typically a rich golden brown. This can take anywhere from 1 to 4 hours, depending on the density of the smoke and the hide’s thickness.
    5. Flip and Smoke the Other Side: Once one side is done, carefully remove the hide, turn it inside out, and re-position it over the smoke source to smoke the other side (flesh side). This ensures even penetration and color.
    6. Check for Evenness: Periodically check the hide for even color. If you notice lighter spots, adjust the hide’s position or the smoke source.
    7. Finish: Once both sides are evenly smoked to your satisfaction, remove the hide. Cut the stitching that formed the tube, and your buckskin is complete!

    How to Brain Tan a Deer Hide Into Buckskin: The Complete Bushcraft Guide
    How to Brain Tan a Deer Hide Into Buckskin: The Complete Bushcraft Guide.

    Safety Warning: Never leave a smoking fire unattended. Ensure adequate ventilation to prevent carbon monoxide buildup if smoking indoors (not recommended). Be mindful of fire hazards.

    CWD Safety: When Not to Use Deer Brains and Alternatives

    While deer brains are the traditional and highly effective tanning agent, it’s crucial to address the concern of Chronic Wasting Disease (CWD). CWD is a fatal neurological disease affecting deer, elk, and moose. It’s caused by prions, which are highly resistant to conventional sterilization methods like boiling.

    Understanding the Risk:

    • Prion Location: Prions are concentrated in the brain, spinal cord, lymph nodes, and spleen of infected animals.
    • Transmission: While there’s no confirmed case of CWD transmission to humans, the CDC and other health organizations advise against consuming meat or handling tissues from CWD-positive animals.
    • Geographic Risk: CWD is present in specific regions across North America and other parts of the world. Check with your local wildlife agency (e.g., state game and fish department) for current CWD prevalence in your hunting area.

    When to Avoid Deer Brains:

    • If the deer was harvested in a known CWD-positive area.
    • If the deer showed any signs of illness or abnormal behavior.
    • If you are unsure about the CWD status of the animal or your region.
    • If you prefer to err on the side of caution.

    Safe and Effective Alternatives to Deer Brains:

    Fortunately, you can still achieve excellent buckskin without using deer brains. The key is to find other sources of emulsified fats and lecithin.

    1. Egg Yolks: This is a widely accepted and effective alternative. Egg yolks are rich in lecithin and fats. For an average deer hide, you’ll need about 10-12 large egg yolks. Mix them with 1-2 gallons of warm water and a tablespoon of mild dish soap (to help emulsify) until thoroughly combined. Apply and soak the hide as you would with brain solution.
    2. Lecithin Powder: Pure lecithin powder (often derived from soy or sunflower) is available at health food stores. Mix about 1/2 to 1 cup of lecithin powder with 1-2 gallons of warm water until fully dissolved. This is a very clean and consistent tanning agent.
    3. Commercial Tanning Oils/Emulsions: Several companies produce natural tanning oils specifically designed for brain-tanned or primitive hides. These often contain a blend of natural oils and emulsifiers. Follow the manufacturer’s instructions for dilution and application.
    4. Brains from Other Animals: If you have access to brains from healthy, non-cervid animals (e.g., pig, cow, sheep) that are free from disease, these can also be used effectively. The process for preparing and applying them is identical to deer brains.

    Recommendation: If you are in a CWD-affected area, or simply want to avoid any potential risk, using egg yolks or lecithin powder is a perfectly viable and safe alternative that yields beautiful buckskin.

    Troubleshooting Common Brain Tanning Mistakes

    Brain tanning is an art, and like any art, it comes with a learning curve. Don’t get discouraged if your first hide isn’t perfect. Here are some common issues and how to address them:

    • Stiff Spots After Drying: This is the most common problem. It means those areas weren’t sufficiently brained or, more likely, not adequately softened as they dried.
      • Solution: Re-wet the stiff areas with warm water (or a fresh brain solution if the whole hide is stiff). Wring out excess water and immediately begin working those spots vigorously until they are completely dry and soft. You might need to re-brain the entire hide if it’s extensively stiff.
    • Hide Rotting or Smelling Bad: This usually indicates incomplete fleshing or leaving the hide in water/solution for too long in warm conditions.
      • Solution: If it’s just a slight smell, a thorough washing with mild soap and water, followed by immediate drying and softening, might save it. If it’s truly rotting (hair slipping, slimy texture), it’s likely unsalvageable. Prevention is key: flesh thoroughly, keep water clean, and process quickly.
    • Tears or Holes in the Hide: Often caused by aggressive scraping with a sharp tool during fleshing, or over-stretching/pulling during softening.
      • Solution: Small tears can be sewn up with sinew or strong thread. For future hides, use a duller fleshing tool and be more gentle during stretching.
    • Uneven Color After Smoking: This happens when smoke doesn’t penetrate evenly, often due to an improperly sealed smoke tent or uneven hide positioning.
      • Solution: Re-smoke the lighter areas. Ensure your smoke structure is well-sealed and the hide is positioned to allow smoke to circulate evenly. You might need to re-sew the hide into a different configuration.
    • Hide Shrinks During Smoking: This means your smoke fire was too hot.
      • Solution: Unfortunately, shrinkage is often permanent. For future hides, ensure your smoke is cool enough to comfortably hold your hand in. Use smoldering wood, not flames.
    • Greasy Spots: Indicates that some fat or membrane was missed during fleshing, or the brain solution wasn’t properly emulsified.
      • Solution: Try washing the hide with warm water and mild soap, then re-soften. If the grease is deep, you might need to re-brain the hide.

    Remember, each hide is unique, and each tanning experience is a learning opportunity. With practice, you’ll develop a feel for the process and produce increasingly beautiful buckskin.

    Frequently Asked Questions About Brain Tanning

    How long does brain tanning a deer hide typically take?
    The actual hands-on time for brain tanning a deer hide can range from 20 to 40 hours, spread over several days or even weeks, depending on your efficiency and the hide’s condition. Fleshing and softening are the most time-consuming steps. Soaking times add to the overall duration.
    Can I tan other animal hides using the brain tanning method?
    Absolutely! The brain tanning method is effective for a wide variety of animal hides, including rabbit, squirrel, coyote, fox, beaver, elk, and moose. The principles remain the same, though larger or thicker hides (like moose) will require more brain solution and significantly more effort in fleshing and softening.
    What if my brain-tanned buckskin gets wet after it’s finished?
    One of the primary benefits of smoking brain-tanned buckskin is that it becomes resistant to hardening when wet. If your smoked buckskin gets wet, it will become pliable again as it dries, and you won’t need to re-soften it. Unsmoked brain-tanned hide, however, will dry stiff and require re-softening.
    Is brain tanning safe, especially concerning bacteria or diseases?
    When done properly, brain tanning is safe. Always wear gloves when handling raw hides to protect against bacteria. For CWD concerns, use alternative tanning agents like egg yolks or lecithin powder if you’re in an affected area or prefer to be cautious. Proper ventilation during smoking is also important to avoid inhaling excessive smoke.
    How should I store finished buckskin?
    Store your finished buckskin in a dry, well-ventilated area, away from direct sunlight and extreme temperatures. Avoid storing it in airtight containers, as this can lead to mildew. Hanging it or loosely folding it in a breathable fabric bag is ideal. If it gets dusty, you can gently brush it off.
  • How to Build a DIY Rocket Stove: 3 Designs Using Bricks, Cans, and Cinder Blocks

    How to Build a DIY Rocket Stove: 3 Designs Using Bricks, Cans, and Cinder Blocks

    How to Build a DIY Rocket Stove: 3 Designs Using Bricks, Cans, and Cinder Blocks

    In a world where self-reliance is paramount, the ability to cook efficiently and safely without conventional power sources is a critical skill. Enter the DIY rocket stove – a marvel of combustion engineering that allows you to cook meals using minimal fuel, often just twigs and small branches. For preppers, homesteaders, and outdoor enthusiasts, understanding how to build a rocket stove isn’t just a hobby; it’s a vital preparedness measure. This comprehensive guide will walk you through three distinct rocket stove plans, ranging from a permanent base camp setup to a portable bug-out option, ensuring you’re ready for any scenario.

    Related TacticalProof reading: How to Make Char Cloth for Fire Starting: A Step-by-Step Prepper’s Guide

    What Is a Rocket Stove and Why Preppers Need One

    A rocket stove is an efficient, hot-burning stove using a small-diameter combustion chamber and an insulated vertical chimney, which ensures nearly complete combustion of fuel prior to the flames reaching the cooking surface. This design creates a powerful draft (the ‘rocket’ effect) that pulls air into the combustion chamber, mixes it with hot gases, and burns off most of the smoke and particulate matter. The result is a clean, intense flame that directs heat precisely where it’s needed, making it far more efficient than an open campfire.

    Key Benefits for Preppers:

    • Fuel Efficiency: Rocket stoves can burn up to 70% less wood than an open fire for the same cooking task. This means less time foraging for fuel and conserving precious resources.
    • Minimal Smoke: The efficient combustion significantly reduces smoke output, making your cooking less detectable and more comfortable to be around.
    • Versatility: They can burn a wide variety of small biomass fuels – twigs, small branches, pinecones, wood scraps, and even some agricultural waste.
    • Portability (depending on design): Some designs are incredibly lightweight and can be packed for bug-out scenarios.
    • Safety: The contained flame reduces the risk of uncontrolled fires compared to an open pit.
    • Rapid Cooking: The concentrated heat allows for quick boiling and cooking, saving time and fuel.

    In a grid-down situation, access to propane, natural gas, or electricity for cooking will be severely limited. A rocket stove provides a sustainable, reliable alternative, turning readily available biomass into a powerful heat source for boiling water, cooking meals, and even providing warmth.

    Design 1: The 25-Brick Rocket Stove (Permanent Base Camp)

    This design is robust, stable, and ideal for a semi-permanent outdoor kitchen or a base camp setup. It requires no mortar, making it easy to assemble, disassemble, and relocate if necessary. The thermal mass of the bricks helps retain heat, providing a consistent cooking temperature.

    Materials Needed:

    • 25 standard red bricks (fire bricks are ideal for longevity, but standard bricks work)
    • A flat, non-combustible surface (concrete slab, dirt patch cleared of debris)
    • Optional: Metal grate or trivet for cooking surface

    Tools Required:

    • Gloves
    • Measuring tape (optional, for precise spacing)

    Step-by-Step Instructions for Your Brick Rocket Stove:

    1. Prepare the Base: Choose a level, stable, and non-combustible area. Clear away any dry leaves, grass, or other flammable materials from a 3-foot radius around your intended stove location.
    2. First Layer (Base & Fuel Feed):
      • Lay 4 bricks flat in a square formation, leaving a square opening in the center. This will be the base of your combustion chamber.
      • Place 2 bricks on their sides, parallel to each other, extending out from one side of the square opening. These will form the bottom of your fuel feed tunnel. Leave a gap between them for air intake.
    3. Second Layer (Combustion Chamber & Fuel Feed Walls):
      • Place 4 bricks on their sides, forming the walls of the central combustion chamber, directly on top of the first layer’s square. Ensure they are snug against each other.
      • Place 2 more bricks on their sides, extending the walls of the fuel feed tunnel, directly on top of the first layer’s fuel feed bricks.
      • You should now have a square combustion chamber and a short tunnel extending from one side.
    4. Third Layer (Insulation & Chimney Base):
      • Place 4 bricks flat around the central combustion chamber, effectively creating an insulated wall. These bricks should overlap the bricks from the second layer, tying the structure together.
      • Place 2 bricks on their sides, continuing the walls of the fuel feed tunnel.
    5. Fourth Layer (Chimney Walls):
      • Place 4 bricks on their sides, directly on top of the third layer’s central square, forming the next section of the chimney.
      • Place 2 bricks on their sides, continuing the walls of the fuel feed tunnel.
    6. Fifth Layer (Pot Support & Final Structure):
      • Place 4 bricks on their sides, forming the top of the chimney. Crucially, leave small gaps (approx. 1 inch) between these bricks at the top. These gaps will act as pot supports, allowing airflow around your cooking pot for optimal heat transfer and preventing the flame from being smothered.
      • Place 1 final brick flat on top of the fuel feed tunnel, creating a lid for the fuel feed. This helps direct airflow and heat upwards.
    7. Final Check: Ensure all bricks are stable. The central chimney should be clear, and the fuel feed tunnel should lead directly into the bottom of the chimney.

    This brick rocket stove design is incredibly sturdy and provides excellent thermal mass. It’s perfect for long-term cooking needs at a fixed location.

    Practical Tip:

    For even better performance and longevity, consider using refractory cement or clay to mortar the bricks together if you intend this to be a truly permanent structure. This will seal gaps and prevent heat loss.

    Practical Tip:
    Practical Tip:: Practical Tip:.

    Design 2: The #10 Tin Can Rocket Stove (Portable Bug-Out)

    When portability and lightweight design are paramount, the tin can rocket stove is your go-to option. This design is incredibly simple, uses readily available materials, and can be constructed quickly. It’s perfect for a bug-out bag, camping, or emergency situations where you need a compact cooking solution.

    Materials Needed:

    • Two #10 (gallon-sized) tin cans (e.g., from institutional-sized foods like tomatoes or coffee)
    • One standard-sized tin can (e.g., 15oz vegetable can)
    • Perlite, vermiculite, or sand (for insulation)
    • Tin snips or heavy-duty scissors
    • Marker
    • Ruler
    • Can opener (for removing tops/bottoms)
    • Drill with metal bit or punch (for air holes)

    Tools Required:

    • Gloves (essential to prevent cuts from sharp can edges)
    • Safety glasses
    • Tin snips or heavy-duty scissors
    • Marker
    • Ruler
    • Can opener
    • Drill or punch

    Step-by-Step Instructions for Your Tin Can Rocket Stove:

    1. Prepare the Outer Can:
      • Take one #10 can. Use a can opener to carefully remove both the top and bottom. Clean thoroughly. This will be your outer shell.
      • Measure and mark a rectangular opening near the bottom edge of the can. This opening should be approximately 3-4 inches wide and 2-3 inches high. This is your fuel feed port.
      • Carefully cut out the marked rectangle using tin snips. Bend any sharp edges inward or file them down.
    2. Prepare the Inner Can (Combustion Chamber/Chimney):
      • Take the second #10 can. Remove both the top and bottom. Clean thoroughly. This will be your inner chimney.
      • Measure and mark a rectangular opening near the bottom edge, similar in size to the fuel feed port on the outer can. This will align with the outer can’s port.
      • Cut out this opening.
    3. Prepare the Small Can (Fuel Shelf/Air Gap):
      • Take the standard-sized can. Remove the top and bottom. Clean thoroughly.
      • This can will serve two purposes: to create an air gap at the bottom of the combustion chamber and to act as a fuel shelf.
      • Cut this can down to a height of about 2-3 inches. You can also punch several holes in the sides of this small can for better airflow.
    4. Assemble the Core:
      • Place the small, cut-down can inside the bottom of the inner #10 can. This creates a raised platform for your fuel and an air gap underneath.
    5. Insert the Inner Can:
      • Carefully slide the assembled inner #10 can (with the small can inside) into the outer #10 can.
      • Align the fuel feed ports of both #10 cans. There should be a gap between the inner and outer cans.
    6. Add Insulation:
      • Pour your chosen insulation material (perlite, vermiculite, or sand) into the gap between the inner and outer #10 cans.
      • Gently tap the stove on the ground to settle the insulation, then add more until the gap is completely filled to the top. This insulation is crucial for reflecting heat back into the combustion chamber and achieving high efficiency.
    7. Create Pot Supports:
      • Near the top edge of the inner chimney, drill or punch 3-4 small holes (about 1/4 inch diameter) evenly spaced around the rim.
      • Insert small bolts, sturdy wire, or even bent coat hanger pieces into these holes to create a stable platform for your cooking pot. These supports also allow hot gases to escape around the pot, preventing the flame from being smothered.
    8. Final Check: Ensure all components are secure. The insulation should be packed tightly. Your portable tin can rocket stove is ready!

    Safety Warning:

    The edges of cut tin cans are extremely sharp. Always wear heavy-duty gloves and safety glasses during construction. File down or bend over any sharp edges to prevent injury.

    Design 3: The Cinder Block Rocket Stove (Quick Field Build)

    For a rapid, robust, and surprisingly effective field cooking solution, the cinder block rocket stove is hard to beat. Cinder blocks (also known as concrete masonry units or CMUs) are often found on construction sites, abandoned buildings, or even in backyards, making them a readily available resource in many scenarios. This design offers excellent stability and heat retention.

    Materials Needed:

    • 6-8 standard cinder blocks (8x8x16 inches)
    • 1-2 flat paving stones or bricks (for pot support)
    • A flat, non-combustible surface

    Tools Required:

    • Gloves

    Step-by-Step Instructions for Your Cinder Block Rocket Stove:

    1. Prepare the Base: As with any fire-based cooking, select a level, stable, and non-combustible area. Clear a 3-foot radius of any flammable materials.
    2. First Layer (Base & Fuel Feed):
      • Lay 2 cinder blocks on their sides, parallel to each other, with the hollow cores facing upwards. Leave a gap of about 4-6 inches between them. This gap will be the base of your combustion chamber and chimney.
      • Place a third cinder block on its side, perpendicular to the first two, at one end of the gap. This forms the back wall of the combustion chamber.
      • Place a fourth cinder block on its side, extending outwards from the front of the gap, creating the base of your fuel feed tunnel.
    3. Second Layer (Chimney Walls & Fuel Feed):
      • Place 2 more cinder blocks on their sides directly on top of the first two parallel blocks. This extends the height of your chimney walls.
      • Place a fifth cinder block on its side, extending the fuel feed tunnel, directly on top of the fourth block.
    4. Third Layer (Pot Supports):
      • Place 2 flat paving stones or bricks across the top of the chimney opening. Position them so they create a stable platform for your cooking pot, but also leave gaps for the hot gases to escape and for airflow. You can also use two more cinder blocks laid flat across the top, leaving a central opening for the pot.
    5. Optional: Air Intake/Ash Pit:
      • For improved airflow and ash collection, you can place a small brick or stone at the very front of the fuel feed tunnel, creating a small opening underneath for air to be drawn in. This also helps keep fuel from rolling out.
    6. Final Check: Ensure all blocks are stable and the chimney is clear. The fuel feed tunnel should lead directly into the bottom of the chimney.

    This cinder block rocket stove is incredibly quick to assemble and provides a very stable cooking platform. The hollow cores of the blocks can also provide some insulation, though not as effectively as packed perlite.

    Practical Tip:

    If you have extra cinder blocks, you can create a small windbreak around the stove to further improve efficiency and protect the flame from gusts.

    Practical Tip:
    Practical Tip:: Practical Tip:.

    Fuel Efficiency: How Rocket Stoves Burn 70% Less Wood Than Open Fires

    The remarkable efficiency of a rocket stove isn’t magic; it’s a testament to clever engineering principles. Understanding these principles highlights why they are superior to open fires for cooking:

    1. Insulated Combustion Chamber: The core of a rocket stove is its insulated burn tunnel and chimney. This insulation (whether bricks, perlite, or air gaps) traps heat, allowing the combustion chamber to reach extremely high temperatures.
    2. Complete Combustion: In an open fire, much of the wood gas (smoke) escapes unburnt. In a rocket stove, the high temperatures in the combustion chamber, combined with a controlled air supply, cause these gases to ignite and burn. This secondary combustion is what produces the characteristic clean, hot flame and minimizes smoke.
    3. Venturi Effect / Chimney Effect: The vertical chimney creates a strong draft. As hot air rises, it pulls in fresh, oxygen-rich air through the fuel feed port. This continuous flow of air feeds the flame, creating a powerful, focused burn. This is often referred to as the ‘rocket’ effect.
    4. Focused Heat Transfer: Unlike an open fire where heat dissipates in all directions, a rocket stove directs almost all its heat upwards, directly onto the cooking pot. The pot supports ensure that the flame isn’t smothered and hot gases can circulate around the pot, maximizing heat transfer.

    By achieving near-complete combustion and directing heat efficiently, a rocket stove extracts far more energy from a given amount of fuel. This means you can boil water or cook a meal with just a handful of twigs that would barely get an open fire started, making it an invaluable tool for sustainable living and emergency preparedness.

    Cooking Tips and Safety When Using a Rocket Stove

    Mastering your rocket stove involves more than just building it; it requires understanding how to operate it safely and effectively. Here are essential tips and safety warnings:

    Cooking Tips:

    • Use Dry, Small Fuel: Rocket stoves thrive on small, dry fuel. Twigs, small branches (pencil-thickness or less), pinecones, and wood chips are ideal. Avoid large logs or wet wood, as they will produce more smoke and burn less efficiently.
    • Feed Continuously: Rocket stoves are designed for continuous feeding. As the fuel burns down, gently push more fuel into the feed port. Don’t overfill it; a steady supply of small pieces works best.
    • Pre-Heat Your Stove: A few small pieces of kindling and paper/cardboard can help get the chimney hot and establish a good draft before you start cooking.
    • Pot Placement: Ensure your pot is stable on the supports and allows for adequate airflow around its base. A flat-bottomed pot works best for maximum heat transfer.
    • Adjusting Heat: You can somewhat control the heat by adjusting the amount and rate of fuel fed into the stove. More fuel, more heat. Less fuel, less heat.
    • Cleanliness: Periodically clear out ash from the combustion chamber and fuel feed to maintain optimal airflow.

    Safety Warnings:

    • Outdoor Use Only: Never use a rocket stove indoors or in an enclosed space without proper ventilation. They produce carbon monoxide, an odorless, colorless, and deadly gas.
    • Fire Hazard: Despite being contained, rocket stoves produce intense heat and can spark. Always operate on a non-combustible surface, away from flammable structures, dry vegetation, or overhanging branches. Keep a bucket of water or a fire extinguisher nearby.
    • Hot Surfaces: The entire stove, especially the chimney and cooking surface, will become extremely hot. Use heat-resistant gloves when handling pots or adjusting fuel. Keep children and pets away.
    • Stable Base: Ensure your stove is on a level, stable surface to prevent tipping, especially when a heavy pot is on top.
    • Fuel Management: Only feed small pieces of fuel that fit easily into the feed port. Do not force large pieces, as this can disrupt airflow and cause smoke.
    • Ash Disposal: Allow the stove to cool completely before attempting to dispose of ash. Ash can retain heat for a long time and pose a fire risk.
    • Ventilation: Ensure the pot supports allow for proper airflow. If the pot completely seals the chimney, it can smother the flame and cause smoke to back up.

    By following these guidelines, you can safely and effectively harness the power of your DIY rocket stove for all your off-grid cooking needs.

    FAQ: Your Rocket Stove Questions Answered

    Q: Can I use charcoal in a rocket stove?
    A: While rocket stoves are primarily designed for biomass like wood, some designs can burn charcoal. However, charcoal typically requires a different airflow dynamic and may not burn as efficiently as wood in a standard rocket stove design. It’s best to stick to small, dry wood for optimal performance.
    Q: How long does it take to boil water on a rocket stove?
    A: This depends on the stove’s design, the type of fuel, and the amount of water. A well-built rocket stove using dry fuel can boil a liter of water in 5-10 minutes, often faster than a conventional stovetop burner, due to its concentrated heat.
    Q: What’s the best insulation for a tin can rocket stove?
    A: Perlite and vermiculite are excellent choices due to their high insulating properties and lightweight nature. Sand can also work, but it’s heavier and slightly less efficient. Avoid materials that can burn or off-gas when heated.
    Q: Can I use a rocket stove for heating a small space?
    A: While a rocket stove generates significant heat, its primary purpose is cooking. Using it for space heating in an enclosed area is extremely dangerous due to the risk of carbon monoxide poisoning. If you need to heat a space, use a purpose-built, properly vented wood stove or heater.
    Q: How do I clean my rocket stove?
    A: For brick and cinder block stoves, simply remove accumulated ash from the combustion chamber and fuel feed. For tin can stoves, you can usually dump out the ash. Ensure the stove is completely cool before cleaning. Regular cleaning maintains optimal airflow and efficiency.
  • How to Make Char Cloth for Fire Starting: A Step-by-Step Prepper’s Guide

    How to Make Char Cloth for Fire Starting: A Step-by-Step Prepper’s Guide

    How to Make Char Cloth for Fire Starting: A Step-by-Step Prepper’s Guide

    In the world of survival and preparedness, reliable fire starting is not just a skill; it’s a lifeline. While ferro rods and lighters are excellent tools, knowing how to make char cloth provides an unparalleled advantage, especially when relying on traditional methods like flint and steel. Char cloth is a pre-carbonized material that readily catches even the smallest spark, transforming it into a glowing ember that can ignite a tinder bundle. This comprehensive guide will walk you through every step of the char cloth DIY process, from selecting the best materials to mastering the charring technique and effectively using your homemade fire starter.

    Whether you’re a seasoned prepper, a bushcraft enthusiast, or simply looking to expand your survival skill set, understanding how to create this essential fire-starting aid is a game-changer. Let’s dive in.

    Related TacticalProof reading: How to Preserve Meat Without Refrigeration: 7 Proven Methods for Long-Term Storage | Bug Out Bag Essentials: A Comprehensive Checklist for Every Prepper | How Can You Start a Fire Using Just Car Parts?

    What Char Cloth Is and Why It Catches a Spark So Easily

    At its core, char cloth is a piece of natural fabric, typically cotton, that has been subjected to a process called pyrolysis. Pyrolysis is the thermal decomposition of organic materials in the absence of oxygen. When you heat cotton in an airtight container with a small vent, the oxygen inside is quickly consumed, preventing combustion (burning with a flame). Instead, the heat breaks down the cellulose fibers, driving off volatile gases, moisture, and tars, leaving behind nearly pure carbon.

    This carbonized material is incredibly porous and has a significantly lower ignition temperature than raw fabric. While raw cotton requires a direct flame or intense heat to ignite, char cloth can be ignited by a single, fleeting spark from a flint and steel, a ferro rod, or even concentrated sunlight from a magnifying lens. The porous structure allows the spark to quickly transfer heat and ignite the carbon, which then glows red and slowly smolders, providing ample time to transfer the ember to a tinder bundle and blow it into a flame.

    Its ability to catch a spark so easily makes it an indispensable component of any traditional fire-starting kit. It bridges the gap between a high-temperature spark and a low-temperature tinder bundle, making fire creation much more reliable in challenging conditions.

    Best Fabrics for Char Cloth: Cotton vs Linen vs Canvas Compared

    The success of your char cloth fire starter largely depends on the material you choose. The golden rule is to use 100% natural fibers. Synthetic fabrics like polyester, nylon, or rayon will melt into a plastic-like blob rather than charring into usable carbon. Always check the material composition tag before you begin.

    Cotton: The Undisputed Champion

    Cotton is by far the most popular and easiest material to work with for char cloth. It’s readily available, inexpensive, and produces excellent results. Look for:

    • Old T-shirts or Jeans: Well-worn, thin cotton T-shirts or denim from old jeans are perfect. The thinner the material, the faster it chars.
    • Bandanas: Often 100% cotton, bandanas are a classic choice due to their thinness and weave.
    • Cotton Socks or Underwear: Again, check for 100% cotton.
    • Cotton Canvas (thin): While thicker than T-shirts, thin cotton canvas can also work well, producing a more robust piece of char cloth.

    The ideal cotton material should be relatively thin, tightly woven, and free from dyes or treatments if possible, though most common cotton items will work fine.

    Linen: A Finer Alternative

    Linen, derived from the flax plant, is another excellent natural fiber. It tends to be finer and stronger than cotton, and it chars beautifully. Linen char cloth can be very effective, often producing a delicate, high-quality ember. However, linen fabric can be more expensive and less common to find in scrap form than cotton.

    Canvas: For Robust Pieces

    Thicker cotton canvas, like that from old tarps or heavy bags, can also be used. The charring process will take longer due to the material’s density, and you might need to cut it into smaller, thinner pieces to ensure even charring. The resulting char cloth will be thicker and potentially more durable, but it might require a slightly stronger spark to ignite initially.

    Avoid: Any fabric with synthetic blends, elastic, or heavy dyes that might leave residues. Stick to natural, untreated fibers for the best and safest results.

    Canvas: For Robust Pieces
    Canvas: For Robust Pieces: Canvas: For Robust Pieces.

    Building Your Char Tin: Container Selection and Vent Hole Sizing

    The container you use for charring is almost as important as the fabric itself. It needs to be metal, have a tight-fitting lid, and crucially, a small vent hole. This setup creates the anaerobic (oxygen-free) environment necessary for pyrolysis.

    Container Selection

    Excellent choices for char tins include:

    • Altoids Tin: This is the classic and most popular choice. Its compact size is perfect for small batches of char cloth, and the lid fits snugly.
    • Shoe Polish Tin: Similar to an Altoids tin, these are also excellent.
    • Coffee Cans (with lid): For larger batches, a metal coffee can with a crimped lid works well. Ensure the lid can be securely re-attached after charring.
    • Paint Cans (new, unused): Small, unused paint cans with their original lids can also serve as char tins.
    • Any Small Metal Box: As long as it’s metal and has a reasonably tight-fitting lid, it can be adapted.

    Important: The container must be able to withstand high heat without melting or deforming. Aluminum foil alone is not sufficient as it’s too thin and can tear, exposing the fabric to oxygen.

    Vent Hole Sizing and Placement

    The vent hole is critical. It allows the volatile gases produced during pyrolysis to escape. Without it, pressure can build up inside the tin, potentially causing it to explode, which is a significant safety hazard.

    • Size: A small hole, approximately 1/16 to 1/8 inch (1.5mm to 3mm) in diameter, is ideal. This is roughly the size of a small finishing nail or a drill bit.
    • Placement: Drill or punch the hole in the center of the lid. This allows gases to escape efficiently. If you’re using a larger can, one hole is usually sufficient, but for very large containers, two small holes might be considered, though one is generally safer to manage.
    • How to Make the Hole:
      1. Place the lid on a scrap piece of wood.
      2. Use a small nail and a hammer to punch a hole through the lid.
      3. Alternatively, use a drill with a small metal-appropriate drill bit.

    Safety Warning: Never attempt to char fabric in a completely sealed container without a vent hole. The buildup of flammable gases can lead to a dangerous explosion.

    Preparing Your Fabric

    Cut your chosen fabric into pieces that will fit comfortably inside your char tin without being overly compressed. A common size is 1×1 inch (2.5×2.5 cm) squares, but you can make them larger or smaller depending on your preference and tin size. Don’t overfill the tin; leave a little space for the gases to circulate and escape. Lay the pieces flat or loosely folded to ensure even charring.

    The Charring Process: Campfire, Stove, and Improvised Heat Sources

    Now for the main event: the charring! The goal is to heat the tin evenly until all the volatile compounds have been driven off, leaving behind pure carbon. This process can be done using various heat sources.

    Using a Campfire or Fire Pit

    1. Prepare the Fire: Build a good fire and let it burn down to a bed of hot coals. Direct flames are too intense and can unevenly heat the tin or even burn through it if left too long.
    2. Place the Tin: Nest the char tin directly into the hot coals. Ensure the vent hole is facing upwards or slightly to the side, away from direct flame, so you can observe the gases escaping.
    3. Monitor the Smoke: Initially, you’ll see white smoke escaping from the vent hole. This is mostly steam and some initial volatile compounds. As the charring progresses, the smoke will become thicker, often yellowish or bluish, and may even ignite into a small, flickering flame. This flame is the flammable gases burning off – a good sign that the process is working.
    4. Wait for the Flame to Stop: Continue heating until the smoke and any flame from the vent hole completely stop. This indicates that all the volatile compounds have been expelled, and the fabric is fully carbonized. This usually takes 5-15 minutes, depending on the heat of the coals and the thickness of your fabric.
    5. Cool Down: Carefully remove the tin from the coals using tongs or a stick. Do not open the tin immediately. Allow it to cool completely to room temperature. Opening it while hot can expose the still-hot char cloth to oxygen, causing it to spontaneously combust and turn to ash.

    Using a Gas or Electric Stove Burner

    This method offers more control and is safer for indoor use (with proper ventilation).

    1. Place the Tin: Place the char tin directly on a medium-heat burner.
    2. Monitor and Rotate: Watch for smoke and flame from the vent hole, just as with a campfire. Rotate the tin occasionally with tongs to ensure even heating.
    3. Wait for Cessation: Continue heating until the smoke and flame from the vent hole stop.
    4. Cool Down: Turn off the burner and let the tin cool completely on the stove or a heat-safe surface before opening.


    Improvised Heat Sources

    In a survival situation, you might not have a perfect campfire or stove. Consider these alternatives:

    • Rocket Stove: Excellent for concentrated heat and efficient fuel use. Place the tin on top of the combustion chamber or in the exhaust path.
    • Wood Stove/Fireplace: Place the tin directly on the hot surface of a wood stove or in the coals of a fireplace.
    • Hot Rocks: If you have a fire, heat some large, flat rocks thoroughly. Once hot, place the char tin on top of the hot rock, then cover it with more hot rocks or coals to maintain heat.

    Safety Precautions for All Methods:

    • Always work in a well-ventilated area, especially when using a stove indoors, as the gases released are flammable and can produce smoke.
    • Have a fire extinguisher or a bucket of water/sand nearby, especially when working with open flames.
    • Use heat-resistant gloves and tongs when handling the hot tin.
    • Never leave the charring process unattended.

    How to Test Your Char Cloth and Troubleshoot Failures

    Once your char tin has cooled completely, open it carefully. Inside, you should find pieces of uniformly black, brittle, but still intact fabric. This is your char cloth!

    Testing Your Char Cloth

    To test its effectiveness:

    1. Take a small piece of char cloth.
    2. Place it on a small, dry tinder bundle (like finely shredded bark or cotton fibers).
    3. Using a flint and steel or a ferro rod, strike a spark directly onto the char cloth.
    4. A good piece of char cloth will immediately catch the spark and begin to glow red, spreading slowly across the material.
    5. Once glowing, gently transfer it to your main tinder bundle and blow on it to encourage a flame.

    If it glows readily and holds an ember for a reasonable amount of time (at least 10-15 seconds), you’ve succeeded!

    Troubleshooting Common Failures

    Don’t be discouraged if your first batch isn’t perfect. Char cloth making is an art that improves with practice. Here are common issues and their solutions:

    • Problem: Not Charred Enough (Brown or Soft Spots)

      Symptoms: The fabric is still brown, gray, or has soft, uncharred spots. It won’t catch a spark or only smolders weakly.

      Cause: Insufficient heat or not enough time in the heat. The volatile compounds haven’t fully been driven off.

      Solution: Place the tin back on the heat source and continue charring until the smoke/flame stops completely. Ensure the tin is evenly heated.

    • Problem: Over-Charred (Crumbles to Dust)

      Symptoms: When you open the tin, the fabric is extremely brittle and crumbles into fine ash or dust with the slightest touch.

      Cause: Too much heat or left on the heat for too long. The carbon structure has degraded too much.

      Solution: Unfortunately, over-charred cloth is unusable. Discard it and try again with a new batch, reducing the heat or the charring time slightly. It’s better to under-char and re-char than to over-char.

    • Problem: Uneven Charring

      Symptoms: Some pieces are perfectly charred, while others are under-charred or over-charred.

      Cause: Uneven heat distribution (e.g., one side of the tin was hotter), or the fabric pieces were too thick or folded too tightly.

      Solution: Ensure your heat source is as even as possible. Rotate the tin periodically. Cut fabric into thinner, smaller pieces and don’t overfill the tin.

    • Problem: No Spark or Ember

      Symptoms: The char cloth doesn’t catch a spark at all, or it catches but immediately goes out.

      Cause: Material not 100% natural fiber, too thick, or not fully charred (see ‘Not Charred Enough’ above). Could also be damp char cloth.

      Solution: Double-check your fabric source. Ensure it’s fully charred. If it’s damp, re-dry it in the sun or near a heat source (but not in the char tin again). Practice your spark striking technique.

    Troubleshooting Common Failures
    Troubleshooting Common Failures: Troubleshooting Common Failures.

    Storing Char Cloth to Keep It Dry and Ready

    Once you’ve successfully made a batch of char cloth, proper storage is paramount. The most significant enemy of char cloth is moisture. Even a small amount of dampness can render it useless, as water raises its ignition temperature and prevents it from catching a spark effectively.

    Airtight is Key

    Your char cloth must be stored in an airtight, waterproof container. Fortunately, the very tin you used to make it is often the best storage solution!

    • The Original Char Tin: If your Altoids tin or shoe polish tin has a tight-fitting lid, simply store your finished char cloth inside. You can even seal the vent hole with a piece of tape if you’re concerned about moisture ingress.
    • Small Ziplock Bags: Place char cloth pieces into small, heavy-duty freezer-grade ziplock bags. Squeeze out as much air as possible before sealing.
    • Waterproof Pouches: Dedicated waterproof pouches or dry bags designed for electronics or documents are excellent for larger quantities or for carrying in a survival kit.
    • Pill Bottles or Film Canisters: These small, often airtight containers are perfect for carrying a few pieces of char cloth for immediate use.
    • Vacuum Seal Bags: For long-term storage of larger batches, vacuum sealing is an excellent option to remove all air and moisture.

    Adding Desiccants

    To further protect against moisture, consider adding a small desiccant packet (like silica gel) to your char cloth container. These packets absorb any residual moisture or humidity that might seep in over time.

    Location, Location, Location

    Store your char cloth in a cool, dry place, away from extreme temperature fluctuations. Avoid storing it in areas prone to high humidity, like basements or unsealed sheds. A well-prepared individual will have char cloth stored in multiple locations: in their primary survival kit, bug-out bag, vehicle kit, and even a small amount in their everyday carry (EDC) kit.

    By taking these simple storage precautions, your char cloth will remain dry, potent, and ready to ignite a spark whenever you need it most.

    Using Char Cloth With Flint and Steel, Ferro Rods, and Magnifying Lenses

    Now that you have your perfectly charred cloth, it’s time to put it to use. Char cloth excels at catching sparks from various sources and converting them into a stable ember.

    With Flint and Steel (Traditional Method)

    This is the classic pairing for char cloth.

    1. Prepare Your Tinder Bundle: Create a bird’s nest-shaped tinder bundle from very fine, dry, fibrous material (e.g., finely shredded bark, dry grass, cottonwood fluff, cedar bark).
    2. Position Char Cloth: Place a small piece of char cloth (about 1/2 inch square) on top of your tinder bundle.
    3. Strike the Spark: Hold a piece of natural flint (or chert, quartz, obsidian) firmly between your thumb and forefinger. Place the char cloth on the edge of the flint, slightly overhanging. With your other hand, strike the back of a high-carbon steel striker (or the back of a knife blade) downwards against the flint, aiming the sparks directly at the char cloth.
    4. Catch the Ember: A good strike will send a shower of sparks onto the char cloth, and one will ignite it. You’ll see a small red glow appear and begin to spread.
    5. Transfer and Ignite: Once the char cloth is glowing, gently place it into the center of your tinder bundle. Cup the bundle in your hands and gently blow on the ember. The oxygen from your breath will feed the ember, causing it to grow hotter and eventually burst into flame.

    With a Ferro Rod (Modern Method)

    Ferro rods produce much hotter and more numerous sparks than flint and steel, making them incredibly effective with char cloth.

    1. Prepare Tinder: As above, prepare a fine tinder bundle.
    2. Position Char Cloth: Place a piece of char cloth on top of or slightly embedded in your tinder bundle.
    3. Strike the Spark: Hold the ferro rod firmly. Place the striker (or the spine of your knife) against the rod, just above the char cloth. Scrape the striker down the rod with firm, fast pressure, directing the shower of sparks onto the char cloth.
    4. Catch the Ember: The char cloth should ignite almost instantly, producing a bright red glow.
    5. Transfer and Ignite: Transfer the glowing char cloth into your tinder bundle and gently blow to create a flame.

    With a Magnifying Lens (Solar Method)

    This method is silent, fuel-free, and highly effective on sunny days.

    1. Prepare Tinder: Have your tinder bundle ready.
    2. Position Char Cloth: Place a piece of char cloth on a non-flammable surface (like a rock) in direct sunlight.
    3. Focus Sunlight: Hold a magnifying lens (or a Fresnel lens from a wallet card) above the char cloth. Adjust the distance until the sunlight is focused into the smallest, brightest point possible on the char cloth.
    4. Catch the Ember: Within seconds, the char cloth will begin to smoke, then ignite into a glowing ember.
    5. Transfer and Ignite: Carefully pick up the glowing char cloth (it will be hot!) and place it into your tinder bundle. Blow gently to achieve a flame.

    Practice all these methods in varying conditions to become proficient. The more comfortable you are with your char cloth and fire-starting tools, the more reliable you’ll be when it truly counts.

    FAQ: Your Char Cloth Questions Answered

    Can I use synthetic fabrics for char cloth?

    No, absolutely not. Synthetic fabrics like polyester, nylon, or rayon will melt when heated, creating a plastic-like residue that will not char into usable carbon. Always use 100% natural fibers such as cotton or linen for successful char cloth production.

    What if my char cloth crumbles to dust when I open the tin?

    If your char cloth crumbles to dust, it means it was over-charred. This happens when the material is exposed to too much heat or for too long, degrading the carbon structure. Unfortunately, over-charred cloth is unusable. For your next batch, try reducing the heat or the charring time slightly.

    How long does char cloth last in storage?

    When stored properly in an airtight, waterproof container and kept dry, char cloth can last indefinitely. Its carbonized state is very stable. The primary concern is preventing moisture absorption, which can render it ineffective. With good storage, a batch can last for many years, ready for use.

    Is it safe to make char cloth indoors on a stove?

    Yes, it can be done safely indoors on a gas or electric stove, provided you have excellent ventilation. The charring process releases flammable gases and some smoke. Ensure windows are open, a range hood is on, and never leave the tin unattended. Have a fire extinguisher nearby as a precaution.

    What’s the ideal thickness for char cloth material?

    Generally, thinner materials like old cotton T-shirts or bandanas are ideal. They char more quickly and evenly. While thicker materials like denim or thin canvas can work, they take longer to char and might require more careful monitoring to prevent uneven results. Aim for materials that are easy to cut and fit loosely in your char tin.

    Conclusion

    Mastering how to make char cloth is a foundational skill for anyone serious about survival, bushcraft, or self-reliance. It’s a simple, low-cost DIY project that yields an incredibly effective fire starter, bridging the gap between a fleeting spark and a roaring fire. By understanding the principles of pyrolysis, selecting the right materials, constructing a proper char tin, and practicing the charring process, you can reliably produce this essential component for your fire-starting kit.

    Remember to prioritize safety, troubleshoot your failures, and store your char cloth properly to ensure it’s always ready when you need it most. Add this valuable skill to your repertoire, and you’ll be better prepared to face any challenge nature throws your way.