Category: Wilderness Survival

Outdoor survival skills and natural environment adaptation

  • How Can You Start a Fire Using Just Car Parts?

    How Can You Start a Fire Using Just Car Parts?

    You can start a fire using car parts like a car battery or a cigarette lighter. For the battery method, connect a strip of aluminum foil to the terminals to generate heat, or use steel wool to create sparks. If your car has a cigarette lighter, ensure it works and prepare dry tinder for ignition. Loose wires can also cause sparks; however, be cautious as this can lead to dangerous short circuits. Always choose a safe spot to avoid hazards. Mastering these techniques can take practice, and there's more to explore about fire safety and maintenance.

    Starting a Fire With a Car Battery

    When you're in a survival situation, starting a fire with a car battery can be a game changer. Using car battery techniques, you can create heat and ignite tinder, which is essential for warmth and cooking. Here are a couple of effective fire ignition methods you can use.

    One method involves aluminum foil. First, smooth out a piece of aluminum foil and cut a thin strip about 1 cm wide, with a narrow section in the middle. Bend this strip slightly. Next, touch the ends of the strip to the battery terminals. The foil will heat up quickly. Now, place the hot foil near your tinder to ignite it. Remember to handle the foil with care, as it can become very hot. Additionally, it's important to prepare your tinder beforehand to enhance the success rate of ignition. Understanding basic fire structure knowledge can also greatly improve your fire building efficiency.

    Another approach is to use steel wool. First, loosen the strands of the steel wool. Then, touch both ends of the steel wool to the terminals of the car battery. This creates a short circuit, generating high temperatures. Place the burning steel wool next to your tinder, and watch it catch fire. It's a good idea to have extra tinder ready, just in case.

    Both of these methods are straightforward and effective, so you can quickly start a fire when you need it most. Always prioritize safety when handling materials, and ensure you have a safe space to build your fire.

    Using a Cigarette Lighter

    Using a cigarette lighter is one of the most straightforward methods to ignite a flame from a car. However, keep in mind that many newer cars don't have cigarette lighters, as fewer people smoke and owners often remove them to reduce clutter. Before you attempt to start a fire, gather your tinder and kindling. You'll want dry, properly seasoned materials to ensure ignition. Create a well-ventilated area to contain the fire and minimize wind exposure, which can hinder your lighter's functionality. Once everything is ready, use the lighter to ignite the tinder.

    It is important to remember that fire starting skills can significantly enhance your overall outdoor experience and safety. Responsible use of fire is crucial for enjoying the benefits while minimizing risks. Remember to check if your lighter is functional before relying on it. A clean, debris-free lighter is key to optimal performance. In extreme cold, the lighter's effectiveness might drop, so be prepared for that possibility. If your lighter doesn't work, you'll need to consider alternative ignition techniques.

    Always handle fire with caution. Evaluate the area for potential dangers, and never leave a fire unattended. Once you're done, ensure the fire is completely extinguished. Following local fire safety regulations is crucial to prevent accidents. By understanding how to use a cigarette lighter effectively, you can start a fire safely when you need it most.

    Igniting With Loose Wire

    Loose wires in a vehicle can unintentionally create dangerous conditions that lead to fires. When a loose wire makes contact with the car's chassis, it can cause a short circuit. This situation is one of the biggest loose wire hazards you need to watch out for. A short circuit generates a high current path to the ground, which produces enough heat to ignite flammable materials, like insulation and plastics, inside your car.

    The starter and its wiring are common culprits behind electrical fires, as they handle high current flow. If wires become faulty or worn out, the risk of short circuits increases significantly. Even if fuses are in place, they might blow too late to prevent a fire. To prevent electrical fires, make sure you regularly inspect and maintain your vehicle's wiring system. Proper insulation and maintenance reduce the risk of electrical failures in vehicles. Building a fire is an essential survival skill that highlights the importance of understanding potential fire hazards in everyday situations.

    Using a multimeter or test light can help you identify any short circuits. Check for signs of wear, damage, or improper installation in your wiring. If you find a blown fuse, it's a strong indicator of a potential short circuit. Systematically removing fuses can help you pinpoint the specific circuit causing the issue. Once identified, isolate the faulty wire or component causing the problem.

    Preparing the Fire Site

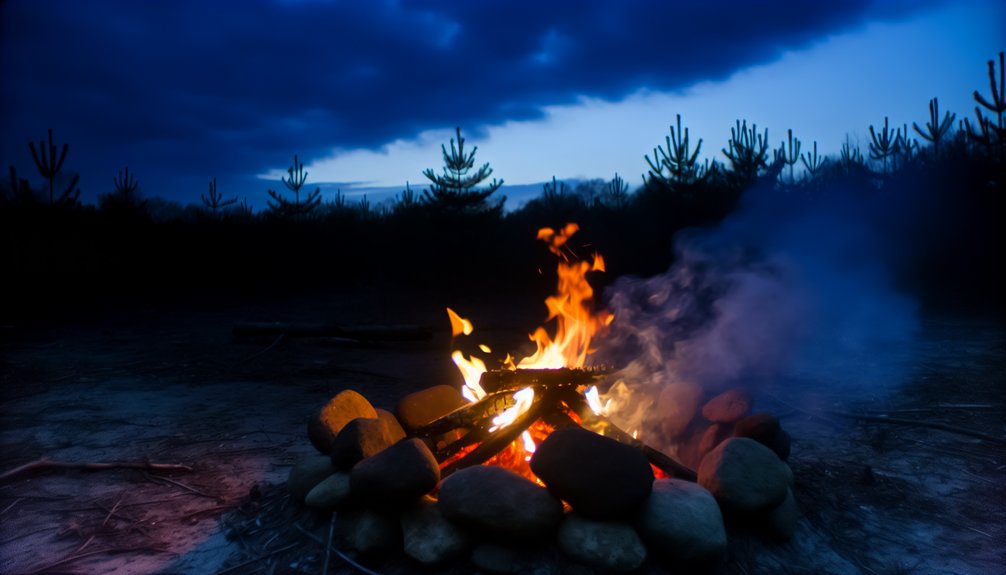
    Before you start a fire, it's crucial to prepare the site properly to ensure safety and efficiency. Proper fire site selection is key. Look for an open area, away from trees, buildings, and anything flammable. Clear the ground of organic materials like leaves or moss, and if possible, use rocks to create a fire pit. Always check for overhead wires or obstacles that could pose a risk. Ensuring that the site is free from any potential ignition sources is essential for preventing accidents. Additionally, understanding the importance of fire sustainability will help you maintain a steady and safe flame.

    Here's a quick reference table to help you with ground preparation:

    Step Action Purpose
    Choose Location Find an open space Reduces fire hazards
    Clear Ground Remove grass, leaves, and debris Prepares a safe burning area
    Create Containment Use rocks to form a barrier Keeps fire contained and controlled

    Once you've selected the site, clear a circular area to ensure nothing catches fire accidentally. If necessary, dig up the grass. Having large rocks to form a barrier around your fire pit is ideal, and if you can find a manmade fire pit, use that instead. Always keep a bucket of water and a first aid kit nearby for emergencies.

    With the ground prepared, you can gather your fire materials. Collect dry twigs, leaves, and other combustible items to ensure your fire starts easily. Remember, a well-prepared site not only enhances efficiency but also keeps you safe while enjoying your fire.

    Essential Safety Precautions

    safety first always follow

    When engaging in activities involving car parts, it's vital to prioritize safety precautions to prevent fire hazards. Start by ensuring regular vehicle maintenance. Check for fuel leaks and electrical issues, and fix them promptly. A well-maintained electrical system helps reduce fire risks, so keep an eye on loose or worn parts and maintain proper tire inflation to avoid friction-induced fires. Regular maintenance can significantly mitigate potential fire hazards present in your vehicle. Additionally, remember that over 100,000 car fires are reported annually, emphasizing the importance of vigilance and preparedness.

    Emergency preparedness is also crucial. Equip your vehicle with a fire extinguisher rated for Class B and Class C fires. If you're using a commercial vehicle, consider installing an automatic fire suppression system. Make sure you can easily access emergency phone services and conduct regular fire safety drills. Everyone in the vehicle should know the emergency procedures to follow.

    Preventing fire hazards is essential, too. Avoid smoking or using open flames near vehicles, especially during refueling. If you need to transport flammable liquids, use approved containers and store these materials outside, away from living spaces. Implement strict safety protocols when handling flammable substances, and educate drivers on safe driving habits to prevent overheating.

    Lastly, recognize the warning signs of a possible car fire, like unusual noises, smoke, or burning smells. If you suspect a fire, pull over and turn off the engine. Evacuate the vehicle safely, move to a safe distance, and call emergency services. Remember, proper safety training can make a big difference in fire prevention and response. Stay safe!

    Alternative Fire Starting Methods

    While traditional fire starting methods often rely on matches or lighters, exploring alternative techniques can enhance your skills and adaptability in various situations. One effective method is the bow drill. You'll need a bow, a spindle, a piece of string, and a hearth board. By attaching the spindle to the bow with the string, you can rotate the spindle against the hearth board to create friction. This friction produces a glowing ember, which you can transfer to your tinder to start a fire. Remember, mastering this technique requires strength, patience, and practice.

    Another creative ignition technique is using flint and steel. For this, you'll need a piece of flint and a steel striker. Strike the flint against the steel at an angle to create sparks that can ignite char cloth or other tinder. This method can be a bit tricky in windy or damp conditions, so be prepared for some challenges.

    If you have sunny weather, try the plastic or balloon method. You can use a plastic bag or a clear water bottle filled with water to concentrate sunlight onto your tinder. This method requires direct sunlight but can produce enough heat to ignite your tinder.

    Lastly, consider using a 9-volt battery with steel wool. Place a small amount of steel wool into your tinder bundle and touch it with the battery terminals. The sparks produced will ignite the steel wool, helping you start a fire. All these methods use unconventional tinder sources and require practice to perfect.

    Gathering Necessary Materials

    collect essential supplies needed

    To kick off your fire-starting project using car parts, you'll need to gather a variety of materials. First, look for essential car parts like a battery, steel wool, and electrical wire. The battery can create sparks by connecting both terminals, while steel wool often comes in car emergency kits and is useful for igniting flames. You can also use electrical wire by stripping it for insulation material, which makes excellent tinder.

    Next, consider adding some natural fire materials. Dry leaves or grass are crucial for kindling, as are small twigs. These items help catch the spark and sustain initial flames. For a longer-lasting fire, larger logs will be necessary once you've got the blaze going. Don't forget to collect some rocks to build a fire pit that contains the fire safely.

    You should also prepare some additional materials, like a knife or sharp tool for shaping your tinder and kindling. Feather sticks, cotton balls coated in Vaseline, or dry shredded wood can all enhance your fire-starting efforts. Consider using dry pine needles or char cloth as well.

    Lastly, always prioritize safety by wearing protective gear and ensuring your area is clear of flammable materials. Having a bucket of water nearby is a smart precaution, too. By gathering these materials and fire materials, you'll be well-equipped to start your fire successfully and safely.

    Understanding Fire Behavior

    Fire behavior plays a crucial role in how flames react to their environment, influenced by factors like fuel, weather, and terrain. Understanding fire dynamics is essential when you're trying to start a fire using car parts. You need to know that fire requires three key elements: fuel, oxygen, and heat. The arrangement and moisture content of your fuel—like car parts—affect how quickly the fire spreads and how intense it becomes.

    When you ignite a fire, the combustion chemistry kicks in. This is the process where your fuel reacts with oxygen, producing heat and light. The rate of spread tells you how fast the flames will grow, while flame length can indicate the fireline intensity, or how much energy the fire releases. Longer flames usually mean a hotter fire, which can be crucial when trying to maintain your fire.

    Weather conditions, such as wind and humidity, significantly influence fire behavior. For instance, strong winds can carry embers farther, causing the fire to spread rapidly. Likewise, the slope of the terrain plays a role; fires tend to move faster uphill.

    Tips for Fire Maintenance

    fire safety maintenance tips

    Maintaining a fire requires diligence and awareness to ensure safety and efficiency. To keep your fire safe, follow these maintenance tips. First, always keep flammable materials away from heat sources like space heaters, stoves, or fireplaces. This simple step can prevent accidents. When using space heaters, place them on level, non-flammable surfaces, and never leave them unattended.

    Next, focus on electrical safety. Regularly check cords for damage and replace any frayed ones. Store matches and lighters out of children's reach to avoid unwanted fires. It's also smart to schedule regular maintenance for your electrical equipment and inspect exhaust systems for grease buildup.

    In the kitchen, consider installing an automatic fire-suppression system. Keep your cooking area clean, and store flammable liquids properly. Make sure everyone knows the evacuation plan in case of a fire.

    Finally, train staff to use fire extinguishers correctly. Everyone should understand the PASS method: Pull, Aim, Squeeze, and Sweep. Regularly inspect fire extinguishers and check their pressure gauges. This ensures they're ready when needed.

    Responsible Fire Extinguishing Techniques

    Knowing how to extinguish a fire responsibly can mean the difference between a small mishap and a full-blown emergency. When you're faced with a fire, quick thinking and proper techniques are essential. Here are some responsible extinguishing techniques you should know:

    1. Identify the fire class: Use the correct fire extinguisher type. For example, Class A is for ordinary combustibles, while Class B is for flammable liquids.
    2. Proper use of extinguishers: Remember the acronym PASS: PULL the pin, AIM the nozzle at the base of the fire, SQUEEZE the handle, and SWEEP from side to side.
    3. Maintain your extinguisher: Regular fire extinguisher maintenance is vital. Check that it's inspected annually and tagged with the inspection date. Replace any extinguishers that aren't in good condition.
    4. Know when to evacuate: If the fire grows rapidly, prioritize your safety. Ensure clear evacuation routes and don't hesitate to call emergency services if needed.

    Additionally, consider alternative methods for small fires, like using a fire blanket to smother flames or throwing sand on open flames. Always remember that extinguishers work best on small fires, so don't take unnecessary risks. By understanding these extinguishing techniques and maintaining your fire safety tools, you'll be better prepared to handle emergencies effectively.

    Frequently Asked Questions

    Can I Use Any Car Battery to Start a Fire?

    You can use a car battery safely to start a fire, but follow fire starter tips. Always handle batteries carefully, avoid sparks, and ensure good ventilation to prevent accidents while creating heat and ignition.

    What Type of Tinder Is Best for Starting Fires?

    When starting a fire, dry leaves are one of the best natural materials you can use as tinder. They ignite easily and help catch the flames, making your fire-building efforts much more effective.

    Is It Safe to Start Fires in Rainy Conditions?

    Starting fires in rainy conditions can be risky, but with proper fire safety precautions, you can manage it effectively. Always prioritize dry materials, protective setups, and constant monitoring to minimize hazards during wet weather.

    How Can I Extinguish a Fire Safely?

    To extinguish a fire safely, remember fire safety principles. Use extinguishing techniques like the PASS method, ensure you have the right extinguisher class, and always keep an exit behind you while addressing the fire.

    Can I Use Car Parts for Cooking Over a Fire?

    Yes, you can use car parts for cooking, but prioritize fire safety. Ensure your engine's clean, manage temperature control, and wrap food properly to avoid contamination. Always be cautious about potential hazards when cooking this way.

    Conclusion

    In summary, starting a fire using car parts can be done safely and effectively with the right knowledge and materials. Remember to prepare your fire site and follow essential safety precautions to prevent accidents. Always understand fire behavior to maintain control and ensure your fire serves its purpose. Finally, when you're done, make sure to extinguish your fire responsibly. By following these steps, you can create a fire safely and enjoyably.

  • Improvised Wilderness Weapons

    Improvised Wilderness Weapons

    Improvised wilderness weapons are vital for survival in the great outdoors. You can create tools for protection and hunting using materials like stones, wood, and fibrous vines. Common categories include blunt force weapons, like clubs, piercing tools such as spears, and projectile options like bows. Crafting involves techniques like tying, shaping, and binding for added strength. Always prioritize safety by treating these tools as potentially dangerous and practicing proper storage. Understanding local wildlife and terrain can enhance your survival strategies, making you more effective in the wild. There's much more to learn about each aspect, so keep exploring this topic.

    Essential Materials for Crafting

    When it comes to crafting improvised weapons in the wilderness, having the right materials is crucial. You'll find that both natural and manmade materials can be incredibly helpful. Natural materials like stone, wood, and fibrous vines are your best friends. Stone can be shaped into spear tips or knives, while wood serves as the backbone for spears and clubs. Fibrous vines or bark strips can lash various components together, ensuring your weapon is sturdy. Additionally, consider that items like loose change can be used as projectiles to distract or flinch opponents in self-defense situations.

    When you look for natural materials, consider green wood for handles. It's more durable and provides a better grip than dried wood. If you're in a non-wooded area, palm fronds and yucca stalks can substitute for branches, allowing you to create effective weapons. In addition, knowing about resourcefulness and creativity is essential for successfully crafting these weapons in the wilderness.

    On the manmade side, paracord is invaluable. It's great for securing knife blades to handles or for crafting sling weapons. If you don't have paracord, twine or even fabric from old clothing can work. Metal alloys are also essential when you want to craft sharper edged weapons. If you find plastic, it can be molded into crude knives or other tools.

    Finally, gathering the right tools will make crafting easier. A knife is critical for shaping wood, while rocks can serve as makeshift hammers. With the right combination of natural and manmade materials, you'll be well on your way to creating effective improvised weapons in the wilderness.

    Categories of Improvised Weapons

    Crafting improvised weapons in the wilderness can take many forms, and understanding the various categories helps you choose the right tool for your needs. The first category is blunt force applications. Here, you could create clubs by lashing rocks to branches or use heavier objects like maces or hammers for effective bludgeoning. Shovels can also serve dual purposes, allowing for both blunt-force and piercing attacks. It's important to note that improvised firearms, although a different category, can also be crafted in extreme situations using available materials. Additionally, having a clear understanding of anatomy for effective defense can enhance your use of blunt force weapons by targeting vulnerable areas.

    Next, consider piercing techniques. Knives made from stone, bone, or metal alloys are great for cutting and stabbing. You might sharpen a stick to create a spear or use a longer pike for defense. Atlatls are useful for launching spear-like projectiles, while simple shivs can be crafted from sharp-edged materials.

    The third category focuses on projectile advantages. Traditional bows and arrows are excellent for hunting while slings can launch stones effortlessly. Javelins and bolas are also effective, with bolas designed to entangle targets. Rabbit sticks can serve as unique hunting tools due to their boomerang-like shape.

    Finally, hybrid functionalities combine different weapon types. An axe can serve as both a blunt-force and piercing weapon, while tomahawks are versatile for hacking and throwing. Pickaxes and hatchets offer a mix of chopping and slashing capabilities, and shovel-axes blend the functions of a shovel and axe, proving you can get creative with available materials. Understanding these categories will help you make informed decisions in the wilderness.

    Techniques for Weapon Crafting

    To create effective improvised weapons in the wilderness, you'll need to master several fundamental techniques that ensure both functionality and safety. Start with tying; this involves securing stones or bones to wooden handles using ropes or vines. This method is vital for ensuring weapon durability, so make sure your knots are tight and secure. Additionally, consider that completing activities can significantly enhance your skills in weapon crafting as you practice these techniques.

    Next, focus on shaping. Use a knife or sharp stone to carve wood into useful forms like clubs or spear shafts. Pay attention to the edges; they need to be sharp for effective use. Splitting wood is another important technique. By dividing it, you can create space to fit blades or stones securely. Additionally, consider constructing a club from a firm piece of hardwood for enhanced impact when striking.

    When it comes to binding, utilize paracord or vines to hold your blades or stones in place. This adds extra strength and stability. Lastly, don't forget about honing. This process sharpens the edges of your stone or bone tools, making them more effective in action.

    Strategies for Effective Use

    Effective use of improvised weapons in the wilderness hinges on understanding your surroundings and making strategic decisions. To enhance your wilderness tactics, start by assessing the materials available. Look for rocks, sticks, or other objects that can serve as impact or edged weapons. Knowing which weapon suits your situation can be crucial, especially when engaging with potential threats. For instance, a knife-tipped spear can be especially effective for both hunting and defense due to its versatility. Utilizing basic cutting tools can significantly improve your ability to craft these weapons from natural resources.

    Utilize stealth maneuvers to your advantage. Move quietly and remain unseen as you approach your target. This increases your chances of successfully using your weapon without drawing attention. When it comes to engagement, always aim for vulnerable areas, such as the head or joints, to maximize your weapon's effectiveness.

    Practice is key. Familiarize yourself with various weapons and their uses in different environmental conditions. For instance, a ranged weapon like a slingshot can be effective from a distance, while impact weapons require close proximity. Being adaptable allows you to switch strategies if the situation changes.

    Stay aware of your surroundings, including terrain and wildlife. Know where escape routes are located in case you need to retreat. The time of day can also affect visibility, so adjust your tactics accordingly. Remember, maintaining a survival mindset is crucial; prioritize your safety and avoid unnecessary confrontations when possible. By combining these strategies and staying calm under pressure, you'll be better prepared to use improvised weapons effectively in the wilderness.

    Safety Guidelines and Precautions

    follow safety measures diligently

    When it comes to using improvised weapons, safety should always be your top priority. Always assume that any improvised weapon is ready to discharge, even if it seems harmless. Handle these weapons carefully to avoid accidental discharge or injury. Only use them when absolutely necessary, ensuring your actions are controlled and deliberate. Additionally, being aware of your surroundings enhances your ability to respond effectively during an emergency.

    Be aware of your surroundings to prevent harming others or damaging property. When crafting improvised weapons, choose materials that are safe and less likely to cause unintended harm. Use proper techniques to avoid creating unstable or dangerous items. Always test these weapons in a safe environment to ensure they function as intended. Additionally, understanding local hazards in the area can help you avoid creating a weapon that could be ineffective or dangerous in specific environments.

    Storage is also crucial. Store materials and crafted weapons safely to prevent accidents. Regular weapon maintenance is important too; inspect and maintain your improvised weapons to keep them safe for use. Dispose of or store them responsibly when not in use, so they don't pose a risk.

    Understand local laws regarding the creation and use of improvised weapons. Use the minimum force necessary to ensure safety, and remember to respect life. Always hold yourself accountable for the use of any improvised weapon, knowing the consequences of your actions.

    Finally, obtain proper training in crafting and using these weapons safely. Practice in controlled environments to build your skills, and mentally prepare yourself to emphasize safety and responsible use. Continuous learning is key to staying safe while exploring improvised safety measures.

    Applications in Survival Scenarios

    Improvised wilderness weapons can be lifesavers in various survival scenarios, offering protection, food procurement, and signaling for help. Understanding their applications is crucial for your survival psychology and wilderness adaptability. Here's how you can effectively use them:

    • A knife-tipped spear for warding off large animals like bears or moose.
    • Clubs, such as a Native American war club, for self-defense.
    • Shepherd slings to throw rocks at predators or attackers.
    • Fire to create smoke signals that alert rescuers.

    In defensive situations, a well-crafted spear can help you keep dangerous wildlife at bay. Clubs are also handy in close encounters. When it comes to food procurement, you can make spears or DIY bows and arrows to hunt small and large game. Shaping rocks into knives lets you process food more easily, while improvised traps can catch small animals for sustenance.

    For signaling rescue, always have a plan. Use fire to create visible smoke signals by day, and reflective materials can attract attention during daylight. Remember, your mindset plays a big role. Maintaining a calm, focused attitude helps you think clearly and act decisively, enhancing your survival psychology. Being adaptable in the wilderness means using whatever you have at hand creatively. Whether it's everyday items or natural materials, the ability to improvise weapons can significantly improve your chances of survival.

    Hunting With Improvised Weapons

    improvised weapon hunting techniques

    Hunting with improvised weapons can be a rewarding yet challenging endeavor in the wilderness. When you're in a survival situation, understanding how to create and use these tools effectively is essential. Start by crafting a spear, which can be made from a straight stick. Sharpen one end and, if possible, attach a stone or bone tip to increase its effectiveness. This spear can also be used for spear fishing, allowing you to catch fish with precision.

    For small game, consider using trapping techniques. You can create a simple snare with wire or cordage, attaching it to a stick. This passive tool can capture animals without constant supervision. If you're looking for a more active approach, a throw stick can be useful. Find a hard, straight piece of wood and use it to stun or kill game directly.

    Another option is to make a bola, which consists of weights tied to the ends of a cord. This can help you trap or stun animals effectively. Slingshots are also handy; find a Y-shaped branch, add elastic bands, and use small stones as projectiles.

    Lastly, don't forget about the frog gig, crafted from natural materials. This tool can help you catch small game like frogs or fish. By honing these skills and crafting these tools, you'll increase your chances of successfully hunting in the wilderness. Remember, practice makes perfect, so try these techniques before you find yourself in a survival situation.

    Self-Defense Tactics

    Self-defense tactics are crucial for anyone venturing into the wilderness, as encounters with wildlife or hostile individuals can happen unexpectedly. Developing a tactical mindset is essential for navigating these self-defense scenarios. Here are some strategies to consider:

    • Identify local wildlife to know what threats you might face.
    • Use your environment to create improvised weapons from nearby materials.
    • Stay aware of your surroundings to avoid potentially dangerous situations.
    • Look threatening to deter attackers, raising your arms and speaking firmly.

    When faced with wildlife, different tactics apply. For example, if you encounter a black bear, don't play dead; instead, try to escape and, if necessary, fight back by targeting the bear's face. If you come across a mountain lion, make yourself look larger and maintain eye contact without running away. For human threats, using your backpack as a shield can buy you time, allowing for a strategic retreat if needed.

    Improvised weapons can greatly aid your defense. Use solid branches as clubs or create piercing tools like spears from sticks. Remember, your safety comes first, so if a confrontation seems unavoidable, be ready to fight back with whatever you can find.

    Psychological Aspects of Weaponry

    mental impact of weapons

    Understanding the psychological aspects of weaponry is vital, especially when considering how the presence of weapons can influence behavior. When you see a weapon, it can trigger aggressive thoughts and behaviors, a process known as psychological priming. This means that just viewing a weapon can make you more likely to think about aggression or act aggressively, especially if you're already feeling heightened emotions like anger or fear.

    Societal perceptions also play a big role in how weapons affect us. In many cultures, weapons are glorified in movies and advertisements, which reinforces the idea that they are powerful and desirable. This cultural backdrop can shape your views, making you more inclined to associate weapons with strength or safety. However, the reality is that the psychological damage from weapon exposure can extend far beyond immediate violence. People who witness or experience weapon-related harm may suffer from grief, PTSD, and other long-term emotional struggles.

    The General Aggression Model explains this by suggesting that weapons can activate aggressive thoughts and feelings, making it easier for those feelings to spill over into real-life actions. Understanding these dynamics is crucial, especially if you're in a wilderness setting where improvised weapons might come into play. By being aware of how weapons can influence your mindset and behavior, you can make more informed decisions about their use and the potential consequences involved.

    Frequently Asked Questions

    What Are the Best Natural Materials for Making Weapons?

    To make effective weapons, you'll want to gather sturdy wood types like oak or hickory, along with sharp stone tools. These materials provide strength and durability, essential for crafting reliable and functional weaponry.

    How Can I Improve My Accuracy With Improvised Projectile Weapons?

    To improve your accuracy with projectile weapons, focus on practice techniques like consistent grip and stance. Start with easy target selection, gradually increasing difficulty as you gain confidence and refine your skills. Consistency is key!

    What Are Some Creative Uses for Improvised Weapons Beyond Combat?

    You can use improvised weapons for survival skills by crafting emergency signaling devices, like flares or whistles. They're also handy for building shelters, preparing food, and providing first aid, enhancing your overall preparedness in the wild.

    How Do I Maintain My Improvised Weapons for Longevity?

    To maintain your weapons for longevity, use proper weapon storage and maintenance techniques. Regularly clean and inspect them, dry thoroughly, and store in a cool, dry place to prevent rust and decay.

    What Are the Ethical Considerations of Using Improvised Weapons?

    When using improvised weapons, consider self-defense ethics carefully. In survival scenarios, prioritize minimizing harm and ensuring your actions are justified. Always assess the legality and potential consequences of your choices before taking action.

    Conclusion

    In conclusion, crafting improvised wilderness weapons can be a valuable skill in survival situations. By understanding essential materials, techniques, and safety precautions, you can create effective tools for hunting and self-defense. Remember to always prioritize safety and practice your skills responsibly. With the right knowledge and preparation, you can confidently navigate challenging environments and protect yourself when needed. Stay aware, stay prepared, and use these skills wisely to enhance your survival chances.

  • Fire Building Techniques for Survival Situations

    Fire Building Techniques for Survival Situations

    To build a fire in survival situations, you need dry tinder, kindling, and fuel. First, gather materials like grass and small sticks, and clear a safe area. Choose fire structures like the teepee or log cabin for efficient burning. Use various ignition methods; friction, spark techniques, or chemicals like matches can help. Keep your fire's size manageable, with at least ten feet of clearance around it. Monitor the flames and control smoke. Make sure to practice your skills and consider advanced techniques. With each effort, you'll increase your chances of success and comfort in the wild. More details can enhance your skills.

    Fire Building Fundamentals

    When it comes to building a fire for survival, preparation is key. Before you even strike a match, ensure you clear the area of debris. This helps prevent uncontrolled fires that could pose a danger. Choose a sheltered location, protected from wind and rain, to improve your fire's stability. Once you've found a suitable spot, gather dry materials like tinder and kindling for easy ignition.

    Next, focus on your fire structure. Clear a space and use stones to create a ring that will contain your coals and fuel. This fire bed elevates the fire, promoting better combustion. To shield your fire from the elements, build a windbreak with natural materials. Arranging your tinder and kindling in a teepee or log cabin formation allows for efficient airflow, which is crucial for a successful fire. Additionally, always opt for sheltered spots when selecting a fire location to enhance protection from the elements. Proper fire building techniques enhance safety and efficiency, making it easier to maintain control over your fire.

    As you prepare the fire, gradually add larger pieces of wood as the flames grow. This step is essential to maintain a steady burn. Remember to leave some space for airflow to ignite the fire easily.

    Types of Survival Fires

    Understanding the different types of survival fires can greatly enhance your ability to stay warm, cook food, and signal for help. When you think about fire construction, it's essential to choose the right type of survival fire for your situation.

    One common type is the Teepee Fire. This fire is built by arranging sticks and kindling in a cone shape. It's easy to start and provides a lot of heat but isn't the best for cooking. If you're in windy conditions, you might prefer the Dakota Fire Hole, which involves digging a pit and an air tunnel. This fire is fuel-efficient and produces little smoke, making it great for cooking while keeping the fire contained. Be mindful of weather conditions can also significantly affect your ability to control the fire and ensure safety. Dry wood is crucial for successfully starting and sustaining any of these fire types.

    For a long-lasting fire, consider the Council Fire. Built by stacking logs in a box shape, it burns steadily and doesn't require much tending. If you need control over the flame, the Starfire allows you to manage the heat by pushing logs inward.

    The Log Cabin Fire is another excellent option, stacking logs in a square shape to provide warmth and cooking capabilities. For a versatile design, the Keyhole Fire uses two fire areas, perfect for both warmth and cooking.

    Lastly, the Trench Fire is useful in open areas, allowing airflow under the tinder, making it effective in windy conditions. Selecting the right type of survival fire can significantly impact your experience in the wild.

    Ignition Techniques

    Selecting the right type of survival fire is only part of the equation; knowing how to ignite that fire is just as important. You've got several ignition techniques at your disposal, each with unique fire starters. Friction ignition methods, like the bow drill or hand drill, rely on creating heat through the friction of wood. For the bow drill, you'll use a spindle, fireboard, and a bow to generate your ember. The hand drill involves rotating a wooden stick between your palms against a fireboard. Practicing these methods regularly helps ensure you can start a fire under various weather conditions. The bow drill method is particularly effective because it generates more friction and heat, making ember creation easier.

    Spark ignition techniques are also effective. The flint and steel method requires a ferrocerium rod and a piece of high carbon steel to create sparks that can ignite tinder. You could also try percussion fire starting, striking two rocks together to generate sparks.

    If you find yourself in bright sunlight, solar ignition techniques might be your best bet. Using a magnifying glass, you can focus sunlight on tinder, igniting it quickly.

    Chemical ignition sources are often the quickest. Matches and lighters are durable options that can easily ignite tinder. You can also use isopropyl alcohol to enhance the ignition process.

    No matter which method you choose, understanding these ignition techniques will greatly increase your chances of successfully starting a fire in a survival situation. Make sure you practice these techniques before you need them, so you're prepared when it counts!

    Fire Safety and Control

    Building a fire is just the beginning; controlling it is crucial for safety and effectiveness. You need to manage the fire's size and behavior to prevent it from getting out of control. Keeping your fire between 12 to 36 inches is a good rule of thumb. Make sure there's at least 10 feet of clearance around the fire to reduce risks. Techniques like the Dakota fire hole can help you maintain an efficient and safe fire. Recent trends show an increase in deaths due to exposure to fire and combustion products, so it's essential to prioritize fire control measures. Additionally, removal of any element such as fuel or oxygen can extinguish an unwanted fire, making it critical to monitor and adjust your fire accordingly.

    When it comes to smoke management, choose methods that distribute smoke evenly. This helps minimize visibility issues. Always be aware of your surroundings; build fires in areas where smoke won't get trapped. If you notice any symptoms like redness or flushing, seek fresh air immediately.

    Here's a quick reference table for fire safety and control:

    Fire Control Aspect Tips Fire Behavior Impact
    Fire Size Keep it 12-36 inches Reduces risk of wildfires
    Clearance 10 feet on all sides Prevents fire spread
    Smoke Management Use even distribution Improves visibility control
    Fuel Management Use hardwoods for stability Ensures long-lasting heat
    Monitoring Always keep an eye on it Prevents accidents overnight

    Advanced Fire Building

    mastering fire construction techniques

    When you venture into advanced fire building, mastering various techniques can significantly enhance your survival experience. Begin with proper fire preparation by selecting an ideal location. Choose a spot away from moisture, out of the wind, and close to a noncombustible surface like a large rock wall. Elevate your fire using rocks or logs to create a stable, dry foundation.

    Next, gather dry tinder and kindling, looking for sheltered areas where vegetation may have accumulated. Choose an effective fire structure, like a teepee or log cabin, depending on your available resources. Reliable ignition sources, such as matches or lighters, are essential for starting your fire.

    Now, let's explore some advanced techniques. If you want to go beyond matches, consider friction methods, where you create a flame by rubbing sticks together. Alternatively, use a lens, like a magnifying glass, to focus sunlight and ignite tinder. You can also use unconventional tools, like a chainsaw, to create sparks or ignite flammable materials. Remember that maintaining warmth is crucial for preventing hypothermia, especially in cold climates, as fire aids in psychological comfort during survival situations.

    To optimize your fire's performance, ensure adequate airflow by building windbreaks and constructing a fire bed with dry rocks or logs. For sustained heat, add larger logs gradually. Try specialized fire designs, like a Dakota Hole fire for a concealed option or a star fire for efficient wood burning.

    Emergency Fire Situations

    In emergency fire situations, knowing how to respond quickly can save lives. First, if you discover a fire, activate the nearest fire alarm and exit the building immediately. It's crucial to warn others about the fire and direct them to the nearest exit. Always use the stairs, not elevators, during evacuation. Close doors behind you to help contain fire and smoke, and once outside, move to the designated evacuation zone. Never re-enter the building until it's declared safe.

    If you encounter a small fire, like one in a wastebasket, and you're trained to do so, attempt to extinguish it. Use the PASS method for fire extinguishers: Pull, Aim, Squeeze, and Sweep. Avoid trying to put out large or uncontrollable fires. If your clothes catch fire, remember to Stop, Drop, and Roll.

    In some cases, you might find yourself trapped. Before opening any doors, check the handles for heat. If the primary escape route is blocked, look for secondary routes. If you can't escape, stay in a room with the door closed, placing a wet towel underneath to block smoke. Call 9-1-1 to report your location.

    If you're in a position to signal for help, use a bright-colored cloth at the window. Open windows, if safe, to create ventilation and signal with a flashlight or by waving a sheet. Always prioritize your safety while following these evacuation strategies to avoid fire hazards.

    Essential Fire Materials

    fire safety equipment essentials

    To ensure you can start a fire in any survival situation, it's vital to gather essential fire materials. First, focus on your tinder selection. This is the initial material you'll use to catch a spark. Look for small twigs, dry leaves, or forest duff. These items are light and easily ignite. You can even use char cloth, which is a homemade option that catches fire quickly.

    Next, consider your kindling sources. Kindling consists of small sticks, typically less than one inch in diameter. You'll want to gather pieces that are dry and will catch fire easily after your tinder is lit. These will help build up your fire and make it strong enough to ignite larger pieces of wood.

    In addition to your tinder and kindling, having reliable fire starters is crucial. Matches and lighters are essential for quickly starting fires. If you don't have those, consider using a magnifying glass to focus sunlight on your tinder, but remember, it requires sunny weather. Flint and steel or ferrocerium strikers can also create sparks to ignite your tinder, working well even in damp conditions.

    Maintaining Fire Longevity

    Maintaining fire longevity is crucial for survival, as a well-managed fire can provide warmth, cook food, and signal for help. To keep your fire burning strong, it's essential to understand fuel types and ember management. Start by strategically placing larger, slow-burning logs at the base of your fire. This creates a solid foundation. As the fire grows, gradually add smaller logs and kindling on top. Timing matters too; add fuel just before the flames start to flicker out.

    Make sure your firewood is dry and organized for efficient burning. Utilize hot embers to reignite new wood, which cuts down on the need for constant fuel replenishment. Embrace various fire structures like the star fire or conical design to enhance heat intensity and longevity.

    Protection against wind and rain is also vital. Build a windbreak or use a mesh screen to contain sparks and shield the fire from rain. This helps maintain a steady burn and keeps your fire safe. Monitor your fire's heat and ember formation; adjusting the size and position of the wood can help control the flames.

    Regularly clear excess ash to prevent smothering, and always keep flammable materials away from the fire. By following these tips on fuel types and ember management, you'll ensure your fire lasts longer, providing you with warmth and safety in survival situations.

    Signaling for Help

    emergency assistance request signal

    When you're in a survival situation, signaling for help becomes a top priority. You need to make your presence known to rescuers, and there are effective ways to do this through visual signaling and audio signaling.

    For visual signaling, consider building three fires in a triangle shape. This is an internationally recognized distress signal. Make sure to construct your fires in high ground or open areas to maximize visibility. Use materials like green vegetation or damp leaves to create thick, white smoke, which stands out in the sky. If you're near snow or sand, arrange branches or rocks in a large X pattern to catch attention. Brightly colored flags or clothing can also help attract eyes from afar, so keep these items handy.

    On the audio signaling side, whistles are incredibly useful. If you blow three distinct blasts, it signals distress. Manufactured whistles often have a greater range than your voice, so they're worth carrying. If you have a firearm, firing three shots at intervals can also serve as a distress signal, but be careful not to use this method in areas where it might cause alarm. If you have a radio, such as the AN/PRC-90 or AN/PRC-112, use it to transmit tone or voice signals. Always consider your surroundings and battery strength to maximize your chances of being heard. By combining visual and audio signals, you enhance your chances of being rescued.

    Tips for Fire Success

    Fire is a crucial element for survival, providing warmth, cooking, and signaling for help. To achieve fire success, you need to focus on effective preparation techniques and construction methods. Start by selecting the right tinder. Choose dry materials like leaves, grass, or shredded bark, as they ignite easily. Next, prepare your kindling. Use thin, dry sticks and branches to help the fire grow.

    Selecting the right fire site is also essential. Look for protected areas or natural windbreaks to minimize wind interference. Before starting your fire, build a shelter to shield you from the elements. Always carry emergency supplies, such as waterproof matches or lighters, to ensure you can start a fire when needed.

    When constructing your fire, consider using a teepee structure, where you arrange logs in a cone shape over your tinder. Alternatively, try the log cabin formation by stacking logs in a square around the tinder. This design allows for good airflow, making it easier for your fire to thrive.

    For ignition, use reliable methods like lighters or ferro rods, which produce sparks. If you're feeling adventurous, you can even try the bow drill technique, which uses friction to create heat.

    Finally, remember to manage your fire safely. Build a windbreak around your fire and ensure it's elevated from wet ground. After you're done, extinguish the fire completely to prevent wildfires. By following these tips, you'll be well on your way to achieving fire success in any survival situation.

    Frequently Asked Questions

    What Should I Do if I Can't Find Dry Tinder?

    If you can't find dry tinder, look for alternative tinder options like birch bark or juniper bark. You can also practice fire starting improvisation by using crumpled grass or dry leaves for ignition.

    Can I Use Gasoline to Start a Fire?

    You can use gasoline to start a fire, but be aware of gasoline dangers. Prioritize fire safety by using small amounts, standing back, and avoiding over-saturation to minimize risks and prevent accidents. Stay cautious!

    How Do I Extinguish a Fire Safely?

    To extinguish a fire safely, use effective fire extinguishing techniques. Remember to cool it with water, smother it with a blanket, or use the P.A.S.S method with an appropriate extinguisher for safe fire methods.

    What Are the Best Materials for Fire Starters?

    When choosing fire starters, consider natural materials like cedar bark and fatwood for their effectiveness. Alternatively, chemical starters like paraffin wax and petroleum jelly offer convenience. Each has unique benefits for igniting and sustaining your fire.

    How Can I Prevent Smoke Inhalation While Building a Fire?

    To prevent smoke inhalation while building a fire, ensure proper smoke ventilation. Position your fire away from wind direction and use a fire placement that allows smoke to disperse, keeping your breathing area clear and safe.

    Conclusion

    Building a fire in a survival situation is an essential skill that can keep you warm, cook food, and signal for help. Remember the fundamentals of fire building, such as choosing the right location and materials. Practice different ignition techniques and always prioritize safety. With patience and practice, you can master these techniques and ensure your fire lasts. Stay prepared, and you'll increase your chances of staying safe and comfortable in the wild.

  • Fire Building Techniques for Wet Environments

    Fire Building Techniques for Wet Environments

    To build a fire in wet environments, first, choose a sheltered spot, like under trees or rock faces, to protect your fire from rain and wind. Gather dry wood from standing dead limbs and collect various fuels like twigs, bark, and dried leaves. Avoid wet or green wood. Use dry materials to ignite the fire, spacing your kindling in a teepee shape for airflow. Make sure to monitor your fire closely and extinguish it safely when done. Understanding the weather and moisture levels can also help with fire success. You'll uncover more practical tips as you explore further.

    Site Selection and Preparation

    When choosing a site for building a fire in wet environments, it's crucial to prioritize both safety and efficiency. Start by looking for a sheltered location that provides protection from rain and wind, such as under thick tree cover or near rock faces. These natural shelters help keep your fire burning well even in damp conditions. Avoid spots with overhanging branches or dry grass, as these can catch fire unexpectedly.

    Next, consider the wind direction. You want to place your fire where gusts won't carry sparks to flammable materials nearby. If there's an established fire ring, use it for your fire ring construction. If not, create a new fire bed by clearing a patch of ground, ensuring it's free of debris and flammable materials. Additionally, never leave a fire unattended as this can lead to unintended wildfires, particularly in environments that are damp but still contain dry materials.

    To enhance your fire's stability, build a fire bed using dry rocks or logs, which raises the fire above the wet ground. Using dry tinder will greatly improve your chances of successful ignition, so look for materials like dead leaves or pine needles to gather. Arrange the rocks in a circular shape to contain the flames and allow for better airflow. Ensure that your fire bed is elevated to prevent water accumulation and improve ignition potential.

    Lastly, always be mindful of local fire restrictions. Before you start, confirm that it's safe and allowed to build a fire in your chosen area. With careful site selection and preparation, you'll set the stage for a successful fire, even in wet environments.

    Gathering and Preparing Fuel

    Gathering and preparing fuel is essential for building a successful fire in wet environments. Start by looking for dry wood locations, such as standing dead limbs and timber. These tend to be drier than wood lying on the ground, which often retains more moisture. It's crucial to gather various fuel types, including small twigs, dead leaves, bark, and pine needles. These materials can help you establish a strong base for your fire, especially if they're sheltered from moisture.

    When preparing your fuel, avoid using green wood, as it has high moisture levels and won't burn well. Use a knife or hatchet to split wood and expose the dry inner sections. This helps improve ignition. You can also shave the bark off a piece of wood; if it feels dry, it's a good sign that it'll burn better. Consider using the feather stick technique, where you carve thin curls from dry wood to enhance your chances of successful ignition. Additionally, survival instructors recommend collecting three times the estimated fuel needs to ensure you have enough for your fire.

    Staying organized and ensuring proper air circulation is crucial for efficient fire burning. Store your gathered fuel under a shelter or tarp to keep it dry. Keep it organized by size, making sure to group different sizes together for easy access when you need them. Always test for dryness before using your fuel; a simple lighter test on a small piece of wood can show if it's ready to burn. By following these tips, you'll ensure you have the right fuel to keep your fire going, even in challenging wet conditions.

    Fire Starting Methods

    Once you've gathered and prepared your fuel, the next step is to focus on effective fire starting methods suitable for wet environments. To achieve flame ignition, you'll need to use dry materials like dead leaves, bark, and pine needles. Start by creating a solid fire bed using dry rocks or logs. This helps elevate your fire and keeps it protected from moisture.

    For reliable fire starting, consider using waterproof fire starters, like waterproof matches or disposable lighters. If you want to create ember efficiently, try the bow drill technique. Here, you use a bow to spin a spindle against a fireboard, which generates heat and produces an ember. Alternatively, you can use the feather stick technique, where you carve thin curls of dry wood that catch fire easily.

    It's also useful to form tinder bundles, combining wood shavings, dried grass, and pine needles. Ensure you gather more tinder than you think you'll need, as this increases your chances of a successful ignition. Additionally, you may want to pack fire starters to help ignite your materials when conditions are particularly challenging. Once you start your fire, arrange your kindling in a teepee formation to allow airflow, which encourages flame growth.

    When the flames are strong, gradually add larger wood to sustain the fire. If you encounter damp wood, strip off the wet bark to reveal the dry inner layers, or split larger sticks for access to dry core wood. Always check local regulations regarding fire use to ensure safety and compliance. By following these methods, you'll enhance your chances of successfully starting a fire, even in challenging wet conditions.

    Fire Management and Safety

    Effective fire management and safety are crucial for enjoying a safe outdoor experience, especially in wet environments. To ensure your fire behaves as intended, start by selecting the right location. Find a spot sheltered from wind and rain, away from overhanging branches or dry grass. Use a tarp lean-to or natural shelter to create a dry environment for your fire setup. Additionally, remember that a well-placed shelter protects fire and aids in warming and drying.

    Next, prepare a stable fire bed. Elevate your fire using dry rocks or logs to keep it off the wet ground. Arrange rocks in a circular shape to contain the flames, which helps control fire behavior and prevents it from spreading unexpectedly.

    When collecting materials, gather fuel of varying sizes, including dry tinder and kindling. Create "feather sticks" by shaving curls from dry wood, and make tinder bundles with fine wood shavings and dried grass. Construct your fire in a teepee formation on top of a twig platform, ensuring there's good airflow underneath for optimal flame characteristics. Fire safety considerations are essential to incorporate early in the fire setup process to mitigate potential hazards.

    Always prioritize safety during ignition and management. Use waterproof matches or lighters, and protect the flame from wind and rain. Monitor your fire closely, ensuring it remains manageable and never leave it unattended.

    When it's time to extinguish your fire, let it burn down to coals. Cover the coals with water or dirt, making sure they're cold before leaving the site. By following these guidelines, you can enjoy a safe fire experience, even in challenging wet conditions.

    Weather Considerations

    weather related decision factors

    Understanding weather considerations is vital when building a fire in wet environments. Weather impacts can greatly influence your fire-building efforts, especially in areas with high humidity or fluctuating temperatures. Wind, for example, can provide an essential boost of oxygen to your fire, helping to dry out fuels and increase combustion. However, it can also carry embers away, potentially igniting spot fires nearby. When choosing a location for your fire, look for a sheltered spot that minimizes wind exposure.

    Temperature and humidity effects are crucial as well. Rising temperatures tend to lower relative humidity, which can make it easier for fuels to catch fire. If you have access to direct sunlight, take advantage of it; dry fuels, such as dead leaves or twigs, will ignite more readily. Keep in mind that smaller fuels are more sensitive to these changes, so focus on them when gathering materials. Additionally, ensure that all group members understand fire safety protocols to prevent accidents while managing the fire.

    Precipitation can have a significant effect on fuel moisture. Heavy rain can saturate your materials, making them less likely to ignite and burn effectively. To counteract this, try to protect your fire from rain and find dry tinder whenever possible. The duration of precipitation also matters; longer rain spells will have a greater impact on moisture content. By understanding these weather considerations, you can improve your chances of successfully building and maintaining a fire in wet conditions.

    Suppression and Control

    When tackling fire suppression in wet environments, it's crucial to employ various techniques tailored to the specific conditions you're facing. Effective fire suppression techniques can make a huge difference in controlling a fire that might otherwise spread rapidly. Here are some key methods you should consider:

    1. Direct Attack: Aim water directly at the base of the fire. This method helps suffocate the flames effectively.
    2. Wet Lines: Create a mowed line and spray water on it. This acts as a firebreak, helping to control the fire's spread.
    3. Fog Attack: Use a fog nozzle in closed areas with no wind. This disperses water droplets, making it easier to extinguish the fire.
    4. Indirect Attack: Spray water at the ceiling to disrupt thermal balance. The water droplets will drop down, helping to put out the flames.

    In addition to these fire control methods, it's vital to break the fire triangle. You can do this by removing fuel, smothering the fire with dirt to cut off oxygen, and using water to cool down the heat. Utilizing constructed firebreaks can also enhance your ability to manage fire spread effectively in wet environments.

    Always remember to prioritize safety during suppression efforts. Protect your crew by maintaining distance, using proper gear, and continuously monitoring fire behavior. Communication is key—ensure everyone on your team is informed and coordinated in their tactics. By implementing these techniques and maintaining a clear plan, you'll be better prepared to manage fires effectively in wet environments.

    Utilizing Natural Resources

    sustainable management of resources

    After mastering fire suppression techniques, you can enhance your fire-building efforts by utilizing natural resources effectively. In wet environments, finding dry components is crucial. Look for sheltered materials like dead leaves, bark, and small twigs that are protected from moisture. You can also use man-made items like fire putty or natural igniters such as pine sap in emergencies.

    Creating a proper fire bed is essential. Use dry rocks or logs to keep your fire off the wet ground. Arrange these in a circular shape to contain the flames and promote air circulation. This helps prevent moisture from affecting your firewood.

    When crafting tinder bundles, gather fine wood shavings, dried grass, and pine needles. Form these into a loose bundle that allows air to flow. Natural materials like birch bark are excellent for this purpose, but don't forget that man-made materials like laundry lint can be very effective too.

    Here's a quick reference table to help you remember the key components:

    Component Type Examples Purpose
    Dry Components Dead leaves, small twigs Starting fire
    Natural Igniters Pine sap, dry grass Igniting tinder bundles
    Fire Bed Materials Dry rocks, logs Elevating fire, preventing moisture
    Tinder Bundles Birch bark, wood shavings Sustaining the fire

    Utilizing these natural resources will increase your chances of successfully building a fire, even in wet conditions.

    Building a Sustainable Fire

    Building a sustainable fire in wet environments requires careful planning and resourcefulness. To create an effective fire structure that maintains flame stability, you'll need to set the right foundation and gather suitable materials. Here's a step-by-step guide to help you succeed:

    1. Select a sheltered location: Look for spots without overhanging branches or heavy snow, which could add moisture or hazards.
    2. Create a dry environment: Use a tarp or natural windbreaks to protect your fire from rain.
    3. Use a fire bed: Construct a fire bed with dry rocks or logs to keep the flames elevated and away from the wet ground.
    4. Gather dry materials: Collect dry leaves, bark, and twigs that are sheltered from moisture.

    Once you've prepared your site and gathered your materials, arrange your kindling in a teepee formation over the tinder, ensuring proper airflow. Add a cross-piece of wood to act as a windbreak and elevate the kindling. Start your fire with small sticks, gradually adding larger pieces as the flames grow stronger.

    To sustain your fire, continuously monitor it and adjust the size of the fuel as needed. Add larger timbers once the fire is established and place wet logs around the perimeter to dry out. By following these steps, you'll ensure a sustainable fire that stands strong against the elements, providing warmth and light as needed.

    Essential Fire Safety Tips

    fire safety essential tips

    Understanding fire safety is crucial, especially in wet environments where conditions can complicate your efforts. First, always have a plan in place for evacuation procedures. If you notice signs of lightning or hear thunder, it's time to leave swimming pools and beaches immediately. Avoid being the tallest object in the area; instead, seek low ground like ditches or trenches.

    Stay away from metal objects, including fences and electric wires, as these can conduct electricity during storms. Unsafe places like small shelters, canopies, and areas near trees should also be avoided due to the risk of falling branches or debris. When you need to evacuate, don't head towards open spaces like cliffs or dunes, as these can be unpredictable.

    When it comes to handling fire situations, remember that not all fires are extinguished with water. If you encounter a fire involving materials that react violently with water, use a Class D fire extinguisher specifically designed for such situations. Always keep a fire extinguisher accessible, and teach all family members how to use it correctly.

    Regularly inspect your fire extinguishers to ensure they're charged and ready for use. Before leaving any fire unattended, make sure it's completely extinguished. During a fire incident, stay low and crawl to avoid smoke inhalation. Following these basic fire safety tips will help you stay safe in wet environments, ensuring you're prepared for any emergency.

    Frequently Asked Questions

    What Are the Best Types of Wood for Wet Environments?

    When selecting firewood for wet environments, you'll want durable wood types like mahogany, oak, and teak. They resist moisture, ensuring better burning efficiency and heat output for your outdoor fires, even in challenging conditions.

    How Do I Prevent My Fire From Going Out in Rain?

    To prevent your fire from going out in rain, use reliable fire starters like cotton balls with Vaseline. Also, consider shelter options like a lean-to or natural overhang to shield your flames from moisture.

    Can I Use Damp Wood to Start a Fire?

    You can use damp wood for a fire, but it's tricky. Pair it with a reliable fire starter to help ignite the wood. Be patient and ensure proper airflow to maintain your fire's strength.

    What Tools Are Essential for Fire Building in Wet Conditions?

    For effective fire building, you'll need reliable fire starters like waterproof matches and dry tinder. Additionally, consider your shelter construction; it should protect your fire from moisture while allowing airflow to maintain a strong flame.

    How Do I Safely Extinguish a Fire in Wet Environments?

    To safely extinguish a fire in wet environments, prioritize fire safety by using appropriate extinguishing methods. Assess hazards, maintain distance, and follow the correct techniques to ensure effective control while minimizing risks to yourself and others.

    Conclusion

    In wet environments, building a fire takes careful planning and attention to detail. By choosing the right site, gathering suitable fuel, and using effective fire-starting methods, you can create a sustainable flame. Always remember to manage your fire safely and be aware of weather conditions. By following these techniques and tips, you can enjoy a warm, safe fire even in challenging conditions. Stay prepared, and you'll have the skills needed to build a successful fire outdoors.

  • Does Snow Work as Fire Insulation?

    Does Snow Work as Fire Insulation?

    Snow isn't an effective fire insulation material. While fluffy snow can trap heat due to its air pockets, it doesn't have the heat resistance needed to protect structures from flames. Snow tends to melt when exposed to high temperatures, losing its insulating properties quickly. Compared to traditional insulation materials like fiberglass, snow lacks fireproof qualities and cannot prevent heat transfer effectively. Though snow serves as an insulator in cold conditions, it isn't reliable against fire. If you're curious about more details on snow's insulation capabilities, there's plenty more to discover.

    Understanding Snow's Insulation Properties

    Snow's unique structure makes it an intriguing natural insulator. When you think about insulation, consider how snow density affects its ability to trap heat. Fluffy snow, which has a lower density, contains more air pockets. These air pockets are essential because they help retain warmth, making fluffy snow an excellent insulator. On the other hand, as snow becomes denser—like when it gets wet—it loses its insulating properties. This is because the thermal conductivity of snow increases with density. Essentially, denser snow allows heat to escape more easily.

    You might notice that fresh, fluffy snow acts as a barrier against cold temperatures, similar to traditional insulation materials like fiberglass. This is why a thick layer of snow can keep the ground beneath it warmer during winter. In contrast, wet snow, which is heavier and denser, doesn't insulate as well. Heat transport mechanisms, including conduction, play a significant role in how effectively snow retains warmth.

    The arrangement of snow grains also plays a role in how well snow insulates. Grain shape and bonding impact thermal conductivity, meaning that not just density matters. When snow accumulates in depth, it can create significant temperature differences, further enhancing its insulation capabilities. Fluffy snow is a better insulator than wet, dense snow, which demonstrates how variations in snow types can lead to different insulation outcomes.

    Understanding these properties can help you appreciate how snow works in nature, and it may even inspire you to think about how you could use snow in practical insulation projects or observe its effects on the environment around you.

    Comparing Snow and Traditional Insulation

    How does snow stack up against traditional insulation materials? When comparing snow to traditional insulations like fiberglass, you'll notice some similarities and key differences. Both snow and fiberglass contain air pockets that help trap heat, but their effectiveness varies. Snow density plays a crucial role here; snow can provide an insulation R-value of R-0.5 to R-2 per inch, which is comparable to some traditional products. However, this value isn't consistent. Additionally, excessive snow can cause structural stress on roofs, which traditional insulation does not.

    While both snow and traditional insulation can reflect heat back into a building, snow's insulation effectiveness is unreliable and temporary. It can melt, change density, and lose its insulating properties based on weather conditions. In contrast, traditional insulation is designed for durability and offers consistent performance over time. Furthermore, vertical lists are beneficial for presenting detailed comparisons of insulation properties.

    Another important factor is the weight and structural impact. Heavy snow can stress roofs, especially if it accumulates on wet layers, while traditional insulation is engineered to be lightweight and safe. Plus, traditional insulation systems include ventilation to prevent moisture issues, something snow can't manage well.

    In terms of maintenance, traditional insulation requires little upkeep, while snow may need regular removal to avoid structural problems. Overall, while snow can provide some insulation benefits, it can't replace traditional materials. If you're considering insulation for a building, relying on traditional options will ensure better performance, longevity, and safety.

    Practical Uses of Snow in Insulation

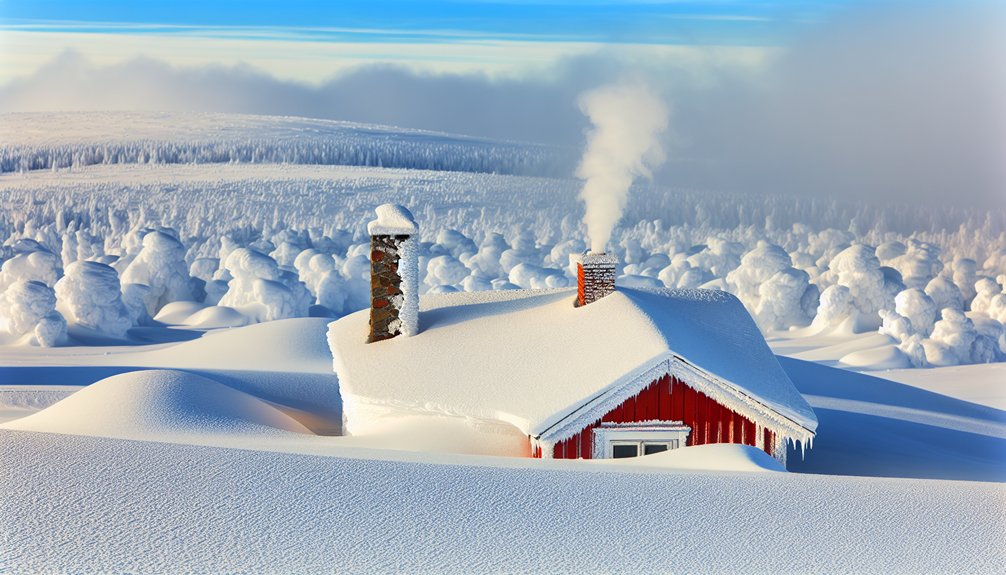
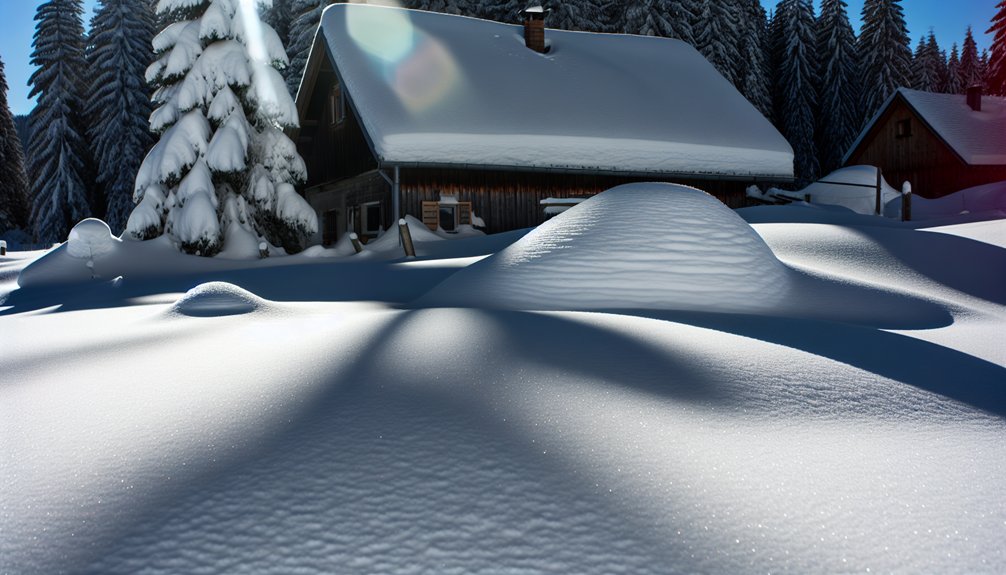
    Using snow as an insulation material might sound unconventional, but it has practical applications that can be surprisingly effective. Snow insulation techniques work best when you use fresh, fluffy snow, which has about 95% air trapped within it. This high air content makes it an excellent insulator, comparable to fiberglass insulation. You can apply snow insulation in various ways, such as banking log cabins to help keep them warm during winter or using it to insulate traditional Inuit shelters.

    One fascinating example of snow insulation benefits is the snow huts built by the Inuit people. These structures can maintain a cozy temperature of 61°F inside, even when it's -19°F outside. Snow also acts as a protective barrier for landscape plants, keeping soil temperatures stable and providing moisture. Additionally, the insulating effect of snow helps maintain a consistent temperature beneath the snow, which is crucial for protecting plants during winter. Fresh snow might also be used to pile against homes during snowstorms for added insulation, but be cautious, as too much snow can lead to potential damage.

    In practical terms, if you notice a solid layer of snow on your roof without any bare patches, it could indicate that your attic is well-insulated. However, be mindful of the snow's density; fresh snow is ideal, while wet or heavily packed snow loses its insulation value. By understanding these snow insulation techniques and benefits, you can effectively use snow to improve warmth and comfort in your living spaces.

    Limitations of Snow as Insulation

    While snow can be an effective insulator in certain situations, it has notable limitations that can affect its practicality. One of the main issues is snow density. Dense snow has high thermal conductivity, which means it doesn't trap heat well. Instead of insulating, it quickly transfers heat away. Wet or heavy snow is particularly poor at insulation because it compacts easily, reducing the amount of trapped air that helps slow down heat transfer.

    In contrast, fluffy snow, with its lower density, does a better job of insulating. The air pockets in fluffy snow slow down heat movement, which is why dry, fluffy snow is more effective at keeping warmth in. However, even fluffy snow has its limits. The insulation effectiveness of snow is temporary; it can only help if temperatures remain consistently cold. If it starts to melt, its insulating properties diminish rapidly. Additionally, even though snow may provide some level of insulation, it does not compare to the fireproof qualities of fiberglass insulation, which is non-flammable and offers better protection against fire hazards.

    Moreover, banking snow around your home may not be practical in all climates, especially if thawing cycles occur frequently. Lastly, using snow as insulation doesn't eliminate fire risks associated with other materials. Faulty wiring or overheating can still ignite insulation, regardless of its type. Therefore, while snow can provide some insulation, you need to consider these limitations before relying on it for long-term protection from heat loss or fire hazards.

    Environmental Impact of Snow Insulation

    snow insulation s environmental effects

    The environmental impact of snow insulation reflects both its ecological benefits and the challenges posed by snow removal practices. Snow cover benefits the environment in many ways. It helps regulate temperature fluctuations, protecting plants and trees from harsh conditions. When snow covers the ground, it insulates root systems, preventing damage from extreme cold. As the snow melts, it gradually releases moisture into the soil, providing a natural irrigation system. This process supports the ecological balance by maintaining healthy ecosystems, which is crucial for various plant and animal species. Additionally, the decline in snow cover negatively impacts species survival rates, further emphasizing the importance of preserving snow insulation. Proper insulation during winter months also contributes to energy efficiency, benefiting the overall ecosystem.

    However, snow removal can create significant environmental challenges. Using fossil fuel-powered equipment emits greenhouse gases, contributing to climate change. De-icing agents and heavy machinery can harm plant roots, reduce biodiversity, and even contaminate water sources, threatening aquatic life. Furthermore, improper snow disposal disrupts natural ecosystems and can lead to soil pH imbalances that affect plant health.

    To minimize these negative impacts, consider alternative snow removal methods. Using snow brushes and brooms instead of heavy machinery can lower emissions. Proper snow disposal at designated sites can prevent contamination, while reducing chemical use protects both plant roots and aquatic habitats. By adopting sustainable practices and raising awareness about the environmental impacts of snow removal, you can help preserve the ecological balance that snow cover provides. Understanding these factors empowers you to make choices that benefit the environment while enjoying the beauty of winter.

    Frequently Asked Questions

    Can Snow Withstand High Temperatures During a Fire?

    Snow can't withstand high temperatures during a fire. Its insulating properties diminish rapidly as fire temperatures rise, leading to melting and reduced effectiveness in protecting structures from heat, compromising safety and increasing fire risks.

    Does Snow Provide Any Fire Resistance Properties?

    Snow's composition and thermal properties inherently provide some fire resistance. Its insulating capabilities help maintain lower temperatures beneath the surface, potentially mitigating fire intensity while its reflective qualities limit heat absorption during fire exposure.

    How Does Snow Insulation Affect Fire Safety Regulations?

    Snow insulation doesn't directly influence fire safety regulations or insulation standards. While it may provide temporary insulation benefits, it lacks the fire resistance required for compliance, so relying solely on snow isn't advisable for fire safety.

    Is Snow Effective Against Fire in Residential Buildings?

    When considering snow properties in residential buildings, it doesn't provide real insulation effectiveness against fires. Instead, focus on proper fire-resistant materials to ensure safety and reduce risks during winter months. Snow's benefits are limited.

    Can Snow Melt During a Fire and Cause Hazards?

    Yes, snow can melt during a fire, creating hazards. The melting snow may cause water buildup, leading to electrical issues or obstructing vents, which increases fire hazards in your home. Always monitor snow accumulation carefully.

    Conclusion

    In conclusion, while snow can provide some insulation due to its air-filled structure, it isn't as effective as traditional insulation materials. Snow can help keep warmth in a shelter temporarily, but it has limitations, like melting and losing its insulating properties. If you're considering using snow for insulation, remember it's not a long-term solution. For better results, rely on proper insulation materials that are designed to keep your space warm and energy-efficient.

  • Can Any Glass Start a Fire?

    Can Any Glass Start a Fire?

    Not every type of glass can start a fire. Specialized glass, like high-quality magnifying glasses, can concentrate sunlight, which might ignite dry materials under the right conditions. However, regular window glass and thin glass break easily under heat and won't work effectively for this purpose. Glass alone can't start fires without extra help from sunlight or other materials. It's important to use suitable tinder, as well as arrange it properly to catch sparks and grow a fire. If you're curious about fire starting techniques, you'll find more helpful tips just ahead.

    Material Requirements for Fire Starting

    Starting a fire requires specific materials to ensure success, and understanding these requirements is key. The first thing you need is tinder. For effective tinder selection, choose dry materials like pine needles, dry grass, or birch bark strips. Remember, your tinder should be small and fluffy to catch a spark easily. High-quality tinder, like shredded inner bark or fluffy punk wood, will ignite more efficiently. Additionally, using a magnifying glass can significantly aid in igniting your tinder when sunlight is available.

    Next, you'll need kindling. This is the material you add after your tinder catches fire. Kindling should be smaller than a pencil, so gather thin twigs, dry branches, and small sticks. It's important to avoid using green or wet wood, as it won't burn well. Proper kindling arrangement is crucial; gradually add kindling to the burning tinder to help the fire grow stronger. Fresh timber and green wood are unsuitable for burning.

    Make sure you gather enough kindling to maintain the fire until larger logs can be added. Once your kindling is burning, you can introduce bigger pieces of dry wood to keep the fire going.

    Practical Considerations for Success

    Success in fire starting hinges on a few practical considerations that can make or break your attempts. First, you need to pay attention to the weather. A sunny day with minimal cloud cover is essential for effective solar ignition. If it's cloudy or raining, your chances of concentrating sunlight will drop significantly. Avoid attempting to start a fire on hot, dry, windy days, as this can lead to dangerous fire spread.

    Next, focus on your tinder and material preparation. Using dry, fluffy tinder like punkwood or charcloth will give you the best results. Arrange your tinder in a way that allows for good airflow, as this will increase your chances of ignition. The shape and density of your tinder bundle also matter, so take the time to prepare it properly. Additionally, understanding how to harness solar power for fire is essential knowledge for outdoor enthusiasts, as it can enhance your fire-starting skills. Remember that using certified eclipse glasses can help prevent eye damage during the fire-starting process.

    When it comes to technique, using high-quality magnifying glasses with 10x or greater magnification will help you focus sunlight effectively. Keep your glass steady at the optimal focal length for the best results. Remember to practice this technique; it's key to developing your skills.

    Lastly, don't forget about safety. Choose an open area away from flammable items, and always have a bucket of water or fire extinguisher nearby. By considering these practical factors, you'll significantly improve your chances of successfully starting a fire using glass properties and sunlight focus.

    Types of Glass Ineffective for Fire

    When it comes to fire safety, understanding which types of glass are ineffective is crucial. Certain glass properties can make them more susceptible to breakage and fire spread, which can pose serious risks. Here are some types of glass you should be aware of:

    1. Regular Window Glass: This type isn't designed to handle high temperatures, meaning it can fail easily when exposed to radiant heat or direct flames.
    2. Annealed Glass: Commonly used but prone to breakage due to temperature differences. When it breaks, it can contribute to fire spread.
    3. Non-Tempered Glass: Lacking the strength of tempered glass, it's more likely to break under fire conditions, allowing flames to spread more easily.
    4. Thin Glass: Thinner varieties generally don't resist fire well compared to their thicker counterparts, making them a bad choice for fire safety. Additionally, using glass with fire-retardant additives can significantly reduce the risk of fire spread. It's essential to remember that even small glass fragments can pose a fire risk by focusing sunlight on combustible materials.

    Recognizing these types of glass is important for preventing fire hazards. Using glass that can withstand high temperatures and has fire-retardant coatings can help reduce the risk of fire spread. Always consider the properties of any glass in your home or workspace. Opt for materials designed with fire safety in mind to protect yourself and your surroundings. By being informed, you can make better choices that enhance your fire safety.

    Common Misconceptions About Glass

    Many people hold misconceptions about the role of glass in fires, leading to confusion and potentially dangerous assumptions. One common misunderstanding is that glass can start fires on its own. In reality, glass requires external factors, like concentrated sunlight, to ignite materials. Additionally, the appearance of crazing on glass is often misinterpreted as a sign of rapid heating from accelerants, when, in fact, it results from rapid cooling. Historically, burning glasses have demonstrated the ability to focus sunlight effectively to start fires.

    To clarify these misconceptions, here's a simple table to help you understand different glass properties and their relation to fire:

    Glass Type Glass Property Fire Behavior
    Ordinary Glass Can focus sunlight Can ignite materials under specific conditions
    Tempered Glass Strengthened but can shatter Does not indicate fire accelerants
    Stained Glass Decorative but thin Less likely to cause ignition

    Moreover, some people mistakenly believe that melted or deformed glass always indicates the use of accelerants. This isn't true; high temperatures can alter glass without the presence of any flammable substances. Misinterpretations of glass behavior during fire investigations can lead to wrongful convictions, emphasizing the need for accurate knowledge. Understanding how different glass types and their properties interact with fire is crucial. By educating yourself, you can help dispel these myths and prevent potential misunderstandings in fire safety and investigations.

    Safety Tips for Fire Starting

    fire starting safety guidelines

    Starting a fire safely requires careful planning and the right materials. Knowing how to manage fire safety is essential, especially when using glass properties to start a fire. Here are some practical tips to help you start a fire safely:

    1. Choose the Right Materials: Use local firewood and select seasoned hardwood for better combustion. Avoid flammable liquids, as they can be dangerous and unpredictable. Additionally, always use local firewood to minimize the risk of introducing pests and diseases. Understanding various primitive fire-starting methods can also enhance your skills and preparedness.
    2. Know the Regulations: Always check the fire regulations in your area. This includes any temporary bans on outdoor fires, which are crucial for safety.
    3. Use a Fire Pit: If available, use a fire pit to contain your fire. Start small and gradually add larger logs, paying attention to wind directions to prevent embers from spreading.
    4. Prepare for Emergencies: Keep a bucket of water and a shovel nearby in case you need to control runaway flames. Always have a water source ready to extinguish the fire when you're done.

    Remember to clear the area of combustible materials and stack firewood at least 30 feet away from buildings. Also, keep your roof clear of debris to prevent any accidental fires. By following these safety tips, you'll enjoy your fire starting experience while protecting yourself and the environment.

    Educational Benefits of Fire Skills

    Understanding fire safety not only protects you but also opens the door to valuable educational experiences. Developing fire skills isn't just about knowing how to start a fire; it's a pathway to enhancing your cognitive development. When you practice fire-starting techniques, you're improving your fine motor skills and hand-eye coordination. Striking a match or arranging tinder requires patience and persistence, as you often need multiple attempts to succeed.

    Moreover, these activities encourage critical thinking. You'll find yourself experimenting with different materials and techniques, stimulating your curiosity and deepening your understanding of scientific principles like combustion and heat transfer. Each attempt teaches you to analyze what worked and what didn't, fostering resilience as you face challenges.

    Fire skills also promote risk management. By learning to handle fire responsibly, you develop self-reliance and confidence. You become more aware of your actions and their consequences, which is crucial for personal growth. This hands-on experience translates into enhanced problem-solving skills that can be applied in various academic subjects.

    Additionally, engaging with fire teaches you about the environment, as you explore the role of fire in ecosystems. By integrating physical skills with scientific concepts, you're not only learning to start a fire but also gaining valuable life skills. So, as you practice fire skills, remember, you're building a foundation for cognitive development and personal growth that can benefit you in many ways.

    Frequently Asked Questions

    Can Colored Glass Be Used for Starting Fires?

    Yes, you can use colored glass to start fires, but its effectiveness depends on clarity and quality. While it won't impact fire intensity significantly, a clear lens will yield better results in sunny conditions.

    How Does Humidity Affect Fire Starting With Glass?

    Humidity levels significantly impact fire ignition. When humidity's high, it dampens materials and limits oxygen, making it tougher to start fires. In contrast, low humidity increases flammability, heightening the risk of ignition, especially with glass.

    Is There a Specific Angle for Optimal Sunlight Focus?

    To achieve optimal sunlight focus, hold the magnifying glass at a 90-degree angle. This angle maximizes sunlight intensity, ensuring the rays concentrate effectively on your tinder for successful ignition. Adjust as needed for best results.

    Can Fire Starting Glass Be Homemade?

    Yes, you can create fire-starting glass using homemade materials, but it requires precision and effort. Ensure you follow safety precautions, as improper crafting could lead to ineffective results or potential hazards while experimenting.

    What Are the Best Types of Glass for Beginners?

    As a beginner, you'll want versatile glass types like Old Fashioned, Coupe, and Collins glasses. Remember, prioritizing glass fire safety is crucial, so choose sturdy options that withstand heat and won't easily break under pressure.

    Conclusion

    In conclusion, while some types of glass can start a fire, it's essential to understand the right conditions and techniques. Focus on using clear glass, like lenses, and ensure you have a suitable target, such as dry kindling. Remember, not all glass works well for this purpose, and safety should always come first. By practicing these skills responsibly, you can gain valuable knowledge that may help you in outdoor situations or emergency scenarios later on.

  • What’s the Best Natural Tinder?

    What’s the Best Natural Tinder?

    When you're looking for the best natural tinder, consider using fatwood, dry grass, or birch bark. Fatwood is highly flammable due to its resin and works well in damp conditions. Dry grass is easily combustible but must be bone dry. Birch bark contains oils, making it effective even when wet. For best results, you can mix these materials, like combining fatwood with dry grass to enhance ignition. Always check moisture levels before using any tinder, as wet materials are hard to ignite. There's more to learn about gathering and selecting tinders to improve your fire-starting skills.

    Common Types of Natural Tinders

    When you're looking for effective natural tinders, there are several common types you should consider. First, plant identification is crucial. Dry grass is an excellent choice; it's highly combustible, but make sure it's naturally dried. Birch bark is another great option, as it contains oils that make it usable even when wet, perfect for firesteels. Honeysuckle's outer bark can work, but the inner fluff is even better for tinder preparation.

    Next, you might want to explore seed and fungi tinders. Thistle's fluffy tops burn quickly, and you can store them in bulk. Dandelion seed heads are also highly combustible, making them a reliable choice. Dry moss, when thoroughly dried, can serve as tinder, just like dry pine needles. Cramp balls, found on dead Ash trees, are also effective as they smolder long after ignited. Understanding the importance of natural tinder can greatly enhance your fire-starting success.

    For bark and leaf tinders, consider cherry bark, although it's less successful. Willow bark can also be effective if it's dry. Many dry leaves can be used as tinder, and softwoods like pine provide usable bark. Hickory bark, when dry, is highly combustible and worth adding to your collection.

    Lastly, don't overlook other natural tinders. Dry pine resin is extremely flammable and works well with other tinders. Small twigs, certain vines like grapevine, and even dry grass seed heads can all serve as effective options. By knowing these common types, you'll be well-prepared for your next fire-building adventure!

    Effective Examples of Natural Tinders

    Exploring effective natural tinders can significantly enhance your fire-starting success. When you're out in the wild, knowing what to use can make all the difference in getting that fire going, especially when dealing with moisture effects. Here are some excellent natural tinders you can rely on:

    • Dry Grass: Works best when fully dry and can be shaped into a bird's nest structure.
    • Fatwood: This resin-soaked heartwood from pine trees is highly flammable and resists dampness.
    • Usnea (Old Man's Beard): Requires drying, preferably inside clothing, and fluffing up before use.
    • Cattail Flowers: Best when combined with slower-burning materials and gathered before they open.

    Using these tinders in combinations can really improve your chances of starting a fire. For example, mixing fatwood with dry grass creates a strong ignition source. Remember that all natural tinders must be dry to ignite effectively. Avoid using rotten materials, as they lose their fuel value and won't help you at all. Additionally, understanding the capabilities and limitations of different tinders can help you select the best ones for your specific situation.

    For optimal results, store your tinders in a way that keeps them dry, and consider processing some, like tinder fungus, into powder or shavings for better use. It's also important to note that high surface area increases burn efficiency, which is crucial for effective fire-starting. Experiment with different combinations to see what works best for you. By knowing these effective examples, you'll be well-equipped to start a fire no matter the conditions.

    Processing Techniques for Tinders

    Knowing how to process tinders can significantly improve your fire-starting skills. Proper tinder preparation involves several techniques that enhance the effectiveness of different materials. For grasses, start by fluffing the dead leaf blades and seed tops to separate them. Make sure they're bone dry; if they feel damp, spread them out over warm surfaces, like prickly shrubs, to dry. Roughing them up helps loosen the fibers, making them ignite easier. Remember to avoid lawn clippings, as they retain moisture and nitrogen, which can hinder your fire. Natural tinders enhance fire-starting success with fire steels, making the effort put into processing them even more valuable.

    When working with bark, scrape off the outer layer to reach the inner bark, which lights up more easily. You can also pound the inner bark to increase its surface area and fluffiness. Shredding it finely, especially birch, provides even better ignition. Always check for moisture; some types, like cedar, can still catch fire when damp.

    For leaves and needles, only use dead and dry materials. Crush or tear leaves to enhance their surface area, and don't forget to mix them with other tinders for better results. Pine needles handle moisture better due to their pitch content, but avoid rotten materials as they don't burn well.

    Lastly, for other tinders like seed down, collect fluffy tops from plants such as thistle or cattail. Crushing cattail heads exposes tiny fibers and mixing them with slower-burning tinders leads to a more sustained fire. Always assess moisture levels to ensure your tinders are ready to go! Additionally, consider using manufactured tinders, like TinderFire which can provide effective ignition even in extreme conditions.

    Strategies for Finding Tinders

    Finding natural tinders requires a keen eye and a bit of strategy. To effectively locate tinders, you need to understand the environmental factors around you and practice good tinder identification. Start by exploring areas where dry materials naturally accumulate, like forests or open fields. Here are some strategies to help you in your search:

    • Tinder Walks: Plan a systematic search in a wild area, dedicating time to gather and identify potential tinders.
    • Observation: Keep your eyes open for dead grass, leaves, or pine needles, which can be excellent tinder sources.
    • Combination: Collect a variety of tinders, such as inner bark and seed down, to create a more effective tinder bundle. Using a combination of natural tinders can significantly enhance your chances of successful ignition. Additionally, understanding the importance of fire in survival can motivate you to gather the best materials possible for your fire-making needs.
    • Seasonal Awareness: Learn how seasons affect the availability of tinders; for example, autumn often yields plenty of dry leaves.

    When you're out searching, pay attention to your surroundings. Look for areas where moisture might not linger, as this will help you find drier materials. Remember, the best tinders are dead and dry, with a lot of surface area to catch a spark. By using these strategies, you can ensure that you have the best natural tinders ready for your fire-making needs. Keep practicing your tinder identification skills, and soon, you'll be able to spot ideal materials without much effort.

    Safety Tips and Considerations

    safety first always consider

    While collecting natural tinders can be rewarding, it's essential to prioritize safety throughout the process. Start by gathering dry tinder. Wet tinder can be tricky to ignite, so always look for materials that are free from moisture. If you do collect damp tinder, think about drying it before use. Proper storage is crucial—keep your tinder away from moisture and consider placing it in your clothing for warmth. Additionally, it's important to protect personal info when sharing your location with others during outdoor activities.

    Before you set up your fire, prepare your tinder. Different types may need specific processing, so familiarize yourself with their unique characteristics. Practicing with various tinders will help you understand their capabilities and limitations, ensuring you're ready when it counts. Additionally, always be aware of potential risks when using fire outdoors to avoid accidents.

    Be aware of your environment while collecting tinder. Avoid areas that might pose risks, like marshy spots where dry options are limited. Always handle your tinder and kindling with care to prevent injuries. Time management is also important. Don't rush your collection and fire-starting process; allocate enough time to do it safely.

    Finally, it's wise to have a backup plan, especially if you're in a remote location. Carry man-made tinders as a safety net. Remember, fire safety is paramount. Always assess the risks involved in outdoor activities. With these tips, you'll be prepared to enjoy your outdoor adventures while keeping safety at the forefront.

    Frequently Asked Questions

    What Is the Best Tinder for Wet Conditions?

    For wet conditions, you'll want effective wet tinder options like fatwood or usnea. Combine waterproofing techniques, such as drying tinders with body warmth, to enhance your chances of igniting a successful fire.

    Can I Use Synthetic Materials as Tinder?

    Yes, you can use synthetic materials as tinder. They offer numerous advantages, like consistent ignition and water resistance. Consider firestarter alternatives, such as cotton balls or paracord, for reliable and portable solutions in various conditions.

    How Long Can Natural Tinders Be Stored?

    Natural tinders' storage duration depends on various longevity factors. If you keep them dry and protected in airtight containers, you can extend their shelf life, but they generally don't last as long as manufactured options.

    Do Different Climates Affect Tinder Effectiveness?

    Yes, climate variations and humidity levels significantly affect tinder effectiveness. In damp conditions, materials like grass can struggle, while others like birch bark remain reliable if processed correctly. Always adapt your tinder choices to local conditions.

    Can I Use Animal Materials for Tinder?

    Yes, you can use animal materials for tinder in emergencies. Animal fur and feather down are excellent choices, as they're lightweight and highly flammable when dry. Just make sure to collect them responsibly.

    Conclusion

    In conclusion, choosing the best natural tinder depends on what you have available in your environment. Common options like dry grass, pine needles, and bark can work well if prepared correctly. Remember to process your tinders by drying and shredding them to increase their effectiveness. Always prioritize safety when gathering and using tinders outdoors. By following these tips, you'll be better prepared for any fire-starting situation, making your outdoor experiences more enjoyable and successful.

  • Can Wet Flint Still Spark?

    Can Wet Flint Still Spark?

    Yes, wet flint can still spark effectively. The physical integrity of flint is unaffected by moisture, so you can use it even in damp conditions. When striking flint against steel or another hard surface, it produces sparks whether it's wet or dry. However, if you're trying to start a fire, your tinder and kindling need to be dry. Seek out sheltered areas to find dry materials, as high humidity can complicate fire starting. Remember, preparation is key in such situations. You'll find more tips on how to manage fire starting challenges in various environments.

    Understanding Flint Properties

    Understanding the properties of flint is essential if you're exploring its uses, especially in fire-starting and tool-making. Flint has unique characteristics that make it an excellent material for these purposes. For starters, it rates a hardness of 7 on the Mohs scale, which means it's quite tough and resistant to wear. This durability is one reason ancient people favored flint for crafting tools.

    When you consider flint composition, it's primarily made up of microcrystalline quartz, specifically silicon dioxide (SiO2). This composition gives flint its dense structure, formed through silica deposition interacting with calcium carbonate in sediments. As you examine flint, you'll notice its typical opaque appearance, though thin edges can be translucent. The conchoidal fracture pattern allows you to create smooth, sharp edges when knapping, making it ideal for tool-making.

    Another important aspect of flint characteristics is its ability to produce sparks. When you strike flint against a high-carbon steel surface, it generates sparks, which can ignite tinder for fire-starting. The texture of flint is also fine-grained and homogeneous, which aids in precision when shaping tools. Additionally, color variations ranging from black to gray and brown can occur due to impurities, impacting its aesthetic appeal. Moreover, Ohio flint is particularly valued for its beautiful coloring, making it a popular choice for jewelry. Interestingly, hardened steel enhances spark production, which is crucial for effective fire-starting using flint.

    Impact of Moisture on Flint

    Moisture doesn't diminish flint's ability to spark when struck against steel, making it a reliable choice for fire starting even in damp conditions. You can confidently use flint in wet weather, as its spark reliability remains unchanged. Here are some key points regarding the impact of moisture on flint:

    1. Spark production unaffected: Flint will produce sparks regardless of being wet; moisture effects don't hinder its performance.
    2. Physical integrity preserved: The flint itself isn't damaged by moisture, meaning it stays usable even in challenging environments. Repeated phrases prompt physical participation, which can be beneficial when demonstrating fire-starting techniques.
    3. Tinder's role: While flint can create sparks, the dryness of your tinder is crucial for ignition. If your tinder's wet, it might not catch fire, no matter how well you strike the flint.
    4. Weather considerations: Rain or high humidity mainly complicate fire starting due to the condition of your tinder, not the flint. Flint remains effective even when wet, unlike matches, which can be a critical advantage in survival situations.

    In essence, while flint can maintain its spark production in wet conditions, you need to ensure your tinder is dry for successful fire starting. This understanding is vital for outdoor enthusiasts and survivalists alike, as it highlights the importance of both materials in your fire-starting kit. Remember, flint's effectiveness is consistent, making it a trusted tool for fire-making, even when the weather isn't cooperating.

    How to Start a Fire

    Starting a fire can be a straightforward process if you have the right materials and follow a few simple steps. First, clear an area on the ground by removing any grass or leaves. This space should be circular and free of flammable materials. Next, line the perimeter with large rocks to contain the fire and help with fire maintenance. Creating a fire barrier is essential to ensure that the fire remains controlled and does not spread.

    Now, build your kindling by placing dry sticks and twigs in the center. These will serve as the base for your fire. On top of the kindling, add dry grass and leaves, which act as tinder to catch the initial spark. Once your setup is ready, it's time to light the fire. Use a lighter or matches if you have them. If you're relying on primitive methods, flint and steel or a knife can create sparks to ignite your tinder. Understanding that flint and steel can produce sparks even when wet is crucial for successful fire-starting in challenging conditions.

    Troubleshooting Fire Ignition

    Troubleshooting fire ignition requires attention to detail and a few essential techniques. Whether you're using flint as your fire starter or looking for other ignition sources, understanding these steps can help you succeed.

    1. Check Your Materials: Make sure your wood and kindling are dry. Wet materials are harder to ignite and can dampen your chances of success.
    2. Control Airflow: Ensure there's adequate airflow around your fire area. Good airflow helps keep your embers alive and prevents them from being extinguished too quickly.
    3. Use Sufficient Flint Shavings: Don't skimp on flint shavings when trying to create sparks. The more shavings you have, the better your chances of catching a spark. Additionally, understanding how fire behavior interacts with your ignition materials can enhance your chances of success. Wet flint may hinder spark production due to its inability to generate effective friction.
    4. Mind the Wind: Protect your fire area from excessive wind. Wind can blow out your sparks and make it challenging to ignite your tinder.

    Position the flint at an appropriate angle so that sparks fall directly into your tinder. Always remember to prepare your tinder well, possibly using charred powder or cloth to retain those precious sparks. If you find yourself struggling, gently blow on the sparks to encourage ignition. Each of these techniques is crucial for troubleshooting fire ignition effectively, so take the time to apply them properly. With patience and attention to detail, you'll be well on your way to starting a successful fire.

    Alternative Fire Starting Techniques

    creative ignition methods explored

    When you're in a pinch and need to ignite a fire, exploring alternative fire starting techniques can expand your options significantly. One effective method is the flint and steel technique. You'll need a piece of flint and carbon steel. When you strike the steel against the flint, it creates sparks. Direct those sparks onto your tinder or char cloth, then gently blow on them to help ignite the material. Remember, practice is key to mastering this fire starter type.

    Friction methods, like the hand drill and bow drill, are also popular. These techniques generate heat through friction between two pieces of wood. With the right materials and technique, you can produce a glowing ember that ignites your tinder, especially when using a notch in the fireboard. Mastery of these techniques is essential for success.

    If you have sunlight, consider solar fire starting. This method uses a magnifying glass, clear water bottle, or plastic bag to concentrate sunlight onto a small area. With enough heat, you can ignite your tinder, but it requires favorable weather conditions.

    Lastly, the fire piston technique involves a piston and cylinder. By quickly slamming the piston, you compress air, creating heat and pressure that can ignite char cloth or other ignition materials. This method requires specific components, including the piston, cylinder, lubricant, and tinder.

    Essential Materials for Fire Starting

    Gathering the right materials is crucial for successfully starting a fire. Knowing the essential tinder types, kindling sources, and fuel options will help you ignite a fire quickly and efficiently. Here's what you need to gather:

    1. Tinder Types: Look for dry leaves or pine needles that are firm and "crackly." You can also use dry shredded wood, deconstructed cattail, or char cloth. Cotton balls covered in Vaseline are excellent, too; just make sure they're well-saturated.
    2. Kindling Sources: You'll need small twigs, about the size of a #2 pencil or smaller. Dry branches from dead trees work well, as do small dry sticks from the base of pine trees. Also, consider dry grass and dead wood pieces that are roughly the diameter of a thumb.
    3. Fuel Materials: As your fire grows, larger logs from dead trees are important. Look for thicker branches and dry wood pieces that are larger than thumb-sized but smaller than full logs.
    4. Fire Starting Tools: You'll want a reliable flint, steel (like a pocketknife or fire steel), and possibly a fire piston. A magnifying glass can help focus sunlight, and matches or a lighter can ignite your tinder directly.

    Wet Conditions and Fire Success

    wet weather affects fires

    Even with the right materials, wet conditions can make starting a fire challenging. To increase your chances of success, you'll need to focus on fire location, ignition methods, and effective building techniques. Here are some essential tips:

    1. Choose a Protected Location: Find a spot sheltered from rain and wind, like under a large rock or fallen tree.
    2. Gather Dry Materials: Look for dry tinder and kindling in sheltered areas to ensure you have the best chance for ignition.
    3. Create a Fire Bed: Use dry rocks or logs to lift your fire off the wet ground.
    4. Use Effective Ignition Methods: Waterproof matches or fire starter sticks can be reliable options for igniting your fire.

    Here's a quick reference table for building your fire:

    Step Description
    Build Structure Use a teepee or log cabin design for airflow.
    Shield the Fire Protect your flame with a tarp or shelter.
    Manage the Flame Adjust wood placement to control size and direction.
    Monitor Regularly Check the fire's condition for safety and efficiency.

    Frequently Asked Questions

    Can Flint Be Effective in Humid Environments?

    Flint can struggle in humid environments due to humidity effects on tinder and moisture absorption. Proper flint storage helps maintain effectiveness, but ensuring your materials are dry is crucial for successful fire starting.

    What Happens if My Flint Gets Wet?

    If your flint gets wet, don't worry; its properties remain intact. Use flint drying techniques like air drying or sunlight exposure to ensure maximum effectiveness when you need to strike a spark later.

    Is There a Difference Between Dry and Wet Flint?

    There's a noticeable difference between dry flint and wet flint in spark generation. Dry flint performs better, allowing for more effective sparks, while wet flint can challenge your fire-starting efforts without proper technique and tinder preparation.

    How Does Temperature Affect Flint's Sparking Ability?

    Temperature doesn't significantly affect flint's sparking efficiency. Instead, the oxidation of steel generates sparks. Focus on using high carbon content steel and ensuring fine tinder to maximize your success in creating fire, regardless of temperature.

    Can Flint Be Used After Prolonged Exposure to Water?

    Yes, you can use flint after prolonged water exposure. Its wet flint properties remain effective for sparking. Just remember flint maintenance tips, like keeping the edge sharp, to ensure optimal performance when striking.

    Conclusion

    In conclusion, while wet flint can be challenging to use, it can still spark if you know the right techniques. If you find yourself in a damp situation, remember to dry your flint as much as possible and use a good kindling material. If flint doesn't work, don't hesitate to explore other fire-starting methods. Always be prepared with essential materials, and you'll increase your chances of successfully starting a fire, even in wet conditions.

  • How to Survive in the Wild With a Bow

    How to Survive in the Wild With a Bow

    To survive in the wild with a bow, you’ll need the right gear and skills. Start with a reliable bow, arrows, and a quiver for easy access. Practice understanding animal behavior, which helps you ambush or spot-and-stalk effectively. Know your surroundings; use maps and a compass to navigate. Always prioritize safety; inspect your gear and make sure you’re aware of others around you when shooting. Learn to forage for high-energy food like nuts and edible plants. Regular practice will improve your archery skills and hunting techniques, making your survival experience more successful and enriching. More essential tips await to enhance your journey.

    Essential Bowhunting Gear

    When preparing for a successful bowhunting trip, gathering the right gear is vital. Start with your bow. A compound bow is perfect for hunting large game, so make sure yours is in top shape through regular bow maintenance. Check the strings, limbs, and cams to keep it functioning smoothly. Next, select the right arrows and broadheads. Micro-diameter shafts enhance penetration and trajectory, making your shots more effective.

    You’ll also need a quiver to hold your arrows securely for easy access. A bow sight improves your targeting and accuracy, which is essential when aiming at fast-moving game. Don’t forget a release aid; this mechanical tool helps you fire arrows with precision, increasing your chances of success.

    In addition to your bow and arrows, pack important hunting gear. A camo backpack can help you carry all your supplies. Binoculars are great for scouting the area without disturbing the wildlife. Bring field dressing tools, including a large knife, bone saw, and latex gloves, for processing your game once it’s down.

    Safety and survival items are equally important. A safety harness protects you while hunting from tree stands, ensuring your safety in elevated positions. Regular gear checks can ensure that your equipment is ready for action and help prevent unexpected failures during your hunt. A multi-tool, complete with Allen wrenches and hex keys, will assist with any adjustments to your gear in the field. Finally, stay hydrated with a quiet, insulated water bottle, and pack a first aid kit for emergencies. With the right gear selection, you’re well on your way to a successful bowhunting adventure.

    Understanding Animal Behavior

    Understanding animal behavior is essential for surviving in the wild, especially when you’re bowhunting. To be successful, you need to recognize how animals detect and respond to threats. Animals rely on visual, auditory, and olfactory cues for predator recognition. They watch for changes in their surroundings, listen for unusual sounds, and smell for danger. Understanding these signals helps you anticipate their movements.

    Group vigilance is another important aspect of animal behavior. Many species have individuals that keep watch for predators while others forage or rest. This teamwork enhances survival rates, as one alert animal can signal others through alarm calls, allowing the group to react quickly. Additionally, analyzing social dynamics within these groups can provide insights into their behavior and alertness.

    Animals also use various survival strategies. Some blend into their environment using camouflage, while others rely on speed and agility to escape. When hunting, you must consider these behaviors. For instance, if you’re stalking a herd, pay attention to any alert postures or movements. If one animal senses danger, the whole group may bolt in different directions.

    Additionally, knowing how animals defend their territories can help you choose the right approach. They might use intimidation or work as a team to fend off threats. Understanding how animals respond to their environment and each other will make you a more effective hunter. By being aware of these behaviors, you can adapt your tactics, improve your chances, and truly connect with the wild. Survival skills are fundamental for ensuring that you can effectively navigate and thrive in the wild environment.

    Effective Hunting Techniques

    Effective hunting techniques can markedly increase your chances of success in the wild. Two effective methods you can use are ambush strategies and spot-and-stalk techniques. Both require careful planning and observation, allowing you to catch game off guard.

    • Scouting for deer: Use binoculars to identify feeding areas and deer entry points.
    • Setting up ambushes: Choose spots near food sources, considering wind direction and cover.
    • Spotting game: Use high-powered optics to find deer from a distance, observing their behavior.
    • Approaching undetected: Utilize natural barriers to break the line of sight and get close without being seen.

    When employing ambush strategies, scout the area thoroughly. Walk the woods to find signs like tracks and droppings. Identify deer patterns and set up tree stands or ground blinds to conceal yourself. This way, you reduce the chances of being detected by scent. Additionally, consider extended seasons for bowhunting that provide more time to hone your ambush skills in various conditions. Understanding animal behavior is crucial for making informed decisions while stalking.

    For spot-and-stalk techniques, begin by locating deer from afar. Observe their movements to determine the best approach. Range multiple objects for distance reference and stay motionless if spotted. Avoid making eye contact, as that can alert the deer.

    Mastering these techniques requires practice, so spend time honing your skills. By combining ambush strategies with spot-and-stalk techniques, you’ll enhance your hunting success and enjoy the freedom of the wild.

    Wilderness Navigation Skills

    Maneuvering through the wilderness requires more than just a good sense of direction; it demands a solid set of skills and tools. To thrive in the wild, you’ll need to master wilderness navigation skills. Start by developing a positive attitude. Keeping your mind focused helps you absorb and apply what you learn.

    Begin with creating mental maps. Visualize the landmarks around you, like mountains, rivers, and lakes. Understanding these landforms will aid in your land navigation. Next, invest time in map reading. Familiarize yourself with topographic maps, paying close attention to contour lines and symbols. This knowledge will help you estimate distances and elevations. Additionally, knowing how to find water sources is crucial for maintaining hydration during your adventures.

    Learn compass techniques, as a compass is an essential tool in the wilderness. Get comfortable measuring bearings and following them. It’s also vital to understand magnetic declination and adjust your compass accordingly. When you venture off-trail, consider horizontal distance, vertical change, and ground cover to make smart route selections. Effective skills and knowledge are crucial for navigating the wilderness successfully.

    If you have access to GPS devices, use them in conjunction with traditional methods. While they can be handy, relying solely on technology might limit your skills. Engage in navigation challenges to sharpen your abilities, pushing your limits and discovering new routes.

    Safety Precautions

    follow safety guidelines strictly

    Safety should always be your top priority when using a bow in the wild. Practicing bow safety isn’t just about protecting yourself; it’s about guaranteeing the safety of everyone around you. By following proper shooting etiquette and being aware of your surroundings, you can enjoy the freedom of archery while minimizing risks. Here are some essential safety precautions to keep in mind:

    • Always point your bow safely: Keep your bow and arrow pointed in a safe direction at all times.
    • Nock your arrow only when it’s safe: Only nock an arrow when you’re prepared to shoot, guaranteeing no one is in the line of fire.
    • Identify your target clearly: Know your target and what’s behind it to avoid accidents.
    • Avoid shooting over ridges: This helps prevent unintended injuries to people or animals you can’t see.

    Before you shoot, inspect your equipment for any damage, and maintain your bowstring to guarantee it’s in good condition. Check bows for cracks to ensure safety before you start shooting, as this will help prevent accidents caused by equipment failure. Always wear protective gear, like an armguard and finger protection, to keep yourself safe. Stand behind the shooting line and don’t cross it until you’re sure it’s safe to do so. Additionally, regularly practicing equipment maintenance will enhance your safety and performance in the field.

    Optimal Bow Selection

    Choosing the right bow for wilderness survival can greatly impact your success in both hunting and self-defense. You need to take into account different bow types and their suitability for your situation. Traditional bows are often favored for their durability and ease of repair. They allow you to craft arrows from natural materials, essential when resources are limited. On the other hand, compound bows offer more power and accuracy, making them effective for long-range hunting, but they require more maintenance and modern materials.

    Here’s a quick comparison to help you decide:

    Bow Type Advantages Disadvantages
    Traditional Bow Simple, durable, easy to repair Limited range, lower power
    Compound Bow Greater power, accuracy, and ease of use Higher maintenance, depends on modern materials
    Bow Crafting Allows for resourcefulness and creativity Requires skills and knowledge for crafting

    In a survival situation, the ability to quickly craft a bow and arrows is vital. For traditional bows, hardwoods like ash or yew work best; choose straight branches for making them. Keep in mind that while traditional bows may require you to get closer to your target, they can be crafted with minimal tools, making them practical in the wild.

    Stealth and Camouflage

    hide and blend in

    Mastering stealth and camouflage is essential for anyone looking to survive in the wild with a bow. When you move quietly and blend into your environment, you increase your chances of success. Use these stealth techniques and camouflage patterns to stay hidden and improve your hunting skills:

    • Wear natural colors: Choose clothing that mimics the earth, like greens, browns, and grays, avoiding any bright or distinctive colors.
    • Utilize shadows: Stay low and use the land’s contours, like hills and ditches, to conceal yourself as you navigate through the terrain.
    • Observe wildlife: Pay close attention to animal behavior and habitats to better understand how to remain unseen and undetected.
    • Practice movement: Move slowly and deliberately, controlling your breathing to minimize noise and visibility.

    As you hone your stealth, remember that effective camouflage isn’t just about your clothes. It’s about blending in with your surroundings, using natural cover, and being aware of your environment. Slow down your movements, analyze the area, and stay alert to shifting winds that could carry your scent.

    When you combine these techniques, you’ll find yourself slipping through the wilderness like a shadow. Mastering stealth and camouflage doesn’t just improve your hunting; it enhances your overall survival skills. Embrace the freedom of the wild, and let your instincts guide you as you practice and perfect your abilities.

    Practicing Archery Skills

    Once you’ve honed your stealth and camouflage techniques, it’s time to focus on your archery skills, which are fundamental for successful hunting in the wild. Mastering the archery fundamentals is essential. Start by establishing consistent practice routines. Just like weight training, shoot in sets and allow time for your muscles to recover. This approach builds strength and endurance for drawing and holding the bow.

    As you practice, aim for accurate grouping—getting your arrows to land closely together. This not only boosts your confidence but also guarantees you’re ready for real-life situations. Focus on perfecting your shooting techniques, including your stance, grip, and release. Vary your practice by shooting from different distances and angles to simulate real hunting scenarios.

    Additionally, keep your equipment in top shape. Regularly check your bow strings and arrow fletching for wear. Safety is paramount, so always avoid dry firing and confirm you have a safe shooting area.

    To prepare for hunting, mimic conditions you’d face in the wild. Wear your hunting gear and practice from a tree stand. Work on judging distances accurately, as this skill is significant for placing effective shots. Familiarize yourself with various arrow types and how they match with the game you’re pursuing.

    Scouting for Game

    Effective scouting is essential for a successful hunt, and it sets the foundation for your entire experience in the wild. To maximize your chances, you’ll need to employ various scouting techniques and perform thorough terrain analysis. Here are some key factors to take into account:

    • Use digital tools like Google Earth to scout large areas.
    • Identify water sources, food supplies, and cover habitats where game might be found.
    • Analyze topographic maps to understand elevation changes that affect animal movements.
    • Cover promising areas on foot to verify your findings and spot hazards.

    Start by looking for animal signs—clearcuts, meadows, and trails that indicate where deer and elk frequent. Trail cameras can also help monitor animal activity, especially in areas with clear signs of use. Remember to scout early and late in the day, when animals are most active.

    Next, engage in terrain analysis by identifying edges and bedding areas that attract deer. Study how these areas connect with food and water sources, and plan your access routes to minimize disturbance. By understanding deer behavior and movements, you can pinpoint potential stand locations and make your hunt more effective.

    Lastly, take into account how weather changes or hunting pressure might affect animal behavior in the days leading up to your hunt. Gathering local insights from wildlife biologists can provide valuable information that enhances your scouting efforts. With these strategies in hand, you’re well-equipped to find your game and enjoy your time in the wild.

    Survival Food Sources

    Foraging for survival food sources can be a game changer in the wild, providing the energy you need to sustain yourself. When you’re out there, knowing which edible plants to look for is essential. Start by familiarizing yourself with common sources like acorns, which are high in protein and fat, and berries, which offer natural sugars. Don’t overlook nut trees like hickory or beech, as their nuts are important for energy.

    To effectively gather these food sources, you’ll need to develop some solid foraging techniques. First, learn how to identify plants safely to avoid poisonous ones. This skill is critical for ensuring what you consume is safe. Seasonal knowledge is also important; some plants are best harvested at specific times of the year.

    When you’re out foraging, prioritize high-calorie foods like mast crops, which include acorns and chestnuts. Be sure to explore wild edibles like cattails and edible inner bark, as they’re reliable and abundant. Remember to keep an eye out for edible weeds like American beautyberry and dogwood.

    Efficiency is key in the wild. Focus on easily accessible foods to minimize your energy expenditure. Once you gather your edible plants, learn how to prepare them for consumption. Always practice food safety to avoid harmful sources. By mastering these skills, you can turn foraging into a reliable food source, keeping you fueled and ready for your next adventure.

    Maintenance and Care of Equipment

    equipment upkeep and maintenance

    Proper maintenance and care of your bow are vital for guaranteeing its longevity and ideal performance in the wild. By taking the time to care for your equipment, you’ll enhance your shooting experience and make certain your bow is ready when you need it most.

    Here are some key practices for effective bow maintenance:

    • Store your bow lying down to prevent warping.
    • Use a bow case to protect it from dust and damage.
    • Regularly inspect your bow for any signs of wear or damage.
    • Keep your bowstring lightly waxed to prolong its life.

    Before each use, perform pre-shooting checks. Look for varnish imperfections, laminate cracks, and warped limbs. When storing your bow, keep it away from high temperatures and direct sunlight. A well-maintained bow will perform better and last longer, so don’t neglect equipment care.

    Regular cleaning is essential; use only water and make sure the bow is thoroughly dried. Tighten any loose components, and check the limbs for defects with a cotton ball. For deeper inspections, replace bowstrings every two years and seek professional help for significant repairs.

    To guarantee long-term preservation, oil or wax your bow frequently, especially after extensive use. Store it in a dry environment and perform yearly checkups to catch any potential issues early. By consistently practicing these maintenance habits, you’ll keep your bow in top shape for all your wild adventures.

    Conclusion

    In summary, surviving in the wild with a bow requires knowledge, practice, and preparation. By gathering essential gear, understanding animal behavior, and honing your archery skills, you’ll increase your chances of success. Don’t forget to scout for game and stay safe while traversing the wilderness. Always maintain your equipment to guarantee it works when you need it most. With these tips, you’re better equipped to thrive in nature, making your outdoor experience both enjoyable and rewarding.