
The Frugal Prepper’s Starter Kit: Essential Items You Already Own or Can Get Cheaply
The idea of preparing for emergencies often conjures images of expensive bunkers, high-tech gear, and massive stockpiles. For many, the perceived cost barrier is enough to deter them from even starting. However, true preparedness isn’t about how much money you spend; it’s about resourcefulness, knowledge, and making the most of what you have. This article provides a comprehensive frugal prepper checklist, demonstrating how you can build a robust survival kit using items you already own, repurpose common household goods, and acquire essential supplies without breaking the bank. Get ready to embrace budget survival gear and discover that being prepared is far more accessible than you think.
Related TacticalProof reading: How to Build a Root Cellar on a Budget: 5 DIY Designs Under $500 | Best Hand Grain Mill for Preppers: Manual vs Motorized Options Compared | How to Raise Meat Rabbits for Survival: Breeds, Housing, and Year-Round Production
Phase 1: Inventory Your Home – What You Already Have
Before you buy anything, take stock of your current possessions. You’ll be surprised at how many items in your home can serve a dual purpose in an emergency. This initial inventory is the cornerstone of any cheap prepper supplies strategy.
Food & Water
- Canned Goods: Check your pantry for non-perishable items like canned vegetables, fruits, beans, soups, and meats. Ensure they have a long shelf life and rotate them regularly.
- Dry Goods: Rice, pasta, oats, flour, sugar, salt, and spices are excellent long-term storage items.
- Bottled Water: Any bottled water you have for daily consumption can be part of your emergency supply.
- Pet Food: Don’t forget your furry friends! Inventory their dry and canned food.
First Aid & Hygiene
- Basic First Aid Kit: Most homes have bandages, antiseptic wipes, pain relievers, and antibiotic ointment. Consolidate these.
- Prescription Medications: Keep a small emergency supply if possible, or at least a current list of all medications.
- Hygiene Products: Soap, shampoo, toothbrushes, toothpaste, toilet paper, feminine hygiene products, and hand sanitizer are crucial.
- Towels & Rags: Old towels can be repurposed for cleaning, bandages, or insulation.
Tools & Utilities
- Flashlights & Batteries: Gather all working flashlights and any spare batteries.
- Matches/Lighters: Essential for fire starting.
- Basic Tool Kit: Hammer, screwdriver set, pliers, wrench – useful for minor repairs.
- Duct Tape: The ultimate multi-purpose repair tool.
- Knives/Multi-tools: Any sharp knife or multi-tool you own is valuable.
Clothing & Shelter
- Warm Clothing: Old sweaters, jackets, hats, gloves, and thermal underwear can provide crucial warmth.
- Blankets/Sleeping Bags: Any extra blankets, quilts, or old sleeping bags are vital for warmth.
- Tarps/Plastic Sheeting: Often found in garages or sheds, these can be used for temporary shelter or ground cover.
Practical Tip: Create a physical checklist as you go through your home. This helps you visualize your existing resources and identify immediate gaps.
Phase 2: Repurpose and Reuse – Creative Solutions for Common Items
Ingenuity is a prepper’s best friend. Many everyday items can be given a new life as essential survival gear. This is where your DIY prepper essentials truly shine.
Water Storage & Purification
- Plastic Bottles/Jugs: Cleaned soda bottles, milk jugs, or laundry detergent containers (thoroughly rinsed!) can store water.
- Bathtub: In an impending emergency, fill your bathtub with water for non-potable uses like flushing toilets.
- Coffee Filters/Cloth: Can be used for pre-filtering turbid water before boiling or chemical treatment.
Cooking & Heating
- Tin Cans: Large coffee cans or soup cans can be turned into simple stoves (with proper ventilation and safety precautions) or used for cooking over a fire.
- Aluminum Foil: Can be shaped into cooking vessels or used to wrap food for cooking over coals.
- Lint/Cotton Balls: Excellent fire starters when combined with petroleum jelly.
Light & Communication
- Glass Jars: With a wick and some cooking oil, a glass jar can become a makeshift oil lamp. (Safety Warning: Always use caution with open flames. Ensure good ventilation and never leave unattended.)
- Old Cell Phones: Even without service, an old cell phone can still dial 911 in many areas and can be used for its flashlight function.
- Hand-Crank Radios: If you have an old one, ensure it still works.
First Aid & Hygiene
- Old T-shirts/Sheets: Can be torn into strips for bandages, slings, or cleaning cloths.
- Plastic Bags: Can be used for waste disposal, collecting rainwater, or protecting items from moisture.
- Buckets with Lids: Can be repurposed as emergency toilets with a sturdy liner.
Practical Tip: Keep a designated “repurpose bin” for items you identify as having survival potential before they hit the trash or recycling.

Phase 3: Smart Shopping Strategies – Thrift Stores, Sales, and Bulk Buys
Once you’ve exhausted your home inventory and repurposing options, it’s time to fill the gaps. This doesn’t mean spending a fortune. Smart shopping is key to building your prepper on a shoestring kit.
Thrift Stores & Second-Hand Shops
- Warm Clothing: High-quality wool sweaters, sturdy jackets, hats, gloves, and scarves are often found at a fraction of retail price. Look for natural fibers like wool or down for superior warmth.
- Blankets & Sleeping Bags: Inspect carefully for tears or damage, but good quality blankets and even sleeping bags can be found. Wash thoroughly before use.
- Backpacks & Bags: A sturdy backpack is essential for a bug-out bag. Thrift stores often have durable, older models that are built to last.
- Cooking Pots & Utensils: Cast iron skillets, stainless steel pots, and basic cutlery are common finds.
- Books: Survival guides, first aid manuals, and gardening books can be invaluable resources.
Sales, Clearance Racks, & Discount Stores
- Non-Perishable Food: Stock up on canned goods, pasta, rice, and beans when they go on sale. Look for “buy one, get one free” offers.
- Batteries: Often on sale around holidays or in bulk packs.
- First Aid Supplies: Bandages, antiseptic, pain relievers, and medical tape can be found cheaply at dollar stores or on clearance.
- Hygiene Items: Soap, toothpaste, toilet paper, and feminine hygiene products are frequently discounted.
- Candles & Lighters: Basic emergency lighting and fire starting.
Bulk Buys & Co-ops
- Grains & Legumes: Rice, beans, oats, and pasta are significantly cheaper when bought in large quantities (e.g., 25-50 lb bags). Store them properly in airtight containers to prevent pests.
- Water Filters: While some filters can be pricey, look for sales on reputable brands or consider a larger, more economical filter system if your budget allows for one significant purchase.
- Salt & Sugar: Essential for food preservation and energy, these are very affordable in bulk.
Practical Tip: Always check the expiration dates on food items, even if they’re on sale. For non-food items, inspect for quality and durability.
Phase 4: DIY Solutions for Basic Needs (Simple, non-complex builds)
Some of the most critical survival items can be created with minimal cost and a bit of effort. These DIY prepper essentials empower you with practical skills and affordable preparedness.
DIY Water Filter (Basic)
While not a substitute for boiling or chemical treatment, a basic DIY filter can remove larger particulates from water, making subsequent purification more effective.
- Materials: An empty plastic bottle (cut bottom off), coffee filter or cloth, layers of charcoal (from a campfire, crushed), sand (fine and coarse), gravel, and a collection container.
- Construction: Layer the materials inside the inverted bottle: cloth/coffee filter at the bottom, then charcoal, fine sand, coarse sand, and finally gravel. Pour dirty water through.
- Safety Warning: This filter does NOT remove bacteria, viruses, or chemical contaminants. ALWAYS follow with boiling for at least one minute (three minutes at high altitudes) or use purification tablets for potable water.
Simple Rocket Stove
A rocket stove is incredibly fuel-efficient and can be made from common materials.
- Materials: Two large tin cans (e.g., coffee cans), a smaller tin can, tin snips, and a marker.
- Construction: Cut openings and assemble the cans to create an L-shaped combustion chamber.
- Safety Warning: Use outdoors only, away from flammable materials. Ensure stable placement.
Emergency Oil Lamp
A simple, long-lasting light source.
- Materials: A glass jar (mason jar works well), cooking oil (vegetable, olive), a cotton shoelace or strip of cotton cloth for a wick, and a small piece of metal or a bottle cap to hold the wick.
- Construction: Thread the wick through the metal holder, allowing a small portion to extend above. Fill the jar with oil, submerge the wick, and let it soak. Light the exposed wick.
- Safety Warning: Never leave an open flame unattended. Keep away from children and pets. Ensure good ventilation.
Basic Tarp Shelter
With a tarp and some rope, you can create various shelters.
- Materials: A tarp (even a cheap blue one), paracord or strong rope, and stakes (can be fashioned from sticks).
- Construction: Learn basic knots (e.g., taut-line hitch, bowline). Practice setting up A-frame, lean-to, or diamond fly configurations.
Practical Tip: Practice these DIY skills before an emergency. Knowing how to build and use them effectively is as important as having the materials.
Essential Categories on a Budget: Food, Water, First Aid, Light, Warmth, Shelter
Let’s break down the core components of any survival kit, focusing on affordable preparedness strategies for each.
Food Storage (Affordable & Long-Term)
- Staple Grains & Legumes: Rice, beans (dried), oats, and pasta are incredibly cost-effective and calorie-dense. Buy in bulk and store in Mylar bags with oxygen absorbers or food-grade buckets.
- Canned Goods: Canned vegetables, fruits, meats (tuna, chicken), and soups are excellent. Look for sales and stock up.
- Cooking Oil & Salt: Essential for cooking and preservation.
- Sugar/Honey: For energy and morale.
- Gardening: Even a small container garden can supplement your food supply. Seeds are cheap and provide a renewable resource.
- Foraging Knowledge: Learning about edible plants in your area is free and invaluable.
Water Purification & Storage
- Water Purification Tablets: Very inexpensive and effective. Keep a good supply.
- Bleach (Unscented, Regular): Can be used to purify water (2 drops per liter, let stand 30 minutes). Check labels for active ingredient (sodium hypochlorite 5-6%).
- Large Water Containers: Food-grade plastic barrels or even thoroughly cleaned 2-liter soda bottles for storage.
- Rainwater Collection: A simple tarp and a bucket can collect significant amounts of water.
First Aid & Medical
- DIY First Aid Kit: Combine items from your home (bandages, antiseptic, pain relievers, gauze, medical tape, tweezers) with a few cheap additions like a thermometer, small scissors, and safety pins.
- Knowledge: Take a basic first aid or CPR course. Many community centers offer these affordably or even free.
- Herbal Remedies: Learn about local medicinal plants (e.g., plantain for stings, willow bark for pain).
Light Sources
- Candles: Cheap and provide both light and a little warmth. Stock up on tea lights or pillar candles.
- Flashlights: Prioritize LED flashlights for efficiency. Look for hand-crank or solar-powered options to reduce battery dependence.
- Headlamps: Allow for hands-free operation.
- Oil Lamps: As described in the DIY section, these are very economical.
Warmth & Shelter
- Layered Clothing: The most effective way to stay warm. Focus on natural fibers like wool (thrift store find!) and synthetic layers.
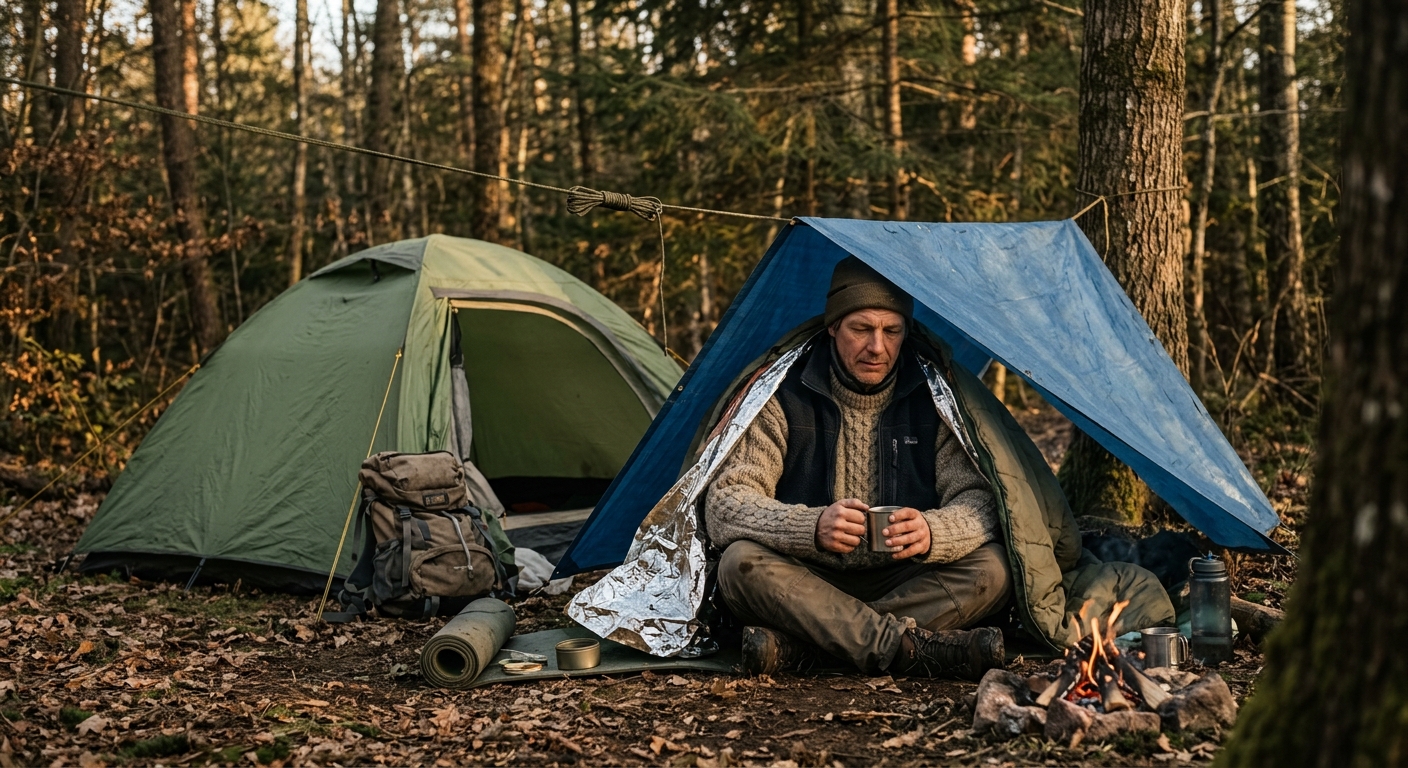
- Mylar Blankets: Very cheap, compact, and effective for retaining body heat.
- Sleeping Bags: Look for used ones at thrift stores or on sale.
- Tarps: Versatile for shelter, ground cover, or rain collection.
- Tent: A small, used tent can provide significant protection.
Safety Warning: When storing food, ensure proper sealing and rotation to prevent spoilage and pest infestation. For water, always prioritize purification methods for drinking water.
Prioritization: What to Acquire First When Funds Are Limited
When you’re building your frugal prepper checklist, it’s crucial to prioritize. Focus on the most immediate threats to life first. This hierarchy ensures your limited funds are spent on the most impactful items.
- Water: The human body can only survive a few days without water. Focus on purification methods (tablets, bleach, filter) and storage.
- Shelter & Warmth: Exposure to the elements can be deadly. Tarps, blankets, warm clothing, and a way to make fire are critical.
- First Aid: The ability to treat injuries and illnesses can prevent minor issues from becoming life-threatening.
- Food: While important, humans can survive weeks without food. Prioritize calorie-dense, non-perishable staples.
- Light & Communication: Flashlights, candles, and a hand-crank radio for information.
- Security: While not always a budget item, basic self-defense knowledge and tools can be important.
- Sanitation: Buckets, soap, and hygiene products prevent disease.
Practical Tip: Remember, knowledge and skills are free. Learning how to purify water, build a fire, administer first aid, or tie essential knots costs nothing but your time and effort, and these skills are priceless.
Conclusion: Building Resilience Without Breaking the Bank
Preparedness is not a luxury; it’s a responsibility. As this frugal prepper checklist demonstrates, you don’t need a massive budget to build resilience. By taking inventory of what you already own, creatively repurposing common items, shopping smartly, and embracing DIY solutions, you can assemble a comprehensive survival kit. The journey of becoming an affordable preparedness expert is ongoing. Start small, prioritize your needs, and continuously learn new skills. Every step you take, no matter how small or inexpensive, brings you closer to being truly tactical proof against life’s uncertainties. Your most valuable assets are your ingenuity and your will to prepare.
Frequently Asked Questions (FAQ)
- Q: What’s the absolute first thing a frugal prepper should do?
- A: The very first step is to conduct a thorough home inventory. You’ll be amazed at how many essential items you already possess. This helps you identify true gaps before spending any money.
- Q: How can I store food cheaply for the long term?
- A: Focus on bulk dry goods like rice, beans, and oats. Store them in food-grade 5-gallon buckets with gamma seal lids or in Mylar bags with oxygen absorbers. These methods are cost-effective and provide excellent protection against pests and moisture.
- Q: Are DIY water filters safe to drink from?
- A: Basic DIY water filters (like sand/charcoal filters) are excellent for removing sediment and larger particles, making the water clearer. However, they do NOT remove bacteria, viruses, or chemical contaminants. You MUST follow DIY filtration with a purification method like boiling, chemical tablets, or a certified filter to make water safe for drinking.
- Q: What are some free or very cheap preparedness skills I can learn?
- A: Absolutely! Learning basic first aid, CPR, fire starting without matches, knot tying, how to purify water, and identifying edible plants in your local area are all free skills that are incredibly valuable. Many resources are available online or at local libraries.
- Q: How often should I rotate my cheap prepper supplies?
- A: For food and water, a “first in, first out” (FIFO) system is best. Aim to consume and replace items with shorter shelf lives (e.g., canned goods) every 6-12 months. For long-term staples, check them annually. Non-food items like batteries should be checked every 6 months, and first aid supplies should be inspected for expiration dates regularly.