Category: Food & Water

Essential food storage

  • How Long Does Canned Food Really Last After the Expiration Date?

    How Long Does Canned Food Really Last After the Expiration Date?

    Canned food can last years beyond its expiration date when stored properly. Those dates mainly indicate quality, not safety. Low-acid foods, like green beans, can remain safe for 2 to 5 years, while high-acid foods, like tomatoes, usually last 1 to 1.5 years. Make sure to store cans in a cool, dry place, and check for dents, rust, or leaks before use. If you notice odd odors or changes in texture, it's best to discard the food. Keeping these tips in mind will help you enjoy your canned goods longer, and there's more to discover about ensuring food safety.

    Understanding Expiration Dates

    When it comes to canned food, what do those expiration dates really mean? You might think they indicate when the food goes bad, but that's not quite right. The expiration date significance primarily reflects the manufacturer's recommendation for peak quality and flavor, not safety. You'll often see labels like "Best By" or "Use By"—these are food quality indicators that suggest when the food is at its best.

    These dates aren't mandatory and are set by manufacturers to guide you and retailers. It's important to note that canned foods can still be safe to eat after these dates. For instance, high-acid foods like tomatoes and fruits have a shorter shelf life due to chemical reactions, while low-acid foods can last longer. Most food products are safe beyond their labeled dates, as clarified by the USDA. Additionally, while canned goods can remain safe to eat years past best by dates if stored correctly, it's crucial to monitor for any signs of spoilage such as bulging lids.

    Temperature also plays a role in how long your canned goods last. If you store them in a cool, dry place—ideally between 50°F and 70°F—you can help maintain their quality. High temperatures can lead to spoilage and nutrient loss, so keep them away from heat sources.

    Regularly check your canned goods, looking for any deep dents, swelling, or rust, as these can indicate spoilage. While the dates on your cans are helpful, remember that they're about quality, not safety. By understanding expiration dates, you can better determine when your canned foods are at their best, ensuring you enjoy them fully.

    Canned Food Safety Guidelines

    To ensure your canned food stays safe and enjoyable, it's crucial to follow specific safety guidelines. Keeping these guidelines in mind can help prevent food spoilage and keep you and your family healthy. Here are three key safety precautions to follow:

    1. Storage: Store your canned food in a cool, dry place, ideally between 50-70°F. Avoid heat sources, and don't keep them under sinks or in garages where temperatures can change. It's best to keep cans off the floor to prevent moisture from causing rust. Additionally, storage temperatures above 100°F can significantly increase spoilage risk. Ensure you implement a "Last in, First out" method to maximize freshness.
    2. Safety Checks: Before using any canned food, inspect the can. Discard any with deep dents, rust, swelling, or leaking. If the can hisses or spurts liquid when opened, it's best to throw it away. Always trust your senses—if it smells off or shows signs of mold, don't taste it!
    3. Usage: Try to use canned foods within a year of purchase for the best quality. If you have leftover canned food, transfer it to a plastic or glass container and refrigerate it. While commercially canned foods can be eaten straight from the can, remember to boil home-canned vegetables for at least 10 minutes before consuming.

    Factors Influencing Shelf Life

    Understanding the factors influencing shelf life is essential for maximizing the longevity of your canned food. One of the most significant factors is temperature impact. Storing canned foods at temperatures above 75°F can lead to nutrient loss, while temperatures over 100°F can increase spoilage risks. Ideally, you should keep your canned food in a cool, dry place, preferably between 50°F and 70°F. Avoid freezing temperatures, as they can damage the can's integrity. Canned food typically has a shelf life of at least 2 years when stored under optimal conditions.

    Storage conditions also play a crucial role. Keep canned goods away from direct sunlight and hot surfaces like pipes or stoves. Light exposure can cause color changes and nutrient loss, especially in glass jars. Additionally, ensure that cans and metal lids are not rusty, as rust can create holes that allow spoilage agents to enter. Inspect cans and jars for dents, leaks, rust, and bulging lids to ensure safety.

    Food acidity is another key factor. High-acid foods, such as fruits, pickles, and tomatoes, typically last about 12 to 18 months. In contrast, low-acid foods like vegetables and soups can last between 2 to 5 years. Canned meats and seafood have a shelf life of around 3 years, while fruit juices are best used within a year.

    Finally, handling practices matter too. Rotate your canned goods so that you use older cans first, and avoid denting or crushing them during shipping. Opened cans should be refrigerated and used within a few days for safety. By considering these factors, you can extend the shelf life of your canned food effectively.

    Signs Your Canned Food Is Spoiled

    After considering how to store canned food properly, it's important to recognize the signs that indicate your canned goods may be spoiled. Being aware of spoilage indicators can help you avoid health risks. Here are three key signs to look for:

    1. Visible Damage: Check for bulging cans, rust, or deep dents. Any can that shows these signs is more likely to harbor harmful bacteria. This is particularly important because improperly canned food significantly increases the risk of spoilage. Additionally, canned goods can be safe to consume beyond best-by dates if containers remain intact.
    2. Odor Changes: When you open a can, take note of any unpleasant or sulfurous smells. If it smells off or has a sour aroma, it's best to discard it.
    3. Texture and Appearance: Pay attention to the texture of the food. If it appears mushy, slimy, or has visible mold, these are clear signs of spoilage.

    It's crucial to follow safety precautions when handling canned goods. If you suspect spoilage, never taste the food, as some harmful bacteria, like botulism, have no visible signs. Regularly check your canned food for any changes, like leaks or unusual colors. Proper inspection can help ensure your safety and prevent foodborne illnesses. Remember, if you notice any of these spoilage indicators, dispose of the can responsibly. Taking these simple steps can save you from potential health hazards and keep your pantry safe.

    Proper Storage Techniques

    effective food preservation methods

    Proper storage techniques are essential for maximizing the shelf life and safety of your canned foods. Start by choosing a cool, dry place for storage, ideally between 50 °F and 70 °F. Avoid areas near heat sources like pipes, ranges, or furnaces, as high temperatures can spoil your food. Also, keep your canned goods out of direct sunlight to prevent color changes and nutrient loss.

    Moisture control is crucial too. Make sure the storage area is dry to avoid rust on cans, which can lead to spoilage. Avoid extreme conditions, such as damp garages or uninsulated attics, which can negatively affect your food's safety.

    When it comes to canned food organization, inspect cans for damage, rust, or swelling before storing. Rotate your stock using the "first in, first out" method, so you use older products first. If you open any canned foods, store them in clean, dry containers and label them properly. For opened cans, refrigerate them to maintain freshness. Additionally, properly stored canned foods can remain safe for consumption for years.

    Lastly, regularly inspect your canned foods for signs of spoilage. Remember, while commercially canned foods can last indefinitely if stored properly, their quality may decline over time. By following these proper storage techniques, you'll help ensure that your canned foods remain safe and delicious for as long as possible.

    Special Considerations for High-Acid Foods

    How do high-acid foods affect your canned goods? High-acid foods, like canned tomatoes and pickled products, have a pH level between 0 and 4.6, which significantly impacts how long they last. Due to their acidity, these foods can lead to faster corrosion of the can, changing the texture, color, and flavor over time. Here are some important considerations when dealing with high-acid foods:

    1. Shelf Life: Expect a shelf life of only 12 to 18 months. After that, the quality may decline quickly due to internal corrosion and chemical reactions. Additionally, because canned foods are safe for several years when stored properly, it's important to monitor the condition of high-acid foods closely.
    2. Storage: Always store high-acid canned goods in a cool, dry place below 85 degrees Fahrenheit. This helps slow down deterioration and maintain quality.
    3. Post-Opening Care: Once you open a can, transfer leftovers to a storage container and refrigerate them. They typically last about 5 to 7 days.

    The acidity impact on these foods means you should be particularly vigilant about their storage and handling. Use proper canning techniques to ensure they're sealed correctly, reducing the risk of spoilage. Regularly check your cans for any signs of damage, rust, or dents. Remember, the longer you wait to consume these items, the more likely they are to lose quality and nutritional value. By paying attention to these details, you can enjoy your high-acid foods while ensuring they're safe to eat.

    How to Extend Shelf Life

    prolong food freshness effectively

    Extending the shelf life of canned food is essential for both safety and enjoyment. You can take several practical steps to ensure your canned goods last longer. First, consider refrigeration and freezing. Refrigerating leftovers slows down microbial growth, so make sure to store them right away and eat them within a few days. If you want long-term storage, freezing is your best option. It halts microbial growth almost entirely, making it safe to freeze foods indefinitely at 0°F (-18°C) or below.

    Next, use proper packaging techniques. Vacuum packaging removes air, slowing down oxidation and preventing spoilage. If you've opened a can, transfer any leftover food to airtight containers or bags, and make sure to remove as much air as possible. This keeps your food fresher for longer.

    You can also utilize heat treatments like pasteurization and sterilization. Boiling opened canned foods thoroughly can kill any remaining bacteria, ensuring safety. When buying canned goods, look for ones stored in cool, dry places, and avoid damaged cans.

    Finally, keep an eye on your pantry. Use older canned goods first and label your storage containers to track food dates. By following these methods, you can effectively extend the shelf life of your canned foods, enhancing your food preservation efforts and ensuring you get the most out of your pantry staples.

    Resources for Food Safety

    Maintaining the safety of your food goes beyond just extending its shelf life; it involves understanding food safety resources available to you. Knowing where to find reliable information and training can help you keep your food safe and avoid potential health risks.

    Here are three key food safety resources you should explore:

    1. FDA and USDA Guidelines: Both the Food and Drug Administration (FDA) and the U.S. Department of Agriculture (USDA) offer extensive educational materials on how to buy, store, and prepare food safely. Browsing their websites can provide valuable insights into food safety practices.
    2. Food Safety Training Programs: Participating in food safety training can be incredibly beneficial. These programs are designed for food service employees and child care providers, helping them learn safe food handling techniques. Look for local workshops or online courses that focus on essential practices.
    3. Emergency Preparedness Resources: It's essential to be ready for unexpected situations, such as natural disasters. You can find emergency food safety planning materials, including disaster response guides, to help you manage food safety during crises.

    Best Practices for Canned Food

    proper storage and usage

    When it comes to canned food, following best practices can significantly extend its shelf life and ensure your safety. Start by storing your canned goods in a cool, dry place, ideally between 50 °F and 70 °F. Avoid areas that get too hot, like above the stove, as high temperatures can lead to spoilage. Keep moisture away, since it can cause rust and leakage. Regularly check your cans for any signs of damage, such as deep dents, swelling, or rust. If you find any, it's best to dispose of those cans.

    When you buy canned food, always check the expiration dates. Remember, these dates indicate quality, not safety. Use the first in, first out method; this means you should use the oldest cans first to maintain their nutrient retention. If you open a can, transfer any leftovers to a clean glass or plastic container and refrigerate it. Most opened canned foods should be used within a few days.

    For high-acid foods like tomatoes and fruits, aim to use them within 12 to 18 months. Low-acid foods, such as meats and vegetable soups, can last between 2 to 5 years. Home-canned foods should ideally be consumed within one year. By following these best practices, you can enjoy nutritious, sustainable, and cost-friendly canned food while ensuring your safety and health.

    Frequently Asked Questions

    Can I Eat Canned Food After the Expiration Date?

    You can eat canned food after the expiration date if it's in good condition. Just follow canned food safety guidelines: check for dents, rust, or swelling, and store it properly to ensure quality.

    How Should I Dispose of Spoiled Canned Food?

    To dispose of spoiled canned food safely, check for spoilage signs and use heavy garbage bags. Consider local recycling options for metal cans, but ensure they're sealed and unusable before disposal in regular trash.

    What Is the Best Way to Check Canned Food Freshness?

    To check canned food freshness, inspect for physical damage and signs of spoilage. Look for freshness indicators like foul odors, color changes, or unusual textures. Proper canned food inspection ensures you're consuming safe, quality products.

    Can I Freeze Canned Food to Extend Its Life?

    You can't freeze canned food to extend its life effectively. It's best to focus on proper canned food storage techniques, ensuring you keep them in a cool, dry place to maintain freshness and safety.

    Are There Any Health Risks From Eating Expired Canned Food?

    Eating expired canned food can pose health concerns. If cans are damaged or stored improperly, bacteria may grow, leading to food safety risks. Always inspect cans for signs of spoilage before consumption to ensure your safety.

    Conclusion

    In conclusion, canned food can last well beyond its expiration date if stored properly. Always check for signs of spoilage before consuming, like unusual smells or bulging cans. Remember, high-acid foods, like tomatoes, have a shorter shelf life than low-acid ones, such as beans. By following safety guidelines and storing your cans in a cool, dry place, you can help ensure they're safe to eat. Stay informed and keep your pantry stocked wisely!

  • How Do You Build a DIY Water Filter Without Charcoal?

    How Do You Build a DIY Water Filter Without Charcoal?

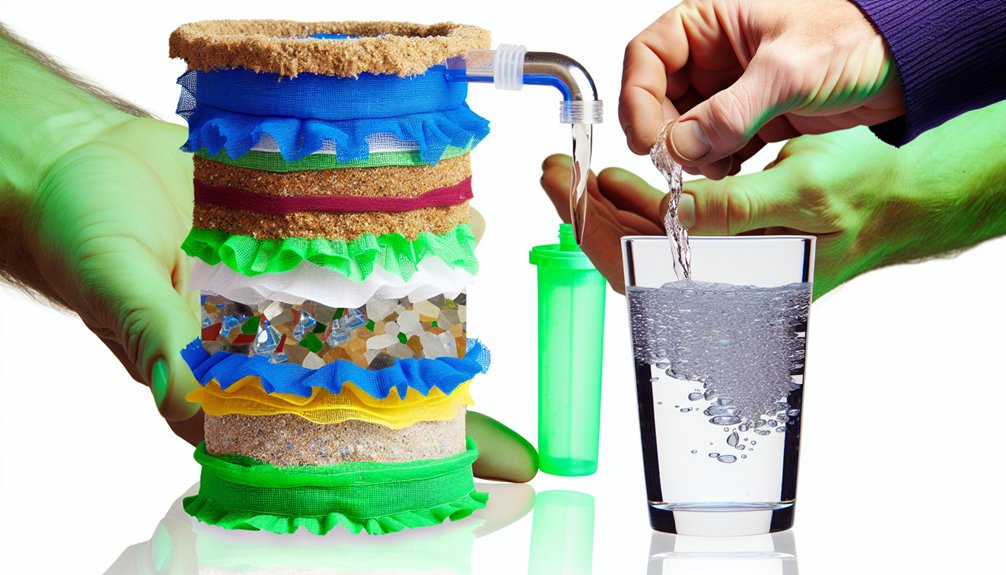
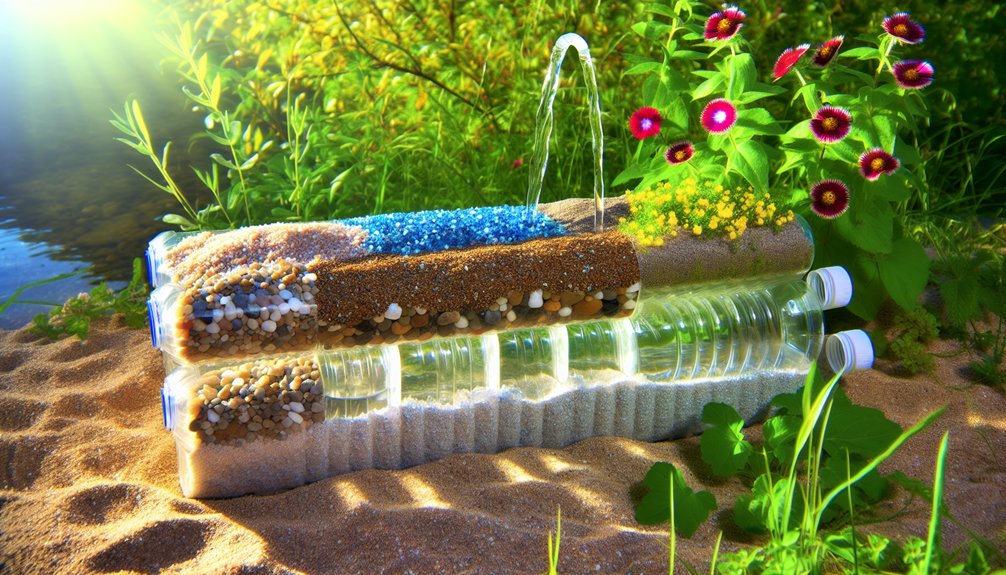
    To build a DIY water filter without charcoal, start by cutting the bottom of a plastic bottle and cleaning it. Layer the filter with gravel at the bottom, then add coarse sand, fine sand, and finally a straining fabric like cheesecloth. This setup captures large debris and filters smaller particles efficiently. Pour unfiltered water through the top and collect the clean water at the bottom. Regularly inspect and clean your filter to prevent clogs and maintain effectiveness. If you're looking for more tips on enhancing your filtration or maintenance methods, there's a lot more to explore.

    Understanding Water Filtration

    When it comes to understanding water filtration, it's essential to grasp the fundamental processes that ensure clean and safe drinking water. Water treatment involves several key steps, each playing a vital role in removing impurities. The first step is screening, where water passes through a screen to trap large materials like leaves and debris. This prevents clogging and keeps the purification processes running smoothly. Additionally, this initial barrier helps to reduce the risk of damage to subsequent filtration stages.

    Next, coagulation and flocculation take place. Here, chemicals like alum are added to the water. These chemicals help form sticky particles called floc, which attract and trap dirt and smaller particles. This makes it easier to remove impurities from the water.

    After that, we move on to filtration techniques. Water is pumped through various types of filters, such as sand or cloth, which catch remaining particles that weren't removed earlier. This step ensures the water is clearer and cleaner. However, it's important to remember that many DIY filters do not purify water of bacteria.

    Finally, disinfection occurs. This stage uses chemicals, like chlorine, or advanced methods, such as UV light, to kill bacteria and microorganisms. This is crucial for providing safe drinking water.

    Whether you're looking at industrial systems or DIY methods, understanding these steps helps you appreciate how filtration works. By knowing these processes, you can better understand how to create effective water treatment solutions, even if you're doing it at home without charcoal.

    Necessary Materials

    To create an effective DIY water filter, you'll need specific materials that work together to ensure clean water. Start with a standard plastic bottle or any food-safe container as the base of your filter. This will serve as the main structure to hold everything in place.

    For the initial straining layer, select a clean straining fabric such as cotton, cheesecloth, or coffee filters. This layer captures larger particles right away, enhancing your filter's overall filtering effectiveness. Next, you'll need both fine and coarse sand. The fine sand will help to remove smaller particles and impurities, while coarse sand is essential for filtering out larger sediments.

    You should also gather gravel or small pebbles. This material acts as a barrier to prevent larger debris from entering the finer layers of your filter. Additionally, have a separate container ready to collect the filtered water.

    When you think about material selection, consider alternatives like cotton balls or a bandana for the top layer. Sea sand can provide better filtration than regular sand, while medium-sized stones can enhance the filtering process in the middle layers. It's important to remember that a layered approach is crucial for maximizing filtering effectiveness, ensuring that the water you collect is as clean as possible. Regularly check and replace your first layer to maintain optimal filtration results. Additionally, using activated charcoal in your filter can significantly improve the removal of impurities and contaminants.

    Step-by-Step Construction

    As you begin constructing your DIY water filter, cutting off the bottom third of a plastic bottle is your first step. This creates a container for your filter. Next, invert the top part of the bottle and place it inside the bottom section for stability. Make sure to clean the plastic bottle thoroughly before use, and remove the cap. Smooth edges are crucial to prevent damaging your filtration materials.

    Now, focus on material selection. Start with a layer of small rocks or gravel at the bottom. This layer helps with drainage and acts as the first barrier to larger particles. On top of the gravel, add a layer of coarse sand. This will further aid in filtering out larger impurities. Following the coarse sand, include a layer of fine sand for additional filtration. If you have a coffee filter or porous cloth, you can place it on top to catch smaller debris.

    It is important to note that using multiple filtration stages by stacking the layers correctly ensures optimal filter efficiency, ensuring that the coarser materials are at the bottom. Homemade water filters are often a cost-effective solution for ensuring clean drinking water. As you assemble your filter, regularly check for clogs to ensure proper water flow. Once constructed, slowly add polluted water to the filter and observe the process. Testing the filtered water against unfiltered water will help you visually assess the effectiveness of your filter. Don't forget to maintain your filter regularly to keep it performing well. Adjusting the layers and materials can also enhance filtration results over time.

    Layering Techniques

    Layering techniques are crucial for effective filtration in your DIY water filter. Each layer plays a specific role, contributing to the overall layer efficiency and filtration effectiveness of your setup. Start with a straining fabric, like a coffee filter or cheesecloth, at the bottom. This first layer filters out large debris, preventing big particles from clogging the filter and keeping the system clean.

    Next, add a 2-3 inch layer of gravel or small rocks. This layer stabilizes the sand above it and prevents displacement during water pouring. It also helps to keep larger particles from moving into the finer layers, maintaining the filter's structure.

    Then, you'll want to include a layer of coarse sand, about 2-3 inches thick. This mid-stage filtration layer removes larger particulates from the water, improving the overall quality. It acts as another line of defense against bulk contaminants, making your water even cleaner. Studies indicate that multi-layer filters can sequentially separate cells or particles, enhancing filtration efficiency. Additionally, using natural materials in your filter enhances its eco-friendliness and sustainability.

    Finally, finish with a 2-3 inch layer of the finest sand available. This last layer is critical for filtering out microscopic impurities, ensuring that the water you collect is as clean as possible. By carefully layering these materials, you significantly enhance the filtration effectiveness of your DIY water filter. Each layer serves a purpose, so don't skip or rush through any part of the process. Pay attention to the order and thickness of your layers, as they directly affect how well your filter performs.

    Filtration Process Explained

    understanding the filtration process

    Understanding the filtration process is key to maximizing the effectiveness of your DIY water filter. By knowing how each layer functions, you can ensure better water quality. Your filter will consist of several layers, each playing a specific role in cleaning the water. Here's how it works:

    • Gravel Layer: This serves as a pre-filter, catching large debris like twigs and leaves. It must be coarse enough to let water pass while supporting the entire structure.
    • Sand Layers: Fine and coarse sand layers work together to trap medium-sized particles, enhancing filtration.
    • Slow Water Flow: Pour the water slowly to avoid disturbing the layers and ensure effective filtration. The filter should be stable to prevent spills.
    • Layer Resistance: Filtering speed may be slow, as each layer presents some resistance. However, this means more thorough cleaning. Additionally, using food grade buckets ensures that the water remains free from harmful chemicals during storage.
    • Cleaning After Use: Always clean your filter after each use to prevent contamination.

    Different filter types may use various materials, but the layering concept remains constant. Each layer effectively removes different contaminants, but remember this method doesn't eliminate chemicals or microorganisms without charcoal. You can improve your filtering system by experimenting with alternative methods like solar disinfection(5) or ceramic filters. Each method has its advantages and limitations, so think about what best fits your needs. By understanding these processes, you'll be well on your way to creating a reliable DIY water filter.

    Testing Water Purity

    To ensure the water you filter meets safety standards, testing its purity is essential. You need to check for various water contaminants to make sure your DIY filter is effective. Start with physical tests. Look at the water's color; if it's murky, that could indicate impurities like algae or minerals. Measure turbidity to see if there are suspended solids present. Also, take note of any unusual odors, as they can hint at harmful substances.

    Next, conduct chemical tests. Check the mineral content for substances like chlorine and lead, which can be dangerous. Use pH testing to determine if your water is too acidic or alkaline, and measure total hardness to find out how much calcium carbonate is present. High levels of dissolved solids can also be a concern.

    Finally, don't overlook biological tests. You can identify harmful bacteria like E. coli using the filtration method or the pour plate method. Coliform testing is crucial to check for fecal contamination, highlighting the importance of clean water.

    Incorporate these testing procedures into your routine after filtering water. Regular testing helps ensure that your DIY water filter is working properly and keeps your drinking water safe. Remember, maintaining the purity of your water is just as important as the filtering process itself, so don't skip these essential steps.

    Maintaining Your Filter

    regular filter maintenance tips

    Maintaining your water filter is crucial for ensuring clean and safe drinking water. Regular upkeep not only promotes filter longevity but also helps you avoid potential health risks. Here are some essential maintenance tips to keep your filter in top shape:

    • Schedule Regular Checks: Inspect your filter often for wear, leaks, or clogs.
    • Clean Filter Components: Regular cleaning prevents bacterial growth and maintains effectiveness.
    • Replace Filter Cartridges: Follow the manufacturer's recommendations for replacing cartridges.
    • Backflush When Necessary: Backflushing helps dislodge debris and maintain optimal flow rates.
    • Sanitize Filters: Sanitize your filters, especially before long-term storage, to prevent bacteria.

    To dive deeper, make sure to clean pre-filters and storage tanks to avoid buildup. If you have an activated carbon filter, check for clogs regularly and replace cartridges as needed. Performing a system flush clears any buildup in membranes, ensuring your filter operates effectively.

    It's also important to handle your filters carefully to avoid damage and store them away from freezing temperatures. Always follow the manufacturer guidelines for maintenance schedules. Taking these steps will enhance the longevity of your water filter and ensure you're drinking safe, clean water. Remember, consistent maintenance is key to a successful DIY water filter setup!

    Alternative Purification Methods

    When it comes to purifying water, several effective methods can meet your needs. One popular method is ultrafiltration. This process uses a membrane filter with larger pore sizes than reverse osmosis. Hydrostatic pressure pushes water through the semipermeable membrane, effectively removing impurities like silt, sediments, bacteria, viruses, and proteins. One of the ultrafiltration advantages is that it can be combined with other filtration systems for a more comprehensive approach, although it doesn't filter out chemicals.

    Another method you might consider is ceramic water filtration. This technique uses natural ceramic media, where filter candles trap impurities through tiny pores. Ceramic filtration benefits include its ability to remove sediments and bacteria effectively. Plus, ceramic filters come in various sizes, making them suitable for point-of-use and portable devices. They're also economical and environmentally friendly, which is a bonus.

    If you're looking for an eco-friendly option, ultraviolet water purification might suit you. It uses UV light to inactivate microorganisms, without producing waste water or harmful chemicals. Lastly, sand and layered filtration involves creating layers of materials like sand, cotton, and stones. As water passes through each layer, impurities get removed. Sand filters out flocs and trapped particles, while cotton and stones catch larger ones.

    Limitations of DIY Filters

    diy filter challenges and drawbacks

    Understanding the limitations of DIY filters is crucial for anyone considering this approach to water purification. While these homemade solutions can be helpful in certain situations, they often fall short in several key areas that can affect both filtration effectiveness and user safety.

    • DIY filters may not effectively remove microbes like viruses and bacteria.
    • They struggle with filtering inorganic impurities and certain chemicals.
    • The pore sizes of materials might be too large, allowing impurities to pass through.
    • Regular maintenance is necessary, as clogging can reduce effectiveness over time.
    • DIY filters lack professional testing standards that ensure reliability.

    These limitations can pose health risks if the water isn't properly purified. The materials you use directly impact the filter's ability to clean water. If you choose low-quality items, your filter's effectiveness will suffer. Additionally, the arrangement of filter layers matters greatly; an improper setup may lead to inadequate contamination removal.

    It's also vital to remember that DIY filters typically don't match the performance of commercial systems. They might be cheaper initially, but ongoing maintenance and the potential for user error can add costs in the long run. You may also face risks if the filter becomes contaminated due to improper upkeep.

    Practical Applications

    How can you effectively build a DIY water filter without charcoal? First, gather your materials: a plastic bottle, a knife, sand, and gravel. Start by cutting off the bottom of the plastic bottle. Layer your materials from the bottom up, beginning with coarse gravel. This gravel will trap larger particles like twigs and leaves, improving your filtering efficiency.

    Next, add layers of sand—first coarse, then fine. The different sizes of sand help filter out smaller impurities. If you want to hold these layers in place, consider using a piece of cotton or a bandana as a filtering cloth. This setup will help you tackle various contamination sources in the water.

    For added purification, you can use boiling water to kill microorganisms. Alternatively, try solar water disinfection (SODIS) by placing clear bottles in sunlight. Distillation is another method, removing contaminants through heating and cooling.

    Before you use your filter for drinking water, test its effectiveness. Collect the filtered water at the bottom of the bottle and check for any remaining impurities. Remember, using clean and natural materials is crucial to avoid adding any new contamination sources. Regularly clean and replace your filtration materials to maintain the filter's performance. With these steps, you can create a reliable water filter that works even without charcoal, ensuring you have access to cleaner drinking water in various situations.

    Environmental Considerations

    sustainability and ecological impact

    Environmental considerations play a crucial role in the effectiveness and sustainability of DIY water filters. When creating your own filter, it's important to think about the materials you use and the waste you generate. Opting for sustainable materials can help reduce your environmental impact significantly. Here are some key points to keep in mind:

    • Choose natural or recyclable materials for your filter, like sand, gravel, or cloth.
    • Minimize the use of single-use plastics to reduce landfill waste.
    • Understand that some materials, like certain plastics, may not decompose easily.
    • Practice proper disposal of used filters to prevent chemical leaks into the environment.
    • Educate yourself on recycling options to ensure your materials are handled correctly.

    By focusing on waste reduction and using eco-friendly materials, you contribute to a healthier planet. Many filters on the market create waste and can be energy-intensive to produce. Instead, by making your own filter, you can avoid these pitfalls. Remember, using materials that are easy to recycle or decompose will lessen your overall waste footprint.

    Also, be mindful of how you dispose of your filters. Improper disposal can lead to environmental pollution, which harms both wildlife and natural ecosystems. By taking these environmental considerations into account, you can create a more sustainable DIY water filter while protecting the planet for future generations.

    Frequently Asked Questions

    Can I Use Other Materials Instead of Sand and Stones?

    Absolutely, you can use alternative filtration options! Natural materials like small rocks, pebbles, and aquatic plants effectively filter water. Create layers using these materials to enhance your filtration system and improve water quality.

    How Long Does the Filtration Process Take?

    The filtration process can take anywhere from 10 to 60 minutes, depending on your setup. Thicker layers slow filtration speed, while proper maintenance enhances filtration efficiency, ensuring your filter works effectively over time.

    What Type of Water Is Best for Filtering?

    For effective filtration techniques, you'll want to use water from clean sources like rivers or ponds. These often contain particulate matter that's easier to filter, ensuring you get cleaner, safer drinking water.

    Is It Safe to Drink Filtered Water Immediately?

    Drinking filtered water immediately isn't always safe. Depending on your filtration effectiveness, contaminants might remain. It's best to boil or use UV treatment afterward to ensure filtered water safety before consumption. Stay cautious!

    How Often Should I Replace the Filter Materials?

    You should regularly replace filter materials to ensure effective filtration. Monitor material lifespan closely; frequent replacements prevent contamination and maintain optimal filter maintenance. Inspect layers after use, especially cotton and gauze, for signs of degradation.

    Conclusion

    In conclusion, building a DIY water filter without charcoal is possible and can be effective using common materials. By layering different substances, you can improve the filtration process and make water safer to drink. Remember, though, that DIY filters have limitations and may not remove all contaminants. Always consider using additional purification methods if necessary. With the right approach, you can create a simple and functional water filter for practical use. Stay safe and informed about your water sources!

  • What Long-Term Food Storage Mistakes Should You Avoid?

    What Long-Term Food Storage Mistakes Should You Avoid?

    To avoid long-term food storage mistakes, start by ensuring proper temperature control, ideally between 50°F and 75°F. Avoid storing food in places with extreme temperature changes. Use food-grade, airtight containers to prevent moisture and pests, and always sanitize them first. Implement a first-in, first-out system to rotate your stock and regularly check expiration dates. Proper food preparation is crucial; control moisture levels to prevent spoilage. Lastly, label your containers with contents and dates for easy tracking. By following these tips, you can enhance your food storage practices and keep your supplies safe for longer. More insights await you.

    Mistakes in Storage Conditions

    When it comes to long-term food storage, don't underestimate the impact of storage conditions. One major mistake you can make is ignoring temperature fluctuations. Ideally, you should store your food in a cool, stable environment, keeping temperatures between 50°F and 75°F. Avoid placing your food in garages or near heat sources like stoves, as these areas can get too hot. For high-risk foods, make sure to keep them in the fridge at 5°C or below, or above 60°C to prevent bacteria from growing. Additionally, maintaining a consistent temperature is crucial for preserving food quality over time. Regularly checking for damage to containers can also help ensure that your food remains safe and uncontaminated.

    Another common error is light exposure. Ultraviolet (UV) light can spoil food and strip away essential nutrients. To combat this, store your food in dark places or use containers that block out light. Avoid clear containers if they're near windows or any sunny spots. Instead, opt for shaded areas or cover your containers to minimize light exposure.

    Errors in Storage Handling

    Errors in storage handling can significantly impact the longevity and safety of your food supplies. To ensure your food stays fresh and safe, you need to pay attention to how you store it. Here are some common mistakes to avoid:

    • Inadequate container materials: Always use food-grade containers to prevent contamination. Avoid materials that could leach harmful chemicals into your food. For acidic items, like dried fruit, glass jars or Mylar bags are your best bet.
    • Incorrect packaging techniques: Proper packaging methods vary for different foods. For example, canning is suitable for cooked meats, while vacuum sealing helps keep moisture and oxygen away. Don't just toss bulk items into non-airtight containers, as this can lead to spoilage. Additionally, improper packaging can lead to increased moisture exposure which can compromise food quality. Furthermore, storing uncooked meat on the top shelf of the fridge increases the risk of cross-contamination.
    • Oxygen and moisture exposure: Even small holes in your packaging can cause significant issues. Always transfer food into airtight containers to keep moisture and oxygen out. Regularly check for signs of spoilage or pests.

    Additionally, prioritize container sanitization. Clean your storage containers thoroughly before use to reduce contamination risks. It's also crucial to label your food clearly, noting expiration dates and implementing a first-in, first-out system. Regularly review your stored items to ensure nothing goes unnoticed. By avoiding these handling errors, you can maintain the quality and safety of your food supplies for years to come.

    Mistakes in Food Preparation

    Food preparation is a critical step in ensuring the safety and longevity of your stored items, yet many people overlook key aspects that can lead to spoilage or contamination. One major mistake is inadequate sanitation and sterilization. You need to ensure all your equipment and packaging are properly sanitized to prevent any contamination. Always use sterile utensils and tools for food preparation and storage. Clean and dry your containers and utensils thoroughly before using them to avoid cross-contamination between different food types.

    Another common error is incorrect processing techniques. For example, using pressure canning for high-pH foods is essential, while canning butter at home is not safe. Keep cooked meat out of jerky-making; instead, opt for canning, freeze-drying, or freezing. With dehydrated foods, you must control moisture levels strictly to prevent mold growth. Always follow established safe canning practices to avoid issues like botulism. Proper packaging must be sterile and properly sealed to prevent spoilage during long-term storage. Additionally, focusing on purchasing items that will be consumed can help you avoid buying unnecessary fillers that may not last as long.

    Additionally, managing moisture and oxygen is crucial. Use oxygen absorbers in your storage to reduce spoilage and ensure airtight, watertight packaging to keep moisture at bay. Don't forget to rotate your foods regularly to minimize exposure to these elements.

    Lastly, understanding food chemistry is vital. Be aware of the pH levels of your stored foods, as high-pH foods spoil more easily. Acidic foods should never be stored in metal containers. By practicing proper sanitation practices and using the right processing techniques, you can significantly extend the life of your stored foods.

    Errors in Container Choice

    Choosing the right containers for long-term food storage is crucial for maintaining quality and safety. If you make errors in container choice, you could end up wasting food and risking safety. Here are some common mistakes to avoid:

    • Using non-food grade materials: Always select containers that are food-safe. High-density polyethylene (HDPE) with a #2 Resin Identification Code is a solid choice. Avoid plastics stamped with #3 or #7, as they can leach harmful chemicals into your food. Additionally, opting for food-grade plastics ensures compliance with safety regulations, further protecting your stored items.
    • Not ensuring airtightness: Airtight containers are essential. If your containers aren't airtight, moisture and pests can ruin your food, leading to stale tastes and unpleasant odors. Glass containers are a great option, but remember they're fragile. Additionally, containers made from glass are more stable than metal cans, making them less prone to chemical leaching.
    • Choosing incorrect packaging types: The right packaging is key. While plastic buckets are popular, ensure they're food-grade. Metal cans work for dry foods but aren't reusable, and vacuum pouches, which are great for certain items, require special equipment.

    Additionally, pay attention to sealing techniques. Properly sealed containers help maintain freshness and prevent spoilage. Always check expiration dates and rotate your food stock, using older items first.

    Mistakes in Storage Location

    errors in storage placement

    When it comes to long-term food storage, the location you choose can make all the difference. One of the biggest mistakes is not considering light exposure. Light can break down your food, leading to spoilage and nutrient loss. To keep your food fresh, store it in dark places. Sunlight can also create off-flavors, which you definitely want to avoid.

    Another mistake is ignoring temperature fluctuations. Extreme changes in temperature can ruin your stored food. Consistent cool temperatures are ideal for long-term storage, so avoid places like garages and carports. Instead, look for basements or other steady cool spaces. Seasonal temperature changes can shorten your food's lifespan, so think carefully about where you store it. Additionally, utilizing different circuits for freezers can help prevent total food loss during outages.

    Also, consider the environment where you keep your food. Pantries should be in cool, controlled areas, away from heat sources like ovens and water heaters. Humidity can also be a problem, so choose a dry spot. Areas with minimal humidity are best for preserving your food quality.

    Lastly, avoid using sheds or outdoor structures since they often experience temperature fluctuations that can harm your food. Closets and cabinet shelves can work if they're cool and dark. If conditions are right, under beds can also serve as a storage option. Cellars are ideal for long-term food storage because they usually maintain stable temperatures. By paying attention to light exposure and temperature, you can significantly extend the shelf life of your stored food.

    Errors in Food Management

    Proper management of your long-term food storage is just as important as where you keep your supplies. To avoid wasting food and money, you need a solid system in place for inventory tracking and expiration management. Here are three common errors to watch out for:

    • No rotation system: Failing to use a first-in, first-out method can lead to old food being overlooked and ultimately wasted.
    • Poor labeling: Without clear labels, you might end up confused about what's in your storage, leading to unnecessary waste.
    • Inadequate inventory management: Not keeping track of what you have can result in expired items hidden in the back of your pantry.

    To keep your supplies fresh and safe, start by regularly checking your inventory. Create a simple list of what you have, making sure to note expiration dates. This way, you can prioritize using older items first. Also, always label your containers with the contents and the date you stored them. This helps you easily identify what needs to be used soon. Additionally, rotating out-of-date food items regularly is essential to prevent spoilage and loss of resources.

    Make sure to set reminders to check your stock every month. This consistent practice not only prevents spoilage but also helps you plan meals based on what you already have. By implementing these strategies, you'll ensure your long-term food storage remains effective and minimizes waste, keeping your food safe and ready for use whenever you need it.

    Frequently Asked Questions

    How Can I Tell if Food Has Gone Bad?

    To tell if food's gone bad, watch for expiration indicators like unpleasant odors, discoloration, and texture changes. Spoilage signs, such as gas production or abnormal taste, also signal that it's time to discard the food.

    What Are the Best Practices for Vacuum Sealing Food?

    When vacuum sealing food, you'll enjoy benefits like extended freshness and reduced waste. Avoid common mistakes, like overfilling bags or sealing hot foods, to maximize your efforts and keep your food safe longer.

    How Does Altitude Affect Food Storage Techniques?

    Altitude affects food storage techniques by changing boiling points and processing times. You should maintain a storage temperature between 40°F and 60°F to preserve quality, considering altitude effects for safe canning and long-term storage.

    Can I Store Canned Food in a Garage?

    You can store canned food in your garage, but ensure the garage temperature stays between freezing and 85°F, and humidity levels are below 15% to prevent spoilage and maintain food quality.

    What Types of Foods Are Best for Long-Term Storage?

    For long-term storage, focus on freeze-dried foods and dehydrated vegetables. They maintain nutritional value and have extended shelf lives, making them excellent choices for your emergency supplies and sustainable meal planning.

    Conclusion

    To avoid long-term food storage mistakes, remember to check your storage conditions, handle food carefully, prepare it properly, choose the right containers, select the best locations, and manage your food inventory wisely. By paying attention to these factors, you can keep your food fresh and safe for longer periods. Regularly review your practices to ensure you're not overlooking any details. With these tips, you'll be better equipped to store food effectively and prevent waste.

  • Which Wood Creates the Most Smoke?

    Which Wood Creates the Most Smoke?

    If you're looking for wood that produces the most smoke, mesquite is your best option. Mesquite wood has a dense structure and high oil content, which leads to thick, heavy smoke when burned. It's perfect for grilling and smoking meats, especially beef and chicken, giving them a robust flavor. However, keep in mind that while mesquite offers strong smoke, it can overpower lighter foods. Other woods like hickory and oak also produce significant smoke but not as much as mesquite. By considering these options, you can choose the right wood for your cooking needs and enhance your flavor experience.

    Types of Wood for Smoking

    When it comes to smoking meats, choosing the right type of wood can make all the difference in flavor. Different woods offer unique wood flavor profiles that can enhance your barbecue. For instance, hickory has a strong, sweet flavor that resembles bacon, making it ideal for pork and beef. Oak provides a heavy smoke flavor and is versatile, pairing well with red meats, pork, and fish. If you prefer a milder taste, pecan wood offers a sweet, mild profile, great for poultry and cheese.

    Mesquite is perfect for those who enjoy a robust, earthy flavor. It burns hot and fast, making it a popular choice for grilling beef and chicken. On the other hand, maple wood gives a mellow, slightly sweet smoke that works well with pork and small game birds. Hardwoods like hickory, oak, and pecan yield the best smoke flavor, as they have lower resin content compared to softwoods. In addition, smoke compounds from hardwoods contain antioxidants and antimicrobials, enhancing both flavor and preservation.

    When applying these smoking techniques, remember that hardwoods like hickory, oak, and pecan yield the best smoke flavor. Softwoods, which contain resin, can create harsh-tasting soot, so it's best to avoid them. Also, the moisture content of the wood plays a role; wood with some moisture burns slower, which is ideal for low and slow cooking.

    Lastly, consider other options like apple, cherry, or birch, each providing distinct flavors that can complement various meats. By choosing the right wood for smoking, you'll elevate your barbecue experience and impress your guests with deliciously flavored meats.

    Smoke Characteristics and Composition

    Smoke characteristics and composition play a crucial role in the smoking process, influencing both flavor and safety. When wood burns, it produces smoke that contains a complex mixture of gases and particles. The smoke density, or how thick the smoke is, can vary based on the type of wood you use and how you burn it. Different woods contain different amounts of cellulose, lignin, and resin, all of which affect the smoke flavor you experience.

    The composition of smoke depends heavily on the burning conditions, like temperature and oxygen availability. For instance, a fire with plenty of oxygen generally burns hotter, producing less smoke. Conversely, lower temperatures can lead to more smoke and a richer flavor profile. When wood burns, it goes through stages, from dehydration to gasification, and eventually to combustion, releasing various compounds into the smoke.

    Particulate matter, including ash and tiny solid particles, is also a key part of smoke. This can impact both the flavor and safety of what you're cooking. Incomplete combustion can create toxic compounds, so it's important to monitor your fire's conditions. Additionally, using wood chunks can help maintain consistent smoke levels, leading to a more controlled flavor experience. Aged smoke can differ significantly from fresh smoke, affecting both taste and health hazards. Furthermore, the wood type used directly influences the flavor profile as different woods impart unique aromas and taste characteristics to the smoke.

    Best Woods for Heavy Smoke

    Choosing the right wood is essential for achieving that rich, heavy smoke flavor you crave in your barbecue. If you want an intense flavor, mesquite is a top choice. It burns hot and produces a robust mesquite flavor, making it great for bold meats like beef and pork. Oak, especially Red Oak, is another excellent option. It's dense and burns slowly, giving off a strong smoke that's perfect for red meats like lamb. Additionally, only hardwoods are recommended for smoking to avoid unpleasant flavors and enhance overall cooking quality. This is because properly dried hardwoods transform dishes with rich flavors.

    Hickory is also a classic favorite among barbecue enthusiasts. It offers a sweet to strong smoke flavor, which works wonderfully for pork, beef, and poultry. If you're looking for something unique, try grapevine. It produces a tart, fruity smoke that pairs well with poultry and game. While pecan wood isn't as intense, it brings a nutty and slightly sweet flavor that adds depth to your barbecue.

    Using different smoking techniques can enhance the flavors even more. Mixing hickory with milder woods like apple or cherry can balance the heavy smoke. Layering woods at different smoking stages can also amplify the smoke production. Remember, the moisture content and density of the wood affect the amount of smoke it produces.

    Factors Influencing Smoke Production

    Understanding the factors that influence smoke production can significantly enhance your barbecue experience. One key factor is wood composition. Different types of wood contain varying levels of lignin, cellulose, and hemicellulose. Lignin, in particular, affects the smoke flavor more than cellulose, which doesn't add any flavor when burned. Generally, softwoods, which have more sap and terpenes, can produce undesirable flavors, making them less suitable for cooking. Hardwoods, being denser, typically produce less smoke and burn more efficiently, providing better heat and flavor. Additionally, the combustion characteristics of different wood types can influence how much smoke they produce. Denser woods contain more energy per unit volume, enhancing the overall performance of the fire.

    Another important factor is moisture impact. The moisture content of the wood you use plays a critical role in smoke production. Wood with a high moisture content struggles to burn, leading to more smoke and less heat. Ideally, you want your wood to have a moisture content of less than 20%. Freshly cut or "green" wood is not recommended, as it contains too much moisture. Instead, opt for seasoned or kiln-dried wood, which burns more effectively and produces less smoke.

    Additionally, the density of the wood affects smoke output. Denser woods burn slower and create less smoke, resulting in cleaner fires. The environmental conditions, including oxygen levels and temperature, also play a role in smoke production. By understanding these factors, you can choose the right wood for your barbecue, ensuring a flavorful and enjoyable cooking experience.

    Health Risks of Wood Smoke

    wood smoke health hazards

    When you enjoy a cozy fire or a barbecue, it's easy to overlook the potential health risks associated with wood smoke. However, being aware of these risks can help you make safer choices. Here are some health effects of wood smoke you should know:

    1. Short-term exposure can cause:
      • Irritated eyes, throat, sinuses, and lungs.
      • Headaches.
      • Reduced lung function.
      • Increased risk of lower respiratory diseases.
    2. Long-term exposure can lead to serious issues such as:
      • Chronic lung disease, including bronchitis and emphysema.
      • Cardiovascular disease.
      • Lung cancer.
      • Chronic obstructive pulmonary disease (COPD).
    3. High-risk groups include:
      • Children, who have developing lungs and a higher chance of respiratory infections.
      • The elderly and adults with pre-existing conditions, whose health issues may worsen due to wood smoke.
    4. Harmful chemicals in wood smoke, like benzene and formaldehyde, can penetrate deep into the lungs and even enter the bloodstream, causing chronic inflammation and damaging lung tissue. Additionally, 57% of direct fine particle emissions from wood burning contribute to air quality issues and respiratory problems. Therefore, it's essential to recognize that wood-burning devices emit harmful toxins that can exacerbate these health risks.

      To reduce your risk of negative health effects, consider using low-emission wood heaters, switching to gas or electric appliances, and ensuring proper ventilation. By staying informed and taking preventive steps, you can enjoy your fires and barbecues while minimizing the health risks associated with wood smoke.

      Woods to Avoid for Smoking

      Avoiding certain types of wood for smoking is essential to ensure both flavor and safety. First, steer clear of softwoods like pine, cedar, or fir. These woods contain high levels of sap and turpenes, leading to unpleasant flavors and softwood risks that can harm your health. They produce thick, pungent smoke filled with unhealthy residues, which can spoil your food. You might also want to skip elm, eucalyptus, sycamore, and liquid amber, as they can give your meats a bad taste.

      Next, be cautious of toxic woods. Trees such as yew, oleander, and poisonous walnut contain harmful substances that can survive the burning process. If you smoke with these woods, you risk ingesting toxins that could pose serious health risks. Moreover, wood from old orchards may carry pesticide residues, so it's best to avoid it as well.

      Also, don't use chemically treated wood like pallets or scraps from furniture. These materials can contain hazardous chemicals that transfer to your food during smoking. Lastly, avoid painted, stained, or moldy wood. Painted wood can impart a bitter taste and may contain harmful lead, while moldy wood can introduce toxins. Always choose known safe wood for smoking to protect your health and ensure a delicious result. By following these guidelines, you can enjoy your smoked dishes without the worry of negative effects.

      Frequently Asked Questions

      How Does Wood Age Affect Smoke Production?

      Wood aging significantly influences smoke characteristics. As wood ages, its moisture content decreases, leading to cleaner combustion and milder smoke. You'll notice that older wood produces more consistent, flavorful smoke while minimizing harsh flavors and health risks.

      Can Soaking Wood Chips Reduce Smoke Intensity?

      Soaking wood chips won't reduce smoke intensity; it just delays it. You'll get more immediate smoke flavor with dry wood. For better results, focus on soaking techniques that enhance flavor without compromising smoke production.

      What's the Best Wood for Cold Smoking?

      For cold smoking, you'll want to choose wood types like apple, cherry, or alder. These woods offer mild flavors, enhancing your food without overpowering it. Experimenting with combinations can also yield delicious results. Enjoy the process!

      Does the Type of Meat Influence Smoke Choice?

      Yes, meat type definitely influences your smoke choice. Different meats absorb smoke flavor differently, so using complementary woods enhances the natural tastes. For instance, poultry benefits from milder woods, while red meats thrive on stronger varieties.

      How Do Weather Conditions Affect Smoke Output?

      Weather conditions greatly affect smoke output. High humidity levels can trap smoke, while wind direction disperses it. You should consider these factors when planning outdoor burning to minimize smoke and ensure better air quality.

      Conclusion

      In conclusion, if you want to create a lot of smoke while smoking food, choose woods like hickory or mesquite. They produce rich, dense smoke that adds deep flavors. However, always remember to consider health risks and avoid certain woods that can release harmful substances. By understanding the types of wood and their smoke characteristics, you'll make better choices for your smoking adventures. Enjoy experimenting with different woods to find the flavor you love!

    5. Can You Drink Coconut Water From Any Coconut?

      Can You Drink Coconut Water From Any Coconut?

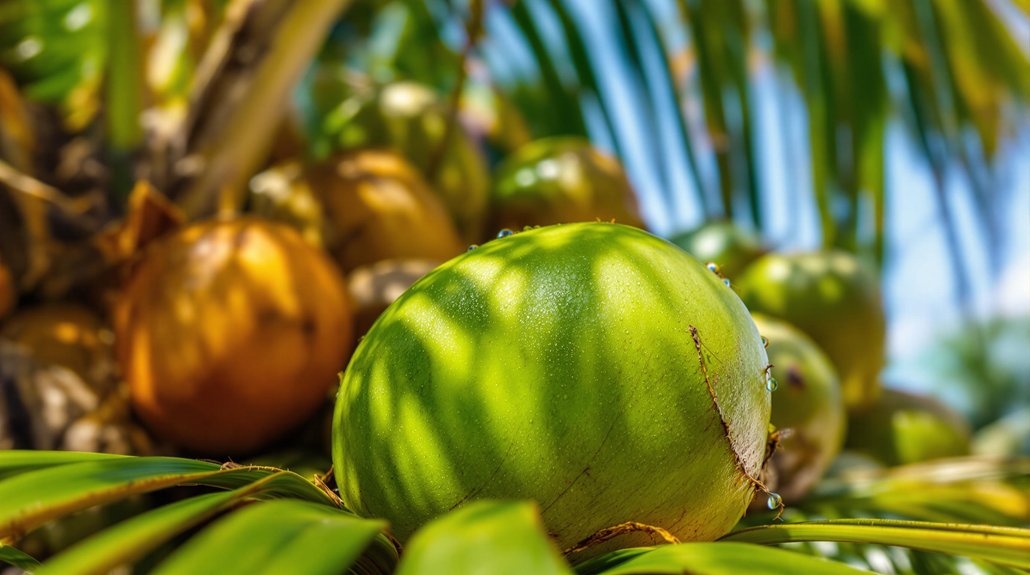
      You can't just drink coconut water from any coconut. Only young coconuts, around 6-7 months old, provide the best quality and flavor. Mature coconuts are better for cooking than for drinking. Look for green coconuts with a firm husk and check for mold around the "eyes." Shaking the coconut can help—you should hear the water inside. Remember, if a coconut is brown or feels light, it might not have good water. Always ensure your coconut is stored properly to avoid spoilage. There's more to know about selecting the right coconut for the best experience.

      Understanding Coconut Water Types

      When you dive into the world of coconut water, you'll quickly discover that not all coconut water is created equal. The type of coconut you choose can greatly affect the flavor and nutritional value. Young coconuts, typically around 6-7 months old, are the best source for coconut water. They have higher sugar levels and phenolic contents, making them sweeter and more refreshing. You might find that certain coconut varieties, like the Nam Hom coconut from Thailand, are especially prized for their unique sweetness and superior flavor. Additionally, coconut water is rich in electrolytes, which makes it an excellent choice for post-workout hydration. This electrolyte content is what sets coconut water apart from plain water, enhancing its ability to replenish lost fluids after exercise.

      Processing methods play a crucial role as well. Some brands, like Raw C, use fresh, unprocessed coconut water without any additives. This means you're getting the pure taste and nutritional benefits right from the coconut. On the other hand, some products are made from concentrate, which involves heating and may result in a different flavor and nutrient profile.

      Packaging is another factor to consider. Look for brands that use BPA-free packaging and UHT technology, as these methods help maintain the freshness and nutritional value of the coconut water. You'll also want to check for labels that indicate no added sugars or flavors, ensuring you're getting the natural taste without any unwanted extras. By understanding these coconut varieties and processing methods, you can make more informed choices when selecting your coconut water.

      Factors Affecting Coconut Water Quality

      In the realm of coconut water, various factors significantly impact its quality, starting from the moment the coconuts are harvested. One major concern is pre-harvest contamination. If pesticides are used during coconut production, residue can end up in the water. Additionally, heavy metals from contaminated soil or irrigation water can seep into the coconuts, posing health risks. The overall condition of the soil and water used for irrigation plays a crucial role in determining the quality of the coconut water you consume.

      Once the coconuts are harvested, post-harvest handling becomes vital. Improper techniques can introduce microorganisms that spoil the water. For example, if coconuts are roughly handled or dropped, they might crack, making them more prone to spoilage. High temperatures during storage can also accelerate microbial growth, shortening the shelf-life of the coconut water. Effective management of microbial presence is crucial for safety and maintaining quality. Furthermore, maintaining appropriate storage temperatures is essential, as quality loss increases significantly with temperature fluctuations.

      To ensure quality, it's essential to maintain hygienic storage conditions. Storing coconut water at lower temperatures helps slow down the growth of harmful microorganisms. Always check the appearance and clarity of the coconut water; clear and colorless water is a sign of quality. Also, be aware of the physiochemical characteristics, like pH and Brix levels, which indicate drinking quality.

      Nutritional Benefits of Coconut Water

      The quality of coconut water not only hinges on external factors but also on its impressive nutritional profile. When you drink coconut water, you're not just hydrating; you're also getting a variety of essential nutrients. For instance, a cup of coconut water contains about 509 milligrams of potassium, which is crucial for maintaining fluid balance and proper muscle function. It also has low calories—approximately 45 to 60 per cup—making it a light and refreshing choice.

      Coconut water is low in sugar, with 8 to 12 grams per cup, and it contains zero grams of fat and fiber. Its nutrient profile includes magnesium and calcium, with around 16.8 milligrams and 40.8 milligrams per cup, respectively. These minerals can help support bone health and aid in lowering blood pressure, thanks to potassium's role in regulating blood pressure levels. Additionally, coconut water contains a natural balance of essential electrolytes, which enhances its rehydration properties. Moreover, the electrolyte content in coconut water can vary based on coconut maturity, offering different nutritional benefits.

      One of the standout features of coconut water is its hydration benefits. It provides a natural balance of electrolytes, making it a better option than plain water for rehydration, especially after physical activities. While it may not be superior to some sports drinks in sodium content, it still offers excellent hydration and a refreshing taste.

      Health Risks to Consider

      What should you be aware of before reaching for that refreshing coconut water? First, consider potential contamination risks. Mold can grow in coconuts that aren't stored properly, leading to coconut allergies or respiratory issues. Always perform a mold inspection before drinking. Check for visible mold on the coconut and transfer the water to a clear container to see if any mold is present. Consuming moldy coconut water can expose you to harmful mycotoxins, which may cause serious health problems over time. Additionally, prolonged exposure to mold contamination can lead to chronic health issues such as liver and kidney damage.

      Next, be cautious about the high potassium content in coconut water. If you drink too much, it can lead to hyperkalemia, causing irregular heartbeats and muscle weakness. This is especially important for individuals with kidney issues, as they may struggle to process excess potassium. Moreover, coconut water is a natural alternative to sports drinks due to its electrolyte content, which can help with hydration.

      Additionally, some people might experience digestive discomfort due to the high FODMAP content in coconut water. If you're sensitive, it could cause bloating or diarrhea. Lastly, if you're allergic to coconut, you could face symptoms like itching or gastrointestinal upset, so be mindful of your body's reactions.

      Proper Handling and Storage

      safe storage practices essential

      Proper handling and storage of coconuts are essential to ensure you enjoy fresh and safe coconut water. Start by considering pre-harvest factors, like the coconut's maturity and the conditions where it grows. Make sure the perianth, the outer part of the coconut, stays intact during harvesting to prevent contamination. Coconuts are best harvested when they're mature, which helps preserve their quality. Additionally, potassium content increases as coconuts mature, further influencing the nutritional profile of the water.

      After harvesting, pay attention to post-harvest techniques. Use cooling methods like forced-air cooling or hydrocooling to quickly lower the temperature of the coconuts. Ideally, store your coconuts at temperatures between 32°F and 35°F, with humidity levels around 80% to 85%. This will help maintain freshness and extend their shelf life to about 1-2 months. Coconut trees require high humidity and warm temperatures for optimal growth, which should be considered during cultivation.

      When handling coconuts, be gentle. Avoid dropping or overcrowding them to minimize physical damage. The husk plays a crucial role in preserving the nut's quality, so keep it intact as much as possible.

      If you plan to extract coconut water, choose methods that reduce contamination, such as drilling instead of halving. After extraction, filter the water to remove any unwanted particles. Proper storage is vital, so keep bottled coconut water in low temperatures to prevent spoilage. By following these steps, you'll ensure that your coconut water is not just delicious but also safe to drink.

      Assessing Coconut Water Safety

      Ensuring coconut water safety is crucial for protecting public health and maintaining consumer trust. To manage the risks associated with drinking coconut water, you should be aware of the quality standards that govern its safety. Recent assessments show that the quality of coconut water can be compromised, which could pose health risks. Therefore, adhering to updated quality assurance standards is essential.

      Organizations like CARDI and CROSQ are actively revising coconut water quality standards to improve food safety evaluation and testing protocols. When producers comply with these standards, they not only enhance consumer confidence but also gain access to regional and international markets. Conversely, failing to meet these standards can result in health issues and trade restrictions, making risk management a priority for producers.

      Contamination is a significant concern. Improper storage can lead to mold growth, which can cause allergic reactions and respiratory problems. Additionally, coconut water can harbor harmful bacteria, such as E. coli, posing serious health risks. Regular testing and quality control are vital to prevent these issues. You should also be cautious of canned coconut water, as some products may contain BPA, which can disrupt hormones and lead to health problems.

      Ultimately, consumers need to stay informed about the safety of coconut water. Checking for recalls and being aware of potential contamination risks are essential steps in ensuring what you drink is safe. By prioritizing these practices, you can enjoy coconut water with greater peace of mind.

      Choosing the Right Coconut

      selecting a quality coconut

      Selecting the right coconut is vital for enjoying fresh and flavorful coconut water. When you go coconut shopping, remember that not all coconuts are created equal. A good coconut can make all the difference in taste and quality. Here are some tips for effective coconut selection:

      1. Inspect the Husk: Look for a green husk, which usually means freshness. Avoid brown or dried-out husks.
      2. Shake It: Give the coconut a gentle shake. You should hear sloshing sounds, indicating there's water inside.
      3. Feel the Weight: Choose coconuts that feel slightly heavy for their size. This weight suggests they contain more water.
      4. Check the Shape: Opt for nice, round coconuts. They tend to have more water than flat or irregularly shaped ones.

      Maturity is important when choosing a coconut. Green or young coconuts are best for drinking coconut water, while mature ones are better for cooking. Also, be mindful of storage conditions, as they can affect the quality of the coconut water.

      Lastly, always check the "eyes" of the coconut for any signs of mold, as this can impact the safety of your drink. By following these tips and focusing on husk inspection, you'll be well-equipped to select the perfect coconut for a refreshing experience!

      Conclusion

      In conclusion, while you can drink coconut water from many coconuts, it's important to choose the right ones. Look for young, green coconuts for the freshest taste and best nutrients. Always check for any signs of spoilage, and handle and store them properly to avoid health risks. By following these guidelines, you can enjoy coconut water safely and reap its many benefits. Stay informed and make smart choices for a refreshing experience!

    6. How Long Do Water Tablets Last?

      How Long Do Water Tablets Last?

      Water purification tablets generally last between three to five years when they're unopened. Once opened, their shelf life drops to about one year, so it's important to keep an eye on the expiration date. Store them in a cool, dry place, away from direct sunlight and humidity, to maintain their effectiveness. Make sure the packaging remains intact, as damage can lead to quicker degradation. Remember, if you see any discoloration or unusual smells, it's best to replace the tablets. By following these guidelines, you can ensure they stay reliable when you need them most. More insights are available on proper usage.

      Types of Water Purification Tablets

      When it comes to ensuring safe drinking water, water purification tablets are your go-to solution. You'll find various types of tablets available, each with unique features and purification methods. Understanding these options can help you make informed tablet comparisons.

      First, let's look at the Katadyn Micropur MP1. This tablet is effective against viruses, bacteria, Giardia, and Cryptosporidium, taking about 240 minutes to purify one liter of water. It comes in durable packaging, making it easy to use while also improving the taste and odor of the water. Additionally, it is considered the best overall water purification tablet choice among tested options.

      Next is the Potable Aqua Chlorine Dioxide. Like the Micropur, it's effective against the same pathogens but takes a bit longer—about four hours to purify one quart. This option has a shelf life of up to four years if stored properly, which is a definite plus. The tablets utilize chlorine dioxide technology, similar to municipal water treatment methods, ensuring high effectiveness.

      Then there's Potable Aqua with PA+Plus. This one purifies water in just 35 minutes but isn't effective against Cryptosporidium. It's lightweight and neutralizes taste and odor, making it user-friendly.

      Lastly, consider Aquatabs. These tablets can treat 0.75 liters of cold water in about 40 minutes and have a shelf life of 5 years for strip-packed tablets. They're effective against viruses and bacteria, providing robust pathogen protection.

      Factors Affecting Shelf Life

      Understanding the types of water purification tablets available is just the first step in ensuring their effectiveness. To truly maximize their shelf life, you need to consider several critical degradation factors.

      First, think about storage conditions. The ideal temperature for storing your tablets is between 59°F and 86°F (15°C to 30°C). Temperatures outside this range can lead to faster degradation. Humidity is another crucial factor; high moisture levels can break down the active ingredients. Always keep your tablets away from direct sunlight, as UV rays can degrade them quickly. If you've opened the original packaging, transfer the tablets to an airtight container to maintain their effectiveness. Expiration dates are critical indicators of when the tablets may no longer be effective, so always check them regularly. Additionally, having a robust backup water filtration system in place ensures that you are prepared in case your tablets become ineffective.

      Next, pay attention to packaging integrity. Tablets in sealed containers typically last longer. If you open a container, the shelf life can drop to less than a year. Individual seals on tablets help them stay fresh longer than those kept in bulk.

      Environmental exposure also plays a role. Minimize air and moisture exposure to prevent degradation. Avoid areas with temperature fluctuations and try to store your tablets in controlled environments. Regularly inspect the tablets for any signs of discoloration or damage. If you notice any changes, it's time to replace them.

      Finally, always follow the manufacturer's guidelines for storage and usage. Adhering to expiration dates is essential for ensuring the safety of your drinking water. By considering these factors, you can effectively extend the shelf life of your purification tablets.

      Product Specifications

      Water purification tablets come in various types and compositions, primarily based on chlorine and iodine. The most common tablet composition includes compounds like Sodium Dichloroisocyanurate (NaDCC), which effectively releases chlorine when mixed with water. You'll often find these tablets in emergency kits, such as the WASH&DignityKit, making them essential for safe drinking water in critical situations.

      When considering product features, it's important to note the certification standards these tablets must meet. They should comply with NSF/ANSI standard 60 and EN 12931:2000 to ensure safety and effectiveness. Different concentrations are available, typically 33 mg and 8.5 mg tablets, allowing you to choose based on your specific needs. Each tablet treats a designated volume of water, often ranging from 2 to 5 liters, and Aquatabs treat up to 20 liters of clear water with each tablet.

      The packaging of these tablets is also significant. They're usually individually packed and sealed in foil strips, designed to protect them from moisture and sunlight. To maximize their shelf life, store them in a cool, dry, and well-ventilated area. Be cautious about exposure to extreme temperatures, as this can shorten their effectiveness. Opened tablets can expire in less than a year if not stored properly, so proper storage is crucial.

      Always follow the instructions provided with the product to achieve the best results. Ensure you understand the dosage and application processes, as these are crucial for safe and effective water purification. Keeping these product specifications in mind will help you make informed choices when selecting water purification tablets.

      Use and Effectiveness

      Proper storage and handling of water purification tablets play a significant role in their use and effectiveness. To ensure you're getting the most out of these tablets, follow these essential usage guidelines:

      1. Check the Expiration Date: Always look for the expiration date on the packaging. Generally, unopened tablets can last 3 to 5 years, but once opened, aim to use them within a year.
      2. Store Properly: Keep your tablets in a cool, dry place away from sunlight and temperature extremes. High humidity can compromise their effectiveness.
      3. Follow Dosage Instructions: Use the correct number of tablets for the amount of water you're treating. The effectiveness of the tablets can vary based on water temperature and pH, so consult the guidelines. Additionally, diuretics like water tablets are often taken in the morning to maximize their benefits. Diuretics help control blood pressure by assisting kidneys in eliminating excess water and salt through urine.
      4. Consider Contact Time: Allow the tablets to work for the recommended duration. This ensures that harmful pathogens are effectively killed, although keep in mind they might not eliminate all chemical contaminants.

      When doing an effectiveness comparison, remember that while these tablets are useful, boiling water is often more effective at eliminating all pathogens. However, in situations where boiling isn't feasible, water purification tablets are a practical alternative. By understanding these factors and following proper usage guidelines, you can significantly improve the effectiveness of water purification tablets, ensuring safe drinking water when you need it most.

      Safety and Precautions

      How can you ensure safety when using water purification tablets? First, always follow the instructions provided on the packaging. Incorrect dosing can lead to ineffective water treatment and potential health risks. Remember that these tablets can expire quickly, so check the expiration dates regularly. Store them in a cool, dry place, away from sunlight, heat, and moisture to maintain their effectiveness. Additionally, using these tablets significantly reduces the risk of waterborne diseases, which underscores their importance in safe water practices.

      Child safety is crucial when handling these tablets. They can easily be mistaken for candy or medications, posing a serious risk to children. Always keep water purification tablets out of reach and sight of kids. It's a good idea to keep them in their original packaging to avoid any confusion. If a child accidentally ingests a tablet, seek medical attention immediately.

      Be aware that while these tablets can disinfect water, they don't remove chemical contaminants like pesticides. For optimal safety, consider boiling water as a more effective method, according to the CDC. Additionally, if you're using chlorine-based tablets, remember that large doses can cause burning and other adverse effects. Always rinse your hands clean of any tablet dust after handling them.

      Lastly, if you notice any changes in the tablets, like discoloration or a strange smell, do not use them. Trust your instincts and prioritize safety. By taking these precautions, you can use water purification tablets effectively while minimizing any health risks. It's also important to pre-filter water to remove larger contaminants before using purification tablets to enhance safety and taste.

      Best Practices for Storage

      Storing water purification tablets effectively is crucial for maintaining their potency and ensuring safe usage. To keep your tablets in the best condition, follow these best practices:

      1. Temperature Control: Store your tablets in cool environments, away from extreme temperatures. Ideal storage temperature helps prevent degradation.
      2. Humidity Management: Keep your tablets in areas with low humidity. High humidity can harm the tablets, leading to reduced effectiveness.
      3. Light Protection: Avoid direct sunlight. Light exposure can break down the active ingredients in the tablets.
      4. Proper Container: Always use the original packaging. This protects against air and moisture, ensuring your tablets stay dry.

      Make sure to regularly check the storage conditions. Ideally, keep your tablets in a cool, dry place like a closet or pantry. After opening, seal the container tightly to prevent moisture from entering. It's also wise to store your tablets away from chemicals, pesticides, and gasoline.

      To prolong the shelf life, rotate your stock every 6-12 months, using older tablets first. Inspect your stored tablets frequently for signs of degradation. Remember, unopened tablets can last 2-5 years, while opened ones may last less than a year if not stored properly.

      Conclusion

      In conclusion, water purification tablets are essential for safe drinking water, especially in emergencies. They can last several years if stored correctly, but their effectiveness can decrease over time. Always check the expiration date and follow the manufacturer's instructions for use. Keep them in a cool, dry place to extend their shelf life. By understanding how to use and store these tablets, you can ensure access to clean water when you need it most.

    7. Can You Drink Morning Dew?

      Can You Drink Morning Dew?

      You can drink morning dew, but keep safety in mind. Dew can hydrate you and may support skin health, but it can also contain harmful pollutants and microorganisms. To make it safer, collect dew from clean surfaces and use a disinfectant before drinking. Regularly testing dew for contaminants is wise. Collecting dew effectively involves creating large surfaces like plastic sheets laid flat to gather moisture. Remember, while it has potential benefits, understanding the risks is crucial for making informed choices. There's much more to explore about morning dew and its uses, so let's look closer at its many aspects.

      Health Benefits of Morning Dew

      When it comes to health benefits, morning dew offers a refreshing way to support your overall well-being. One of the key benefits of drinking morning dew is its detox benefits. This natural source of hydration helps detoxify your body, keeping your skin cells and organs healthy. By drinking morning dew, you might notice a feeling of lightness as your body cleanses itself. Additionally, morning dew serves as an excellent skin refreshment. When consumed, it helps maintain your beauty from the inside out. The pure and clear water of morning dew supports the maintenance of inner cells, which is crucial for overall health. This can lead to a more vibrant complexion and a youthful appearance. If you're looking for something to help with digestion, morning dew might also aid in colon cleansing. It promotes easier defecation, making you feel more comfortable and less bloated. To ensure you get the best benefits, collect morning dew between 4 to 6 o'clock in the morning when it's at its purest. The natural clarity of morning dew surpasses that of many other liquids, making it a unique and beneficial addition to your routine. Additionally, its symbolism of purity enhances the overall experience of consuming morning dew. Incorporating morning dew into your day can be a simple yet effective way to enhance your health, providing both detox benefits and skin refreshment. Just remember to collect it at the right time for the best results! Furthermore, its high water content can also aid in hydration throughout the day, supporting overall bodily functions.

      Safety Considerations for Consumption

      While morning dew can offer various health benefits, it's important to consider safety before consuming it. Dew collection comes with risks, including possible chemical and biological contaminants. To ensure you're making safe choices, follow these key safety guidelines:

      1. Clean Collection Methods: Always use clean cloth materials for dew collection. This minimizes the risk of introducing contaminants into the water. Handle your collection items carefully to avoid any dirt or bacteria.
      2. Disinfection and Treatment: Before drinking dew water, it's crucial to disinfect it. This process kills harmful bacteria and pathogens. Additionally, treat the water for turbidity, which can hide contaminants. Clear water is safer to drink. Collecting dew can provide fresh drinking water without heavy equipment, making it an efficient method for hydration. However, be aware that pollutants in air can affect the quality of the dew water you collect.
      3. Regular Testing: If you plan to consume dew regularly, test it for contaminants. Chemical analyses can reveal pollutants, while biological analyses can indicate harmful microorganisms. Regular testing helps ensure that the water remains safe for consumption.

      Methods for Collecting Dew

      Dew collection techniques can vary significantly, but they all focus on harnessing the natural condensation process to gather water. To effectively collect dew, you'll want to create condensation surfaces that maximize water vapor capture. Start with a large surface area, as this increases your chances of gathering moisture. Fine mesh materials held perpendicular to the wind can work well, allowing moist air to flow through while promoting condensation.

      Consider using black fabric or UV-stabilized polyethylene, as these materials lose heat quickly, encouraging dew formation. To enhance efficiency, the mesh should be designed to dump collected dew rapidly. Elevating your collector slightly above the ground improves air movement, which can boost dew yield. Additionally, in regions where dew and fog harvesting techniques are applied, the effectiveness of collection can be significantly increased. This integration of dew collection systems can complement existing rainwater harvesting efforts.

      If you prefer a simpler approach, lay large plastic sheets or tarps flat in open areas with good airflow. A slight slope toward the center helps direct the dew into a collection point. You can also use multiple sheets positioned in different locations to gather more water overnight.

      Advanced dew collection strategies include utilizing metal roofs, which can condense moisture, or even exploring nature's solutions, like spider silk and mosses. Always select the right location and materials for optimal results. By paying attention to nighttime humidity and surface temperatures, you can predict when dew is likely to form, increasing your chances of a successful collection.

      Uses Beyond Drinking Dew

      After collecting dew, you might be surprised to learn it has a variety of uses beyond just drinking. Morning dew can be an excellent addition to your skincare routine. It offers several skincare benefits, including reducing acne and oily skin, improving hydration, and even enhancing your overall skin health. Here are three key uses for morning dew:

      1. Hydration Booster: Applying morning dew on your skin helps lock in moisture. Its high oxygen content can even reduce pimples and freckles, giving you a clearer complexion. Additionally, the oxygen levels in morning dew can enhance skin health and promote effective learning about skincare ingredients.
      2. Anti-Aging Agent: Dew can help reduce inflammation and sebum production, making your skin appear fresher and less oily. When combined with ingredients like aloe vera exosomes and sodium hyaluronate, it provides intense hydration and anti-aging benefits.
      3. Aromatic Applications: You can also use morning dew in homemade beauty products. Its natural properties can enhance the scent and effectiveness of lotions or sprays, making your skincare routine feel luxurious.

      To use morning dew effectively, apply it with gentle, upward strokes to avoid disturbing delicate skin areas. Use just a pea-sized amount, massaging it in for better absorption. This way, you can incorporate its benefits into your daily skincare regimen, suitable for all skin types. Remember, it's always best to consult a qualified healthcare professional if you're considering new skincare methods, especially if you're thinking about micro-needling. Enjoy the refreshing boost that morning dew can bring!

      Scientific Insights on Dew

      nature s morning moisture phenomenon

      The fascinating process of dew formation reveals much about its composition and environmental significance. Dew forms at night when warm, moist air cools, leading to condensation on cooler surfaces like grass and leaves. This process is crucial for the ecosystem, as it provides moisture to plants and supports microbial life. Dew contributes to ecosystem health and resilience by acting as a supplemental water source during dry periods. Additionally, the chemical characteristics of dew reflect atmospheric air quality, serving as an air quality indicator.

      Here's a quick overview of dew formation and composition:

      Aspect Details Importance
      Formation Process Forms on clear, calm nights Vital for plant hydration
      Dew Point Temperature where condensation begins Key to understanding dew occurrence
      Chemical Composition Contains ions like Ca²⁺, Mg²⁺, Na⁺, Cl⁻ Influences soil health and plant growth
      Ion Concentration Higher than in rainwater Affects local ecology
      Environmental Impact Can purify surfaces, but may also be polluted Important for assessing ecosystem health

      The dew composition is predominantly neutral, largely due to the interaction with alkaline soil elements. The concentration of ions is typically higher in dew than in rainwater, indicating its distinct ecological role. Dew can also host microorganisms, contributing to the biodiversity of the area.

      Understanding dew formation and its composition helps you appreciate its role in the environment. It's not just water; it's a vital resource for many living organisms.

      Cultural Significance of Morning Dew

      While many people might overlook morning dew as just a natural occurrence, it holds deep cultural significance across various societies. Dew is often celebrated in traditions for its association with fertility and growth. Many cultures perform dew rituals at dawn to collect it, believing it possesses healing properties and represents purity. Here are a few key aspects of dew's cultural significance:

      1. Symbol of Blessings: In the Bible, dew symbolizes God's blessings and represents renewal and new life, reminding us of spiritual nourishment.
      2. Connection to Nature: Collecting dew is seen as a way to connect with nature's purity, reinforcing our bond with the environment around us.
      3. Artistic Inspiration: Dew is frequently featured in literature and art, symbolizing beauty and the transient nature of life, as seen in works like Andrew Marvell's poem "On a Drop of Dew."

      Dew symbolism extends beyond religion. It appears in folklore and cultural practices, reminding us of the fleeting aspects of existence. For instance, dew drops can symbolize the delicate balance of life, reflecting how moments are often brief yet beautiful. The way dew refreshes plants daily parallels how spiritual teachings can refresh our minds and hearts. By understanding these cultural meanings, you can appreciate morning dew not just as a natural phenomenon but as a rich symbol woven into the fabric of human experience.

      Commercial Products Inspired by Dew

      dew inspired commercial innovations

      Morning dew's cultural significance often inspires creativity and innovation in various industries, leading to intriguing commercial products. One of the most notable examples is Mountain Dew, which has expanded its product lines significantly over the years. You might be familiar with the original Mountain Dew, known for its refreshing citrus flavor. However, the brand also offers a variety of dew inspired beverages, such as MTN DEW Zero Sugar, DIET MOUNTAIN DEW, and seasonal versions like MOUNTAIN DEW Voltage.

      Mountain Dew's marketing strategies tap into the cultural appeal of these products. Engaging ads and celebrity endorsements help connect with younger consumers. For instance, the Super Bowl ad campaign showcased MTN DEW Zero Sugar, emphasizing its taste as "As Good As the Original." This clever approach attracts attention and encourages consumers to try these dew infused products.

      Furthermore, new competitors like Olipop are emerging with their unique flavors, such as "Ridge Rush," which aim to capture the same audience. These products position themselves as healthier alternatives, reflecting the growing trend toward better-for-you options.

      As you explore the market, keep an eye out for various dew inspired beverages and infused products. Whether you're drawn to the classic Mountain Dew or the innovative offerings from newer brands, there's likely something that fits your taste preferences. Understanding these commercial products can help you make informed choices that align with your health goals and cravings.

      Environmental Impact of Dew Collection

      Dew collection's environmental impact is increasingly recognized as a sustainable water source, especially in arid regions where traditional water supplies are scarce. Using dew as a water source has several advantages, making it a practical choice for those in need. Here are three key benefits of dew collection:

      1. Low Environmental Footprint: Dew collection systems are environmentally friendly because they don't require electricity or fuel to operate. This makes them a great option for sustainable water sourcing.
      2. Supplementing Water Needs: In areas facing drought or water shortages, dew can supplement water demand. It helps provide hydration for plants and supports the dew ecosystem role, allowing local flora to thrive even in challenging conditions.
      3. Improving Efficiency: Technological advancements continue to enhance dew collection efficiency. New materials and designs can optimize how dew is collected, ensuring more water is available when needed.

      However, dew collection systems do face challenges. You need to be aware of factors like contamination from pollutants, seasonal variability affecting yield, and the importance of regular maintenance. While dew may not produce large quantities of water, its role in supporting ecosystems and providing reliable hydration during dry periods cannot be overlooked. As research progresses, dew collection could become an even more vital resource for communities looking to enhance water security. By understanding these aspects, you can better appreciate how dew collection contributes to environmental sustainability.

      Conclusion

      In conclusion, drinking morning dew can be safe and refreshing if collected properly. Always make sure the dew is gathered from clean surfaces and in a pollution-free area. Remember that while it may offer some health benefits, it shouldn't replace your regular water intake. You can also explore different uses for dew, like watering plants. By understanding how to collect and use dew responsibly, you can enjoy this natural resource safely and effectively.

    8. Is Waterfall Water Safe to Drink?

      Is Waterfall Water Safe to Drink?

      Drinking water from waterfalls isn't safe without treatment. Water can contain harmful contaminants like heavy metals and bacteria, which may cause serious illnesses. Even clear water can be polluted, with pathogens like Giardia and E. coli lurking beneath the surface. If you must drink waterfall water, always purify it first. Boiling it for at least five minutes effectively kills most microorganisms. You might also consider using high-quality water filters or chemical tablets to reduce risk. Remember to avoid collecting near campsites or animal grazing areas, as these increase contamination risk. There's much more you can learn about safe water practices.

      General Safety Considerations

      When visiting waterfalls, it's crucial to prioritize safety at all times. The beauty of these natural wonders can be enticing, but you need to be aware of the risks involved. First, avoid swimming or wading upstream near a waterfall. The strong currents can quickly pull you in, making swimming safety a top concern. Always heed posted warning signs and respect area closures to ensure your safety.

      Before you head out, check the water temperature. Cold water can be shocking, and it's essential to know how your body will react. Dress appropriately and consider your limits before deciding to take a dip. Never jump off waterfalls or dive into pools below, as unseen objects like logs and rocks may be lurking beneath the surface, posing a significant hazard. Additionally, be aware that the water from waterfalls can be contaminated by runoff from populated areas, which highlights the importance of treating it before consumption. Assessing water source conditions before filling your bottle can further ensure your safety when considering waterfall water.

      Stay on established trails and enjoy the view from designated overlooks. Slippery rocks and surfaces are common around waterfalls, so watch your step to avoid falls. If you're with children, supervise them closely to prevent accidents. Flash floods can occur rapidly, so always be aware of the weather conditions and any potential dangers.

      Lastly, remember that swimming should be done in designated areas and with a buddy whenever possible. This way, you can look out for each other and ensure a safer experience. By following these general safety considerations, you can enjoy the breathtaking beauty of waterfalls while keeping yourself and your loved ones safe.

      Potential Contaminants in Waterfall Water

      Waterfall water can contain several potential contaminants that pose health risks. Before you consider drinking from a waterfall, it's essential to be aware of these risks. Heavy metals and bacterial contamination are two significant concerns.

      Here are some common contaminants you might encounter:

      • Heavy Metals: Cadmium, chromium, and lead can exceed safe levels in certain areas, posing health hazards to anyone consuming the water.
      • Bacterial Contamination: Pathogens like Giardia and Cryptosporidium can cause gastrointestinal illnesses. They often enter the water through fecal matter from animals or people.
      • Environmental Runoff: Waterfalls near populated areas may experience contamination from runoff or spills, introducing various pollutants into the water. Additionally, water quality assessments have shown that seasonal changes can significantly affect the levels of contaminants present in waterfall water. Recent studies indicate that the WQI (Water Quality Index) calculated for some waterfalls has revealed water quality below acceptable drinking levels.

      It's crucial to note that even waterfalls in remote locations can be affected by natural pathogens. Decaying animals near water sources can lead to bacterial contamination, while seasonal changes can worsen this issue. For instance, during wet seasons, contaminants may spike due to increased runoff.

      Effective Purification Methods

      To safely enjoy waterfall water, effective purification methods are a must. You can choose from various filtration techniques and purification systems to ensure the water is safe to drink. Rapid sand filters and slow sand filters are great options. Rapid sand filters use layers of sand and activated carbon, effectively removing suspended solids. Slow sand filters are more cost-effective and often used in developing countries. Additionally, it's important to note that purification removes chemicals, contributing to safer drinking water. Using multiple purification methods, including decontamination techniques, enhances the safety of your water supply.

      If you're looking for portable options, gravity filters like the Sawyer Mini or LifeStraw can remove virus particles effectively. These filters have a pore size of 0.22 microns or less, making them reliable for outdoor use. For a more thorough method, consider membrane filtration, which tackles bacteria, viruses, and suspended solids.

      Boiling water is another reliable purification method. Just boil clear water for about 5 minutes, then let it rest for another 5 minutes before drinking. This process kills most microorganisms. If you want to use chemicals, chlorine tablets or iodine tablets are effective. Dissolve them in heated water, and let the mixture sit for about 20 minutes.

      You might also explore solar purification, which uses sunlight to kill pathogens, or UV purification, which is useful in emergencies. Lastly, sedimentation can help in removing suspended particles before applying other purification systems. By following these methods, you can confidently enjoy waterfall water while staying safe and healthy.

      Common Misconceptions About Water Safety

      Many people hold misconceptions about water safety that can lead to dangerous situations. Understanding these myths is crucial for drowning prevention and ensuring your safety around water. Here are some common misconceptions you should be aware of:

      • Waterfalls are safe to swim near: Waterfalls can have strong currents and hidden obstacles. Never jump or dive near them, as submerged rocks and logs pose significant risks.
      • Drowning is noisy: Contrary to popular belief, drowning often happens silently. It can occur in just a few inches of water, and children can drown in as little as 20 seconds. Always supervise kids closely, even in shallow areas, as unintentional drowning is preventable with proper education and supervision. It is important to recognize that constant supervision is necessary, regardless of swimming ability or safety devices.
      • Floats guarantee safety: Many think that using floats or water wings is enough for safety. However, these devices can give a false sense of security and don't replace the need for proper swimming skills or Coast Guard-approved life jackets.

      To practice effective water safety, follow these guidelines:

      • Always supervise children near water, and avoid distractions.
      • Use only approved flotation devices when boating or swimming.
      • Stay on marked paths near waterfalls and heed warning signs.

      Understanding Waterborne Illnesses

      waterborne disease prevention strategies

      When you drink or swim in contaminated water, you're at risk of contracting waterborne illnesses caused by harmful microbes. These illnesses come from pathogens, which are tiny organisms like bacteria, viruses, and protozoa that can lead to various health problems. Common pathogen types include E. coli and Shigella, which are bacteria; Norovirus and Hepatitis A, which are viruses; and Giardia and Cryptosporidium, which are protozoa. Recreational water illnesses can often originate from pools, lakes, and hot tubs if proper hygiene and water treatment are not maintained.

      When these pathogens enter your body, they can cause symptoms like diarrhea, nausea, and abdominal pain. Some illnesses can take a few hours to several weeks to show symptoms, so you might not realize you're sick right away. More serious conditions, like Hemolytic Uremic Syndrome (HUS) or Legionnaires' disease, can develop from these infections, leading to severe complications. Diarrhea is the second leading cause of death in children under five, highlighting the critical need for clean water and sanitation.

      Water can get contaminated from various sources, such as human or animal waste, especially during events like flooding. This is why it's crucial to be aware of where your water comes from. Even recreational water, like lakes or pools, can pose risks if not properly treated.

      To protect yourself, always ensure that the water you're drinking or swimming in is safe. Look for signs of contamination, and follow any local health guidelines. It's important to stay informed and practice safe sanitation to prevent illnesses caused by these pathogens. Remember, staying vigilant about water quality can help you avoid these nasty illnesses!

      Assessing Water Sources

      Assessing water sources is crucial for ensuring your drinking water is safe. When you're out in nature, knowing how to evaluate water quality can help prevent serious health issues. Start by focusing on water flow and elevation impact. Water from higher elevations is often cleaner, and moving water, like rivers and streams, is generally safer than stagnant sources.

      Here are three key criteria for safe water collection:

      • Choose collection spots at higher elevations or near the water source.
      • Avoid areas close to campsites or animal grazing zones.
      • Collect from flowing parts of streams and the top few inches of lakes.

      Be on the lookout for signs of pollution. If there's human or animal habitat upstream, or if you see visible decay in the water, it's best to steer clear. Stagnant water, unusual odors, or any discoloration can also indicate contamination.

      Purifying the water you collect is essential. Boiling is the most reliable method to kill pathogens, especially at higher elevations where boiling times increase. You can also use high-quality filters or chemical disinfectants to remove remaining contaminants.

      Importance of Advance Planning

      plan ahead for success

      In today's world, advance planning is essential for ensuring water safety, especially when relying on natural sources. When you plan ahead, you can effectively manage risks associated with water contamination. One way to do this is by developing a Water Safety Plan (WSP). A WSP helps you systematically address potential hazards throughout the water supply chain, making it easier to identify what could go wrong and how to prevent it.

      Creating a WSP involves documenting your water system, assessing hazards, and establishing control measures. This means you'll have a clear understanding of the risks involved and how to put safety protocols in place. Continuous monitoring and verification are key to keeping your water supply safe. Remember, the goal is not just to react but to prevent issues before they arise.

      Implementing a WSP also brings benefits like improved operational efficiency and cost savings. It encourages everyone in your organization to engage actively in water safety efforts, which helps foster a culture of accountability. Plus, it contributes to environmental sustainability by preventing contamination, making it a win-win for both health and nature.

      Don't wait to start your WSP development. While challenges may arise, addressing identified hazards is crucial. Regularly review and improve your practices, and build on what already works. By taking these steps, you're not only protecting your water supply but also ensuring the health and safety of everyone who relies on it.

      Additional Safety Considerations

      Water safety goes beyond just identifying risks; it requires practical steps to ensure the water you consume is safe. When you're considering drinking waterfall water, remember that clear water doesn't always mean it's clean. Contaminants like human or animal waste can introduce harmful pathogens. To protect yourself, it's essential to implement effective water purification methods.

      Here are some key safety tips to keep in mind:

      • Always boil water for at least one minute to kill harmful organisms, especially at lower elevations.
      • Use high-quality water filtration systems with a pore size less than 1 micron to help with pathogen detection and removal.
      • Regularly maintain your filters according to the manufacturer's instructions to ensure they work effectively.

      Before collecting water, make sure to choose clean containers, and wash your hands to prevent additional contamination. Collect water from moving streams or the top layers of lakes, avoiding areas near campsites or livestock. If you're at higher elevations, boil the water for three minutes to ensure it's safe for consumption.

      Additionally, stay informed about local water quality alerts that may affect the safety of your water source. Always prepare your water before drinking it, regardless of how it looks. Water quality can change rapidly due to weather or other factors, so being proactive is key. By following these steps, you can significantly reduce your risk of waterborne illnesses and enjoy nature safely.

      Responsible Water Use Practices

      sustainable water conservation methods

      When it comes to using water responsibly, everyone can make a difference. Practicing sustainable methods in your daily life not only conserves water but also supports responsible consumption. Here are some simple ways to get started:

      Action Benefit
      Check for leaks Prevents water waste
      Use low-flow fixtures Reduces water consumption
      Turn off taps Saves water during daily tasks
      Harvest rainwater Provides water for plants

      Regularly inspect your home for leaks in toilets, faucets, and pipes. Fixing these issues can save significant amounts of water. Installing low-flow fixtures, like showerheads and toilets, can help reduce your overall water usage.

      It's also important to turn off the tap while brushing your teeth or shaving. This small action can save gallons of water each day. Additionally, consider harvesting rainwater for non-drinking purposes, like watering your garden or washing your car.

      Participating in water-saving initiatives and educating others about water conservation can amplify your efforts. When landscaping, choose drought-resistant plants that need less water.

      Finally, using efficient appliances, like dishwashers and washing machines, that are certified for water efficiency can further reduce your water footprint. By adopting these responsible water use practices, you contribute to a more sustainable future for everyone.

      Frequently Asked Questions

      Can I Drink Waterfall Water Without Purifying It First?

      You can't drink waterfall water without purifying it first. While natural filtration might seem effective, it's often contaminated. Always prioritize water source safety by treating any natural water before consumption to avoid illness.

      What Are Signs of Waterborne Illness After Drinking Unsafe Water?

      After drinking unsafe water, you might notice symptoms like diarrhea, vomiting, or stomach cramps. Identifying these symptoms early is crucial for illness prevention, so stay alert and seek help if you experience any severe signs.

      How Does Water Temperature Affect Purification Effectiveness?

      Water temperature significantly affects purification methods. Higher temperatures enhance chemical reactions and microbial activity, improving treatment efficiency. However, too high can reduce dissolved oxygen, impacting aerobic processes. Maintaining optimal temperatures is essential for effective purification.

      Is It Safe to Swim in Waterfall Water?

      Swimming in waterfall water can be risky due to strong currents and hidden dangers. Always prioritize swimming safety by checking water quality and conditions beforehand, and avoid swimming in turbulent areas to protect yourself.

      Can I Use a Water Filter Instead of Boiling?

      You can use a water filter instead of boiling, but remember that filtration effectiveness varies by water filter types. While filters remove many contaminants, boiling is more reliable for killing harmful organisms, especially viruses.

      Conclusion

      In conclusion, while waterfall water may look inviting, it's important to be careful. Always consider potential contaminants and use effective purification methods before drinking. Remember, planning ahead can help you avoid getting sick from waterborne illnesses. Whether you're hiking or exploring, assess your water sources and practice responsible water use. By taking these steps, you can enjoy nature safely and stay healthy. Always prioritize your safety when it comes to drinking water from natural sources.

    9. What Is the Cheapest Survival Food

      What Is the Cheapest Survival Food

      The cheapest survival foods are dry beans and rice. Both are nutritious, have long shelf lives, and are easy to store. You can often buy them in bulk for even greater savings. Canned goods are also cost-effective, typically priced under $2 per can, adding variety to your supplies. Incorporating these staples into your emergency preparations ensures you'll have adequate nutrition when it matters most. By exploring local stores or taking advantage of online discounts, you can further stretch your budget. Stick around to discover more affordable options and storage tips that can enhance your preparedness.

      Overview of Survival Food Costs

      When it comes to budgeting for survival food, understanding the overall costs is essential for effective planning. You'll want to focus on a cost comparison of various food options to identify the most economical choices. Dry beans and peas are not only affordable but also nutritious and long-lasting. Canned goods provide versatility and a long shelf life, often costing under $2 per can when bought in bulk. Whole grains, like rice and pasta, are inexpensive staples that can last for years. Additionally, freeze-dried foods can offer a long-term food source with a shelf life of 25+ years, making them a valuable investment.

      Shelf-stable milk and broths are excellent additions, offering essential vitamins and minerals at a low cost. Dried beans and lentils are particularly budget-friendly, with a 1-lb bag yielding about six servings for just a few dollars. Additionally, nuts and seeds, while higher in fat, contribute significant calories, making them valuable despite their shorter shelf life. Survival food is essential for emergency preparedness and can provide nutrition during challenging times.

      To maximize the efficiency of your investment, consider food preservation techniques. Using mylar bags and oxygen absorbers can extend shelf life at home, reducing waste and further lowering costs. Proper storage conditions also play a vital role in maintaining food longevity, ensuring you get the most out of your purchases.

      Bulk Food Options

      Finding bulk food options is a smart way to keep your survival food costs down while ensuring you have nutritious choices on hand. By focusing on bulk food storage, you can stock up on essentials like dry beans, grains, and canned goods. Dry beans such as black, kidney, and pinto not only offer great nutrition but are also incredibly affordable. Grains like rice and oats provide essential carbohydrates that fuel your body during emergencies.

      Canned goods are another excellent choice, with options like canned meats, fruits, and vegetables delivering long-lasting nutrition. These items are often available at a lower price when purchased in larger quantities, allowing you to enjoy bulk purchasing benefits. Additionally, consider adding starches like potatoes and yams to your stockpile, as they are cost-effective and nutritious. Canned foods are considered shelf-stable until opened and can have a shelf life that extends to two years or longer. With survival food kits designed by prep experts, you can ensure your food storage is both practical and comprehensive.

      When you shop for bulk food, look for sales and discounts to maximize your savings. Stores like Costco, Walmart, and local grocers often have competitive prices for bulk items. It's crucial to store these foods properly in a cool, dry place to extend their shelf life. Regularly rotating your supplies ensures that you use older items first, maintaining a fresh stock.

      Incorporating a variety of food types helps ensure a balanced diet during emergencies. By taking advantage of bulk food options, you can effectively prepare for any situation while keeping costs manageable.

      Long Shelf Life Foods

      Long shelf life foods are essential for any survival plan, providing you with reliable nutrition during emergencies. By stocking up on these foods, you ensure that you have sustenance available when it matters most. Canned goods and dried legumes are two of the cheapest options that can help you maintain your nutritional needs. Canned vegetables and fruits can last up to six years, making them a great addition to your pantry. Canned meats like tuna and chicken offer valuable protein sources, while canned beans are perfect for soups and chilis. Dried legumes, including beans, lentils, and peas, are not only nutritious but can also be stored for years if kept dry and airtight. Additionally, freeze-dried foods retain nutrients and flavor well while boasting a shelf life that can exceed 25 years. Rice is another excellent choice as it can last up to 30 years, making it a versatile staple for long-term storage.

      Here's a handy table to help you keep track of long shelf life foods:

      Food Type Shelf Life
      Canned Vegetables Up to 6 years
      Canned Meat Up to 5 years
      Canned Beans Up to 5 years
      Dried Legumes Indefinite if stored properly
      Oats Up to 2 years

      Incorporating these foods into your survival stockpile gives you a variety of options to choose from. Remember to check expiration dates and store them properly to maximize their shelf life. By planning ahead, you'll be prepared to face any emergency with the nutrition you need.

      Ready-to-Eat Survival Meals

      Ready-to-eat survival meals are a convenient solution for anyone preparing for emergencies. These kits typically contain a variety of meal types, ranging from entrees to sides, ensuring you have options when you need them most. Depending on the kit, you can find anywhere from five to twelve different meals, giving you the flexibility to mix things up during a crisis.

      The calorie content in these kits varies significantly, with total calories ranging from 6,120 to 21,170 per kit. This high calorie count is crucial for maintaining energy levels during emergencies. For example, the Augason Farms Lunch & Dinner Pail packs a whopping 21,170 calories, while the Mountain House Classic Meal Kit offers a more modest 6,120 calories. Many survival food kits, such as the 1-Year Emergency Food Supply, provide over 700,000 total calories, ensuring you have ample sustenance for extended situations.

      When choosing a survival meal kit, consider the shelf life, which can span from 10 to 30 years, ensuring your food remains edible when you need it. Most kits require hot water for preparation, so having access to boiling water is essential. Nutrient Survival offers a 14-day kit that contains a significant amount of protein, ensuring you have adequate nutrition during emergencies.

      Brands like Heaven's Harvest and My Patriot Supply offer comprehensive options that cater to various dietary needs, ensuring you find the right fit for your situation. Additionally, it's important to maintain a balance of calories, proteins, and vitamins in your selection. By selecting the right ready-to-eat meals, you'll be better prepared to face any emergency with confidence.

      Cost-Effective Shopping Strategies

      When you're stocking up on survival food, implementing cost-effective shopping strategies can make a significant difference in your budget. Start by taking advantage of bulk discounts. Buying dry goods like beans, lentils, and rice in larger quantities reduces the cost per unit, helping you save money. Grains like oats and corn also provide long-term sustenance at a lower price. Canned foods are another area where bulk purchases can pay off, so consider stocking up on canned vegetables, fruits, and meats. Additionally, prioritize nutritional balance in your selections to ensure high-quality sustenance during emergencies.

      Creating detailed shopping lists is essential. Focus on basic staples like white rice, dry beans, and canned goods, which offer better value than premium survival foods. Don't forget to compare prices between local stores and independent grocers, as they often have cheaper alternatives. Buying seasonal produce and preserving it through canning or drying can further stretch your budget. Additionally, consider storing long-term survival food to ensure you have a steady supply during emergencies.

      Additionally, consider home production methods. Growing your own food can be the cheapest option for long-term survival. If you learn to preserve food through techniques like canning or freezing, you'll extend its shelf life and save money. Remember to rotate your stock using the FIFO method to ensure older items get used first, preventing waste.

      Nutritional Considerations for Survival

      Nutritional considerations play a crucial role in ensuring you have the energy and health needed during survival situations. When choosing survival foods, focus on nutrient density. This means selecting foods packed with essential vitamins, minerals, proteins, fats, and carbohydrates. Canned fish, beans, nuts, and whole-grain products are excellent options that provide a well-rounded nutrient profile.

      Protein is vital for building and repairing tissues, maintaining muscle mass, and supporting immune function. Opt for canned fish like tuna or salmon, legumes such as lentils, and nut butters for a protein boost. Carbohydrates are your primary source of energy, so include whole-grain crackers, oats, and canned fruits. These will help keep you energized throughout the day.

      Don't forget about healthy fats, which are essential for hormone production and vitamin absorption. Nuts, seeds, and canned fish are great choices. Fiber is also crucial for digestive health, so ensure you consume fiber-rich foods like whole grains and legumes.

      Lastly, practice portion control. Even the most nutrient-dense foods can lead to issues if consumed in excess. By monitoring your portions, you'll maintain energy levels and prevent food waste. Balancing your meals will also help you avoid nutrient deficiencies, ensuring you stay strong and healthy in challenging situations. Prioritizing these nutritional aspects will equip you for survival, enabling you to face whatever challenges arise.

      Preparation and Storage Techniques

      Selecting nutrient-dense foods is just the beginning; how you prepare and store these supplies significantly impacts their longevity and usability. Effective preparation and storage techniques can help you maximize your food rationing efforts and ensure you have reliable resources when needed.

      Here are three key strategies to keep in mind:

      1. Water Purification: Always store water in clean, food-grade containers. Before filling them, sanitize your containers with a bleach solution. For long-term storage, add a few drops of unscented liquid chlorine bleach per gallon. Store the water in a cool, dark place, and remember to rotate every six months.
      2. Dehydration: This cost-effective method removes moisture, extending shelf life dramatically. You can use your oven on its lowest setting or create a DIY solar dehydrator. Dehydrated foods are lightweight and easy to pack, making them perfect for survival scenarios.
      3. Airtight Storage: Use airtight containers to protect your food from moisture and pests. Vacuum sealing is an excellent option, as it removes oxygen, preventing spoilage. Incorporate oxygen absorbers into your storage to further slow down degradation.

      Comparing Popular Survival Foods

      Comparing popular survival foods can help you make informed decisions for your emergency pantry. Different survival food types offer various benefits, calorie counts, and meal variety, so it's essential to evaluate your options.

      Budget-friendly choices like Augason Farms' Lunch & Dinner Pail provide 21,170 calories for about $99.99 and include 11 different meals, requiring only hot water for preparation. My Patriot Supply offers a more extensive option, supplying 2,000 calories per day for a month at around $250, featuring multiple entrees and sides that need 15 to 20 minutes of cooking.

      Emergency Essentials and ReadyWise also present solid choices with a higher calorie count. ReadyWise provides 54,000 calories for about $208, while Emergency Essentials boasts 60,220 calories for around $229, both requiring hot water for preparation.

      For premium options, Mountain House Classic Meal Kit gives you 6,120 calories for about $126, but with fewer meal varieties. Valley Food Storage stands out with 60,000 calories and 44 pouches, though it's pricier at around $479.

      Finally, don't overlook supermarket staples like rice, beans, and cornmeal. They're often cheaper and offer significant calories per pound, making them practical for long-term storage.

      Growing Your Own Survival Food

      Self-sufficiency is a powerful asset when it comes to food security, and growing your own survival food can be an effective way to ensure you have nutritious options in times of need. To start, you'll want to focus on effective garden planning to create a sustainable survival garden. Here are three key steps to consider:

      1. Assess Your Space and Climate: Evaluate your garden area for sun exposure, soil quality, and water access. This will help you determine what survival crops will thrive in your conditions.
      2. Select Heirloom Seeds: Choose nutrient-dense and high-calorie crops that are suited to your local climate. Options like potatoes, sweet potatoes, and kale are excellent choices to pack your garden with essential nutrients.
      3. Incorporate Companion Planting: Use companion planting techniques to enhance productivity and maintain soil health. This can lead to a more robust harvest, maximizing your yield.

      Remember to prioritize adaptability by selecting plants that need minimal maintenance. Rotate your crops to ensure long-term productivity and consider growing perennial crops for sustainability. Also, learning gardening skills before emergencies can make a significant difference.

      Budgeting for Survival Preparedness

      Growing your own survival food helps build a solid foundation for food security, but it's equally important to plan your budget for survival preparedness. Start by considering bulk purchases. Dry goods like rice and beans are not only cost-effective but can also be stored for up to 30 years. Stocking up during sales at places like Costco can significantly lower your overall expenses. Repackaging large quantities into smaller portions can extend their shelf life even further.

      When exploring emergency food kits, you'll find affordable options like the Augason Farms Lunch & Dinner Pail, priced at $99.99. While other kits, such as the Heaven's Harvest Entree Kit, offer more calories, they come at a higher price. Compare these options to find the best fit for your budget.

      Don't overlook DIY methods for food storage and meal planning. Dehydrating your own food is a cost-effective strategy. You can create homemade dehydrators using your oven or even a solar setup. Repurposing clean bottles for water storage is another smart way to save money.

      For convenience, look into pre-packaged meals. Single-serving options like Beyond Outdoor Meals pouches are affordable and practical. The Ready Hour 4-Week Emergency Food Supply offers a comprehensive package for long-term storage, while compact options like the 1-Week Food Supply Ammo Can are great for short-term needs. By carefully considering these strategies, you can effectively budget for survival preparedness and ensure you're ready for any situation.

      Frequently Asked Questions

      What Are the Best Survival Food Options for Children?

      When considering survival food options for children, focus on their nutritional needs. Kid-friendly options like applesauce, granola bars, and dried fruit offer essential nutrients while being easy to store and prepare for emergencies.

      How Do I Store Survival Food in a Small Space?

      To store survival food in a small space, use space-saving techniques like stackable food storage containers. Maximize vertical space and utilize hidden compartments, ensuring easy access while keeping your supplies organized and fresh.

      Are There Survival Foods Suitable for Vegetarians?

      Yes, there are plenty of plant-based options for vegetarians. You can stock up on canned beans, lentils, quinoa, and various vegetables. These provide essential vegetarian protein, ensuring you stay nourished during emergencies.

      Can I Use Expired Survival Food?

      You can use expired survival food, but check for food spoilage signs like off smells, mold, or texture changes. Expiration dates indicate quality, not safety, so trust your judgment before consuming anything expired.

      What Is the Shelf Life of Homemade Survival Meals?

      The shelf life of homemade survival meals depends on factors like moisture, temperature, and packaging. For effective meal preservation, store them in airtight containers, keep them cool and dry, and regularly check for freshness.

      Conclusion

      In conclusion, finding the cheapest survival food doesn't have to be overwhelming. By exploring bulk options, long shelf life items, and ready-to-eat meals, you can stock up without breaking the bank. Remember to use cost-effective shopping strategies and proper storage techniques to maximize your investment. Consider growing your own food for added savings and freshness. With careful planning and budgeting, you'll be well-prepared for any situation while keeping costs low. Stay smart and stay ready!

    10. The Best Canned Survival Food

      The Best Canned Survival Food

      For the best canned survival food, focus on nutrient-rich options that offer variety and flavor. Canned meats like tuna and salmon provide protein and omega-3 fatty acids, while canned beans and chili add fiber and calories. Don't forget fruits packed in juice or water—they're great for hydration and vitamins. Look for low-sodium choices to keep your intake in check. Store your cans in a cool, dry place for optimal shelf life, and regularly check for integrity. With careful selection and storage, you'll ensure a reliable food source during emergencies. There's more to discover that can optimize your choices.

      Selection Criteria

      When selecting canned survival food, it's crucial to consider several key criteria to ensure you're well-prepared for any situation. First, focus on nutrient balance. Aim for a mix of protein sources like canned fish and legumes, along with fruits and vegetables. This variety helps you obtain essential vitamins and minerals, ensuring your body gets the nutrients it needs to function optimally. Don't forget to consider any dietary needs or allergies when making your selections.

      Next, think about taste variety. Having a range of flavors can make meals more enjoyable during stressful times. Look for different types of beans, veggies, and fruits to keep your palate satisfied. Low-sodium or no-salt-added options are also wise choices, as they allow you to manage your sodium intake while still enjoying delicious meals. Additionally, choosing canned foods ensures access to vital vitamins and minerals when fresh produce is unavailable, which is especially important during emergencies.

      Shelf life and durability are equally important. Select canned foods that can last for years without spoiling. Regularly rotate your stock to maintain freshness, and store the cans in appropriate conditions to prevent spoilage. Efficiency and practicality should guide your choices, too. Opt for calorie-dense foods to maximize energy storage while minimizing space. Additionally, canned goods are a reliable source of nutrition during emergencies, providing peace of mind knowing that you are prepared for unforeseen circumstances.

      Lastly, consider ease of preparation. Canned foods typically require minimal equipment and can be enjoyed straight from the can or quickly heated. This versatility simplifies meal planning, ensuring you can create balanced meals without much hassle. By following these criteria, you'll be well-equipped to handle any survival situation.

      Recommended Canned Foods

      What should you stock up on for a well-rounded survival food supply? To ensure you have a diverse range of nutrients, focus on high-calorie foods, protein sources, and options that can add variety to your meals. Here's a quick reference table for your canned food shopping list:

      Category Examples Calories & Protein
      High-Calorie Foods Spam, DAK Ham 1080 cal, 96g protein
      Protein Sources Tuna in Oil, Chunk Chicken Breast 200-300 cal, 20-30g protein
      Versatile Canned Foods Canned Chili, Baked Beans 300-400 cal, 200-300 cal
      Canned Fruit Varieties Canned Peaches, Canned Pineapple 100-200 cal

      Incorporate canned fruit varieties to provide essential vitamins and minerals, which can help maintain your health during emergencies. Canned beans are also a great protein source, offering about 1 3/4 cups per 15 oz can. Additionally, it's important to consider high-calorie foods as they are more beneficial for survival situations. Don't overlook canned soups and stews, as they can hydrate you while delivering a mix of nutrients. Canned ravioli is another handy option, providing around 440 calories and 14 grams of protein per can. Stocking up on these recommended canned foods will help you create a balanced and satisfying survival food supply, especially since many items can last longer than printed Best Buy dates.

      Storage and Shelf Life

      Properly storing canned survival food is essential for maximizing its shelf life and ensuring your supply remains safe to eat. To achieve effective canned food storage, you need to follow specific guidelines for temperature, environment, and routine checks.

      Here are three key considerations for shelf life management:

      1. Temperature Control: Aim to store your canned goods in a cool, dry space where temperatures stay below 85°F. Avoid areas with extreme temperature fluctuations, like garages or attics, as high temperatures over 100°F can spoil your food. Canned foods can remain safe past expiration dates if properly evaluated, making it important to monitor their condition. Additionally, storing canned foods at temperatures above 50-70°F can lead to nutrient loss.
      2. Type of Canned Food: Understand the shelf life of different types of canned foods. Low-acid foods can last 2-5 years if stored properly, while high-acid foods usually remain good for only 12-18 months. Always check the expiration dates and prioritize using older cans first.
      3. Regular Inspections: Regularly inspect your canned goods for any signs of damage, such as bulging, rust, or deep dents. If you notice any issues, it's best to discard those cans to prevent potential foodborne illnesses.

      Emergency Food Kits

      Emergency food kits are essential tools for anyone looking to ensure their survival during unexpected situations. These kits typically provide around 2,000 calories per day, meeting your caloric needs while offering a variety of meals. You'll find breakfasts, lunches, dinners, desserts, and snacks, ensuring you maintain a balanced diet even in tough times. The food variety not only keeps your meals interesting but also supports your nutritional needs. Each kit contains over 769,280 total calories, providing ample energy for extended emergencies.

      Most emergency food kits come packaged in heavy-duty, four-layer pouches or buckets designed for long-term storage, with some kits boasting a shelf life of up to 25 years. This long-term reliability means you can prepare for emergencies without worry. You can choose kits that last from two weeks to a year or more, giving you flexibility based on your preparedness plan.

      Consider the total servings each kit provides, as some can offer thousands of servings. Keep in mind that certain kits may require significant water for preparation, so plan accordingly.

      If you have dietary restrictions, look for specialized options that cater to gluten-free or high-protein diets. Additionally, kits vary in cost and value, so consider your budget when selecting one. For convenience, many kits are easy to prepare, needing only water and minimal cooking.

      Ultimately, emergency food kits are a smart investment for anyone wanting to stay ready for emergency situations.

      Preparation and Safety

      Preparation and safety are vital when it comes to canned survival food. Understanding proper canning techniques and food preservation methods can ensure your supplies remain nutritious and safe. Canned foods can last anywhere from 1 to 5 years, depending on how they're processed. To maximize shelf life and nutrient retention, follow these guidelines:

      1. Storage: Keep canned foods in a cool, dry place. This helps prevent spoilage and maintains safety. Use the FIFO (First In, First Out) method to rotate your stock regularly. Additionally, high-quality cans packed in water or brine are more likely to retain their nutritional value over time. Including a variety of canned foods can enhance meal diversity, ensuring you can create enjoyable meals even in emergencies.
      2. Expiration Checks: Regularly inspect your canned goods for expiration dates. Discard any expired items to avoid potential health risks.
      3. Handling: Be cautious when handling canned goods. Look for any signs of damage or bulging, which can indicate contamination. If a can is compromised, it's best to dispose of it.

      Additional Tips

      To make the most of your canned survival food, consider additional tips that enhance both storage and usage. First, prioritize canned food safety by storing your items in cool, dry places. Avoid exposing them to temperature extremes and moisture, as this can compromise their integrity. Keep cans off bare concrete floors to prevent moisture buildup and rusting.

      One of the best rotation tips is to label each can with its purchase date. This practice helps you use older items first, ensuring nothing goes to waste. Regularly inspect your stock for signs of damage, such as rust, leaks, or dents—discard any compromised cans immediately. Remember, while unopened commercially canned foods can last 2-5 years, using them within one to two years is ideal for maintaining quality.

      Additionally, prevent cans from freezing, as this can alter food textures and potentially break seals. If you open a can and have leftovers, store them in clean containers and refrigerate them within two hours to inhibit bacterial growth.

      Lastly, consider having a list of inspection dates for your food items to stay on top of rotation. Include a variety of canned goods in your emergency supplies to cater to different dietary needs. By following these tips, you'll ensure your canned survival food remains safe and nutritious when you need it most.

      Nutritional Benefits

      Canned survival food offers an array of nutritional benefits that can be invaluable during challenging times. These foods not only provide essential nutrients but also cater to various dietary preferences, ensuring you maintain a balanced diet. Here are three key benefits of incorporating canned foods into your survival plan:

      1. Diverse Nutrients: Canned foods contain proteins, vitamins, and minerals necessary for your body's functions. For example, canned fish like tuna and salmon are packed with omega-3 fatty acids, which promote heart health and enhance nutrient absorption.
      2. High Protein Content: Protein is crucial during survival situations, and canned meats deliver. A can of Keystone Meats All Natural Ground contains 154 grams of protein, providing a substantial energy source. Including a variety of protein sources, such as pork and beef, boosts your diet's effectiveness.
      3. Long Shelf Life and Convenience: Canned foods can be stored for years without spoiling, making them a reliable option during emergencies. Their durability and ease of preparation allow you to quickly create nutritious meals, accommodating different dietary preferences and needs.

      Cost-Effectiveness

      While navigating the challenges of survival planning, considering the cost-effectiveness of your food choices can significantly impact your budget and preparedness. Canned nutrition offers a range of economical options that not only provide essential nutrients but also fit within your budget. Canned beans, corn, tuna, and chicken are all high in protein and fiber, making them excellent staples for any survival plan.

      When it comes to value for calorie content, options like Spam and canned roast beef deliver a high calorie density, ensuring you get the most bang for your buck. Canned beef stew and DAK Ham also pack a nutritious punch, providing substantial protein and calories, which is vital during emergencies.

      One of the most significant advantages of canned foods is their long shelf life, lasting up to 25 years without refrigeration. This means you can stock up without worrying about spoilage, making canned goods a smart choice for budget planning. To maximize your savings, consider backstocking and buying in bulk. Opt for generic or store-brand canned goods, as they often provide similar nutrition at a lower cost.

      Lastly, focus on variety over quantity. A diverse mix of canned foods ensures you meet your nutritional needs while keeping your meals interesting. By taking advantage of seasonal sales and regularly rotating your stock, you'll maintain an efficient and cost-effective food supply for your survival preparations.

      Long-Term Planning

      Effective long-term planning for survival food involves careful consideration of storage, nutritional balance, and safety. By strategically managing your food inventory, you can ensure you're prepared for emergencies while maintaining a healthy diet.

      Here are three key aspects to consider:

      1. Storage and Rotation

      Store canned foods in a cool, dry place to extend their shelf life. Regularly inspect your stock for dents or leaks and rotate older items to the front. Keep a detailed inventory to track expiration dates and aim for a two-week supply of non-perishable food per person.

      2. Nutritional Balance

      Focus on meal planning that includes a variety of protein sources like meats, beans, and fish. Stock a range of fruits, vegetables, and legumes to cover essential nutrients. Don't forget to consider any dietary restrictions in your planning, and prioritize low-sodium options to maintain heart health.

      3. Health and Safety

      Remember that canned foods shouldn't be your sole nutrition source long-term. Limit high-sodium items and supplement with fresh produce when possible. Regularly update your stock to maintain food safety and avoid nutritional deficiencies.

      Frequently Asked Questions

      How Do I Choose the Best Canned Food for My Family?

      To choose the best canned food for your family, consider their preferences and nutritional value. Focus on high-calorie, protein-rich options with a long shelf-life and easy preparation to ensure everyone stays healthy and satisfied.

      Can Canned Foods Be Eaten After Their Expiration Date?

      Yes, you can eat canned foods after their expiration date, as they're generally safe if stored properly. Check for spoilage signs to ensure canned food safety and enjoy long-lasting food preservation benefits.

      What Are the Best Practices for Opening Canned Food Safely?

      To ensure canned food safety, use proper can opener techniques like the side-cut method or spoon method. Always inspect cans for spoilage, and handle sharp edges with care to avoid injury while opening.

      How Can I Enhance the Flavor of Canned Foods?

      To enhance canned foods, try using spice combinations like Italian seasoning or Creole blends. Add flavor additions such as fresh herbs, sautéed aromatics, and citrus juice for a brighter, more delicious dish that's satisfying.

      Are There Any Canned Foods That Cater to Specific Dietary Needs?

      Yes, there are canned foods catering to specific dietary needs. You'll find gluten-free options like beans and soups, along with vegan choices such as canned vegetables and legumes, ensuring you maintain a balanced diet during emergencies.

      Conclusion

      In conclusion, choosing the best canned survival food can make a significant difference in emergencies. By considering selection criteria and understanding storage, preparation, and nutritional benefits, you'll be better equipped to face any situation. Investing in emergency food kits and planning for long-term needs not only ensures you're ready but also saves you money. With the right canned foods on hand, you can maintain your health and well-being, no matter what challenges arise.